• Welcome to ClassicBroncos! - You are currently viewing the forums as a GUEST. To take advantage of all the site features, please take a moment to register. It's fast, simple and absolutely free. So please join our community today!
    If you have problems registering or can't log into your account, please contact Admin.

Barn Find Restomod Build

OP
OP
AZ73

AZ73

Contributor
Bronco Guru
Joined
Mar 28, 2012
Messages
3,542
Back at it

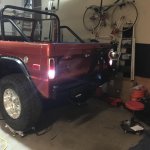
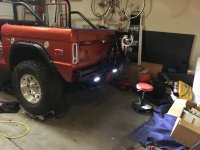
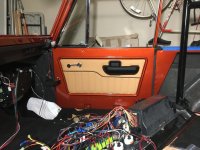
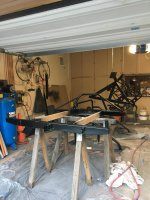
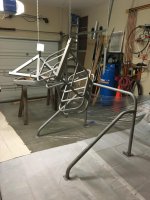
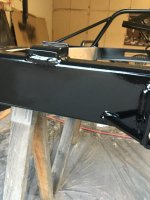
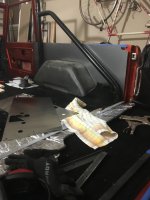
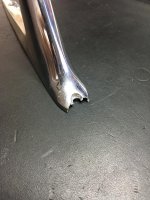
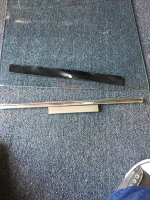
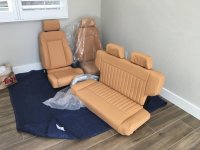
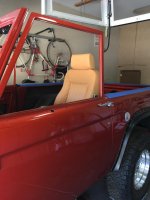
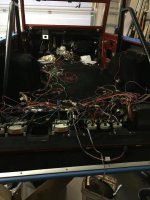
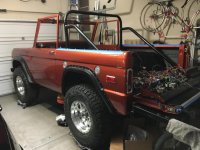
After dealing with a miserable 2020 I'm back at it. Had the bumpers and roll bar sand blasted, then took them home, shot with KBS RustSeal gloss black primer to seal them, and as KBS reacts to UV, I coated them with High Teck flat clear. The High Teck will dial down the gloss to a matte/egg shell finish and has excellent UV protection. Now that this is finally done, the Bronco can move back into my main garage where I'll pull the top, install the roll bar and carpet, and start installing the dash which is already wired, then run the wiring to the rest of the vehicle. I actually purchased a chrome front bumper and I like that too so I can switch bumpers depending on my mood.
 

Attachments

  • IMG_2242.jpg
    IMG_2242.jpg
    90 KB · Views: 120
  • IMG_2245.jpg
    IMG_2245.jpg
    110.7 KB · Views: 114
  • IMG_2241.jpg
    IMG_2241.jpg
    97.5 KB · Views: 115
  • IMG_2246.jpg
    IMG_2246.jpg
    122.9 KB · Views: 120
  • IMG_2247.jpg
    IMG_2247.jpg
    85.6 KB · Views: 114
OP
OP
AZ73

AZ73

Contributor
Bronco Guru
Joined
Mar 28, 2012
Messages
3,542
Ah, the weather's been nice and work has a lull so I get to spend some time working on the Bronco again. Moved it into the big garage, pulled the top, and fit the roll bar. The seats are down at Baca in Tucson getting camel colored leather and the trim is all at Don Jose's in Tucson getting polished. Thanks for the recommendation Tucson Bronco brothers! I was pulling apart the quarter windows to have them re-chromed and broke the bottom hinge. It was rusty and the handle was all pitted. I looked at pieces to repair them and just decided to order new ones. If you're looking for some and have time and don't mind the chrome not being in the best shape, PM me. A new hinge is about $15 and the rest is in good shape but cosmetically in need of some polish.

The door panels will head down to Baca when the seats are done. I picked up Tom's metal door panels for a strong backing (recommended by a couple of upholsters I talked with) and had to cut the bend edges off so it's flat. I also drilled new 3/8" holes about 3/4" inside of their door screw holes. I don't want to see the screws so I'm using factory door panel clips that now will line up with the door panel's screw holes. When upholstered I can just pop the panel in and no screws visible!

I also picked up Tom's metal rear quarter inserts as a backing for the upholstery and to hold the speakers. I saw on another thread people suggested rare earth magnets to mount it. I may use the same door clips for the bottom and a magnet for the top. I'll only need 1 magnet at each point since both the panel and the quarter panel are metal and the upholstery should cover any gap.

The last item is the 3/16" stock bar. I drilled holes to match the hardtop mounting screws and will tap them to take the screws. Then I'll use body panel adhesive to mount them under the rear quarter. I'll do a quick test to see if 3/6" will provide enough threads to hold firmly, else I'll weld on some nuts lined up with the threads for extra support. That way the top can be removed by just pulling the bolts out without the need to pull the panel and use a wrench to hold a nut.
 

Attachments

  • IMG_2527.jpg
    IMG_2527.jpg
    112 KB · Views: 73
  • IMG_2526.jpg
    IMG_2526.jpg
    101.4 KB · Views: 72
  • IMG_2525.jpg
    IMG_2525.jpg
    100.2 KB · Views: 71
  • IMG_2524.jpg
    IMG_2524.jpg
    113.7 KB · Views: 77
  • IMG_2435.jpg
    IMG_2435.jpg
    119.8 KB · Views: 72
  • IMG_2436.jpg
    IMG_2436.jpg
    115 KB · Views: 70
  • IMG_2528.jpg
    IMG_2528.jpg
    62.5 KB · Views: 70
  • IMG_2530.jpg
    IMG_2530.jpg
    76.9 KB · Views: 77
OP
OP
AZ73

AZ73

Contributor
Bronco Guru
Joined
Mar 28, 2012
Messages
3,542
After searching unsuccessfully for a replacement remote mirror from anything that might be close as I can't find a decent factory or aftermarket Bronco replacement, I decided to attempt to repair my original one. After attempting to disassemble, the remote switch just crumbled. So, having nothing to lose, I cut the wires at the remote control and pulled it apart. Once the wires were cut, I was able to pull the mirror head off the base, and gently prying the pot metal, I was able to pull the covers off the cables and pull the mirror and backing completely out of the head. I had to remove the mirror from the backing in order to get the old cables off. I soaked mirror and backing plate in boiling water for 15 min and the black tape holding the mirror became soft and it came apart with the use of a putty scraper blade. I purchased a remote mustang mirror and being new, it was easy to disassemble. I can now use it's cables and remote control to graph to the old bronco mirror, with some minor modifications. Pictures of the broken base were sent to repair/chrome shops in Tucson and Pennsylvania and I await the estimates. I'm open to suggestions of other repair shops if anyone has any experience with them. It turns out that while the Mustang base isn't a perfect match to the Bronco's, it can be used in a pinch as the mirror housing mounts are very similar. I'm trying polishing the old mirror glass first as replacement glass looks rectangular instead of tapered but I'll keep searching for replacement glass.
 

Attachments

  • IMG_2610.jpg
    IMG_2610.jpg
    136.3 KB · Views: 60
  • IMG_2609.jpg
    IMG_2609.jpg
    83.4 KB · Views: 55
  • IMG_2608.jpg
    IMG_2608.jpg
    108 KB · Views: 57
  • IMG_2605.jpg
    IMG_2605.jpg
    103.7 KB · Views: 57
  • IMG_2604.jpg
    IMG_2604.jpg
    74.8 KB · Views: 56
  • IMG_2595.jpg
    IMG_2595.jpg
    64.3 KB · Views: 58
  • IMG_2599.jpg
    IMG_2599.jpg
    168.7 KB · Views: 60
Last edited:
OP
OP
AZ73

AZ73

Contributor
Bronco Guru
Joined
Mar 28, 2012
Messages
3,542
Added the replacement door glass window track. Old one popped off with a tap to a screwdriver. I first bent the new rubber adhesive into the track to create a seam, then bent it over the glass, rubbing the outside with dish soap. Placed the track onto the rubber and started gently tapping it on with a rubber mallet. Since the glass is tempered and will easily shatter if hit on the end, I placed the glass against a carpet and a piece of cardboard to protect the edge. Went on easy. Pay attention to the direction it goes. Also installed the Nu Relics electric window and switch, but haven't wired it up yet.
 

Attachments

  • IMG_2621.jpg
    IMG_2621.jpg
    77.6 KB · Views: 37
  • IMG_2622.jpg
    IMG_2622.jpg
    191.4 KB · Views: 38
  • IMG_2619.jpg
    IMG_2619.jpg
    116.3 KB · Views: 39
  • IMG_2617.jpg
    IMG_2617.jpg
    163.7 KB · Views: 39
  • IMG_2618.jpg
    IMG_2618.jpg
    294.2 KB · Views: 38
  • IMG_2623.jpg
    IMG_2623.jpg
    61.4 KB · Views: 47
OP
OP
AZ73

AZ73

Contributor
Bronco Guru
Joined
Mar 28, 2012
Messages
3,542
These little details are probably boring for readers, but they're exciting for me as I can see the light at the end of the tunnel. I sourced a replacement windshield from one of our smaller vendors as the cost of the glass with free shipping was about $50 less than sourcing it locally. Door glass, with shipping, was $75 less than local source. I tried to polish the old windshield and door glass to get the environmental etching and scratches off them using cerium oxide. The etching came right off but a scratch or 2 were just too deep. New glass it is. If anyone wants the old stuff PM me. I hate to toss it as it's still good.

Seats came back from the upholsterer in Tucson when I dropped off the door and rear inserts to get done. I got the fronts from Tom's Bronco, and the rear Bestop off an Amazon return cheap. I didn't care about the condition of the returned seat as it was going to be recovered in leather anyway. The saddle color looked great on the sample, but looks just a little oranger than the browner I was going for when it scaled up. Since the Bronco is a brunt orange I think it still looks great. And I added seat heaters.

I wanted metal backings for the door and rear panel insert upholstery (per the suggestion of a high end shop) so I sourced them from one of the Bronco houses but had to modify them to work as backings instead of actual raw steel panels they were designed for. Instead of screwing them in, I'll use original style door panel push clips so there's nothing showing on the exterior for the doors. I looked at a number of ways to mount the back panel insert. I want to be able to remove the top so I mounted permanent tapped metal bar under the quarter panels so I wouldn't have to remove the rear inserts to hold the nuts while undoing the top. But I completely forgot about the posts in the tail light housings so the rear inserts will have to come off, or at least bend back in the rear to reach those bolts. That's a problem because of the roll bar. I discovered someone here suggesting using rare earth magnets to hold the rear insert in place. They work like a dream on the metal inserts, and will allow me to slide the insert up between the roll bar and quarter panel when necessary. Glass trim is still at polishing. Thursday starts the installation of the dash and wiring. Dreading this, but it's time.
 

Attachments

  • IMG_2682.jpg
    IMG_2682.jpg
    81.8 KB · Views: 79
  • IMG_2683.jpg
    IMG_2683.jpg
    76.3 KB · Views: 88
  • RenderedImage.jpg
    RenderedImage.jpg
    77.3 KB · Views: 94
  • IMG_2677.jpg
    IMG_2677.jpg
    161 KB · Views: 80
Last edited:

jmhend

Bronco Guru
Joined
Dec 25, 2007
Messages
2,736
Great write up. Nothing boring so far.

It’s the little things that I think we all can see as rewarding. Keep up the great work you will be there soon.


Sent from my iPhone using Tapatalk
 

Howard2x4x4

Contributor
Bronco Guru
Joined
Apr 19, 2014
Messages
2,300
Very nice, indeed! I'm diggin' the attention to detail and the meticulous workmanship! Kudos, Sir!
 
OP
OP
AZ73

AZ73

Contributor
Bronco Guru
Joined
Mar 28, 2012
Messages
3,542
Installed the door glass, the a/c interior box, and the carpet on the tailgate. Also the permanent drilled and tapped bars under the rear quarters for the top bolts. Waiting for the wing windows and door panels to finish the doors up. Now trying to organize the wiring for the install. Bundle of snakes, and some of my taped on paper marking the wires came off. Need to re-mark them. I hate wiring but it's the last major step. Probably gonna have to reach out to the community for help with the solenoid and regulator. Don't really understand that set-up, but that's later.
 

Attachments

  • wire 2.jpg
    wire 2.jpg
    100.3 KB · Views: 79
  • wire 1.jpg
    wire 1.jpg
    100.5 KB · Views: 87

sprdv1

Contributor
REBEL
Joined
Mar 8, 2007
Messages
81,747
These little details are probably boring for readers, but they're exciting for me as I can see the light at the end of the tunnel. I sourced a replacement windshield from one of our smaller vendors as the cost of the glass with free shipping was about $50 less than sourcing it locally. Door glass, with shipping, was $75 less than local source. I tried to polish the old windshield and door glass to get the environmental etching and scratches off them using cerium oxide. The etching came right off but a scratch or 2 were just too deep. New glass it is. If anyone wants the old stuff PM me. I hate to toss it as it's still good.

Nothing wrong with details.. :) good reading material too once you are all said / done
 

Germd

Full Member
Joined
Jun 16, 2014
Messages
342
Great job on the build! Love the body color as mine is going to be a similar metallic copper/bronze. I’m debating interior/upholstery options now. I’m using original front & rear seats with new foam. Was thinking of going with black covers & door panels, but yours got me thinking......
Please post some pics when you get the seats installed.
 
OP
OP
AZ73

AZ73

Contributor
Bronco Guru
Joined
Mar 28, 2012
Messages
3,542
Great job on the build! Love the body color as mine is going to be a similar metallic copper/bronze. I’m debating interior/upholstery options now. I’m using original front & rear seats with new foam. Was thinking of going with black covers & door panels, but yours got me thinking......
Please post some pics when you get the seats installed.

Thanks for the kind words. Our business had doubled over the last year and we're moving into a new warehouse this month so I had to delay finishing wiring again, but free day today! Seats should be installed soon.
 
OP
OP
AZ73

AZ73

Contributor
Bronco Guru
Joined
Mar 28, 2012
Messages
3,542
Slowly working on the wiring. It's my least experienced skill on this build. But it's coming along. The painless wiring harness is installed and I'm working on checking all my custom work to it, and making it buttoned up. The lights all work along with my extra LED back-up light bars. Wrapping all the wiring in the protective covers. I ran a master ground wire around the body and drilled/tapped #10 x 32 screws in the 4 corners to hook all the grounds together. Also took a trip to Tuscon to pick up the rest of the upholstery. Under the hood I mounted the starter relay/solenoid and 150 amp master fuse to the apron next to the battery so when the battery is installed, it'll all be hidden. All the wires to the alt/starter are run between the battery box and core support, down to the frame and to the starter or up under the radiator hose to the alternator so they're mostly hidden from view. Everything is 0,4, or 6 gauge. The chrome shop in WA called to say my remote driver's mirror is finished and they're sending the pieces back. When I finish reassembling it I can add it to the driver's door and then finish that door up
 

Attachments

  • IMG_3235.jpg
    IMG_3235.jpg
    84.8 KB · Views: 88
  • IMG_3236.jpg
    IMG_3236.jpg
    94.6 KB · Views: 76
  • IMG_3237.jpg
    IMG_3237.jpg
    83.9 KB · Views: 68
  • IMG_3192.jpg
    IMG_3192.jpg
    62.8 KB · Views: 80
  • IMG_3238.jpg
    IMG_3238.jpg
    183.8 KB · Views: 81
  • Ground 1.jpg
    Ground 1.jpg
    225.5 KB · Views: 77
  • Ground 3.jpg
    Ground 3.jpg
    71.7 KB · Views: 84
  • IMG_3175.jpg
    IMG_3175.jpg
    113.4 KB · Views: 99
Last edited:

jmhend

Bronco Guru
Joined
Dec 25, 2007
Messages
2,736
Did you also change the license plate light to LED? I did not and I habe a cool 70's dicso vibe....lol I am in search of a short bulb that is a suitable led replacement.

Sent from my SM-N960U using Tapatalk
 

txtruk15

Contributor
Sr. Member
Joined
Apr 1, 2017
Messages
749
Loc.
Highland Village, TX
Love this build. I like the OTTRATW switches as well - how did you convert the windshield wiper switch from it's original state to the Ottratw switch so it would run lo-hi wiper speed? or did you do something completely different? I'm working onfinishing my dash overlay and am trying to decide on ottratw switches in the dash vs the original switches before I finish cutting and then painting
 

blade

Contributor
Maker of sharp things
Joined
May 13, 2020
Messages
146
Loc.
Santa Fe
Really nice write up on your build with a lot of great information and pics! thanks.
Have you had time to complete it or is it still in process?
 

Kently21

New Member
Joined
Sep 20, 2022
Messages
7
Hey Jefe, my 68 is almost ready for paint I was was desperately hoping that you’d be able to share any info on this paint. I understand it’s custom but any advice would be appreciated as this is my first build and I love this color scheme. Thanks in advance
 
Top