


Community
Message Forum
Photo Gallery
Event Calendar
Book Reviews
Bronco Wallpaper
Bronco FAQ
Link Back to CB!
Photo Gallery
Event Calendar
Book Reviews
Bronco Wallpaper
Bronco FAQ
Link Back to CB!
Buy / Sell


Bronco Tech
3 Arm Wiper Setup
Fix Motor Mount
Roll Cage Braces
Throttle Body 65mm
Wheel Alignment
Heat Riser Replacement
Vent Window Repair
Center Console Mount
Straighten Bumper
Ford 6R80 6 spd
More Tech...
Fix Motor Mount
Roll Cage Braces
Throttle Body 65mm
Wheel Alignment
Heat Riser Replacement
Vent Window Repair
Center Console Mount
Straighten Bumper
Ford 6R80 6 spd
More Tech...

Install the app
-
Welcome to ClassicBroncos! - You are currently viewing the forums as a GUEST. To take advantage of all the site features, please take a moment to register. It's fast, simple and absolutely free. So please join our community today!If you have problems registering or can't log into your account, please contact Admin.
You are using an out of date browser. It may not display this or other websites correctly.
You should upgrade or use an alternative browser.
You should upgrade or use an alternative browser.
Its My Official Build Thread (new pic 06 nov2014)
- Thread starter fordguy
- Start date

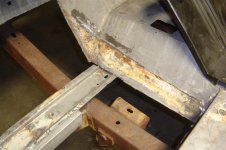
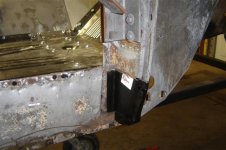
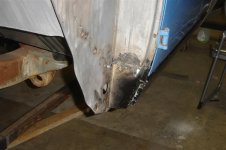
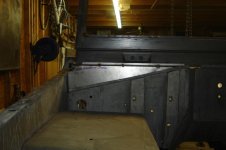
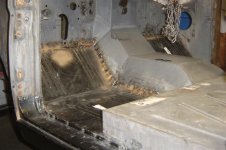
cut the drivers floor pan out yesterday. you can see in the pic, where they laid the replacement pan over the existing tunnel and welded. cleaning up other people's work sometimes is a pain, but this will actually turn out good. the replacement pan was that i cut out was one a vendor sells that has an angle on the tunnel side. you can see it in the pic. you can also see on the seat riser on the other pic where they welded it over the existing metal.
Attachments
POOH BEAR
Sr. Member
Billy,Keep up the good job.... Looking Nice...
Bronco717274
Bronco Guru
Thanks Fordguy for the link looks like things are going well really like the frame. Will be watching your progress post up more pics as you go you know I'm fixing to start mine and you can tell me what to look for.
- Joined
- Dec 8, 2010
- Messages
- 16,306
cut the drivers floor pan out yesterday. you can see in the pic, where they laid the replacement pan over the existing tunnel and welded. cleaning up other people's work sometimes is a pain, but this will actually turn out good. the replacement pan was that i cut out was one a vendor sells that has an angle on the tunnel side. you can see it in the pic. you can also see on the seat riser on the other pic where they welded it over the existing metal.
How many scars you got from cutting the pan out?;DI got some that I believe will be around awhile!
Great work you got goin there for sure!!
")
well over the years i have learned gloves and goggles are for my own good %)
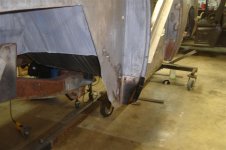
i am headed up to the shop now, will take some pics of progress. had to pull of the frame and start working on the body so i can get it to ecoat and finish with the rotisserie.
i am headed up to the shop now, will take some pics of progress. had to pull of the frame and start working on the body so i can get it to ecoat and finish with the rotisserie.
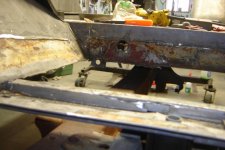
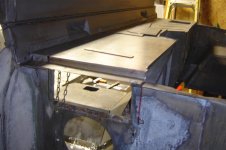
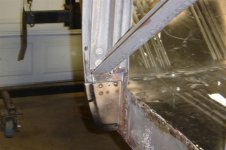
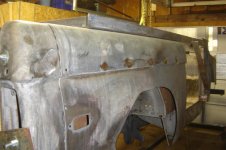
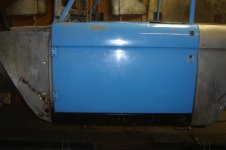
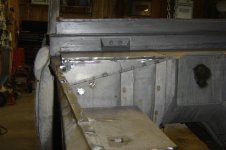
here is a little progress. i have cut the cowl and started bending the pieces i need to fill that. i also have the bottoms cut for the door post and have repair panels. pic of the drivers floor plan, almost completely fitted. i have to finish cleaning up inner rocker panels and it will be time to fit nos outer rocker panels and start welding.
Attachments


Bronco717274
Bronco Guru
Fordguy are those screws permanent or just till you get it welded in. I'm almost through building my rotisserie will start pulling my engine and trans next weekend. already pulled front and rear ends. I've got a dana 60 rear from a 68 barracuda and a hp dana 44 narrowed both with 4:88 gears. Everythings in good shape except the body. So I'll be watching your progress nice job so far.
broncoitis
Bronco Guru
- Joined
- Jul 23, 2010
- Messages
- 4,449
Nice job on the Cowl! All is lookin good. Keep it up. ;D
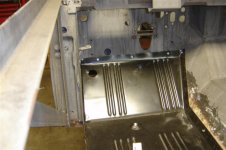
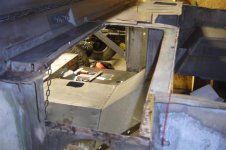
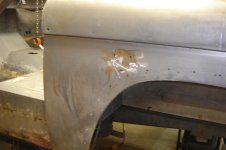
couple of things i have done over the last couple of days. filled some holes, got the rocker repair piece done for drivers side, ds floor pan is in and got the cowl fill piece mocked up.
Attachments
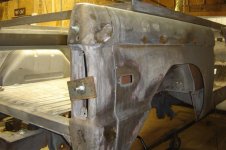
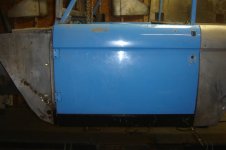
a little more progress. the door post is solid now. the door gap and body lines look good now. the bottom gap is more than i would like but i have a solution for that. see my previous pics for how the door post look before i fixed the bottoms.
Attachments
Last edited:
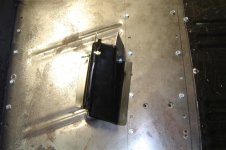
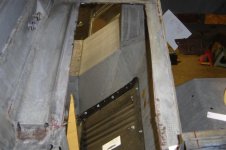
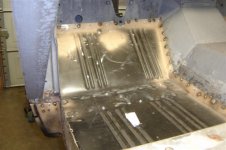
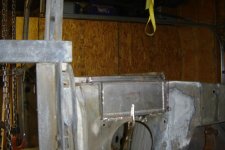
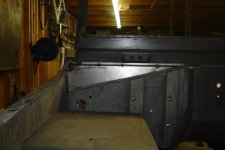
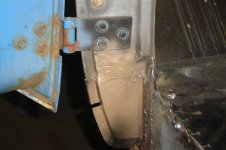
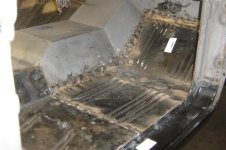
well a friend came over and helped me out yesterday, we got a whole lot done. i will be doing some small things and then she will be off to ecoat this week. check out my patch i made for the firewall. i gave up on a smooth firewall filled a lot of holes, but will put stainless bolts in the others ones for looks. i left the wiring holes on each side.
Attachments


What happened? did it melt in the dip?;D
broncoitis
Bronco Guru
- Joined
- Jul 23, 2010
- Messages
- 4,449
What happened? did it melt in the dip?;D
Pat,
You are a funny man! ;D
Similar threads
- Replies
- 89
- Views
- 21K
- Replies
- 34
- Views
- 9K
- Replies
- 38
- Views
- 4K
- Replies
- 35
- Views
- 3K