• Welcome to ClassicBroncos! - You are currently viewing the forums as a GUEST. To take advantage of all the site features, please take a moment to register. It's fast, simple and absolutely free. So please join our community today!
    If you have problems registering or can't log into your account, please contact Admin.

Spawn build (72 Bronco rebuild) (On the road finally!)

OP
OP
langester

langester

Contributor
MASTER OF MADNESS
Joined
Mar 2, 2013
Messages
2,660
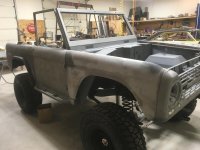
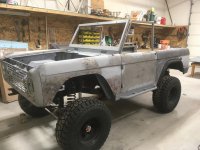
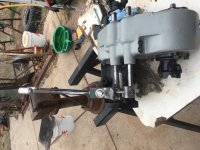
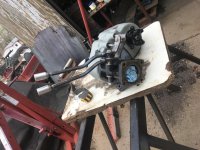
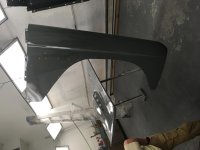
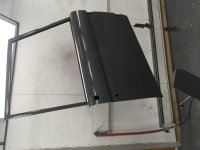
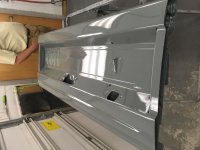
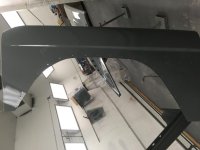
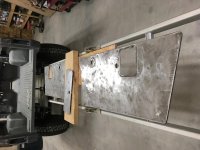
I got to work on the Bronco today finally. My buddy got most of the body work done on the drivers fender so I was able to install the last fender flare. I then removed both of the front flares and cut the front fenders to mach the grill that I cut flat across the bottom. I put the windshield frame and the doors on so i could check for fit before we do any final work before paint.
I have a few spots to play with but for the most part it is ready. Did I mention that I hate lining up doors! 3 hours of playing with those damn things, Uggg!
Here is a couple pics, nothing exciting, still making progress though!
 

Attachments

  • IMG_1177.jpg
    IMG_1177.jpg
    88.3 KB · Views: 60
  • IMG_1178.jpg
    IMG_1178.jpg
    98.9 KB · Views: 69
OP
OP
langester

langester

Contributor
MASTER OF MADNESS
Joined
Mar 2, 2013
Messages
2,660
Thanks, I appreciate the reply! The ball is starting to roll a little easier, finally!
 
OP
OP
langester

langester

Contributor
MASTER OF MADNESS
Joined
Mar 2, 2013
Messages
2,660
I am waiting on my buddy to get some body work done on the drivers fender so I decided to rebuild my transfer case. It was pretty tight and looked good but I didn't want to take any chances. I got it torn down and started the clean up and paint on the case and cover. Hopefully I can finish up next weekend.
 

Attachments

  • IMG_1191.jpg
    IMG_1191.jpg
    121.1 KB · Views: 64
  • IMG_1192.jpg
    IMG_1192.jpg
    72.8 KB · Views: 63
  • IMG_1193.jpg
    IMG_1193.jpg
    72.4 KB · Views: 58

hankjr

Contributor
Bronco Guru
Joined
May 11, 2013
Messages
1,760
Looking great Steve!!! Get at it and finish that rig!

Hank
 
OP
OP
langester

langester

Contributor
MASTER OF MADNESS
Joined
Mar 2, 2013
Messages
2,660
Thanks Hank! I am trying, my wallet is not as willing to help as it needs to be!
 
OP
OP
langester

langester

Contributor
MASTER OF MADNESS
Joined
Mar 2, 2013
Messages
2,660
3 spindle nuts, 3 rear output shafts and a lot of cussing later! I finally got the t case rebuilt! Here are a couple pics to prove its back in one piece.
 

Attachments

  • IMG_1228.jpg
    IMG_1228.jpg
    119.4 KB · Views: 78
  • IMG_1229.jpg
    IMG_1229.jpg
    112.5 KB · Views: 71
OP
OP
langester

langester

Contributor
MASTER OF MADNESS
Joined
Mar 2, 2013
Messages
2,660
I got to finish my twin sticks today. I started them a long time ago, I had a t shift to start out with and switched to a j shift. I had to scrap some of what I had, but the levers worked out okay. I used 9/16 hex stock, I think it looks awesome. I bent them for now I will probably have to tweak them when I install the drive train. Here are a couple pics.
 

Attachments

  • IMG_1232.jpg
    IMG_1232.jpg
    154.6 KB · Views: 70
  • IMG_1231.jpg
    IMG_1231.jpg
    113.9 KB · Views: 73
  • IMG_1230.jpg
    IMG_1230.jpg
    132.6 KB · Views: 70
OP
OP
langester

langester

Contributor
MASTER OF MADNESS
Joined
Mar 2, 2013
Messages
2,660
My buddy shot some paint on a few parts for me today. We still have a little work to do on the tub but should be shot next week I hope. Here are a few pics. Its not a show truck, its going to be a daily driver. It has a few dings we missed here and there but I am loving it!
 

Attachments

  • IMG_1299.jpg
    IMG_1299.jpg
    62.1 KB · Views: 57
  • IMG_1298.jpg
    IMG_1298.jpg
    60.1 KB · Views: 60
  • IMG_1297.jpg
    IMG_1297.jpg
    78 KB · Views: 70
  • IMG_1296.jpg
    IMG_1296.jpg
    61.9 KB · Views: 63
  • IMG_1295.jpg
    IMG_1295.jpg
    58.9 KB · Views: 79
OP
OP
langester

langester

Contributor
MASTER OF MADNESS
Joined
Mar 2, 2013
Messages
2,660
Speaking of paint. I was looking at my glove box door just now and on the bottom inside it has "PAINT OK" in yellow and some other writing I can't make out. I never noticed that before.
 

Attachments

  • IMG_1300.jpg
    IMG_1300.jpg
    54.2 KB · Views: 62

LUBr LuvR

Contributor
Bronco Guru
Joined
Dec 31, 2015
Messages
1,968
Usually the stamp would also have the date and inspector’s last name.
 
OP
OP
langester

langester

Contributor
MASTER OF MADNESS
Joined
Mar 2, 2013
Messages
2,660
Thanks for the reply. I bet that is the part I can't make out. Good to know, it amazes me the amount of little things that pop up on Bronco's that I never noticed. Always learning something, thats what I love about this site!
Thanks again!
 

LUBr LuvR

Contributor
Bronco Guru
Joined
Dec 31, 2015
Messages
1,968
Thanks for the reply. I bet that is the part I can't make out. Good to know, it amazes me the amount of little things that pop up on Bronco's that I never noticed. Always learning something, thats what I love about this site!
Thanks again!

x2 on all the little details. This stamp is located under the dash, so may have been a different format from one used in a glovebox - but it shows the name and date.
 

Attachments

  • E7EE3982-2F17-4327-BD6E-9B60C937C2B1.jpg
    E7EE3982-2F17-4327-BD6E-9B60C937C2B1.jpg
    79.3 KB · Views: 65

sykanr0ng

Bronco Guru
Joined
Aug 11, 2014
Messages
5,363
My buddy shot some paint on a few parts for me today. We still have a little work to do on the tub but should be shot next week I hope. Here are a few pics. Its not a show truck, its going to be a daily driver. It has a few dings we missed here and there but I am loving it!

What color is that?
I'm looking for a good gray for some of my interior.
 
OP
OP
langester

langester

Contributor
MASTER OF MADNESS
Joined
Mar 2, 2013
Messages
2,660
LUBr LuvR, Thanks for the pic, that is very similar to mine. Always cool to see something I didn't know on these rigs!
Thanks for posting it up.


SykanrOng, I am not sure what the name of the color is, I will check today when I am down there. It is a Martin Senour paint from NAPA, Acrylic Enamel. I will let you know this evening, I will take a shot of the label.
I bought a quart when I was shooting my Raptor liner to mix with it to get the color I wanted for the interior. I was going to go with a darker color on the outside of the body but changed my mind. I am very happy with the results.
 
OP
OP
langester

langester

Contributor
MASTER OF MADNESS
Joined
Mar 2, 2013
Messages
2,660
Here is a pic of the label of paint can.
 

Attachments

  • IMG_1303.jpg
    IMG_1303.jpg
    102.3 KB · Views: 56
OP
OP
langester

langester

Contributor
MASTER OF MADNESS
Joined
Mar 2, 2013
Messages
2,660
I got a little more work done today. I got the glove box door and the door panels sanded down and a little hammer work on the panels to fix them up. I think everything is done now except sanding a little on the tub and hopefully we can get everything all painted next weekend.
 

Attachments

  • IMG_1304.jpg
    IMG_1304.jpg
    84.9 KB · Views: 48

hankjr

Contributor
Bronco Guru
Joined
May 11, 2013
Messages
1,760
Looking good Steve!!! Can't wait to see it complete

Hank
 
OP
OP
langester

langester

Contributor
MASTER OF MADNESS
Joined
Mar 2, 2013
Messages
2,660
Hank,
Right on, me too! Maybe next time you are in town it will be on the road.
Have a good one!
 
Top