OP
OP


")
kudos to you to take on a project like this and keep it a daily driver. I would go insane with the off and on and all the running changes. Looks like your on a roll now.
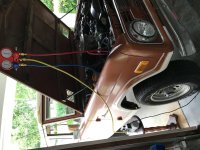
Hey Matt, were you able to get that condenser clearance right with the pics I sent? The hood latch guard was definitely a must.

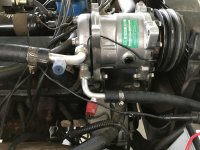


Is your rotation right for your compressor?
When you introduced the 134 the system was still under vacuum right?
Yes.
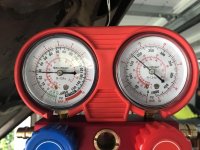
Pulled vacuum. Closed manifold (gauges remained -30 psi). Moved yellow hose from vacuum to Freon can. Pierced can and pressurized yellow line. Purged yellow line of air. Started engine then fans then turned temp knob to max. Immediately the clutch engaged.
I did not make a mental note of the pressures at that time.
Then slowly opened the low side only. It jumped and initially I was ok as that’s what happens when the refrigerant is first introduced and then it settles as it pulls and empties the can.
This time it went to 80 (the high set in around 125 during operation) on the low side and would not take anything out of the can. If I closed the valve the low side would drop to 10psi.
I just went outside and disassembled the manifold and put it back together. No visible blockages.
I’ll play with the vacuum tomorrow and see if one side or the other can’t pull.
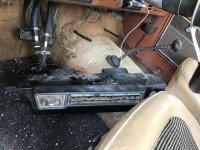
That’s the location of the original drier. I guess I could move it.
Yes. The “in” side is on the condenser side. The non-labeled side is on the evap side.
I just did a/c. During the charge cycle you do not open the high (red) side. I follow that you are taking a high side reading during your charge. Read your directions again if that's what you did.


![IMG_0825[1].jpg](/forums/data/attachments/406/406059-3f6e145aa9c4283e923f553d99d6d92f.jpg)