• Welcome to ClassicBroncos! - You are currently viewing the forums as a GUEST. To take advantage of all the site features, please take a moment to register. It's fast, simple and absolutely free. So please join our community today!
    If you have problems registering or can't log into your account, please contact Admin.

Project NightHorse

American180

Full Member
Joined
Sep 22, 2017
Messages
184
Loc.
Mount Washington, Ky
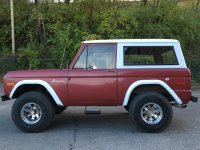
Last week I bought a 74 with 302, C4, and power steering. It will mainly be a daily driver with occasional trail and snow duty and It will be a restomod so I have a blank slate to build on. My goals for the build are as follows:

Safety drive at 85 mph:> Yeah that's a little on the fast side for a short wheel base brick going down the road but I think it can be done. Truth be told 70-75 is plenty, I just want a margin for safety. First thing is sway bars. It has 33 X 12.5 on it so that will help a little with stability. I'll keep lift at 2 1/2 or less and try and keep body lift at 1 inch.

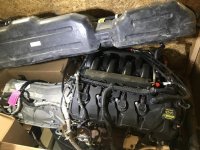
Coyote swap:> I'm looking to buy a 2011-2014 F150 4X4 5.0 and 6R80. I have a 2015 with this combination and I love it.

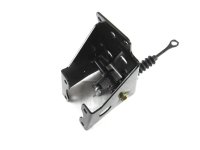
Brake upgrade :> This is a must. Power front disc brakes at the very least.

Reliability is very important:> The plan is to replace every tie rod, ball joint, u-joint, and bushing it has. I'll inspect and replace all the axle bearings and seals. Maybe even re-gear it at the time. Rebuild D20 and power steering box as well.

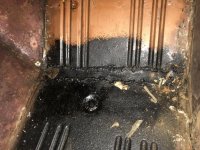
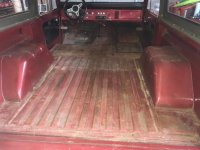
Sheet metal :> I'll replace any sheet metal as need it but I might farm out the body and paint work.

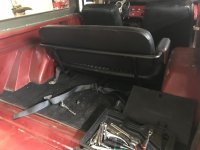
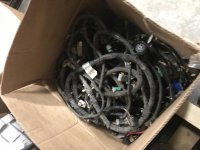
Interior and wiring :> gonna replace it all while I'm at it.

I have a big build a head of me but I've done this type of work before. Hopefully I can keep on it.
 

Attachments

  • IMG_8344.jpg
    IMG_8344.jpg
    124.1 KB · Views: 165
  • IMG_8345.jpg
    IMG_8345.jpg
    131.8 KB · Views: 146
  • IMG_8347.jpg
    IMG_8347.jpg
    155.8 KB · Views: 184

sprdv1

Contributor
REBEL
Joined
Mar 8, 2007
Messages
81,747
Congrats on your Purchase and good luck w/the build... Look forward to the progress.

Nice starting point looks like
 
OP
OP
A

American180

Full Member
Joined
Sep 22, 2017
Messages
184
Loc.
Mount Washington, Ky
I officially started working it on Friday 12/1/2017. I had to drive it to the sheriffs office to get the out of state title transferred and everything passed but the back up lights. The back up light switch and wiring was all jacked up so I wired a switch under the dash. Then when she was looking at the back up light, I just used the switch. No use spending a lot of time on it when the trans and wiring is just going to be replaced.

I started the tear down ower the weekend. I was happy with what I found under carpet, just two old front floor patches need redone. The PO first patched the small holes floor and did fine but then cut up signs and covered everything. It was a little overkill.

Any Idea on what year the seats might be? The front seats and back seat all have the pleats going the whole length of the seat. I'm used to it having a band of material around it.
 

Attachments

  • IMG_1352.jpg
    IMG_1352.jpg
    123.4 KB · Views: 146
  • IMG_1351.jpg
    IMG_1351.jpg
    81.7 KB · Views: 132
  • IMG_1350.jpg
    IMG_1350.jpg
    165.9 KB · Views: 148
  • IMG_1349.jpg
    IMG_1349.jpg
    88.2 KB · Views: 139
  • IMG_1348.jpg
    IMG_1348.jpg
    66.6 KB · Views: 134
  • IMG_1347.jpg
    IMG_1347.jpg
    102.4 KB · Views: 149
OP
OP
A

American180

Full Member
Joined
Sep 22, 2017
Messages
184
Loc.
Mount Washington, Ky
The sign the PO used for floor patches was pretty cool. It was from Barksdale Air Force Base in Louisiana. From What I can tell is it's from the Strategic Air Commands Bombing and Navigation contest called Giant Sword. I think the last picture is from a maintenance crew that one it 2014. http://www.barksdale.af.mil/News/Article-Display/Article/634883/
 

Attachments

  • IMG_1355.jpg
    IMG_1355.jpg
    124.9 KB · Views: 87
  • IMG_1354.jpg
    IMG_1354.jpg
    125.1 KB · Views: 88
  • IMG_1353.jpg
    IMG_1353.jpg
    119 KB · Views: 102
  • 141105-F-KN424-648.jpeg
    141105-F-KN424-648.jpeg
    134.9 KB · Views: 125

LUBr LuvR

Contributor
Bronco Guru
Joined
Dec 31, 2015
Messages
1,967
[QUOTE

Any Idea on what year the seats might be? The front seats and back seat all have the pleats going the whole length of the seat. I'm used to it having a band of material around it.[/QUOTE]


Looks like the stock seats, just that they were recovered using a different pattern than the original.
 

Aliracer

Jr. Member
Joined
Jan 16, 2017
Messages
57
Loc.
Iowa
Sounds like you have a good plan and what appears to be a good bronco to start with. Looking forward to seeing the progress on the build. Congrats!
 
OP
OP
A

American180

Full Member
Joined
Sep 22, 2017
Messages
184
Loc.
Mount Washington, Ky
I received my Marti Report. It's interesting that it came with front and rear posi. The rear posi is gone but hopefully the front is still there. I'll check this weekend.
 

Attachments

  • NighthorseMR.jpg
    NighthorseMR.jpg
    113.7 KB · Views: 83
  • U15GLT11519_dlxrpt.pdf
    214 KB · Views: 5
Last edited:
OP
OP
A

American180

Full Member
Joined
Sep 22, 2017
Messages
184
Loc.
Mount Washington, Ky
I received a big crate of parts. 4 wheel disc, new booster assemble, 2.5 inch lift, tie rods, ball joints and more. I'm a little behind where I wanted to be but I'm almost done with my passenger floor. Need to finish floors so I can pull body and start emptying the crate.
 

Attachments

  • 4B532743-111C-4952-A4E1-437D43DE9480.jpg
    4B532743-111C-4952-A4E1-437D43DE9480.jpg
    105 KB · Views: 99
OP
OP
A

American180

Full Member
Joined
Sep 22, 2017
Messages
184
Loc.
Mount Washington, Ky

Attachments

  • Night Horse Floor.jpg
    Night Horse Floor.jpg
    109.8 KB · Views: 163

McLeod

Full Member
Joined
Jun 29, 2008
Messages
296
I started the tear down ower the weekend. I was happy with what I found under carpet, just two old front floor patches need redone. The PO first patched the small holes floor and did fine but then cut up signs and covered everything. It was a little overkill.

That was a pretty common floor repair method 30+ years ago
 

rguest3

Contributor
Bronco Guru
Joined
Dec 13, 2012
Messages
3,778
Looks like a great starting point. Stance looks good as is.

If you are going with the Coyote / 6R80 Combo then I would suggest a 4.56-4.88 gear with the 33" tire.

If you are sticking to the Original Hood then go with a 2" Body Lift to clear the Coyote Engine Cover. Will help to clear the Power Brake Booster too. I have the Inline Booster Bracket on eBay and the 1" body Lift fit fine.

Starting with a good foundation with new Ball Joints, Bearings and Steering components is always a plus.
 
OP
OP
A

American180

Full Member
Joined
Sep 22, 2017
Messages
184
Loc.
Mount Washington, Ky
I received my used engine yesterday. A lower milage 2014 F150 5.0 and 6R80 transmission. It came with the ECM with pats disabled, all the wiring harnesses, gas tank, fuel pump, gauge cluster, steering column, electronic gas pedal, fuse boxes and a whole lot more. More stuff then I needed but it's nice to have on hand until I get it running. I got it from the The Parts Farm in George. They specialize in putting together kits for transplant into other vehicles.

So why did I go this route and how much was it, is usually the questions people ask on Coyote swaps. I went with the F150 because:
1. it's a cheaper than the new/used Mustang 5.0 engine.
2. I don't have to buy a separate harness and ECM.
3. I don't have to buy a separate transmission controller.
4. The engine is tuned for torque at a lower RPM. it's set up better for MY Bronco's intended use.
5. Buying a complete swap kit means everything is there. I'm sure I'll find a lot of usefully stuff to help save me money.
6. I paid $6400 plus shipping. I know it could be done cheaper shopping piece by piece or pulling things my self locally, I just don't have time to do that. I do not want this project dragging out for years and years. This way I have something guaranteed to run and I know it all works well together. Plus, I can use the time saved for working on the Bronco.
 

Attachments

  • IMG_1462.jpg
    IMG_1462.jpg
    136.3 KB · Views: 81
  • IMG_1466.jpg
    IMG_1466.jpg
    124.9 KB · Views: 98
  • IMG_1470.jpg
    IMG_1470.jpg
    80.6 KB · Views: 81
  • IMG_1472.jpg
    IMG_1472.jpg
    88.6 KB · Views: 92
Last edited:

69broncofun

Bronco Guru
Joined
Nov 22, 2016
Messages
1,380
Sweet setup you go there. Nice Garage too. Is that a CNC machine I see there in the background?
 
Top