• Welcome to ClassicBroncos! - You are currently viewing the forums as a GUEST. To take advantage of all the site features, please take a moment to register. It's fast, simple and absolutely free. So please join our community today!
    If you have problems registering or can't log into your account, please contact Admin.

Floor Pan and Other Half Done Metal Work

OP
OP
Jamie Chriss

Jamie Chriss

Sr. Member
Joined
Feb 28, 2015
Messages
576
So happy I want to cry! So after many months I finally put body on frame, without trying every body bolt slipped in. What a great day!!!!!!
 

Attachments

  • DSC_7643.jpg
    DSC_7643.jpg
    136.7 KB · Views: 181
  • DSC_7645.jpg
    DSC_7645.jpg
    146.6 KB · Views: 181
  • DSC_7647.jpg
    DSC_7647.jpg
    99.1 KB · Views: 178
  • DSC_7657.jpg
    DSC_7657.jpg
    129 KB · Views: 164
  • DSC_7678.jpg
    DSC_7678.jpg
    132 KB · Views: 176
  • DSC_7670.jpg
    DSC_7670.jpg
    104.4 KB · Views: 171

DirtDonk

Contributor
Bronco Guru
Joined
Nov 3, 2003
Messages
47,478
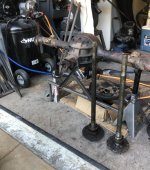
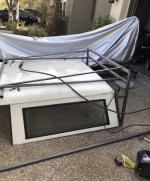
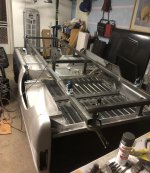
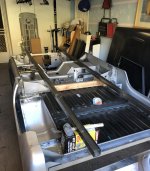
Fantastic! Now your garage looks like a full on race prep shop!
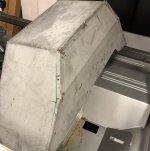
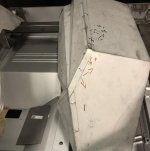
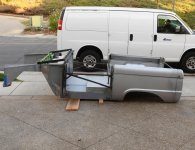
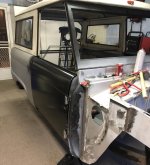
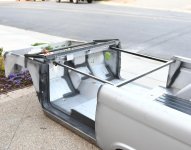
That's a lot of "new" body you got there Jamie.

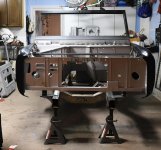
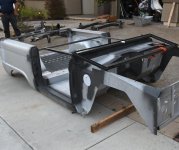
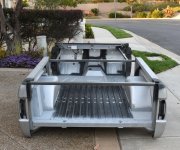
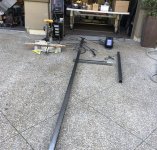
As for the frame, while I'm a huge fan of powder coating, to do that would mean making darn sure that you have done literally everything you're ever going to do to the frame, and committing yourself to accepting the fact that if you do think of something else to add on later, you just won't do it!
Just that paint and POR and stuff like that are all easier to grind off, weld on, then re-coat to get a pretty seamless look. Powder on the other hand is doable, depending on whether or not you have a good paint match, but as thick as it goes on there always seems to be that visible "patch" that you know is there.

Not that plenty of people haven't had to weld a new shock mount to a frame or axle housing that they've just finished powder coating of course. But it's way better to have already done all that stuff before it was coated.
So if you go with PC, make sure you have your I's dotted and your T's crossed and your full checklist crossed off.

But no matter what, it's gonna' be bitchin'!

Paul
 
OP
OP
Jamie Chriss

Jamie Chriss

Sr. Member
Joined
Feb 28, 2015
Messages
576
I think powder is it. I just finished the welding I have planned on the frame, I added taller shock towers and longer drop, I think I need add the power steering plate. I am going with WH 2.5 with longer Bilsteins. I do think I am going Coyote so there are a few more planning steps before powder. Paul thank you for your support your encouragement helped me get this far.
 

DirtDonk

Contributor
Bronco Guru
Joined
Nov 3, 2003
Messages
47,478
Hey, my pleasure. I think I'm getting more good out of it than you are!
It's been great watching you go through all the steps. And in spite of the land mines and other little surprises an EB can throw at you, you seem to still be having good fun doing it too.

Keep the pics coming!

Paul
 
OP
OP
Jamie Chriss

Jamie Chriss

Sr. Member
Joined
Feb 28, 2015
Messages
576
Had some time today, waiting on new drivrs doors so I figured I would tackle the dash. When is a dash no longer resonably salvagable? I am planning on moving the glove box over, removing the ash tray and other not needed holes. I think since I am cutting it up it is best to save a few $$ and save this one?
 

Attachments

  • IMG_0468 (2).jpg
    IMG_0468 (2).jpg
    119.3 KB · Views: 141
  • IMG_0466.jpg
    IMG_0466.jpg
    110.1 KB · Views: 126
  • IMG_0456.jpg
    IMG_0456.jpg
    78.5 KB · Views: 128

rydog1130

Sponsor/Vendor
Bronco Guru
Joined
Jun 19, 2014
Messages
4,024
I would opt for just putting the work in on this one and modify it, if you mess it up then by a blank dash and go from there.
 

half cab

Contributor
Guru Bronco
Joined
Dec 8, 2010
Messages
16,306
So happy I want to cry! So after many months I finally put body on frame, without trying every body bolt slipped in. What a great day!!!!!!

Happy fot you as you've sure put in the time labor and it's looking geat;D
 
OP
OP
Jamie Chriss

Jamie Chriss

Sr. Member
Joined
Feb 28, 2015
Messages
576
Slow go, still taking one step forward two back! Made small progress got both doors to square up, dash is ready for finish welding, most final body welding is done, few more dozen hours then off to paint... Loving it, I once read hew take it one task at a time and enjoy your truck.. great advice at the rate I am going maybe next year. Honestly if my truck wasn't so bent i would have put a new motor in it and enjoyed it.
 

Attachments

  • IMG_0672.jpg
    IMG_0672.jpg
    110.3 KB · Views: 182
  • IMG_0605.jpg
    IMG_0605.jpg
    123.3 KB · Views: 187
  • IMG_0671.jpg
    IMG_0671.jpg
    108.8 KB · Views: 180
OP
OP
Jamie Chriss

Jamie Chriss

Sr. Member
Joined
Feb 28, 2015
Messages
576
Snail pace! Body is almost done. Turned the tub over to finish bottom, I think another week of final welding and I should be done. Next epoxy botton, seam seal and Lizard skin just the underside I am going to use color matching coating for wheel wells and the upper underparts. Then hopefully off to paint.
 

Attachments

  • DSC_3070.jpg
    DSC_3070.jpg
    129.8 KB · Views: 125
  • DSC_3066.jpg
    DSC_3066.jpg
    113.1 KB · Views: 133
  • DSC_3064.jpg
    DSC_3064.jpg
    151 KB · Views: 122
  • DSC_3062.jpg
    DSC_3062.jpg
    93.6 KB · Views: 124

DirtDonk

Contributor
Bronco Guru
Joined
Nov 3, 2003
Messages
47,478
I think it looks pretty great in silver and black already!
I like the idea of color matching the Lizard Skin too. That's what I'll do eventually as well, since I've waited a long time to have nice looking wheel wells and don't want to lose them now!

Back in the seventies I went through quite a few cans of rubberized undercoating to keep things clean looking and hold the rust at bay. Would look like crap a couple of years after each application, but it sure did it's job of protecting. And quieted things down a bit too.
Just never liked the all-black look under there.
I even undercoated the inside of the stock chrome bumpers where the chrome did not reach. Man, those things were clean without a spec of rust thirty years later.

But Lizard is the stuff. Can't wait.

Paul
 
OP
OP
Jamie Chriss

Jamie Chriss

Sr. Member
Joined
Feb 28, 2015
Messages
576
Paul I am not totally convinced on an under coating yet. Since I am keeping this one and have tons of time, I want to do it right. I think the Lizard skin would add sound deadening and heat control in areas I won't see. I love the look of paint, and since it is all new metal it would look great, but from a function standpoint dosen't sound and heat control trump looks? The Lizard skin would be on just the underside of the bed, platform and half way up the fire wall. Lizard skin isn't paintable so yes it would look dark.. PS I am not sure my neighbors would agree on Me having allot of time. I have had this this Bronco all over the yard since September, ha ha F my home owners association.
 

DirtDonk

Contributor
Bronco Guru
Joined
Nov 3, 2003
Messages
47,478
...but from a function standpoint dosen't sound and heat control trump looks?
The Lizard skin would be on just the underside of the bed, platform and half way up the fire wall. Lizard skin isn't paintable so yes it would look dark.

Yes, without a doubt!
But don't they sell either tintable, or already tinted Lizard Skin? Pretty sure I've heard that. Not checked it out though.
If so, then that's the route I'd go. The amount of noise at least, if not heat too, that comes through the rear wheel wells and inner cavities that you may not be planning to coat is not to be underestimated.
Of course, covering the interior with a layer of insulation and then a carpet goes a long way towards reducing that. But if I had the choice I'd do the LS in those areas as well.
But I'm with you on the inner wheel wells and other parts you can see being nice to look at with new paint. But even a textured coating like the Skin would look fine if it was body color too.

Good luck either way. At least you'll have the most heat and noise prone areas covered.

Was thinking you had very accommodating neighbors from some of the pictures I've seen. But being in an HMO area? Yikes!
Good luck with that!

Paul
 
OP
OP
Jamie Chriss

Jamie Chriss

Sr. Member
Joined
Feb 28, 2015
Messages
576
Next piece of the puzzle arrived today! 2015 6R80 from a F150 4x4 with 9K on it!
 

Attachments

  • Trans.jpg
    Trans.jpg
    148.2 KB · Views: 96
OP
OP
Jamie Chriss

Jamie Chriss

Sr. Member
Joined
Feb 28, 2015
Messages
576
Super happy that I am learning to weld, 6 months ago I built my tub frame out of wood that took me two days, today in 3 hours I belt this really functional tub holder I am using to ship my tub off to paint.
 

Attachments

  • IMG_1220.jpg
    IMG_1220.jpg
    102.8 KB · Views: 167
  • IMG_1219.jpg
    IMG_1219.jpg
    124.5 KB · Views: 179
  • IMG_1214.jpg
    IMG_1214.jpg
    103.1 KB · Views: 189
  • IMG_1209.jpg
    IMG_1209.jpg
    132.1 KB · Views: 176
  • IMG_1207.jpg
    IMG_1207.jpg
    288.9 KB · Views: 154

DirtDonk

Contributor
Bronco Guru
Joined
Nov 3, 2003
Messages
47,478
That's a great setup.
And I vote picture #3 for next year's Bronco calendar!
That's as close to a true Bronco image as I've ever seen, that didn't happen to have a Bronco in it.;D

I just told Dinger to pop over and check out your thread(s) because he just got the rust-surprise wake up call with his Bronco.
Hopefully images of your "practically new" and "practically home-made" body will be enough to inspire spiritual strength and dispel at least some of the pain.;):cool:

Paul
 
OP
OP
Jamie Chriss

Jamie Chriss

Sr. Member
Joined
Feb 28, 2015
Messages
576
Paul I didn't start out thinking I would do this but the only PO parts I kept are the dash, axels, tail gate, a few switches and the grill, so I guess it is home grown!

Finished the Tub frame, I am very happy with the fit. Found time to trim down the wheel wells, I did 1.75 on the passenger side and 1.0 on the drivers side.
 

Attachments

  • IMG_1233.jpg
    IMG_1233.jpg
    224.3 KB · Views: 113
  • IMG_1236.jpg
    IMG_1236.jpg
    85.1 KB · Views: 121
  • IMG_1237.jpg
    IMG_1237.jpg
    78.5 KB · Views: 116
OP
OP
Jamie Chriss

Jamie Chriss

Sr. Member
Joined
Feb 28, 2015
Messages
576
While I was waiting I figured it was time to tear apart my rear end, so far other than a cracked bearing housing things are looking ok. I should have the whole thing torn apart by the end of the weekend. I have never open one of these up before seems straight forward. Looking to change gear ratio to match up with the 6R80 transmission.
 

Attachments

  • IMG_1265.jpg
    IMG_1265.jpg
    160.8 KB · Views: 99
OP
OP
Jamie Chriss

Jamie Chriss

Sr. Member
Joined
Feb 28, 2015
Messages
576
Waiting around for my Lizard Skin order, needed a way to cart my top around, devised a way to be able to push upright or lower flat against the floor, I can move it up and down easily... happy my welding skills are improving!
 

Attachments

  • IMG_1271.jpg
    IMG_1271.jpg
    164.6 KB · Views: 114
  • IMG_1273.jpg
    IMG_1273.jpg
    114.3 KB · Views: 124
Top