Community
Message Forum
Photo Gallery
Event Calendar
Book Reviews
Bronco Wallpaper
Bronco FAQ
Link Back to CB!
Photo Gallery
Event Calendar
Book Reviews
Bronco Wallpaper
Bronco FAQ
Link Back to CB!
Buy / Sell


Bronco Tech
3 Arm Wiper Setup
Fix Motor Mount
Roll Cage Braces
Throttle Body 65mm
Wheel Alignment
Heat Riser Replacement
Vent Window Repair
Center Console Mount
Straighten Bumper
Ford 6R80 6 spd
More Tech...
Fix Motor Mount
Roll Cage Braces
Throttle Body 65mm
Wheel Alignment
Heat Riser Replacement
Vent Window Repair
Center Console Mount
Straighten Bumper
Ford 6R80 6 spd
More Tech...

Install the app
-
Welcome to ClassicBroncos! - You are currently viewing the forums as a GUEST. To take advantage of all the site features, please take a moment to register. It's fast, simple and absolutely free. So please join our community today!If you have problems registering or can't log into your account, please contact Admin.
You are using an out of date browser. It may not display this or other websites correctly.
You should upgrade or use an alternative browser.
You should upgrade or use an alternative browser.
Adventure Bronco getting ready for some new journeys!
- Thread starter Z Bronco
- Start date
Z Bronco
Bronco Guru
- Joined
- Mar 17, 2007
- Messages
- 1,138
The adventure in trying to get my Bronco running by summer is a challenge. Work and other things have preventing me from doing more, but I will start posting what I have done.
Over the winter I installed the new suspension. I had to fix the the front spring hanger (rear leafs) as the holes were elongated. I used weld washers from Ruff Stuff for the repair. This was an idea from Dirtdonk that I read from another thread. I moved the holes down around 3/16" to eliminate rubbing of the military wrap on the spring hanger. Searching has given me many ideas and answers to many things that come up. In the near future, I will post with pictures the other work I have done, (shocks with modified mounts, heater tube mod, exhaust, etc).
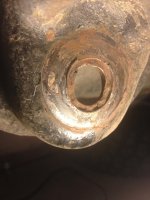
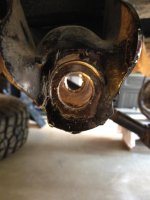
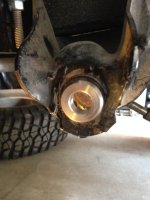
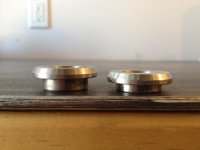

Over the winter I installed the new suspension. I had to fix the the front spring hanger (rear leafs) as the holes were elongated. I used weld washers from Ruff Stuff for the repair. This was an idea from Dirtdonk that I read from another thread. I moved the holes down around 3/16" to eliminate rubbing of the military wrap on the spring hanger. Searching has given me many ideas and answers to many things that come up. In the near future, I will post with pictures the other work I have done, (shocks with modified mounts, heater tube mod, exhaust, etc).


Z Bronco
Bronco Guru
- Joined
- Mar 17, 2007
- Messages
- 1,138
I sure hope I have the Bronco running by then, so not sure at this time. Have to finish up the EFI and serpentine setup. The 35s with the 4.11s allow for the new 65 speed limit, and worked well when I drove the Bronco to the east coast and back. Off road, I make up for things a bit with the 2.92 first gear that was put in the C4 years ago, plus the J shifter I have has the 2.46 instead of the 2.33 low gear in it (another old swap). Have you thought about an overdrive?
I have a local guy that isn't really isn't into 4x4's. He is selling me some AX-15's etc. Yes, it is big on my mind. 37's with the 4.56's is ok. I seem to like less RPM's than most do here. 4.56's will be fine with a 5-speed. That is next years project.
I am installing a roller motor that came in another project. It is essentially a crate 5.0 out of a lincoln. It will be fine for my purposes. I hope to get that in this summer. No EFI just yet.
I will say that since you left I have built almost every 4x4 there is of the smaller variety and the EB is by far the best. I have no interest in even looking at other 4x4's for the most part, although I still have a soft spot for Toyotas.
We need to get together this summer. The school is about 40% the size it is when you left. Still love the place and it is getting better.
Z Bronco
Bronco Guru
- Joined
- Mar 17, 2007
- Messages
- 1,138
I started this post four years ago in the hope of a getting my Bronco back on the road in a reasonable time frame. Shall we say "life threw a few curves" and I still am not done. Now, I am moving and I may not be able to get a trailer to where the new garage is do to snow and crazy alley entry angles that is combined with sharp curved sloping driveway. So, now I am working on the Bronco as much as I can with the hope that I can drive it to the new location. With work, weather, and the holidays, time is in short supply. I have to be moved out by January 23rd. However, I have nothing to lose by trying. I will take the occasionally break and post updates. The big things left to do is finish the EFI conversion and serpentine setup.
First update is shocking the suspension. After calls to numerous places on the Bilstein shocks, most said that due to the weight of my Bronco combined with other factors was that I should still double shock the front end (with reservoir shocks). With the cost of that I decided to go with the Duff shocks instead of the Bilsteins. I have always run soft valve shocks, first the Rancho soft valve 5000s and then the last many years the Doetch Tech MV 12s. My Bronco rode and handled very well with this setup, but suspension travel was limited do to shock size. Fast forward to this past year.....I had already welded up the WH Extreme front shock hoops and had the Shock jock rear setup to weld in. I measured the front for suspension travel and discovered that if I swapped out the 4 1/2" bump stop I had with a 2 1/2" one on a metal spacer (still 4 1/2" tall, but less compression length), I could run the same size Duff shock up front in both mounts. The plus is that I gained several inches in drop and with only limiting the up travel less than an inch with built in safety margins. Even though the rear shock in the front looks like it may bottom out, it won't with the bump stop. This is because I run the stock radius arms, the shock length even out on up travel. For the rear shock mounts, I got the hole spacing on the upper mount that Duff uses on their rear shock mounts and modified my WH mounts to use the Duff shock lengths, thus the extra hole in the WH mounts. This allows both rear shocks to be the same length, all 8 shocks on my Bronco are the same length.
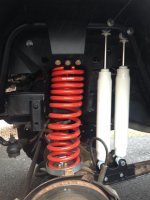
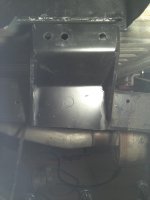

First update is shocking the suspension. After calls to numerous places on the Bilstein shocks, most said that due to the weight of my Bronco combined with other factors was that I should still double shock the front end (with reservoir shocks). With the cost of that I decided to go with the Duff shocks instead of the Bilsteins. I have always run soft valve shocks, first the Rancho soft valve 5000s and then the last many years the Doetch Tech MV 12s. My Bronco rode and handled very well with this setup, but suspension travel was limited do to shock size. Fast forward to this past year.....I had already welded up the WH Extreme front shock hoops and had the Shock jock rear setup to weld in. I measured the front for suspension travel and discovered that if I swapped out the 4 1/2" bump stop I had with a 2 1/2" one on a metal spacer (still 4 1/2" tall, but less compression length), I could run the same size Duff shock up front in both mounts. The plus is that I gained several inches in drop and with only limiting the up travel less than an inch with built in safety margins. Even though the rear shock in the front looks like it may bottom out, it won't with the bump stop. This is because I run the stock radius arms, the shock length even out on up travel. For the rear shock mounts, I got the hole spacing on the upper mount that Duff uses on their rear shock mounts and modified my WH mounts to use the Duff shock lengths, thus the extra hole in the WH mounts. This allows both rear shocks to be the same length, all 8 shocks on my Bronco are the same length.


Z Bronco
Bronco Guru
- Joined
- Mar 17, 2007
- Messages
- 1,138
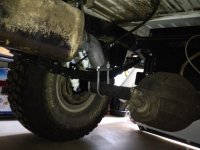
When installing the new rear bump stops for the back my exhaust tailpipe was in the way. Also, the e brake cable would rest on the old tail pipe when the rear suspension articulated. The exit point by the end of the rear tank was excellent, but not wanting to melt the new bump stops, I cut off the old pipe. I used a turndown as a solution for clearance, something tells me that the phrase "Can you hear me now" may apply. We will see, will change if needed.
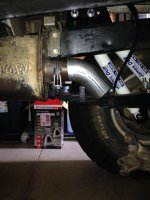


Z Bronco
Bronco Guru
- Joined
- Mar 17, 2007
- Messages
- 1,138
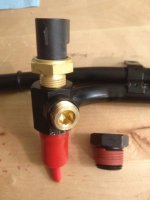
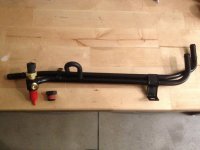
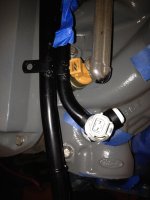
I decided to use the Explorer heater tubes as I liked the bends in the back. I ran into a problem with the heater tube hitting the #1 injector as the motor is a 351W. I heated the tube that I got from a member here on the board and ran into some mounting angle issues. A buddy of mine runs a radiator shop suggested that I cut a new tube and extend it with heater hose, so thats what I did solving the issue. As you can see in the picture the sensor was moved from the side to the top of the assembly for distributor clearance.
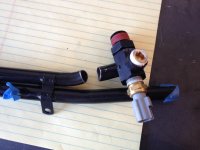
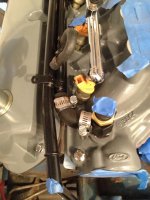


Z Bronco
Bronco Guru
- Joined
- Mar 17, 2007
- Messages
- 1,138
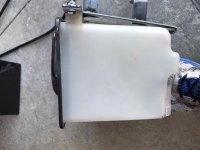
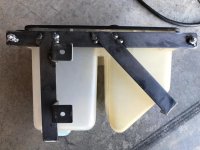
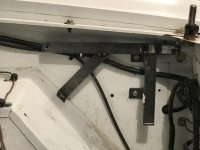
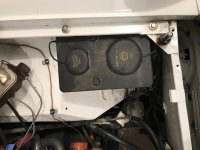
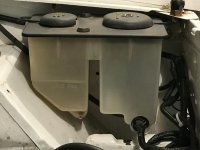
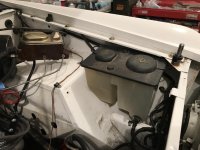
Next up was installing the newer style wiper/overflow tank. Welded together a mount after looking at some pictures here on classic broncos. Worked well in keeping existing wiring location and moving the tank out from the fender a little for easy opening of both the overflow and wiper fluid caps. Cost in parts was $8.
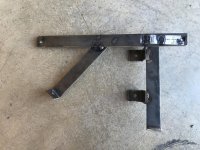
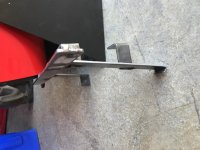


Z Bronco
Bronco Guru
- Joined
- Mar 17, 2007
- Messages
- 1,138
A few major winter storms have dumped a lot of snow in Central Oregon. I shoveled snow at one house to load, then shovel snow at the other house to unload....repeat. Have not been able to work on the Bronco because of the weather and now I am trying to figure out how to get it to the new place when the snow is making the alley way entrance to the garages almost impassible. Mini rant, now back to the shovel.
- Joined
- Nov 28, 2001
- Messages
- 10,102
Yes, I modified the Explorer fuel rail to fit the 351W.
Nice. Did you have to tweak the angle(s) of the inlet/outlet fittings at the rear and if so, how did you do it? I'm converting mine to the Explorer rails at some point to clean things up and I'd like to tweak the fittings a bit without kinking the tubing. I did pull a second one to practice on.
Thanks,
Todd Z.
Z Bronco
Bronco Guru
- Joined
- Mar 17, 2007
- Messages
- 1,138
Yes, the driver's side inlet needed to be tweaked a little to clear the electrical grommet, as it was pointed right at the grommet. I heated up fuel inlet and bent it slightly, so the fitting would easily clear. You can see what I did in some of the previous pictures I posted.
Z Bronco
Bronco Guru
- Joined
- Mar 17, 2007
- Messages
- 1,138
The snow storms and trying to get moved out on time kept me from being able to drive the Bronco to the new place. But here are some pictures of progress made before I towed it to the the new place. We used a tow strap to move the Bronco and I got a good idea of how the ride is with the new suspension.........excellent! The true test of the suspension will be under it own power of course.
Before instilling the heater box assembly with its new heater core. I drilled through the firewall for the EFI harness. After installing a new heater core, I had to loosen the Tuffy glove box to slide in the heater assembly back into place. Next was connecting the Explorer heater tubes. I found three 90 degree heater hoses between Napa and AutoZone and some straight and 90 degree connectors. Remember, I was trying to get this running and couldn't wait for a fourth 90 degree hose to come in, but it turned out well. From the Explorer send tube, I used a 45 degree bend from a previous heater hose left over from the clearing the number one injector mod. From there, it was measure, cut, and connect the hoses. The new style heater control valve woks great.
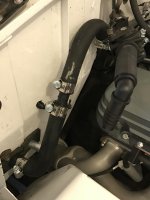

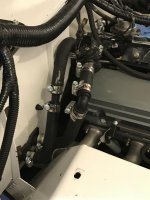
Before instilling the heater box assembly with its new heater core. I drilled through the firewall for the EFI harness. After installing a new heater core, I had to loosen the Tuffy glove box to slide in the heater assembly back into place. Next was connecting the Explorer heater tubes. I found three 90 degree heater hoses between Napa and AutoZone and some straight and 90 degree connectors. Remember, I was trying to get this running and couldn't wait for a fourth 90 degree hose to come in, but it turned out well. From the Explorer send tube, I used a 45 degree bend from a previous heater hose left over from the clearing the number one injector mod. From there, it was measure, cut, and connect the hoses. The new style heater control valve woks great.


Similar threads
TX
Kincer Coil Over Adventure Chassis, Custom Body, Hella Bad Roll Bar Bronco Project/Parts For Sale
City: The Woodlands, TX
Price: $61300
- Replies
- 4
- Views
- 1K
- Replies
- 37
- Views
- 4K


