• Welcome to ClassicBroncos! - You are currently viewing the forums as a GUEST. To take advantage of all the site features, please take a moment to register. It's fast, simple and absolutely free. So please join our community today!
    If you have problems registering or can't log into your account, please contact Admin.

Adventure Bronco getting ready for some new journeys!

OP
OP
Z Bronco

Z Bronco

Bronco Guru
Joined
Mar 17, 2007
Messages
1,138
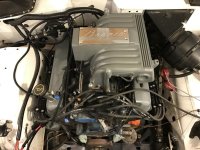
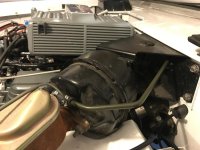
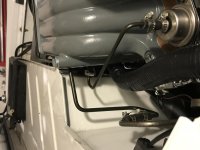
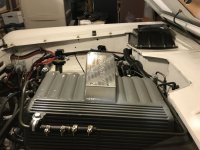
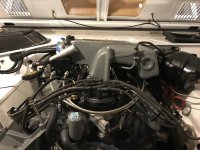
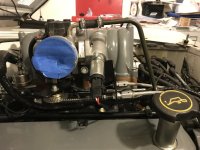
Wow, life has been a journey. Moved in the middle of winter, had a friend tow my Bronco with a tow strap in a snow storm. This was after we were chopping ice in the alley way so I could get the Bronco out of the garage. Had one shot to get the Bronco in its new home due to a sloping driveway. Glad the brakes at least work. Not much to report, But am extremely happy to be able to work on the Bronco starting today. Painting the bracket that I made for the wiper/washer bottle at this time. The pictures are of the upper intake install before the snow storm move (did I share that a washcloth makes a good defroster). ;D I put a 1" spacer between the intakes as there is clearance under the hood, and the bolts are now the correct length. I get a week and a half to work on the Bronco, then off to Wyoming to see my son who just graduated college and got a job in Laramie. Going to go through Yellowstone on the way back. After that, back to work on the Bronco as I will have the time.
IMG_3662.jpg

IMG_3663.jpg
 

broncoitis

Bronco Guru
Joined
Jul 23, 2010
Messages
4,449
Great stories about your travels and build! Keep on goin and the pics coming! Great job!
 
OP
OP
Z Bronco

Z Bronco

Bronco Guru
Joined
Mar 17, 2007
Messages
1,138
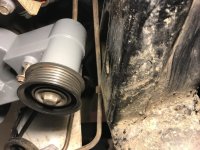
It has been a long time since I posted on this, the adventure of getting it back on the road continues. I have done work to the Bronco and will post some updates. Since the last post I put on the Explorer timing cover and the rebalanced Harmonic balancer. Even with the 351W the Explorer lower pulley on the passenger side was hitting the crossmember brace. The installation of the WH Extreme motor mounts raised the motor up 7/8" with plenty of clearance now (sorry for the sideways picture (my computer shows it being correct, but some change when I post). Will post more progress pictures later tonight.
IMG_5252.jpg

IMG_5322.jpg

IMG_5325.jpg
 

tasker

Contributor
all knowing of nothing
Joined
Jun 2, 2006
Messages
20,762
Loc.
NH
NICE JOB! now come east with that thing!!
 
OP
OP
Z Bronco

Z Bronco

Bronco Guru
Joined
Mar 17, 2007
Messages
1,138
Pulled out the tubing bender to make the vacuum lines. Lines made were lower PVC valve to upper intake, power brake booster, fuel regulator, and C4. Only one 3/8" line was not used on the upper intake. Had fun and everything clears the hood. The 5/16" to 1/4" line from the front to the C4 looks different, but I opted to go that route than use a T off of the 3/16" fuel regulator line.
IMG_5378.jpg

IMG_5422.jpg

IMG_5424.jpg
 
OP
OP
Z Bronco

Z Bronco

Bronco Guru
Joined
Mar 17, 2007
Messages
1,138
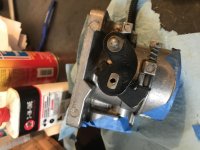
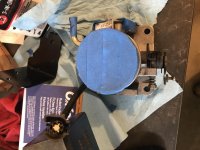
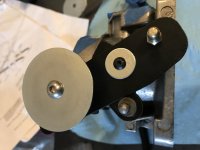
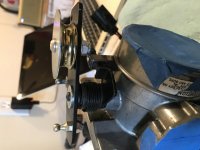
I did the Viper mod on the Explorer TB. Since the cable now goes underneath the TB arm, I need to drill a new hole in the mounting bracket for the throttle cable I followed the tech article to put the mustang plug on for the TPS, as well as turning the vent line. I tapped the Explorer for an 8-32 bolt to attach the BCB bracket in case I ever need to change Throttle bodies (I have another slighter newer one that doesn't have the vent line). I slotted the BCB bracket before I put everything together. The tech articles and the search function were a great help. (Not sure why my pictures want to turn when I upload them, will try to figure that one out)
IMG_5482.jpg

IMG_5483.jpg

IMG_5491.jpg

IMG_5494.jpg

IMG_5496.jpg

IMG_5498.jpg
 
OP
OP
Z Bronco

Z Bronco

Bronco Guru
Joined
Mar 17, 2007
Messages
1,138
Finished connecting the throttle and kick down cables, also made the valve cover to throttle body vent tube.
IMG_5534.jpg

IMG_5537.jpg

IMG_5539.jpg
 
OP
OP
Z Bronco

Z Bronco

Bronco Guru
Joined
Mar 17, 2007
Messages
1,138
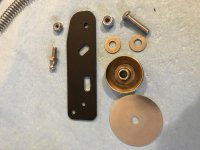
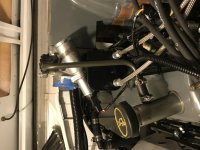
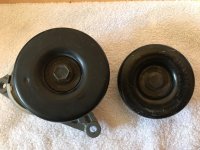
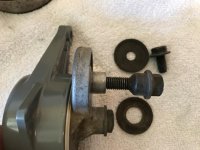
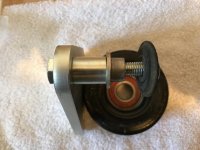
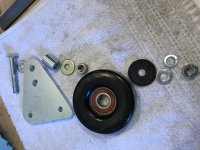
I ended up having the wrong upper idler pulley bolt for the Wild Horses Explorer/saginaw kit, so since it was a weekend and I didn't want to wait till a Monday to call, I decided to go through the extra Explorer serpentine part I have. I discovered that the tensioner pulley uses the same style washer as the upper idler pulley, but has the hole size that I need for the WH bolt. The flange on the tensioner matched the flanged bolt that was on the idler pulley, so I cut the flange off the tensioner. This flange is threaded and just screws on the bolt, it works perfect. Pictures are with the WH idler bracket which is now switched out for a bracket made by a member on this board since my Bronco has a 351W.
IMG_5572.jpg

IMG_5573.jpg

IMG_5574.jpg

IMG_5575.jpg

IMG_5579.jpg

IMG_5584.jpg

IMG_5586.jpg

IMG_5587.jpg
 
OP
OP
Z Bronco

Z Bronco

Bronco Guru
Joined
Mar 17, 2007
Messages
1,138
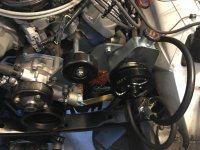
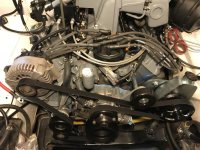
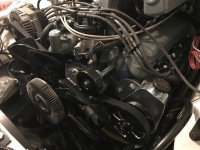
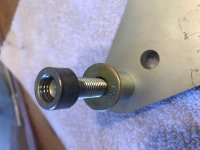
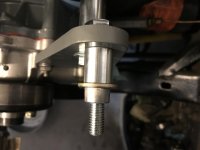
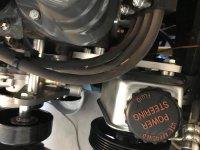
Finished up the Explorer serpentine with saginaw PS pump installation. I used the 351W Upper Idler Pulley bracket that I bought from a member on this board with the WH Explorer kit. I had to use different spacers than what came with the kit so the pulleys would line up. The idler pulley went out 1/8" to a 1" spacer, and I moved out the PS pump 1/4" from the mounting bracket. The 1/2" spacers from the head to the mounting bracket stayed the same. I used a Gates K060891 belt.
IMG_5593.jpg

IMG_5597.jpg

IMG_5601.jpg
 

Dlish

Sr. Member
Joined
Dec 6, 2011
Messages
552
Finished up the Explorer serpentine with saginaw PS pump installation. I used the 351W Upper Idler Pulley bracket that I bought from a member on this board with the WH Explorer kit. I had to use different spacers than what came with the kit so the pulleys would line up. The idler pulley went out 1/8" to a 1" spacer, and I moved out the PS pump 1/4" from the mounting bracket. The 1/2" spacers from the head to the mounting bracket stayed the same. I used a Gates K060891 belt.
View attachment 450491

View attachment 450492

View attachment 450493

How did that bracket from the cb buy work out for you? Stock 351 heads?
I have edlebrock heads and the bracket didnt line up. Have to elongate a few holes
 
OP
OP
Z Bronco

Z Bronco

Bronco Guru
Joined
Mar 17, 2007
Messages
1,138
I have stock '69 351 heads, the bracket worked great, no modifications were necessary.
 
OP
OP
Z Bronco

Z Bronco

Bronco Guru
Joined
Mar 17, 2007
Messages
1,138
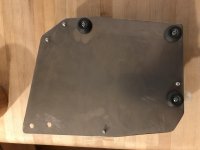
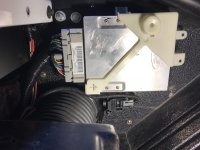
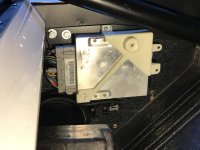
Made a bracket to hold the computer in case I decide later to move the location. Computer is installed as well as the inertia switch. My phone is causing the sideways pictures, sorry.
IMG_5629.jpg

IMG_5631.jpg

IMG_5680.jpg

IMG_5683.jpg
 
OP
OP
Z Bronco

Z Bronco

Bronco Guru
Joined
Mar 17, 2007
Messages
1,138
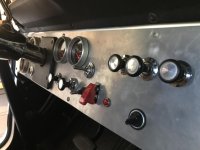
Finished installing the safety switch for the auxiliary tank and the check engine light. The 12 gallon aux. tank is now a big gas can that will send gas through the return line to the main tank which is why I decided to have a safety switch as I did not want any accidental fuel filling the main tank from a bumped switch. All wiring for the EFI that is in the dash is now secure and done.
IMG_5692.jpg
 
OP
OP
Z Bronco

Z Bronco

Bronco Guru
Joined
Mar 17, 2007
Messages
1,138
Radiator and new fan shroud are now installed. Redid the transmission auxiliary cooling lines. Tomorrow I hope to install the radiator hoses and start on making the coolant overflow line.
IMG_5735.jpg

IMG_5736.jpg
 
OP
OP
Z Bronco

Z Bronco

Bronco Guru
Joined
Mar 17, 2007
Messages
1,138
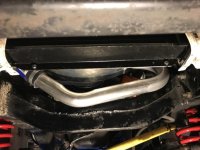
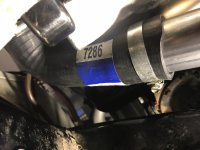
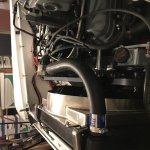
Got the crossover tube finally installed, found a hose that worked with the tube as the stock lower radiator did not work. Had to move the light I put under the hood years ago so it would clear the upper radiator hose.

Upper hose is a '68 GTO hose Napa part #7718
Lower hose that I cut for the crossover tube is Napa part #7286
IMG_5848.jpg

IMG_5849.jpg

IMG_5850.jpg

IMG_5851.jpg

IMG_5853.jpg
 

markw

Contributor
Bronco Guru
Joined
Sep 10, 2009
Messages
2,051
I like the idea of using the aux tank like that. Sure makes plumbing a lot more simple.
 
Top