• Welcome to ClassicBroncos! - You are currently viewing the forums as a GUEST. To take advantage of all the site features, please take a moment to register. It's fast, simple and absolutely free. So please join our community today!
    If you have problems registering or can't log into your account, please contact Admin.

migs' build thread - A 1970 Bronco ...an ever evolving project

OP
OP
migs

migs

Sponsor/Vendor
Bronco Guru
Joined
Nov 12, 2011
Messages
1,318
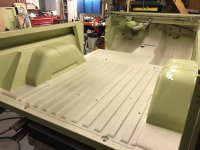
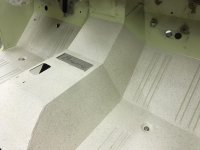
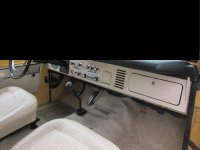
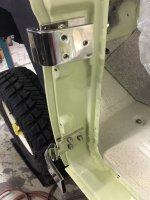
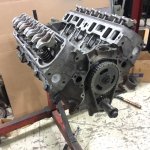
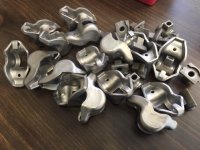
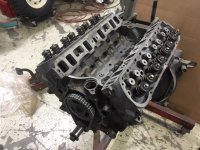
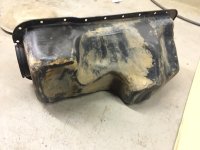
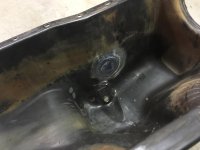
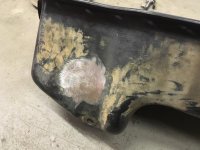
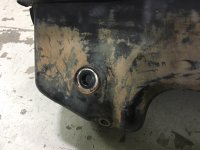
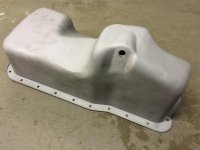
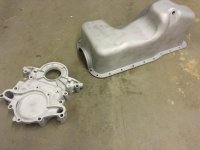
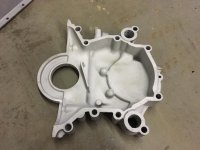
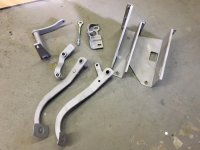
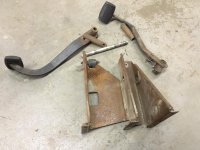
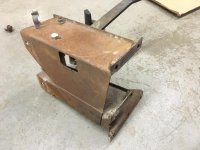
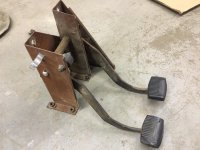
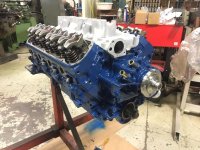
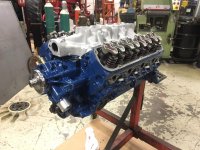
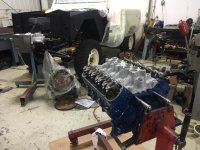
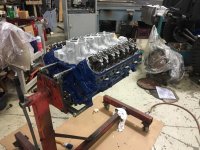
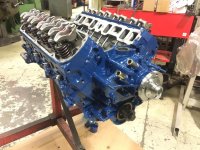
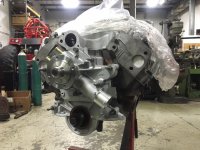
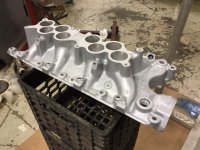
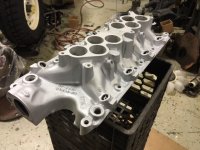
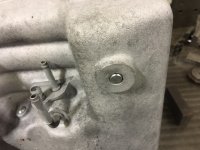
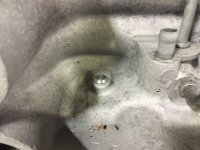
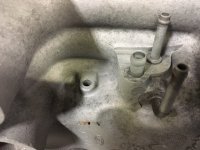
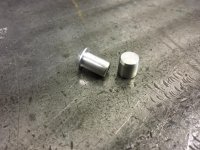
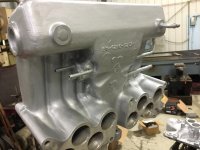
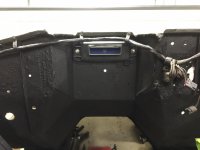
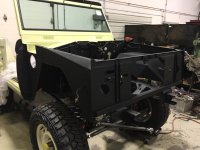
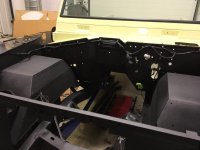
Here's the last of what I have so far and this is pretty much where I'm at now. the last thing I did was to clean up the engine compartment a little more and touch up the coating in there and outside of the front clip.
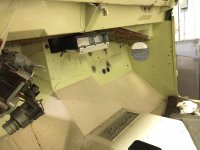
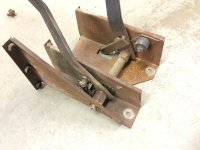
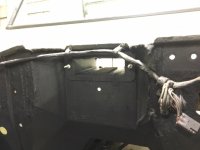
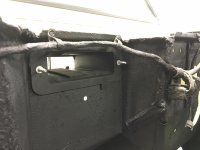
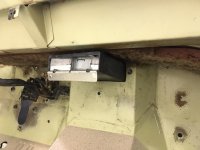
And I finally got that computer mounted up on the center of the firewall right under the cowl.
 

Attachments

  • IMG_8695.jpg
    IMG_8695.jpg
    53.5 KB · Views: 90
  • IMG_8696.jpg
    IMG_8696.jpg
    73.2 KB · Views: 94
  • IMG_8697.jpg
    IMG_8697.jpg
    68.4 KB · Views: 92
  • IMG_8698.jpg
    IMG_8698.jpg
    70.7 KB · Views: 91
  • IMG_8700.jpg
    IMG_8700.jpg
    72.3 KB · Views: 100
  • IMG_8701.jpg
    IMG_8701.jpg
    87.6 KB · Views: 97
  • IMG_8702.jpg
    IMG_8702.jpg
    82.7 KB · Views: 96
  • IMG_8706.jpg
    IMG_8706.jpg
    109.2 KB · Views: 100
  • IMG_8705.jpg
    IMG_8705.jpg
    88.1 KB · Views: 86
  • IMG_8707.jpg
    IMG_8707.jpg
    95 KB · Views: 87
  • IMG_8709.jpg
    IMG_8709.jpg
    64.9 KB · Views: 92
  • IMG_8708.jpg
    IMG_8708.jpg
    75.1 KB · Views: 93

FRANKO289

Contributor
Bronco enthusiast
Joined
Jul 7, 2008
Messages
6,807
hey hey ... custom plate ... you made it ??
 

Attachments

  • IMG_8702.jpg
    IMG_8702.jpg
    82.7 KB · Views: 111

sprdv1

Contributor
REBEL
Joined
Mar 8, 2007
Messages
81,747
Life gets in the way bud.. Looking good

I don't! that's why it's taking so long.;D

And here are some from working on the heads, my father got to use his old valve grinding equipment to grind the valves and seats. then we reassembled it all with new springs and such.
also, the short block is all assembled.
 

fatboy

Contributor
Glad to be here.
Joined
May 15, 2006
Messages
7,004
Loc.
New Hampshire
hey hey ... custom plate ... you made it ??


Franko, if you are asking about the bronco script on the floor, he made that out of metal and it is secured to the actual floor before he did his custom raptor liner. I have seen this personally and it is quite impressive, as you might expect.


Sent from my iPhone using Tapatalk
 

FRANKO289

Contributor
Bronco enthusiast
Joined
Jul 7, 2008
Messages
6,807
Franko, if you are asking about the bronco script on the floor, he made that out of metal and it is secured to the actual floor before he did his custom raptor liner. I have seen this personally and it is quite impressive, as you might expect.


Sent from my iPhone using Tapatalk

all his work is impressive !! I love the look and size of it ! Bin contemplating the idea for someone to make me plates like that w. my name & company name on it so I can att the plate to my customers timber trusses.
 
OP
OP
migs

migs

Sponsor/Vendor
Bronco Guru
Joined
Nov 12, 2011
Messages
1,318
thanks guys.

hey hey ... custom plate ... you made it ??

yes, it's all steel and part of the floor sheet metal. my take on a parchment floor mat using tintable liner.
 

Attachments

  • IMG_7749.jpg
    IMG_7749.jpg
    91.7 KB · Views: 63
  • IMG_7759.jpg
    IMG_7759.jpg
    106.4 KB · Views: 69
  • IMG_7722.jpg
    IMG_7722.jpg
    94.8 KB · Views: 67
  • original mat.jpg
    original mat.jpg
    72.2 KB · Views: 63

FRANKO289

Contributor
Bronco enthusiast
Joined
Jul 7, 2008
Messages
6,807
^^^ its a 2 piece plate ? bronco script and baseplate ?

got time to make me 50 plates ...if so call me !!

Franko
 
OP
OP
migs

migs

Sponsor/Vendor
Bronco Guru
Joined
Nov 12, 2011
Messages
1,318
It is two pieces, but it's just the script and an outer ring fused right to the floor.

could make what you are thinking out of three pieces.
 

FRANKO289

Contributor
Bronco enthusiast
Joined
Jul 7, 2008
Messages
6,807
You would make time for it ...fantastic !!! deal you hired !!!

fig. it out an let me know how much ( it a business wright off )
( see pic) was the size and style inspiration, only w. black background (i let the client pick either to att the plate somewhere to the timber or on one of the bottom steel timber connection plates )

sorry for the highjack ;)
 

Attachments

  • chassbyford.jpg
    chassbyford.jpg
    77.7 KB · Views: 56
  • chassbyford1.jpg
    chassbyford1.jpg
    102.1 KB · Views: 52
OP
OP
migs

migs

Sponsor/Vendor
Bronco Guru
Joined
Nov 12, 2011
Messages
1,318
Ok, so I guess it's time for a set of update posts. I have been picking away at it the past month when I can...

so, first off the cylinder heads were installed, cleaned up the rocker arms and we finished installing the valve train. replaced the old dirty lifters with a new set of Ford racing lifters.
also picked up a set of stainless lift off door hinges.
 

Attachments

  • IMG_8764.jpg
    IMG_8764.jpg
    90.8 KB · Views: 45
  • IMG_8778.jpg
    IMG_8778.jpg
    171.4 KB · Views: 43
  • IMG_8777.jpg
    IMG_8777.jpg
    180 KB · Views: 44
  • IMG_8776.jpg
    IMG_8776.jpg
    165.1 KB · Views: 43
  • IMG_8763.jpg
    IMG_8763.jpg
    126.1 KB · Views: 49
  • IMG_8760.jpg
    IMG_8760.jpg
    146.4 KB · Views: 43
  • IMG_8759.jpg
    IMG_8759.jpg
    152.6 KB · Views: 43
OP
OP
migs

migs

Sponsor/Vendor
Bronco Guru
Joined
Nov 12, 2011
Messages
1,318
Cleaned up the explorer oil pan, cut out the sensor fitting on the side and welded a patch in. fixed some dents then media blasted it.
 

Attachments

  • IMG_8811.jpg
    IMG_8811.jpg
    73.9 KB · Views: 36
  • IMG_8810.jpg
    IMG_8810.jpg
    61.5 KB · Views: 34
  • IMG_8809.jpg
    IMG_8809.jpg
    95 KB · Views: 36
  • IMG_8787.jpg
    IMG_8787.jpg
    94.9 KB · Views: 35
  • IMG_8785.jpg
    IMG_8785.jpg
    83.3 KB · Views: 38
  • IMG_8784.jpg
    IMG_8784.jpg
    63.9 KB · Views: 36
  • IMG_8783.jpg
    IMG_8783.jpg
    93.7 KB · Views: 35
  • IMG_8821.jpg
    IMG_8821.jpg
    67.8 KB · Views: 41
  • IMG_8823.jpg
    IMG_8823.jpg
    64.7 KB · Views: 36
OP
OP
migs

migs

Sponsor/Vendor
Bronco Guru
Joined
Nov 12, 2011
Messages
1,318
cleaned and media blasted some other parts...
 

Attachments

  • IMG_8817.jpg
    IMG_8817.jpg
    72.2 KB · Views: 31
  • IMG_8819.jpg
    IMG_8819.jpg
    84.4 KB · Views: 30
  • IMG_8818.jpg
    IMG_8818.jpg
    74.6 KB · Views: 31
  • IMG_8822.jpg
    IMG_8822.jpg
    86.6 KB · Views: 36
  • IMG_8816.jpg
    IMG_8816.jpg
    101.8 KB · Views: 30
  • IMG_8815.jpg
    IMG_8815.jpg
    100 KB · Views: 30
  • IMG_8814.jpg
    IMG_8814.jpg
    105.6 KB · Views: 31
  • IMG_8813.jpg
    IMG_8813.jpg
    84.5 KB · Views: 31
OP
OP
migs

migs

Sponsor/Vendor
Bronco Guru
Joined
Nov 12, 2011
Messages
1,318
Parts back from powder coating:)
 

Attachments

  • IMG_8914.jpg
    IMG_8914.jpg
    102.8 KB · Views: 64
  • IMG_8909.jpg
    IMG_8909.jpg
    148.6 KB · Views: 62
OP
OP
migs

migs

Sponsor/Vendor
Bronco Guru
Joined
Nov 12, 2011
Messages
1,318
Installed the timing cover along with new water pump, got some fresh Ford corporate blue on the motor.... now we're getting somewhere!;D
 

Attachments

  • IMG_8937.jpg
    IMG_8937.jpg
    128.7 KB · Views: 50
  • IMG_8936.jpg
    IMG_8936.jpg
    130.9 KB · Views: 41
  • IMG_8935.jpg
    IMG_8935.jpg
    119.3 KB · Views: 44
  • IMG_8934.jpg
    IMG_8934.jpg
    133.6 KB · Views: 48
  • IMG_8933.jpg
    IMG_8933.jpg
    131 KB · Views: 50
  • IMG_8931.jpg
    IMG_8931.jpg
    131.9 KB · Views: 56
  • IMG_8924.jpg
    IMG_8924.jpg
    110.7 KB · Views: 47
  • IMG_8923.jpg
    IMG_8923.jpg
    114 KB · Views: 46
OP
OP
migs

migs

Sponsor/Vendor
Bronco Guru
Joined
Nov 12, 2011
Messages
1,318
...and today I worked on the intake. I made a couple aluminum plugs to weld in two of the holes where I removed the vacuum tubes. (I hate welding cast aluminum:mad:)
smoothed some things out and then put a little aluminum color paint on em to freshen things up.

well, that's all I got so far... I'm still picking away at things so hopefully more updates soon.
 

Attachments

  • IMG_8950.jpg
    IMG_8950.jpg
    134 KB · Views: 48
  • IMG_8949.jpg
    IMG_8949.jpg
    129 KB · Views: 51
  • IMG_8946.jpg
    IMG_8946.jpg
    117.3 KB · Views: 52
  • IMG_8945.jpg
    IMG_8945.jpg
    125.9 KB · Views: 52
  • IMG_8944.jpg
    IMG_8944.jpg
    110.3 KB · Views: 50
  • IMG_8942.jpg
    IMG_8942.jpg
    118.4 KB · Views: 51
  • IMG_8940.jpg
    IMG_8940.jpg
    112.5 KB · Views: 54
  • IMG_8951.jpg
    IMG_8951.jpg
    98.5 KB · Views: 50
  • IMG_8953.jpg
    IMG_8953.jpg
    88.9 KB · Views: 53

tasker

Contributor
all knowing of nothing
Joined
Jun 2, 2006
Messages
20,760
Loc.
NH
NICE! where on earth did you find the gaskets for that motor though?
 
Top