• Welcome to ClassicBroncos! - You are currently viewing the forums as a GUEST. To take advantage of all the site features, please take a moment to register. It's fast, simple and absolutely free. So please join our community today!
    If you have problems registering or can't log into your account, please contact Admin.

Aggie007 - Project Sally

Aggie007

Jr. Member
Joined
May 25, 2010
Messages
118
Project Sally


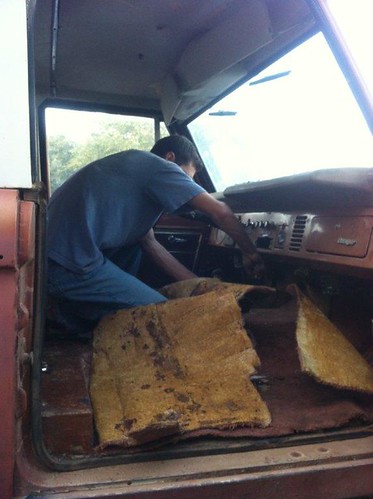
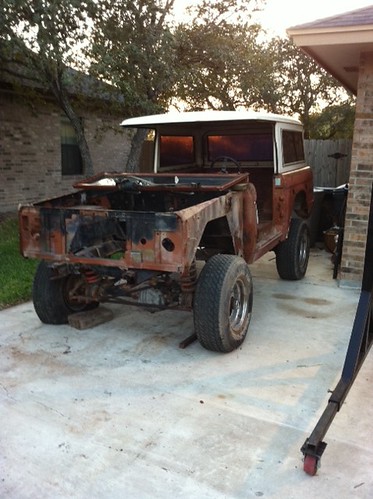
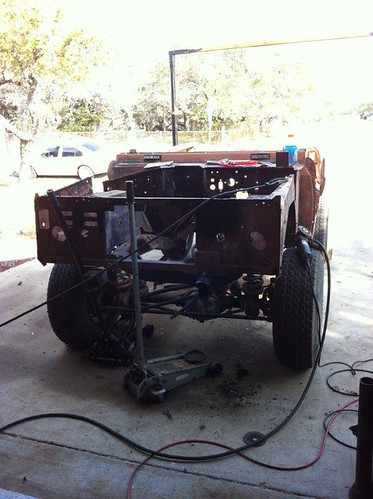
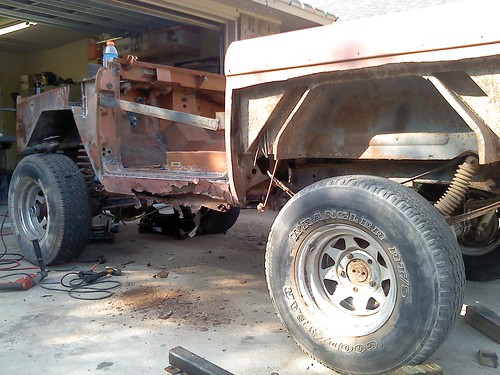
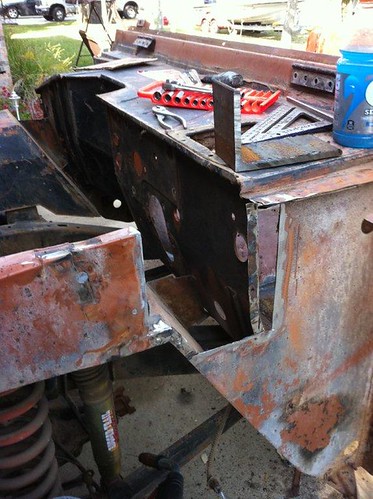
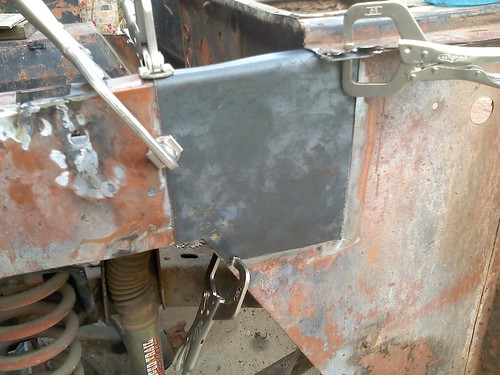
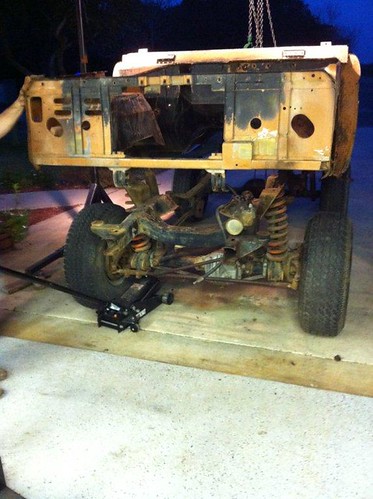
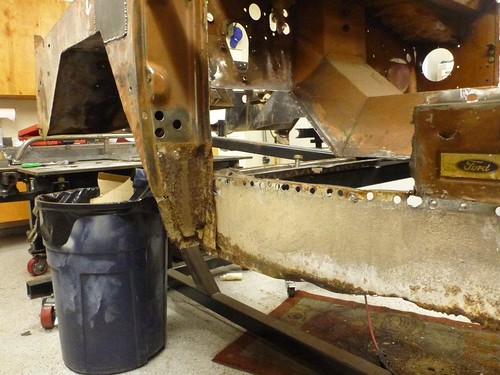
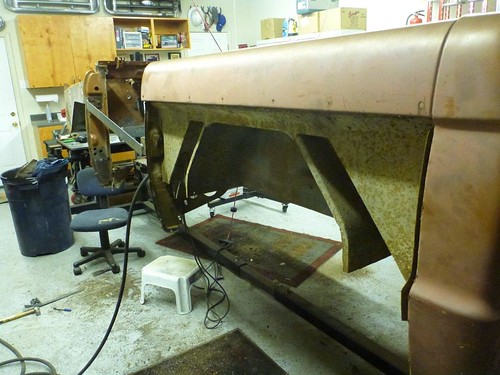
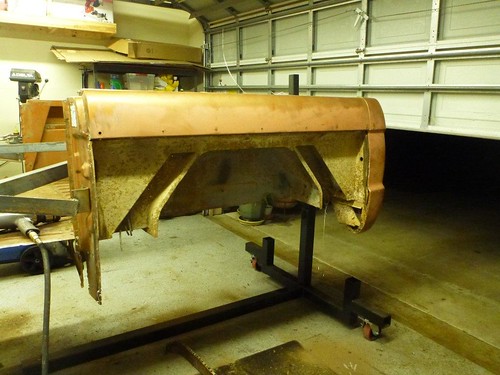
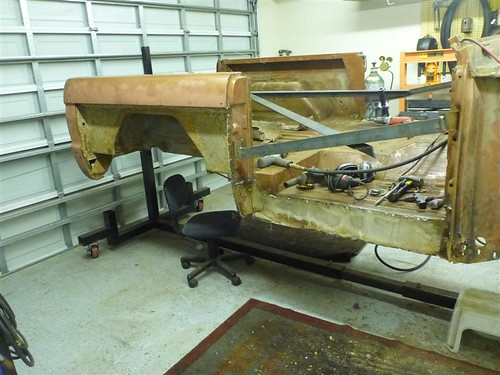
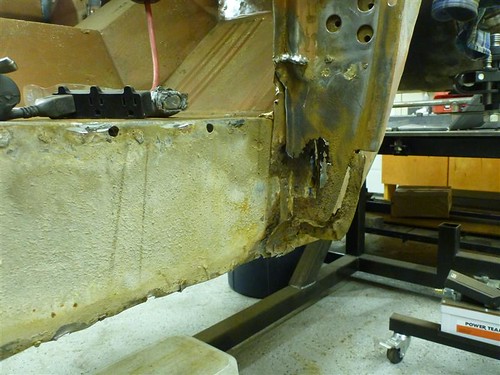
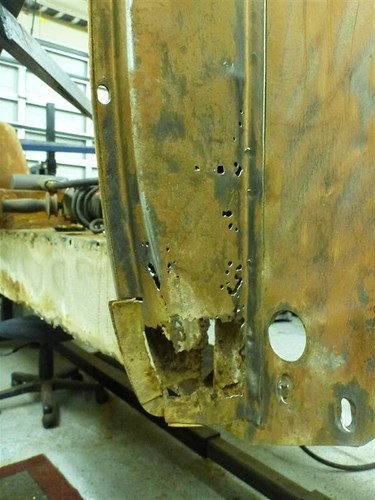
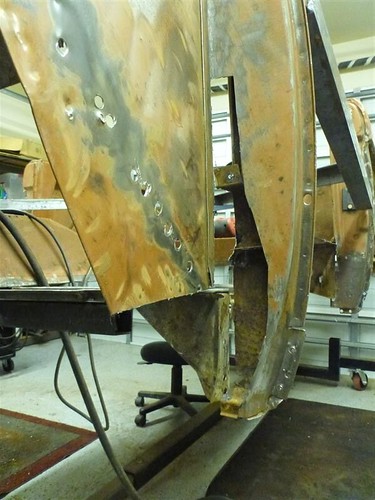
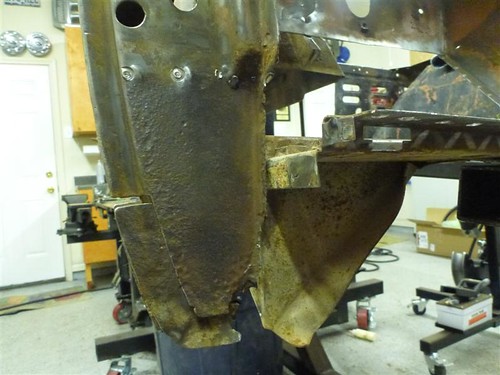
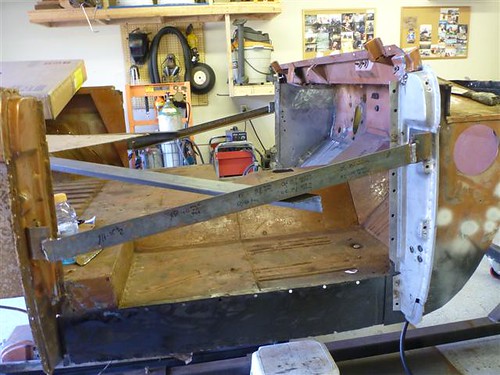
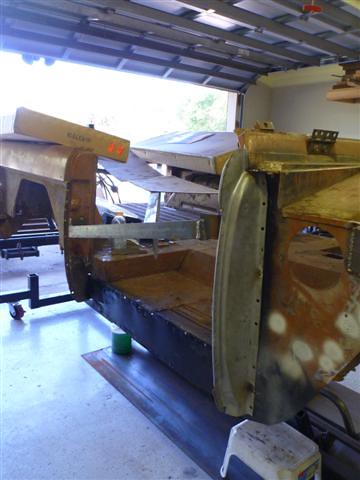
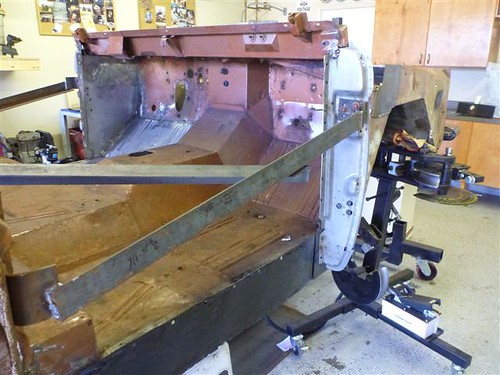
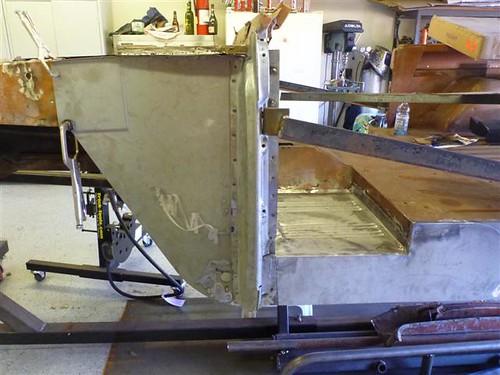
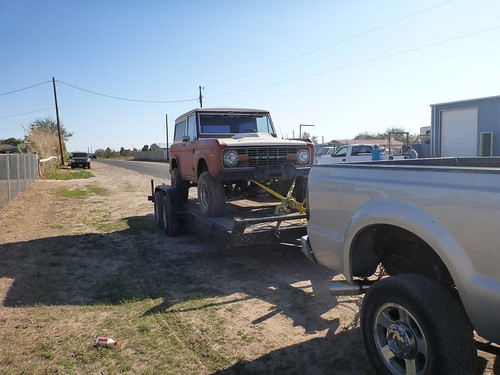
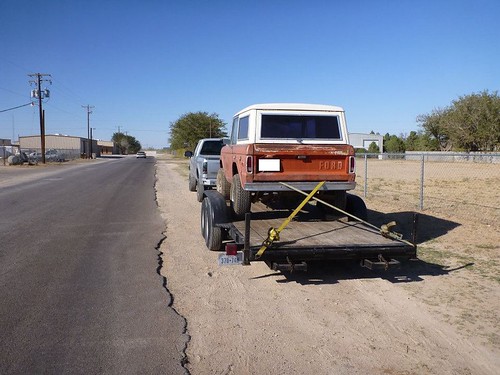
1974 Bronco - I searched on and off for over a year for a Bronco, and ended up with this one originally from Montana, but spent most of its life in West Texas. I picked it up 10/24/2011. It has a rust in all the usual areas, so I will be working on the body for a while before getting to the fun design and fabrication; I really don't like body work. The plan is to keep the bronco looking as much like a bronco as possible except for the trimming of the wheel wells to fit the 40in tall tires, we'll see where I end up:). Stock bronco wheel base is 92in. I will stretch the wheelbase to 102-108in by pushing the front axle forward 3-6in and the rear axle back 6-9in

Chassis (frame and cage) - 1.75in x 0.120in wall DOM

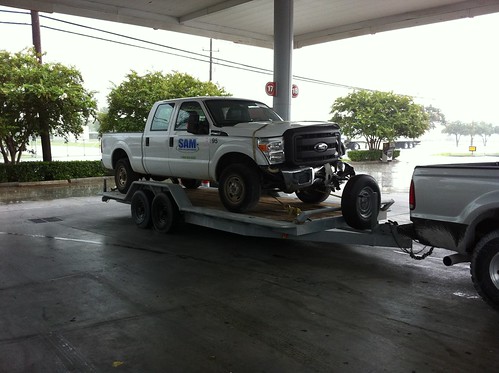
I have yet to buy a donor truck, but I am searching for a totalled 2011 F250.
Engine – 2011 6.2L from donor Ford Superduty; would like to add a whipple supercharger with custom tune and the Raptor cam

Transmission/T-case – 2011 5R110 from donor Superduty

Axles – Dana 60 front and Ford Sterling 10.75 rear from donor Superduty

Suspension –
Front – 3 link with track bar
Rear – 4 link
Steering –
PSC hydraulic assist

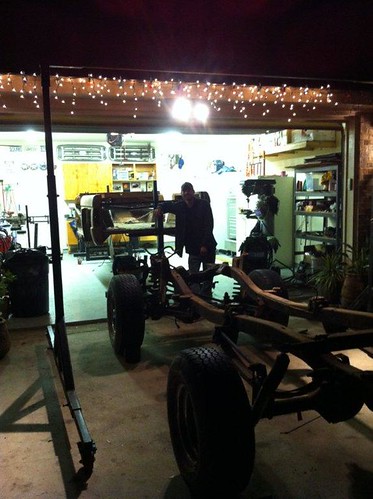
The day I picked it up:
6506896765_ee1862dc41.jpg

6506896879_b5758a5480.jpg

6506932631_ac66dba772.jpg
 
Last edited:

sprdv1

Contributor
REBEL
Joined
Mar 8, 2007
Messages
81,747
Awesome.. Look forward to the build..! Best of luck!
 

mattyq17

Bronco Guru
Joined
Jul 11, 2007
Messages
1,597
Sounds like a great plan be sure to post lots of pics of the progress, Congrats
 
OP
OP
A

Aggie007

Jr. Member
Joined
May 25, 2010
Messages
118
If the owners before had never installed the carpet, the body would have been in so much better condition :(
6679002517_5337effd39.jpg


All stripped:
6510623769_34b733c860.jpg
 

half cab

Contributor
Guru Bronco
Joined
Dec 8, 2010
Messages
16,306
Man you work fast! Hey they rust from the inside out with the rubber mat too so don't feel to bad about the carpet.Lookin good and do keep pic's comin.

hc
 

Devin

Bronco Kineticist
Joined
Apr 29, 2004
Messages
3,956
Looks like a good start. That last picture in your first post is awesome. Calendar material.
 
OP
OP
A

Aggie007

Jr. Member
Joined
May 25, 2010
Messages
118
Thanks! A friend of mine who has been a huge help took the picture just outside of Midland. I bought the bronco the last week in October, so I have had a little bit of time to work on it. I have pictures on 2 different phones plus my camera so I have been slow getting them all together. I doubt there will be any good updates for at least a month after this one. All the pictures below are from New Year's Weekend.

Windshield Frame Removed:
6679002909_10753bb9f1.jpg


Lots of rust:
6679019337_d1b26b83f1.jpg

6679002655_1ede246b3a.jpg


Cutting out rusted area around the inner front fender and making patch panel:
6679002207_29f2b90eb7.jpg

6678625481_575da50503.jpg


Taking the tub off the frame (New Year's Eve):
6679002721_b1322e9324.jpg

6679002053_0d2647c5d3.jpg


Taking apart the chassis (New Year's Day):
6684292761_13efd44ea1.jpg
 
OP
OP
A

Aggie007

Jr. Member
Joined
May 25, 2010
Messages
118
I didn't work on the Bronco again till this week since I have been traveling so much. I got a little work done last night and hopefully continue working on it this weekend. Right now just removing rusted areas and getting ready to start patching new metal back in. Two tools that are a must is a spot weld drill bit (rotabroach) and an air hammer (chisel).
6777083114_a67e7f9495.jpg

6777083082_c68243e614.jpg

6777083026_de2c237e97.jpg

6923196793_c6fa7fa6e4.jpg
 

sellitall

Bronco Guru
Joined
Jul 30, 2002
Messages
1,444
Loc.
Malvern, Pennsylva
Looks like you are moving right along. I'm currently cutting out the rot on my 74, but started on the other side.

How are your upper floors? Mine are rotted, and they are a B#@CH to remove.

Oh yeah, my girls name is Project Irene.
 
OP
OP
A

Aggie007

Jr. Member
Joined
May 25, 2010
Messages
118
Looks like you are moving right along. I'm currently cutting out the rot on my 74, but started on the other side.

How are your upper floors? Mine are rotted, and they are a B#@CH to remove.

Oh yeah, my girls name is Project Irene.

This is my first time at body work and first restoration so if anyone sees something that I didn't do right please tell me!

Upper floors are actually really nice, so I won't have to remove those, just some rust around the wheel wells in the corners. The inner rockers wasn't much fun since they tie into the upper floor, both door post, floor pan and kick panel. The passenger floor pan seems good too. I have some patch work around the driver front door post area and inner rocker on the passenger side but hopefully not much. I started with the drivers side because it seemed to be the worst.
 
OP
OP
A

Aggie007

Jr. Member
Joined
May 25, 2010
Messages
118
I have been side tracked with some other projects, so not much of an update but hopefully I will be bending some tube these next few weeks. I waited 8 weeks to get the passenger side door post on and the body a sagged a little in the center where it is not supported by the rotisserie, so it was not the easiest to get aligned but its tacked in place and I am read to start building a chassis. Then I can mount the tub and hang the doors and get everything aligned.

6958558834_773c3ac213.jpg

6958558746_7c215aaf43.jpg

6958558692_24dfa51fd3.jpg

7104628249_69b896e77a.jpg

7104628177_1a386ca6b1.jpg
 
OP
OP
A

Aggie007

Jr. Member
Joined
May 25, 2010
Messages
118
Not much to update since I have been swamped with other projects, except I finally bought the donor vehicle for engine/trans/axles etc.
7937709808_0347b322e1.jpg
 
Top