kbldawg
Bronco Guru
I figured I'd start my own build thread...so, here goes.
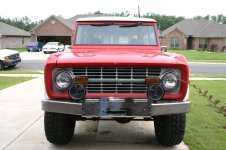
I bought it from a guy in Alabama that found it in a field and started fixing it up. This is what I got from the previous owner.
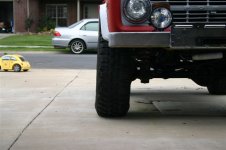
The body looks pretty good. The paint is a few years old and still has a good shine. There are several flaws in the paint but looks really good far off and in pictures, but when closely inspected, not a high quality paint job. The floor pans were butched up by the PO and covered up with a spray-in liner, one of these days I'll have to redo that. I have found very little rust and the spots I have found is just mild surface rust. The wiring has been cut up and most of it is either not original or not hooked up. All-in-all the body is good enough for now and will have to last for a while.
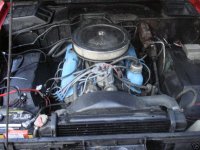
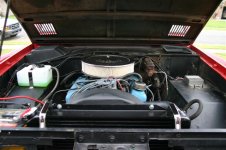
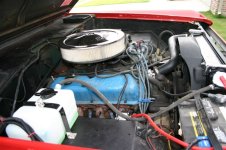
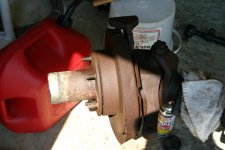
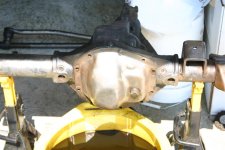
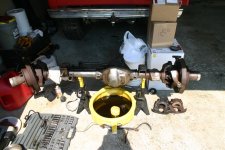
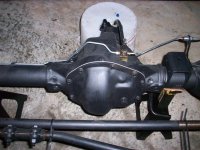
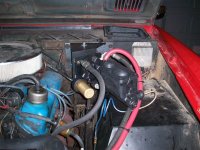
The drive train is in rough shape and that is where I am focusing my attention. I inherited a ragged out Dana30 with worn kingpins and drum brakes. The Engine barely runs, leaks badly, and needs rebuilt or replaced. The tranny seems to be ok, but the shift linkages are badly worn. The Transfer Case appears to be working fine, but the shifter is worn badly. The rear operates fine, but leaks and the rear brakes need to be rebuilt. The 3.50 gears aren't cutting it with the 35's. The front drive shaft clunks pretty badly when locked in, so I've got to investigate that.
The build direction:
I'm building an all purpose vehicle that will be just as capable off-road as it is on the highway. I want to retain the stock interior look, yet have the most up-to-date drive train as possible.
Planned Mods:
Dana44 - DONE
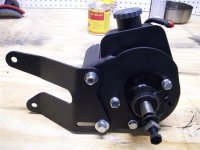
Hydroboost - DONE
4.56 gears - DONE
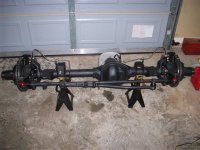
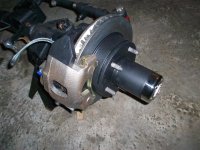
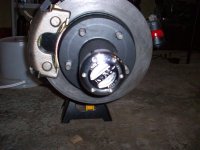
Upgraded Axles and Front and Rear ARBs - Rear Done
ZF Tranny - DONE (NP435)
Twin-Stick Dana20
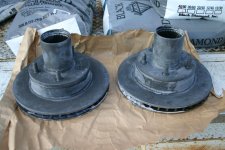
Rebuild rear drum brakes
Rebuild/Replace 302 Engine (maybe 351W or 347 Stroker) - DONE (explorer motor with gt40p heads)
Centech Harness
Might go EFI, not sure yet.
That's pretty much it...
This is what she looked like when I bought it...
I bought it from a guy in Alabama that found it in a field and started fixing it up. This is what I got from the previous owner.
The body looks pretty good. The paint is a few years old and still has a good shine. There are several flaws in the paint but looks really good far off and in pictures, but when closely inspected, not a high quality paint job. The floor pans were butched up by the PO and covered up with a spray-in liner, one of these days I'll have to redo that. I have found very little rust and the spots I have found is just mild surface rust. The wiring has been cut up and most of it is either not original or not hooked up. All-in-all the body is good enough for now and will have to last for a while.
The drive train is in rough shape and that is where I am focusing my attention. I inherited a ragged out Dana30 with worn kingpins and drum brakes. The Engine barely runs, leaks badly, and needs rebuilt or replaced. The tranny seems to be ok, but the shift linkages are badly worn. The Transfer Case appears to be working fine, but the shifter is worn badly. The rear operates fine, but leaks and the rear brakes need to be rebuilt. The 3.50 gears aren't cutting it with the 35's. The front drive shaft clunks pretty badly when locked in, so I've got to investigate that.
The build direction:
I'm building an all purpose vehicle that will be just as capable off-road as it is on the highway. I want to retain the stock interior look, yet have the most up-to-date drive train as possible.
Planned Mods:
Dana44 - DONE
Hydroboost - DONE
4.56 gears - DONE
Upgraded Axles and Front and Rear ARBs - Rear Done
ZF Tranny - DONE (NP435)
Twin-Stick Dana20
Rebuild rear drum brakes
Rebuild/Replace 302 Engine (maybe 351W or 347 Stroker) - DONE (explorer motor with gt40p heads)
Centech Harness
Might go EFI, not sure yet.
That's pretty much it...
This is what she looked like when I bought it...
Attachments

Last edited:


")