Ranchtruck
Sr. Member
- Joined
- Feb 7, 2008
- Messages
- 766
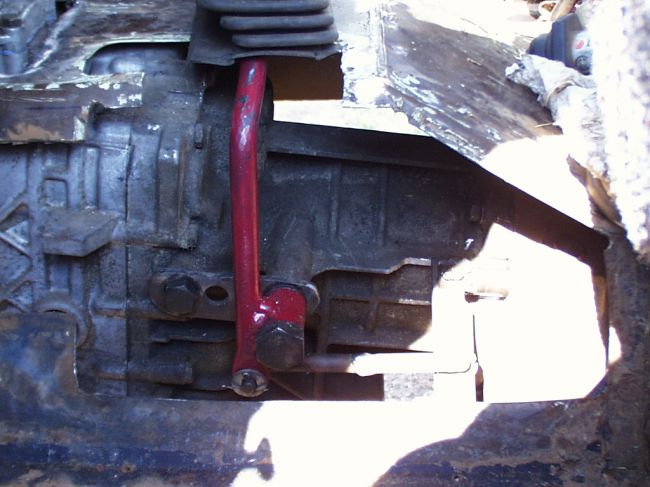
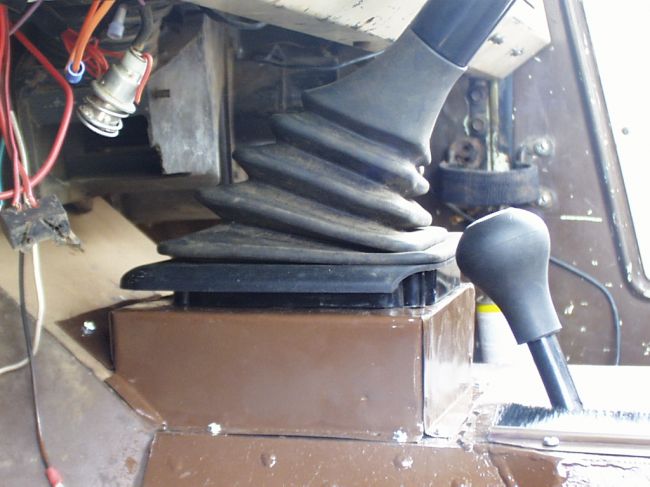
I spent the last couple days moving the pedal box to the left side of the steering column. I'm swapping in a ZF5 so I had to install a hydro clutch master and I didn't like how the kits did it. Here's the result:
I re-bent the pedals so the offset was 2.75" to the right instead of 2" to the left.
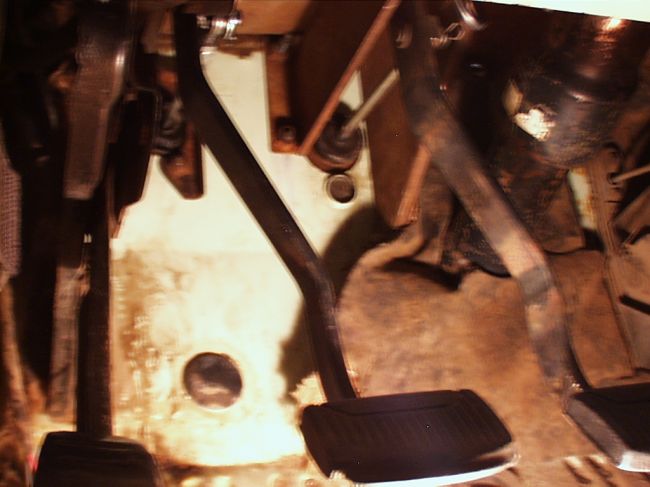
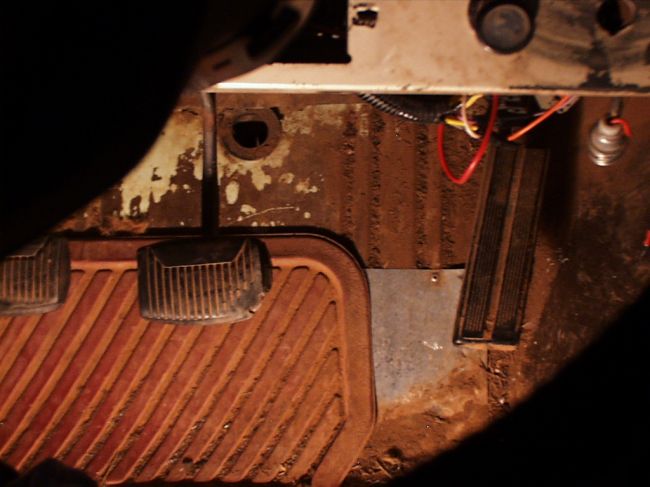
The box is moved to the left 7" and the pedals go back 5" so they still end up 2" to the left of where they used to be. They could be bent into more of a Z bend to offset them more but that makes the pedals shorter. I may just move the gas pedal to the left a bit.
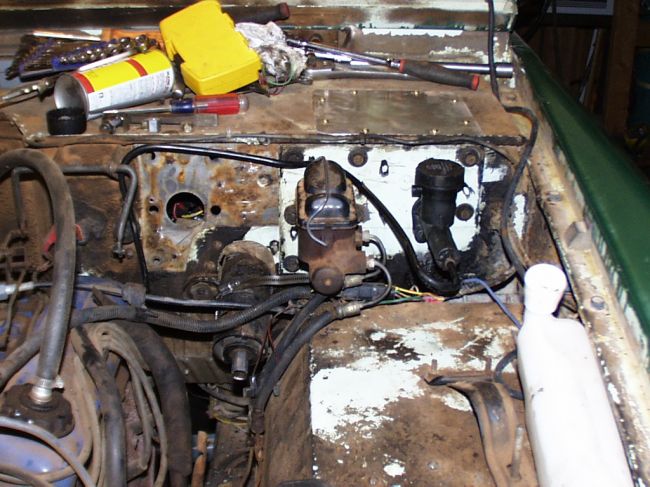
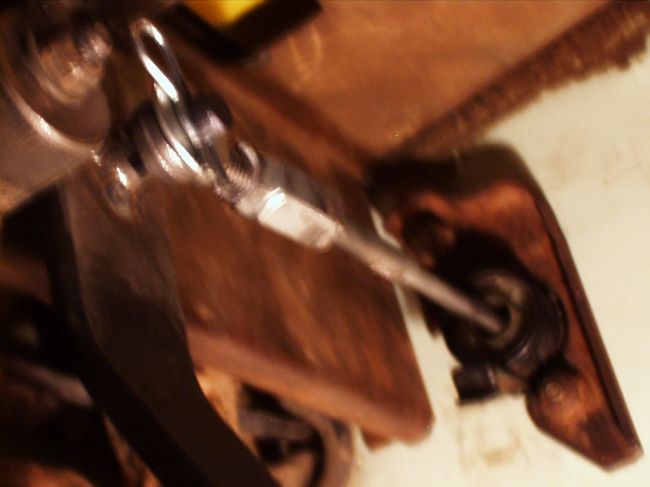
I used the existing hole in the clutch pedal that matches the brake pedals link pin. I welded a pivot pin in to the hole and drilled a cotter pin hole so that it's the same setup as the brake pedal. I then cut and lengthened the stock 88 F250 clutch master pushrod to reach. I made it adjustable, but it's right around 2" longer. I cut it right at the eye because the clutch switch uses all the straight section of rod. The clutch switch is not installed in this picture.
The process goes like this:
Remove brake master cylinder.
Remove steering column.
Remove clutch linkage from pedal and frame.
Unhook the speedo cable and pull it through the firewall.
Take out all the bolts holding the pedal box in and remove it.
Cut the 11 spot welds holding the firewall reinforcement to firewall, this becomes your template.
Use a straightedge and draw lines across so the line of the firewall holes goes over to the fender. Use these to line up your template so that it's close to the steering column opening but still leaves enough space for the column sealing boot to screw to the firewall.
Draw circles of all the bolt holes and brake master cylinder hole on the firewall using the template.
Drill all the holes. Holesawing the brake master hole is an issue because there's an existing hole but not centered. I clamped a piece of 1/8" steel to the back side of the firewall with the holesaw guide bit hole in it.
Clamp the firewall reinforcement in it's new location using a couple bolts and nuts.
Holesaw the smaller hole for the clutch master in the same horizontal plane the brake master cylinder hole is in. Use the reinforcement plate that came with the clutch master to set it's spacing. You need enough room for the upper nut to clear the pedal box on the inside. The lower stud hole will only go through the firewall, not the firewall reinforcement as well.
Remove the pedals from the pedal box
Bolt the box up in it's new location, just temporarily.
Draw the holes where the two vertical bolts go into the base of the cowl under the dash.
Remove the pedal box and drill the cowl holes.
Install 3/8x16tpi nut-serts in the blind holes in the cowl. They're a rivet with threads inside. You can buy a tool or make one out of a bolt to install them.
Take off the plastic bushings including the washer on the brake pedal pivot pin and bend the pedals the opposite way with a torch. Make them the same, you want the spacing between the pedals to remain constant.
Use a cutoff wheel and an air chisel to remove the linkage tab off of the clutch pedal.
Find a bolt with a 1" long shanked portion that fits snugly though the clutch master pushrod's plastic bushing. Drill a 1/8" hole through the flat faces of the head, then grind the head down to the same diameter as the shank, that's your cotter pin hole.
Use a drill to clean up the hole through the pedal, then tap it for the bolt size. Thread the bolt in, cut off the excess on the other side, and weld it in on both sides. The threads are not good enough to hold it, you must weld.
Put the pedals back in the box and bolt it all up into place.
Put the steering column and brake master back in. The brake lines may need to be lengthened to reach the new master location.
Remove the clutch pushrod from the cylinder, it just pulls out of a clip if you yank it hard.
Cut it right where it's been flattened at the eye end. Or cut it anywhere if you don't plan on using the ford clutch switch. Add 2" to it's length. Make sure it's straight, a bend will cause it to fail over time.
Install the clutch master. You will want to make a new inner reinforcement plate, the stock one has a step in it by the upper bolt hole and it doesn't spread the load wide enough in the firewall so it flexes.
Drill a new 1" hole for the speedo cable through the firewall and reinstall the cable.
Extend the brake light switch wires over to reach the new pedal location.
The brake pedal and the clutch pedal should be at the same height and the clutch pedal should create the little bit less than 1.5" stroke needed at the clutch master going from full up to the floor. Clutch is nice and easy to work because you have the full leverage of the pedal instead of the other setups that have you drill another pivot hole partway down the pedal.
I've got the clutch master cylinder inner reinforcement plate left to do and I'm dong a hydroboost install, so I'll have more pictures in a couple of days.
I re-bent the pedals so the offset was 2.75" to the right instead of 2" to the left.
The box is moved to the left 7" and the pedals go back 5" so they still end up 2" to the left of where they used to be. They could be bent into more of a Z bend to offset them more but that makes the pedals shorter. I may just move the gas pedal to the left a bit.
I used the existing hole in the clutch pedal that matches the brake pedals link pin. I welded a pivot pin in to the hole and drilled a cotter pin hole so that it's the same setup as the brake pedal. I then cut and lengthened the stock 88 F250 clutch master pushrod to reach. I made it adjustable, but it's right around 2" longer. I cut it right at the eye because the clutch switch uses all the straight section of rod. The clutch switch is not installed in this picture.
The process goes like this:
Remove brake master cylinder.
Remove steering column.
Remove clutch linkage from pedal and frame.
Unhook the speedo cable and pull it through the firewall.
Take out all the bolts holding the pedal box in and remove it.
Cut the 11 spot welds holding the firewall reinforcement to firewall, this becomes your template.
Use a straightedge and draw lines across so the line of the firewall holes goes over to the fender. Use these to line up your template so that it's close to the steering column opening but still leaves enough space for the column sealing boot to screw to the firewall.
Draw circles of all the bolt holes and brake master cylinder hole on the firewall using the template.
Drill all the holes. Holesawing the brake master hole is an issue because there's an existing hole but not centered. I clamped a piece of 1/8" steel to the back side of the firewall with the holesaw guide bit hole in it.
Clamp the firewall reinforcement in it's new location using a couple bolts and nuts.
Holesaw the smaller hole for the clutch master in the same horizontal plane the brake master cylinder hole is in. Use the reinforcement plate that came with the clutch master to set it's spacing. You need enough room for the upper nut to clear the pedal box on the inside. The lower stud hole will only go through the firewall, not the firewall reinforcement as well.
Remove the pedals from the pedal box
Bolt the box up in it's new location, just temporarily.
Draw the holes where the two vertical bolts go into the base of the cowl under the dash.
Remove the pedal box and drill the cowl holes.
Install 3/8x16tpi nut-serts in the blind holes in the cowl. They're a rivet with threads inside. You can buy a tool or make one out of a bolt to install them.
Take off the plastic bushings including the washer on the brake pedal pivot pin and bend the pedals the opposite way with a torch. Make them the same, you want the spacing between the pedals to remain constant.
Use a cutoff wheel and an air chisel to remove the linkage tab off of the clutch pedal.
Find a bolt with a 1" long shanked portion that fits snugly though the clutch master pushrod's plastic bushing. Drill a 1/8" hole through the flat faces of the head, then grind the head down to the same diameter as the shank, that's your cotter pin hole.
Use a drill to clean up the hole through the pedal, then tap it for the bolt size. Thread the bolt in, cut off the excess on the other side, and weld it in on both sides. The threads are not good enough to hold it, you must weld.
Put the pedals back in the box and bolt it all up into place.
Put the steering column and brake master back in. The brake lines may need to be lengthened to reach the new master location.
Remove the clutch pushrod from the cylinder, it just pulls out of a clip if you yank it hard.
Cut it right where it's been flattened at the eye end. Or cut it anywhere if you don't plan on using the ford clutch switch. Add 2" to it's length. Make sure it's straight, a bend will cause it to fail over time.
Install the clutch master. You will want to make a new inner reinforcement plate, the stock one has a step in it by the upper bolt hole and it doesn't spread the load wide enough in the firewall so it flexes.
Drill a new 1" hole for the speedo cable through the firewall and reinstall the cable.
Extend the brake light switch wires over to reach the new pedal location.
The brake pedal and the clutch pedal should be at the same height and the clutch pedal should create the little bit less than 1.5" stroke needed at the clutch master going from full up to the floor. Clutch is nice and easy to work because you have the full leverage of the pedal instead of the other setups that have you drill another pivot hole partway down the pedal.
I've got the clutch master cylinder inner reinforcement plate left to do and I'm dong a hydroboost install, so I'll have more pictures in a couple of days.
Last edited: