• Welcome to ClassicBroncos! - You are currently viewing the forums as a GUEST. To take advantage of all the site features, please take a moment to register. It's fast, simple and absolutely free. So please join our community today!
    If you have problems registering or can't log into your account, please contact Admin.

'72 Bronco project (Cypress, Tx)

OP
OP
Dne007

Dne007

Contributor
Jr. Member
Joined
Jul 18, 2021
Messages
539
Yes, I did just this about an hour ago. doing so the needle of the gauge moves all the way. So, that may rule that the sender is incorrect or not grounded as you said. I was re-installing the speedo assembly and I keep knocking the high beam indicator from its hole! grrrrr
in the morning I'll make sure to ground: engine to body, metal dash to tub, etc. I have a negative running from the battery to the body.
I really don't think I got anything done today~ but's nice to be in the garage doing something.
dne'
Thanks guys!!!
Take the wire off of your temp sending unit and ground it to the block. If the gauge moves then you have a wrong or bad sender, or the sender is not grounding to the block.
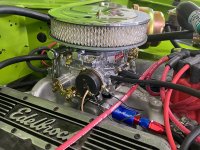
 

Viperwolf1

Contributor
electron whisperer
Joined
Aug 23, 2007
Messages
24,341
How do you know the senders are for the correct range? Are they part of a wiring package or did you just get them individually? I ask because that small temp sender is unusual for a stock gauge.

You can test the fuel and temp gauges themselves by connecting the oil pressure wire up to them. They should move to the same deflection as the oil gauge when you do.
 
OP
OP
Dne007

Dne007

Contributor
Jr. Member
Joined
Jul 18, 2021
Messages
539
Well, I don't;) The temp gauge was on the manifold already, but I just ordered the stock sender so that should take care of that. If that works for the temp, then I just have to wrestle with the gas gauge system. I'll try that little trick you said on my fuel gauge tomorrow;)
thank you Viperwolf;)
dne'

How do you know the senders are for the correct range? Are they part of a wiring package or did you just get them individually? I ask because that small temp sender is unusual for a stock gauge.

You can test the fuel and temp gauges themselves by connecting the oil pressure wire up to them. They should move to the same deflection as the oil gauge when you do.
 
OP
OP
Dne007

Dne007

Contributor
Jr. Member
Joined
Jul 18, 2021
Messages
539
ok, here's another question: I've since installed this lever (thanks again Viper)~ how do I figure the column lever shift length? Automatic shifter on the column. As it stands, when I'm in park,As I move the shift lever, the indicator goes way too far in between gear selection and I can't even achieve 1st gear(C4 trans); does my question make sense?
dne'
 

Attachments

  • Bronco shift levera.jpg
    Bronco shift levera.jpg
    138.5 KB · Views: 7

Viperwolf1

Contributor
electron whisperer
Joined
Aug 23, 2007
Messages
24,341
ok, here's another question: I've since installed this lever (thanks again Viper)~ how do I figure the column lever shift length? Automatic shifter on the column. As it stands, when I'm in park,As I move the shift lever, the indicator goes way too far in between gear selection and I can't even achieve 1st gear(C4 trans); does my question make sense?
dne'
The stock column has the lever pivot at about 3 1/2" from the center of the column. If you have an aftermarket column it may be different. Some are swappable to get the correct length.
 
OP
OP
Dne007

Dne007

Contributor
Jr. Member
Joined
Jul 18, 2021
Messages
539
HI again, a question regarding air cleaners. Does the factory air cleaner utilize fresh air through the radiator support? That is better than a regular air cleaner, yes? When we get back from vacation, I'll start looking for a stock air cleaner. or are there alternatives to stock to use fresh air from the grille?
 

DirtDonk

Contributor
Bronco Guru
Joined
Nov 3, 2003
Messages
48,265
Yes and no. Early models did not, but starting in the 73 model year they connected the snorkel to the front radiator support behind the battery.
I like the factory air cleaner because of its clearance, and yes any normal air cleaner is pulling hot air from under the hood and it’s not really very low profile normally either.
 

Yeller

Contributor
Bronco Guru
Joined
Mar 27, 2012
Messages
6,454
Loc.
Rogers County Oklahoma
I would do the 73 up factory air cleaner with the tube to the core suport.

Or cut out those beautiful inner fenders and have all the cool air it can breathe…. Please don’t take that serious 🤣🤣🤣

I’m trying to figure out how to draw some cool air in on my Gladiator, I’m getting incoming air temps as high as 165 sitting in traffic when it’s 105 outside.
 

Viperwolf1

Contributor
electron whisperer
Joined
Aug 23, 2007
Messages
24,341
The stock column has the lever pivot at about 3 1/2" from the center of the column. If you have an aftermarket column it may be different. Some are swappable to get the correct length.
Also I should have mentioned that the angle of the column arm is important. In park it should point up about 40 degrees. The bolt should be level with the center of the column when the shifter is in drive. Looking at the picture of your lower column it looks like your arm is too far down. Here is pic of one in park. 20221013_120741.jpg
 
OP
OP
Dne007

Dne007

Contributor
Jr. Member
Joined
Jul 18, 2021
Messages
539
Ok, took it for a test spin~ a couple blocks away is a super large baseball field and perfect place for test drives! Though there is more to do, it's nice to see it putt along;)
dne'
 

Attachments

  • IMG_9267(3).MOV
    22.2 MB
OP
OP
Dne007

Dne007

Contributor
Jr. Member
Joined
Jul 18, 2021
Messages
539
Hi! I was having a time with the AC belt squealing, so I searched ebay for an idler pulley of just about any kind, found one and made it work with minimal effort;) There just wasn't enough surface area from the belt in contact with the AC pulley, and the long stretch from the water pump to the pulley, the belt was just flopping. So, now I can have AC without the squeal! Supposed to rain, would like to have taken it on a little longer test drive:(
dne'
 

Attachments

  • Bronco AC belt.jpg
    Bronco AC belt.jpg
    231.3 KB · Views: 34
  • Bronco AC belta.jpg
    Bronco AC belta.jpg
    170.2 KB · Views: 37
  • Bronco AC beltb.jpg
    Bronco AC beltb.jpg
    223.4 KB · Views: 43
  • Bronco AC beltc.jpg
    Bronco AC beltc.jpg
    196.8 KB · Views: 45
  • AC idler pulley ebay.png
    AC idler pulley ebay.png
    1.6 MB · Views: 40
  • 312669597_8586452751372375_155404452251277283_n.mp4
    4.2 MB
OP
OP
Dne007

Dne007

Contributor
Jr. Member
Joined
Jul 18, 2021
Messages
539

Hi, I'm still here~ ;) Holidays take a toll on progress! However, I got my edelbrock carburetor installed and omg, my engine is ALIVE AND WELL! In other words, it runs incredibly well!~ took the first official ride down the road~ ;) excited;)
dne'
 

Attachments

  • Edelbrock carb.jpg
    Edelbrock carb.jpg
    263 KB · Views: 48
  • Bronco and mea.jpg
    Bronco and mea.jpg
    236 KB · Views: 46
OP
OP
Dne007

Dne007

Contributor
Jr. Member
Joined
Jul 18, 2021
Messages
539
Hi! Did the longest test drive yet! AC works great, engine is strong, good take off, not bogging down, C4 shifts great, installed a steering stabilizer. On the recent test drive a few weeks ago, I was/am concerned about the mild drift to left/right, not much play in the non-overhauled steering gear(just seals). Wheel bearings are new, suspension is tight. I had it on the lift a couple days ago, on my alignment turn tables to re-check Toe and is at 1/16-1/8 steering wheel perfectly centered, tire pressure 36 on the front and rear. Actually I hadn't checked on the last test drive and it was at 29psi. The speed I was just driving at was 40mph revealed by my iphone (my speedo said 30). The road I tested on has a fairly strong crown. I'm getting a little braver to find a road which is "flatter" when traffic is not so busy(ha).
I have the red C-bushings~ would more caster help tone this "drift" down a bit. getting a little more excited, more parts on the way to complete doors;)
dne'
 

Attachments

  • Bronco front axleshocks.jpg
    Bronco front axleshocks.jpg
    237.8 KB · Views: 24

Oldtimer

Contributor
Jr. Member with Sr. moments
Joined
Feb 4, 2005
Messages
1,023
Loc.
Sunnyvale, CA
Some questions, the answers may be in the first 34 pages of thread, but I don't remember if I read them.

72 did not come with disc brakes, or dual shock hoops. Did you add them, or a past owner?

If you do not know pedigree of front axle add some detail photos of knuckles, calipers, rotors, hubs, and center section.
Others will be able to tell if it is D30, D44, and or disc brake conversion.

Also a side shot of poly bushings to verify orientation, and side shot of drive shaft and pinion so we have a rough idea where they are at.

Do you know angle of red poly "C" bushings?

May need to take it to alignment shop to find out current caster and camber angles.

This thread may start you in the general direction of you issues:

Oh, and a great build, have enjoyed watching over you shoulder as you have gone down the path.
 
Last edited:
OP
OP
Dne007

Dne007

Contributor
Jr. Member
Joined
Jul 18, 2021
Messages
539
Thank you Oldtimer for the compliments and you watching and advice;) The Bronco came with the hoops welded in place, and a Dana 44, but I did get a D30 in my journeys which had front disc brakes and I swapped them into my d44. I knew you or someone was going to ask me the angle of the Red C bushings~ I'll have to go back to my purchases and see what it is. But here are a bunch of pics I just took;)
thanks you;)
dne'

I'm thinking the C bushings are 2 degree.
 

Attachments

  • Bronco dana44j.jpg
    Bronco dana44j.jpg
    161.9 KB · Views: 16
  • Bronco dana44i.jpg
    Bronco dana44i.jpg
    159.4 KB · Views: 17
  • Bronco dana44h.jpg
    Bronco dana44h.jpg
    178.3 KB · Views: 15
  • Bronco dana44g.jpg
    Bronco dana44g.jpg
    166.3 KB · Views: 14
  • Bronco dana44e.jpg
    Bronco dana44e.jpg
    205.8 KB · Views: 14
  • Bronco dana44d.jpg
    Bronco dana44d.jpg
    229.1 KB · Views: 13
  • Bronco dana44c.jpg
    Bronco dana44c.jpg
    164.9 KB · Views: 13
  • Bronco dana44a.jpg
    Bronco dana44a.jpg
    220.8 KB · Views: 14
  • Bronco dana44b.jpg
    Bronco dana44b.jpg
    197.1 KB · Views: 14
Last edited:

Yeller

Contributor
Bronco Guru
Joined
Mar 27, 2012
Messages
6,454
Loc.
Rogers County Oklahoma
Air pressure in these old trucks can be a huge player. My old jeep truck likes 32psi in the front, more than that and it follows ruts in the road badly, normally with your tire size you find the sweet spot between 25 and 35psi. Tire width aslo contributes to it wanting to wander, they have enough leverage to pull on ridges in the road surface, its usually manageable though. Really need to measure the caster angle from the bottom of the lower ball joint. I need to do that on my jeep and post pics for you if you'd like a quick tutorial. If you have less than 3-1/2 degrees it will usually wander, most find the happy place to by 4-7 degrees.

Edit:
I went out and did some measuring and took a couple of pics. This is difficult to get a good measurement with the the tires on. The Jeep truck is at 3 degrees, it needs more, it’s a little wandery but is much longer than a bronco and is livable, would like to see 5-6 degrees, can get some better but not quite that much without reworking the lower control arms. I used all of my low tech tools, didn’t feel like getting the electronic level lol. The dial protractor is low tech and very inexpensive, the round one is a plane prop indicator and is very accurate. For giggles, since I couldn’t remember, I measured my bronco, it is at 11.5 degrees and comfy 1 hand on the wheel at illegal speeds 😝

There is no way to get a functional 11.5 degrees in a bronco and have a happy driveshaft and ujoint angles at the pinion without modifying the front axle.
 

Attachments

  • 9A2C9AC7-FCE3-4983-B765-A8AF000DD9AB.jpeg
    9A2C9AC7-FCE3-4983-B765-A8AF000DD9AB.jpeg
    160.9 KB · Views: 18
  • 4AE2B9B1-54F6-4D78-8AE1-591ADA595064.jpeg
    4AE2B9B1-54F6-4D78-8AE1-591ADA595064.jpeg
    129.3 KB · Views: 19
  • 74E7506C-8291-4A57-9B98-52BB6055A5B8.jpeg
    74E7506C-8291-4A57-9B98-52BB6055A5B8.jpeg
    127.9 KB · Views: 20
  • 1F7642E4-9D3E-419A-BBCF-C68CECCCFB03.jpeg
    1F7642E4-9D3E-419A-BBCF-C68CECCCFB03.jpeg
    195.1 KB · Views: 19
Last edited:
OP
OP
Dne007

Dne007

Contributor
Jr. Member
Joined
Jul 18, 2021
Messages
539
Thank yo Yeller~ I figured these tires might do something~ I've never had large tires like these before, but it's pretty much doing the same thing when the tire pressure was 29, then the same at 36, I was just playing with the pressures. I'm pretty sure I bought the 2degree C bushings~ I didn't put a lot of thought into those bushings. I just need to hear what degree to buy; don't want to make a habit of changing these bushing out;)
dne' ;)
 

Yeller

Contributor
Bronco Guru
Joined
Mar 27, 2012
Messages
6,454
Loc.
Rogers County Oklahoma
If you’re able to measure the caster we can point you to the correct bushings. My guess with your lift you are somewhere between 0 and 1.5 degrees, but I’m guessing. We also need to know if it is positive or negative. Positive is good, negative is really bad.
 

Attachments

  • 4D463EAE-3D65-42B5-868D-851F59E77848.jpeg
    4D463EAE-3D65-42B5-868D-851F59E77848.jpeg
    183.1 KB · Views: 26
Top