• Welcome to ClassicBroncos! - You are currently viewing the forums as a GUEST. To take advantage of all the site features, please take a moment to register. It's fast, simple and absolutely free. So please join our community today!
    If you have problems registering or can't log into your account, please contact Admin.

Body Mount Order of Operation?

NJBronk

Contributor
Full Member
Joined
Oct 11, 2022
Messages
191
I’ve been reading through all the threads and tech article here about the body mounts. I think I have a plan but wanted to confirm order of operation in detail, particularly when to jack up the body and when to destroy the old mounts:

1) soak everything in penetrating oil for days/weeks
2) try to remove/break all 8 bolts
3) Jack up one side of body (4x4 post horizontally underneath rocker and use floor Jack)
4) Go to town on old mounts with sawzall, air hammer, fists, etc. on lifted side of body
5) put new mounts in place and loosely bolt in place
6) let body back down
7) lift other side and attack mounts on that side
8) install new mounts on second side
9) check gaps, shim mounts if necessary
10) tighten all bolts
11) beer/nap

I’m going with stock height mounts, so I don’t think I need to loosen anything else before lifting the body (filler hose, clutch linkage, steering, etc.)?

Thanks!
 

DirtDonk

Contributor
Bronco Guru
Joined
Nov 3, 2003
Messages
47,483
I’m going with stock height mounts, so I don’t think I need to loosen anything else before lifting the body (filler hose, clutch linkage, steering, etc.)?
Don’t count on that last bit.
At the very least, you must disconnect the fan shroud if you have one.
Even though you’re only lifting the body up a slight amount to get the old mounts out, it only takes a little bit of a nudge to break a very valuable fan, shroud, or an awkward to replace water pump.

You basically have everything correct in your head.
One other alternative though, to the reciprocating saw, is a proper sized drill bit.
Because the reciprocating saw blades are so awkward to get into some positions, some of those can be accessed from straight beneath. Simply drill upward into the bottom tube and washer of the original mount until you get past the rusty interlocked parts.
That should allow them to come out pretty easily.
On certain mounts though, the recip saw is the only alternative.
 

DirtDonk

Contributor
Bronco Guru
Joined
Nov 3, 2003
Messages
47,483
And don’t forget the part about when you do get the bolts out, put them (or an appropriate alternative) back in partially and smack them with a hammer. Very hard!
This is the last step in determining whether the old mounts will come out easily or not. If smacking the top with a hammer pops the bottom half out of the frame, consider yourself very lucky.
Even if it’s only one mount, it can be hours of work saved.
 

jamesroney

Contributor
Sr. Member
Joined
Sep 11, 2007
Messages
1,712
Loc.
Fremont, CA
Don’t count on that last bit.
At the very least, you must disconnect the fan shroud if you have one.
Even though you’re only lifting the body up a slight amount to get the old mounts out, it only takes a little bit of a nudge to break a very valuable fan, shroud, or an awkward to replace water pump.

You basically have everything correct in your head.
One other alternative though, to the reciprocating saw, is a proper sized drill bit.
Because the reciprocating saw blades are so awkward to get into some positions, some of those can be accessed from straight beneath. Simply drill upward into the bottom tube and washer of the original mount until you get past the rusty interlocked parts.
That should allow them to come out pretty easily.
On certain mounts though, the recip saw is the only alternative.

Sawzall is over-rated. Oxy-Acetylene is the alternative. Twist off the head, lift off the body, burn off the bolt, burn thru the washer, set the rubber on fire. Pry off the rubber, burn the metal parts flush with the bracket. Burn off the nut plate, knock out the lower bushing.

Literally 5 minutes per body mount. Try not to set the Bronco on fire. Try not to set yourself on fire.

...and this is a little bit tricky, because the saddle tank stays with the body...but the rear tank stays with the frame. So you end up with one fill neck in the body, and one fill neck on the tank. But you have to lift the body way more than 2 inches in order to get any work done...so you end up breaking off the 50 year old fill neck hose. And it's kinda close to the flames. Then the tank select valve to rear tank hose, and tank select to fuel pump hoses are never quite long enough. So you can disconnect them and try not to set them on fire, or you can leave them connected and break them off when you lift the body.
 
Last edited:
OP
OP
N

NJBronk

Contributor
Full Member
Joined
Oct 11, 2022
Messages
191
And don’t forget the part about when you do get the bolts out, put them (or an appropriate alternative) back in partially and smack them with a hammer. Very hard!
This is the last step in determining whether the old mounts will come out easily or not. If smacking the top with a hammer pops the bottom half out of the frame, consider yourself very lucky.
Even if it’s only one mount, it can be hours of work saved.

After spraying penetrating oil over the last few days I tried to loosen the rear-most bolts to see if I could spray some down from the top and they both broke off at the midpoint (probably 1/6 of the diameter rusted away). So I’m thinking this is going to be harder than I hoped…
 
OP
OP
N

NJBronk

Contributor
Full Member
Joined
Oct 11, 2022
Messages
191
Sawzall is over-rated. Oxy-Acetylene is the alternative. Twist off the head, lift off the body, burn off the bolt, burn thru the washer, set the rubber on fire. Pry off the rubber, burn the metal parts flush with the bracket. Burn off the nut plate, knock out the lower bushing.

Literally 5 minutes per body mount. Try not to set the Bronco on fire. Try not to set yourself on fire.

...and this is a little bit tricky, because the saddle tank stays with the body...but the rear tank stays with the frame. So you end up with one fill neck in the body, and one fill neck on the tank. But you have to lift the body way more than 2 inches in order to get any work done...so you end up breaking off the 50 year old fill neck hose. And it's kinda close to the flames. Then the tank select valve to rear tank hose, and tank select to fuel pump hoses are never quite long enough. So you can disconnect them and try not to set them on fire, or you can leave them connected and break them off when you lift the body.
Fire makes me way too nervous…. I’ll keep an eye on the fill necks and other hoses and see if I need to disconnect them.
 

Bitch'nBronco

Contributor
Loose Cannon
Joined
Dec 1, 2005
Messages
3,361
Loc.
Havre De Grace, MD
Tape......As I recall the mounts behind the seats....there's a hole in the top of the frame. If you don't tape over these holes and you drop a nut....It's now a part of the Bronco forever.....

Tim
I second this comment, I dropped a nut in one of the holes and had to use a chimney sweep on a rope to get it out of the frame rail
 

DirtDonk

Contributor
Bronco Guru
Joined
Nov 3, 2003
Messages
47,483
Try this on those back two mounts that the bolts broke off of. You now have a point to hammer that you don’t have to worry about hurting.
Take a large drift pin or punch or rod that will fit inside the hole without touching the body.
Set it down on the top of the broken bolts and wail on it with a big F hammer.
If they don’t pop out the bottom, well, at least you tried. If they do pop out however, consider it a success!
 

Speedrdr

Contributor
Learning Member
Joined
Nov 27, 2017
Messages
1,165
Loc.
Paris, MS
Sawzall is over-rated. Oxy-Acetylene is the alternative. Twist off the head, lift off the body, burn off the bolt, burn thru the washer, set the rubber on fire. Pry off the rubber, burn the metal parts flush with the bracket. Burn off the nut plate, knock out the lower bushing.

Literally 5 minutes per body mount. Try not to set the Bronco on fire. Try not to set yourself on fire.

...and this is a little bit tricky, because the saddle tank stays with the body...but the rear tank stays with the frame. So you end up with one fill neck in the body, and one fill neck on the tank. But you have to lift the body way more than 2 inches in order to get any work done...so you end up breaking off the 50 year old fill neck hose. And it's kinda close to the flames. Then the tank select valve to rear tank hose, and tank select to fuel pump hoses are never quite long enough. So you can disconnect them and try not to set them on fire, or you can leave them connected and break them off when you lift the body.
Well, at this point in time I personally don’t have to worry about either tank or fill neck cause all of them plus the fuel lines are sitting on a lumber pile in another shed. Lol. I’d just have to take the “temporary” fuel cell out of the engine compartment.
Come to think about it, this MAY be an opportunity to change out MY body bushings. Thanks, @jamesroney for the Great idea.

Randy
 
OP
OP
N

NJBronk

Contributor
Full Member
Joined
Oct 11, 2022
Messages
191
Try this on those back two mounts that the bolts broke off of. You now have a point to hammer that you don’t have to worry about hurting.
Take a large drift pin or punch or rod that will fit inside the hole without touching the body.
Set it down on the top of the broken bolts and wail on it with a big F hammer.
If they don’t pop out the bottom, well, at least you tried. If they do pop out however, consider it a success!
Yes, I have an air chisel being delivered hopefully this weekend from Amazon, was thinking I’d try that with a punch bit from the top. I always take the opportunity to buy new tools when I have a good excuse!
 
OP
OP
N

NJBronk

Contributor
Full Member
Joined
Oct 11, 2022
Messages
191
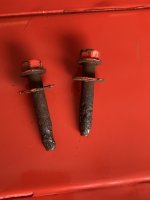
In case anyone was curious what the rear body mount bolts look like (the top half that broke off, anyway). It's somewhat surprising because the truck overall has very little rust, but these were really rough.

Body Mount Bolts.jpeg
 
Last edited:

chuckji

Contributor
Full Member
Joined
May 5, 2017
Messages
388
Loc.
SE Michigan
After spraying penetrating oil over the last few days I tried to loosen the rear-most bolts to see if I could spray some down from the top and they both broke off at the midpoint (probably 1/6 of the diameter rusted away). So I’m thinking this is going to be harder than I hoped…
It always is… 😂
 
Last edited:
OP
OP
N

NJBronk

Contributor
Full Member
Joined
Oct 11, 2022
Messages
191
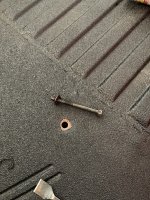
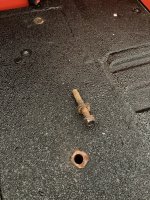
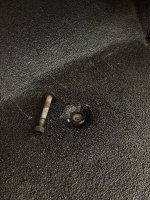
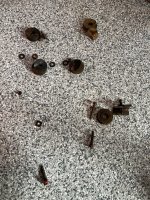
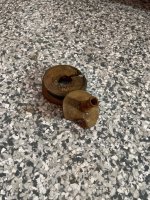
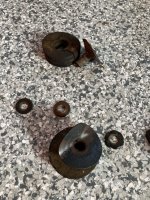
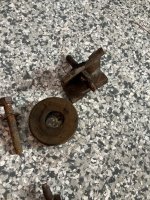
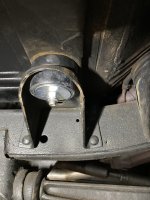
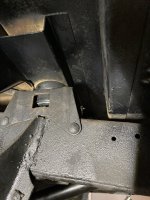
So I've been able to get all of the lower bushings out except the two behind the front seats over the course of a couple weekends / maybe 6 hours total. I think I have the two halves of the remaining two separated, I just can't get the lower bushing out of the frame. I may try to cut the rubber off to see what's going on there and then start lifting / cutting with a sawzall. I'm afraid I may need to drop my exhaust to get better access, which is welded from the long-tube headers back, so not looking forward to that.

Exactly one bolt came out very cleanly (actually the one behind the drivers' seat, which I then re-inserted and hit with a hammer to separate them). I cut the lower rubber bushing off the front two with a utility knife to then grabbed the metal with vice grips, wedged the vice grips in the surrounding suspension, and then unbolted from the top. The two in the front floor pans were pretty easy.

The two in the rear I used a punch on top of the broken bolts and hit hard with a small sledgehammer to separate and deform the lower retainers until I could pull them out.

Hoping to get this done this weekend so that I can then get the cage in, seats back in, and be ready to hit the road when the warm weather comes!

IMG_8563.jpeg

IMG_8564.jpeg

IMG_8565.jpeg IMG_8566.jpeg

IMG_8567.jpeg

IMG_8568.jpeg

IMG_8569.jpeg
 

DirtDonk

Contributor
Bronco Guru
Joined
Nov 3, 2003
Messages
47,483
Wow, one whole bolt came out clean. Count the small victories though, because some of use didn't even get that luxury! :D
Nice job though, getting almost all of them out. Lots of work it sounds like, but most of them finally came around. You can count that as a big victory I'd say. Well, just short of the full victory that is...
What a mess.

I see some small washers though. Were those all just under the bolt heads, or did someone put nuts and washers on the bottom where the exposed threads of the bolts come through? Seen that more than once. If that's the case, I hope you were able to remove them before taking the bolts out.

Down to one now. I'm sure you'll get it once you've had a little time off!
 
OP
OP
N

NJBronk

Contributor
Full Member
Joined
Oct 11, 2022
Messages
191
Wow, one whole bolt came out clean. Count the small victories though, because some of use didn't even get that luxury! :D
Nice job though, getting almost all of them out. Lots of work it sounds like, but most of them finally came around. You can count that as a big victory I'd say. Well, just short of the full victory that is...
What a mess.

I see some small washers though. Were those all just under the bolt heads, or did someone put nuts and washers on the bottom where the exposed threads of the bolts come through? Seen that more than once. If that's the case, I hope you were able to remove them before taking the bolts out.

Down to one now. I'm sure you'll get it once you've had a little time off!

Small washers were mostly under the bolt heads, but there were nuts and washers on the bottom of the body mounts under the front floor boards, so easy to remove.
 
OP
OP
N

NJBronk

Contributor
Full Member
Joined
Oct 11, 2022
Messages
191
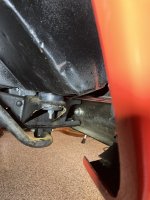
Phew, that was not fun, but finally done!

I put anti-seize on all the threads for the next guy 50 years from now…


511B068C-CACD-4954-8AAE-A382B2E12B1B.jpeg
49166EDB-C20C-489A-8616-605E6DEDB31F.jpeg F17E58CF-AA68-4EED-A84B-32C3DBF27B3B.jpeg
 
Top