summerlife
New Member
- Joined
- Feb 21, 2015
- Messages
- 29
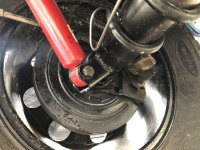
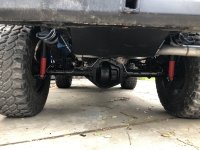
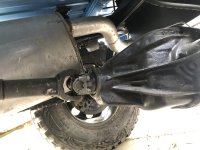
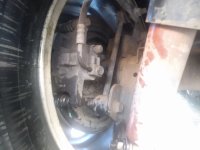
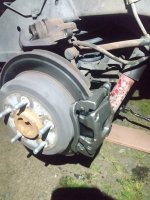
Ok so I just finished installing the hydro boost after having to order a longer higher pressure line as the one from toms wasn't long enough. Everything is going good but I'm confused with the 4way disc proportioning valve.
It has 5 ports and one large one for the rear.
I had the old h block on before. I'm trying to figure out how the lines are suppose to be laid out? I only have one line going out for the front dics brakes and one for the rear.
1: The rear one is a small thread so won't fit the huge hole on the proportioning valves so should I find an adapter? Or do I need to upgrade the lines to a bigger one? They split near the back into two line
2: Do I need to make it so I have two front brake lines going to the proportioning block instead of just the one that splits?
3: does it matter if I hooked up a electric plug to that plug on the block as my bronco doesn't have one and the old h block didn't have one either. Thanks In advance guys. Can't find any diagrams to completely explain thai. There is a diagram for the blocks and Wich ones go where but not what the lines are suppose to do.