• Welcome to ClassicBroncos! - You are currently viewing the forums as a GUEST. To take advantage of all the site features, please take a moment to register. It's fast, simple and absolutely free. So please join our community today!
    If you have problems registering or can't log into your account, please contact Admin.

My 2021 updates on my 73 - long overdue - FINISHED

OP
OP
JWMcCrary

JWMcCrary

Contributor
Bronco Guru
Joined
Oct 14, 2004
Messages
5,001
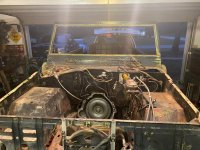
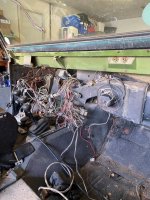
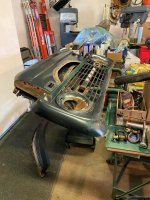
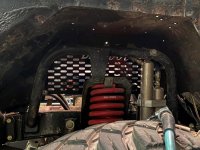
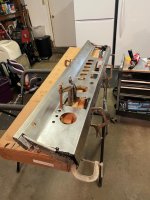
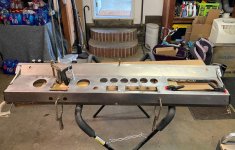
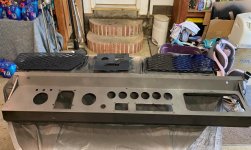
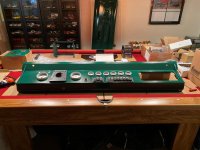
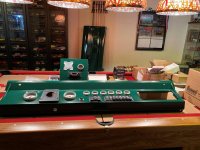
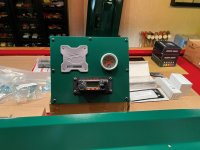
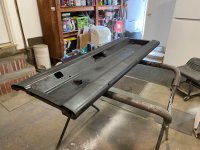
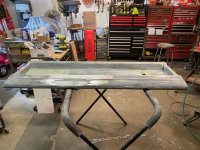
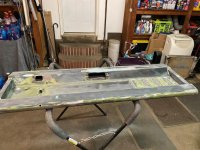
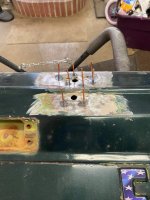
Permanently attached the overlay to the donor dash with some panel bond, this stuff is tough. The steering column cover had a very small gap at the bottom so I added a small piece of metal to fill the gap using the panel bond. tried to fill in a few minor gaps. It turned out pretty good. It's covered with primer, will need a little detail sanding before painting, for now it sits and waits.
 

Attachments

  • IMG_3451.jpg
    IMG_3451.jpg
    107.6 KB · Views: 57
  • IMG_3452.jpg
    IMG_3452.jpg
    116.7 KB · Views: 53
  • IMG_3490.jpg
    IMG_3490.jpg
    105.9 KB · Views: 49
OP
OP
JWMcCrary

JWMcCrary

Contributor
Bronco Guru
Joined
Oct 14, 2004
Messages
5,001
Dash and cubby are painted and considered done. Except for wiring and install of course. A lot to do before that happens.
 

Attachments

  • IMG_3770.jpg
    IMG_3770.jpg
    105.5 KB · Views: 62
  • IMG_3771.jpg
    IMG_3771.jpg
    119.2 KB · Views: 65
  • IMG_3772.jpg
    IMG_3772.jpg
    82.3 KB · Views: 63
OP
OP
JWMcCrary

JWMcCrary

Contributor
Bronco Guru
Joined
Oct 14, 2004
Messages
5,001
Got the tailgate off and stripped down, it's never opened and closed easy, rebuilding with all new parts except the gate itself. Did some repair and painted. Managed to get some grit in it so will need to wet sanding. But it's for the woods so will work on it some but not gong to worry with it being much better than it is..
 

Attachments

  • IMG_3767.jpg
    IMG_3767.jpg
    138.9 KB · Views: 38
  • IMG_3766.jpg
    IMG_3766.jpg
    118.6 KB · Views: 40
  • IMG_3744.jpg
    IMG_3744.jpg
    96.5 KB · Views: 33
  • IMG_3741.jpg
    IMG_3741.jpg
    118.3 KB · Views: 36
  • IMG_3738.jpg
    IMG_3738.jpg
    151 KB · Views: 35
  • IMG_3734.jpg
    IMG_3734.jpg
    141.9 KB · Views: 41
  • IMG_3659.jpg
    IMG_3659.jpg
    120.9 KB · Views: 38

73azbronco

Contributor
Bronco Guru
Joined
Nov 11, 2007
Messages
7,805
Thank the PO of the 351 for using synthetic, thats what my 85,000 mile 5.0 looked like.
 

bronco217

Jr. Member
Joined
Nov 13, 2003
Messages
113
Is it me or do the pistons seem to be upside down in the original engine, valve reliefs seem to be on the wrong side?
 
OP
OP
JWMcCrary

JWMcCrary

Contributor
Bronco Guru
Joined
Oct 14, 2004
Messages
5,001
Is it me or do the pistons seem to be upside down in the original engine, valve reliefs seem to be on the wrong side?

The original motor has Keith Black flat tops, will only work one way, and that's how they are.
 
OP
OP
JWMcCrary

JWMcCrary

Contributor
Bronco Guru
Joined
Oct 14, 2004
Messages
5,001
Having some good weather so I got the Bronco back into the garage to get started and have managed to get it torn down to the point needed for the work I want to do. If this was real restoration and not a trail/fun rig it would need a lot of sheet metal, but for my purposes I am repairing. Rockers are toast so plan to cut them off and add sliders. There was grass behind one of the quarter guards, lol. I think it's cool that the original paint is still visible behind the dash and in decent shape. I plan to clean that up and leave it. AT the point now where I can start building back, which will be a slow process.
 

Attachments

  • IMG_3846.jpg
    IMG_3846.jpg
    136.5 KB · Views: 40
  • IMG_3815.jpg
    IMG_3815.jpg
    190.1 KB · Views: 47
  • IMG_3813.jpg
    IMG_3813.jpg
    167.4 KB · Views: 50
  • IMG_3809.jpg
    IMG_3809.jpg
    135.8 KB · Views: 49
  • IMG_3798.jpg
    IMG_3798.jpg
    146.4 KB · Views: 49
  • IMG_3797.jpg
    IMG_3797.jpg
    157.2 KB · Views: 48
  • IMG_3787.jpg
    IMG_3787.jpg
    185.4 KB · Views: 46
  • IMG_3786.jpg
    IMG_3786.jpg
    140.7 KB · Views: 43

sprdv1

Contributor
REBEL
Joined
Mar 8, 2007
Messages
81,747
Nice brother.. and hopefully the weather continues to get better..

Having some good weather so I got the Bronco back into the garage to get started and have managed to get it torn down to the point needed for the work I want to do. If this was real restoration and not a trail/fun rig it would need a lot of sheet metal, but for my purposes I am repairing. Rockers are toast so plan to cut them off and add sliders. There was grass behind one of the quarter guards, lol. I think it's cool that the original paint is still visible behind the dash and in decent shape. I plan to clean that up and leave it. AT the point now where I can start building back, which will be a slow process.
 
OP
OP
JWMcCrary

JWMcCrary

Contributor
Bronco Guru
Joined
Oct 14, 2004
Messages
5,001
Local retired Marine Veteran who still does glass work on the side helped me get the windshield out. I wanted to take all precautions to not break so I wouldn't loose my Deep Faith sticker. I bought a new gasket so we cut it out. All good and he will come back when it's time to go back in.
 

Attachments

  • IMG_3835.jpg
    IMG_3835.jpg
    111.5 KB · Views: 18
  • IMG_3836.jpg
    IMG_3836.jpg
    150.7 KB · Views: 20
OP
OP
JWMcCrary

JWMcCrary

Contributor
Bronco Guru
Joined
Oct 14, 2004
Messages
5,001
Goodbye gas fillers. Still need a little more work but that will get covered when I do the prep work for painting. My painting skills need all the prep and help they can get.
 

Attachments

  • IMG_3871.jpg
    IMG_3871.jpg
    119.5 KB · Views: 20
  • IMG_3850.jpg
    IMG_3850.jpg
    148.7 KB · Views: 23
OP
OP
JWMcCrary

JWMcCrary

Contributor
Bronco Guru
Joined
Oct 14, 2004
Messages
5,001
Got the Bilt Cool panels installed on the inner fenders. That was a chore. The passenger side inner fender was part of an old battery box repair from before my time, but it's still solid and holding up, SO, I had to modify the panel to fit.
The drivers side had been crumpled in the past before my time and took some massaging to get it on there. I still need to add a piece of metal on the front corner where I tried to panel bond it, it might hold but I doubt it since there's not much of an overlap for it grab. It looks unsquared but when you look at it from the tire side that's where it needed to be. The inner fender isn't exactly factory shape anymore, lol, but it will be ok. I would rather it look right from the tire side since after the motor is in it won't be noticeable in the engine bay.
 

Attachments

  • UHFX0678.jpg
    UHFX0678.jpg
    166.8 KB · Views: 24
  • IMG_3874.jpg
    IMG_3874.jpg
    170.2 KB · Views: 24
  • IMG_3875.jpg
    IMG_3875.jpg
    111.8 KB · Views: 27
OP
OP
JWMcCrary

JWMcCrary

Contributor
Bronco Guru
Joined
Oct 14, 2004
Messages
5,001
Put a patch over the hole for the heater vent, deleting the heater as part of this work. I cutout the speaker grill from the old dash and using it on the passenger inner fender under my trans cooler, should allow it pull a little fresh air as opposed to pulling just air from the engine bay. When I installed the EFI back in 2013 I put the computer on a panel and and had it where the fresh air vent goes on the driver's side. It worked but was not easy to get to, so I'm moving the computer under the dash over where the heater box was located. That left me with the fresh air vent now cut out bigger than what it was originally so I made a panel to fit one of the storage boxes that they sell for that spot.
A lot of little things but they all add up and take time.
 

Attachments

  • IMG_3856.jpg
    IMG_3856.jpg
    140.6 KB · Views: 20
  • IMG_3876.jpg
    IMG_3876.jpg
    124.5 KB · Views: 20
  • IMG_3882.jpg
    IMG_3882.jpg
    128.2 KB · Views: 24
Top