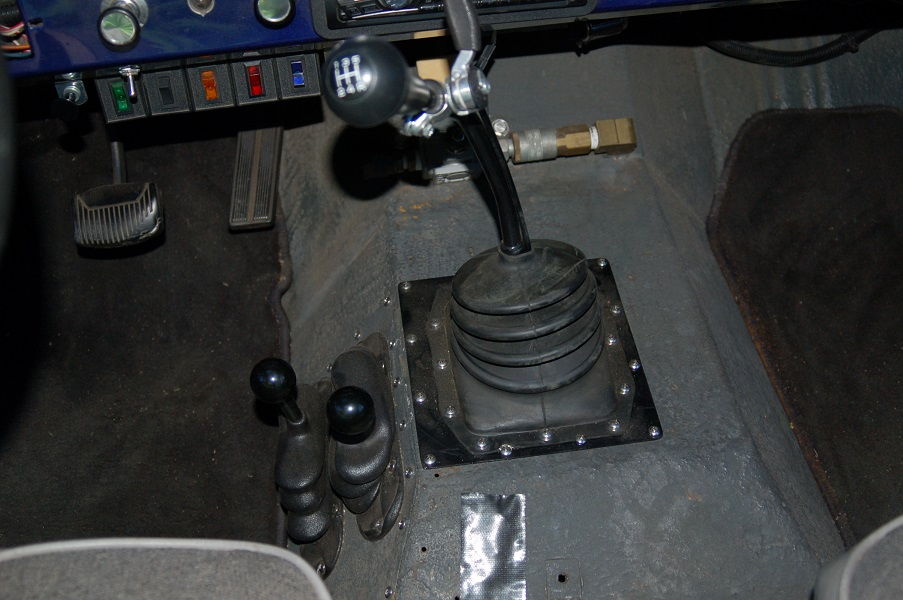
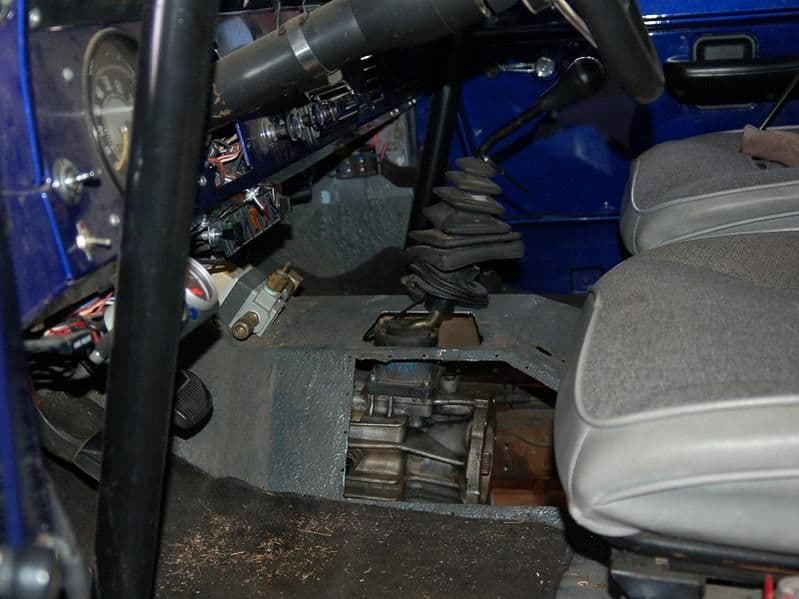
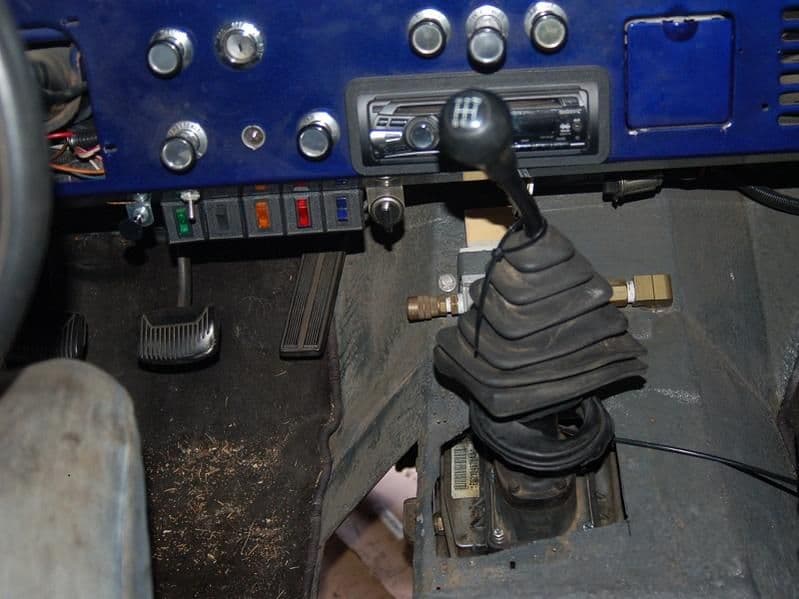
• Welcome to ClassicBroncos! - You are currently viewing the forums as a GUEST. To take advantage of all the site features, please take a moment to register. It's fast, simple and absolutely free. So please join our community today!
    If you have problems registering or can't log into your account, please contact Admin.

Nothing Special – ’71 daily driver – trail rig build thread

OP
OP
Nothing Special

Nothing Special

Sr. Member
Joined
Nov 25, 2016
Messages
804
What more are you looking for? I didn't think most people would want to read through too many details about stuff I did quite a while ago (I feel like I'm pushing it already). But if you have questions about anything in particular I'm happy to dig deeper.
 
OP
OP
Nothing Special

Nothing Special

Sr. Member
Joined
Nov 25, 2016
Messages
804
Axles and brakes – 2007

Dealing with the drum brakes seemed like the priority. Over the years I had the Jeep I often wished for rear disks, especially for their wet performance. So that was the route with the Bronco. And while I had things apart that far it seemed like a good idea to do the rest of the axle work as well. Higher strength shafts front and rear, upgraded U-joints and new Warn hubs in front and a Detroit in the rear were added to the list, as well as a power brake booster/master cylinder.

I wanted to also convert the rear to a full-floater with locking hubs. I had done that to the Dana 44 in my Jeep and it made towing SO much easier when it was just turning two dials instead of taking out the rear driveshaft. The extra freeplay of the hubs had made the Jeeps Detroit that much more noticeable, but the tradeoff was worth it. Unfortunately I couldn't find a kit for the 9". A local 4x4 shop thought they could piece something together, but I decided to skip it.

I also decided to pass on my dream of a selectable locker in the front, just to save cash (after buying one more engine than I had hoped). I stuck with the original 4.10 ratio, but I did put new gears in the rear.

The e.brake was the next challenge. I could have found calipers with an e.brake provision, but my roll cage made it all but impossible to push the pedal down anyway. So I opted for a line lock between the master cylinder and the rear brakes.

Everything went on pretty easily. I was going to install the locker and gears myself, figuring a 9" with the removable 3rd member was the perfect axle to learn gears in. But I chickened out and took it in. The lug studs in the rear axle flanges weren't long enough to go through the disks and my aluminum rims (stock '95 F-150 wheels), so I needed to knock them out and put longer ones in.

Functionally the brake bias is the only problem. The brakes feel a little weak (but still better than the drums), and the front shoes are wearing WAY faster than the rear. The master cylinder I got was supposed to be proportioned for 4 wheel disks, but some time I should probably look into improving that.

The line lock worked great for holding on a hill while starting the engine, but I wouldn't trust it as a long term parking brake. And obviously it won't do anything if the rear brakes fail, so it's not really an emergency brake. But it was OK until this past summer when it just quit working. So now I need to do something about it (probably a new line lock). But that’s still on the to-do list.

I still wish it had locking rear hubs, and some day it might. And a front locker is still on the wish list too.

picture.php
 
OP
OP
Nothing Special

Nothing Special

Sr. Member
Joined
Nov 25, 2016
Messages
804
Caster and bump-steer - 2007

The next issue to take care of was the alignment. The previous owner had lifted it 3" and hadn't addressed the caster very well. It actually had significantly negative caster. Surprisingly it drove fine. the only real issue I had was that when turning a corner while flat towing it the steering would go to full opposite lock. I addressed that short term by tying the steering wheel to keep the wheels pointed straight ahead and putting on junk tires when I towed it out to the Black Hills. But I wanted to get it right.

First I tried new C bushings, but going as far as I could that way still didn't let the steering track right when towing. So I installed drop radius arm brackets. I ended up needing to get a different set of C bushings again (polyurethane), but that got me into the correct range on caster, and now the wheels turn the correct way when I'm towing it.

The other issue with the lift and alignment was bump steer. I was sawing the wheel back and forth almost 1/4 turn when going over railroad tracks! A drop track bar bracket put my track bar parallel with my drag link and no more bump steer.

I do wish I had done this differently, but it's not that I didn't think of it early enough, I just chose to go the least expensive route (still stinging from replacing the engine a second time). But I don't really need as much lift as I have, so I wish I'd lowered it. And it'd be nice to have more front end articulation, so I wish I'd have put long radius arms in it. Either or both of those would have taken care of my caster without the radius arm drop brackets. But I saved the money. (Rubber C-bushings might help the articulation too.)

(see the last post for a picture showing the drop radius arm brackets)
picture.php
 
OP
OP
Nothing Special

Nothing Special

Sr. Member
Joined
Nov 25, 2016
Messages
804
Rear bumper - 2008

The main goal here was to get a receiver hitch on the rear so I didn't have to always push trailers. I also wanted a stronger bumper that I could use a high lift jack on and that would be able to take its knocks rock crawling. Besides, I needed to do something with the chunk of C channel that I'd had in my basement since building the front bumper 5 years before! (I had bought enough then to do both bumpers).

I did the same thing as the front where I made solid attachment points that slide inside the frame rails and are bolted it, with the tabs going through holes in the bumper and the bumper welded to the attachment points. I also trimmed off the bottom corner at both ends so the two bumpers match in appearance.

I didn't want the receiver to cost me any more departure angle than necessary, so I stuck the tube through the C channel rather than putting it underneath. To strengthen the bumper so towing wouldn't bow it back I boxed it between the frame rails by welding another length of C channel to the front of the main bumper channel, essentially making a square tube. The receiver tube goes through this front section as well, so it's better supported against the tongue weight twisting the receiver tube down. I left the receiver tube sticking out of the bumper far enough to be able to put the hitch pin in, and to make sure the draw bar wouldn't stick through the receiver tube and hit the rear tank (the front receiver is flush with the bumper so the hitch pin goes behind the bumper).

I welded a steel plate to the bottom of the receiver tube and to the bottom edge of the bumper. This was probably way overkill for gusseting the receiver, but it also gave me a solid place to attach safety chains.

I cut holes in the bumper to put a 7 pin trailer plug in, so I don't need to worry about banging it on a rock either. And finally I welded some tabs on the front of the bumper to mount a tractor utility light just outside of each frame rail. The lights mount low enough to project light back under the bumper for better reverse visibility, but high enough to be pretty well protected. I finally damaged them 8 years later, so they lasted pretty well, and the lights aren't that expensive either.

I'm really happy with how this worked out too. Like the front bumper, I like the simple, clean lines. And I like the solid jacking and tow points. The receiver mounted up that high means I need a pretty big draw bar drop on most trailers. And it puts my pintle hitch for my utility trailer awfully close to the spare tire so I need to swing the tire carrier open to work the pintle hook. But that's well worth it for having the hitch tucked out of the way.

picture.php
 
OP
OP
Nothing Special

Nothing Special

Sr. Member
Joined
Nov 25, 2016
Messages
804
Manual trans - 2009

As cool as the manual valve body was, the auto trans had to go. Overheating was the biggest issue. I knew I could upgrade the cooling system, but getting rid of the heat generated by the trans would go a long way. And the lack of compression braking was the clincher. OK for normal driving, but completely unacceptable off-road.

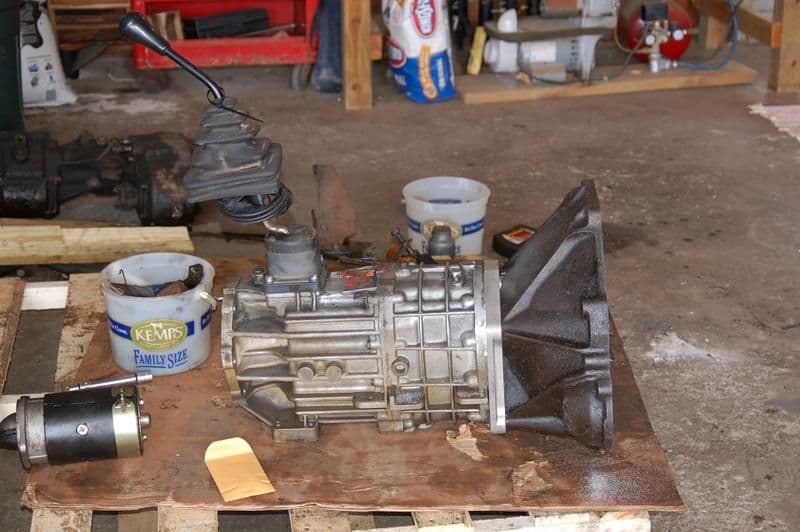
Still trying to save money, I decided to stick the original 3 speed back in, at least for then (as already noted, an NV3550 eventually found its way in). I hadn't junked the trans or the previous owner’s floor shifter conversion, but I had lost the bellhousing, flywheel and most of the clutch linkage with the original engine. I found a junkyard Bronco that could donate most of what I needed, so after a long, cold Minnesota winter day in a junkyard I was ready to start "downgrading".

The only issue I had reinstalling the trans was that the replacement engine didn't have one of the bosses for the clutch linkage. After staring forlornly up at it from a creeper for a while I figured out a way to tie the missing mounting point into the bellhousing. It's not as solid as the original, but it's plenty strong in the direction it needs to be.

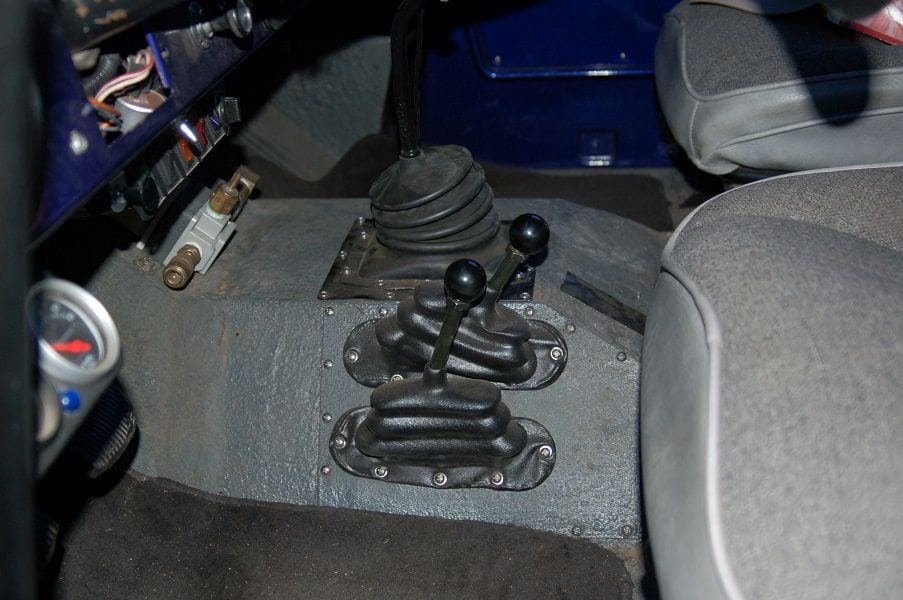
The jerry-rigged clutch link mount was tough to get a picture of, but here's a bad one. This picture is taken looking straight up from a creeper. The bolt that the green arrow points to is pointing straight to the left.
picture.php


I started with a piece of thin angle iron, I think from an old bed frame. The lower end is attached with one of the bolts that holds the thin sheetmetal access cover to the lower front of the bellhousing. The top end provides a mounting point for one end of the bellcrank in the clutch linkage. I had to run the bolt "the wrong way" through the bellcrank mounting hole because there wasn't room for the nut where the boss was supposed to be.

The bracket does nothing to keep the bellcrank moving side to side, but other mounting points on the bellcrank hold it in that direction. And it does very little to keep it from moving front-to-back, but again, other points take care of that. The only motion it really stops is up and down, and that's what was missing.

The other issue was that once it was all back together I had a pretty noticeable vibration. Turned out that the engine I got the flywheel from (as well as all older 302s apparently) was "externally balanced" while my rebuilt engine was "internally balanced". The correct flywheel, along with another new clutch (the other new clutch didn't line up with the holes in the new flywheel) and I was running smooth again.

Obviously I wish I'd never done the auto trans to begin with. If I hadn't I'd have a NV4500 and an Atlas in it and I'd have spent less overall than I did. But given my bad start, I was happy with this temporary step. I had compression braking again and the overheating issues were all but gone.

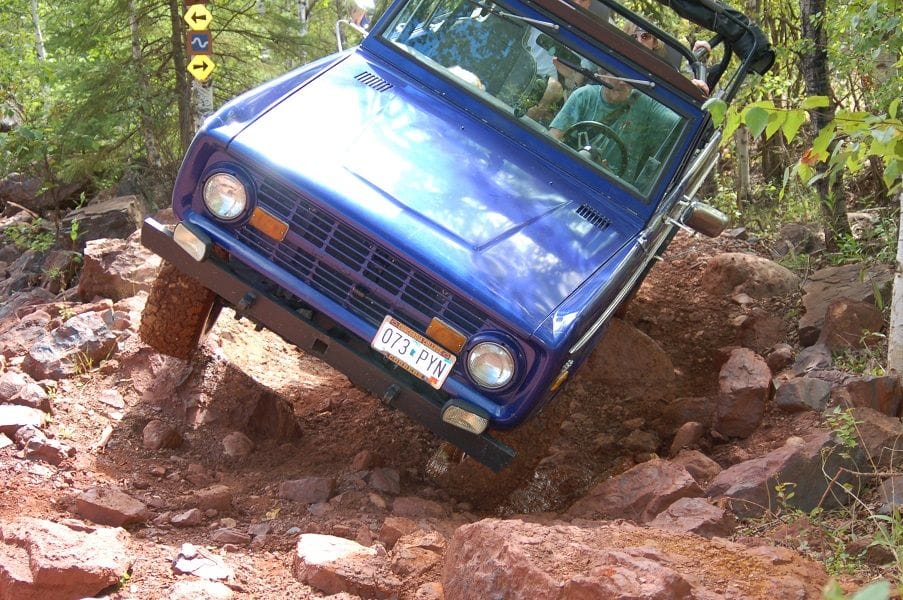
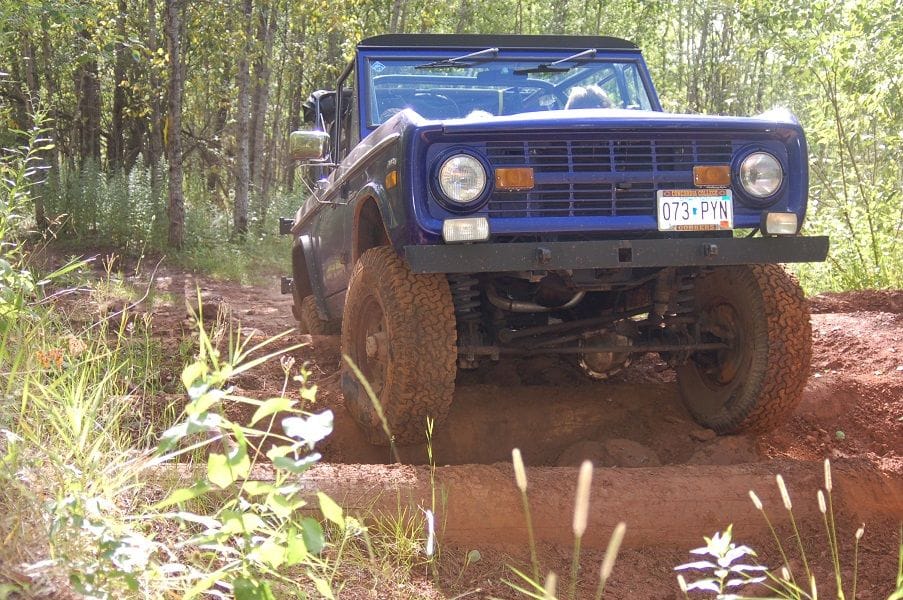
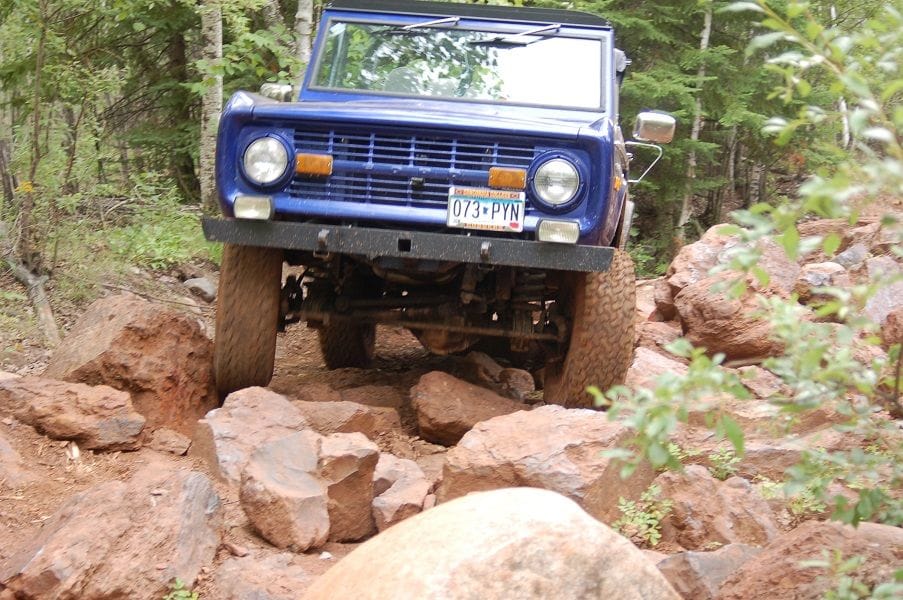
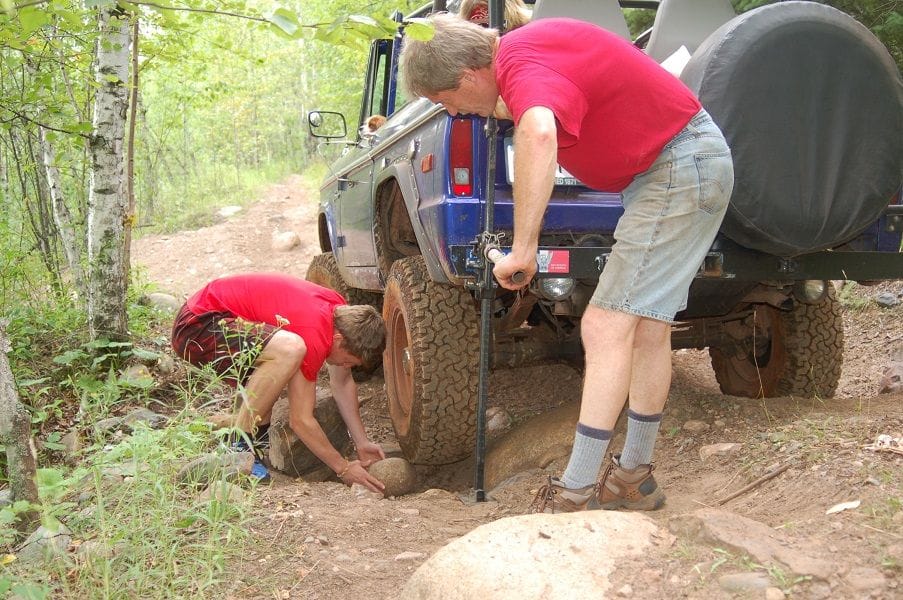
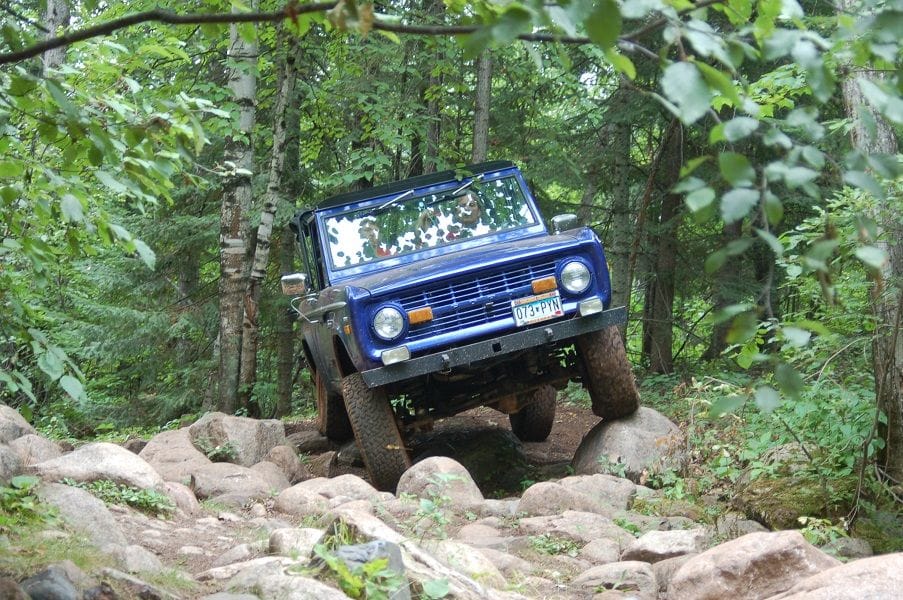
The big issue that it pointed out was the shortcomings of my engine. The original engine could pull away from corners in 3rd gear, but I needed to drop to 2nd now. That's just a symptom though, the problem was rock crawling. I didn't have low enough gears to go slow enough without stalling the engine. I had the same crawl ratio that my Jeep had, and that would go a lot slower with its 258 inline six idling. It makes me wish I'd have gone with a 351 instead.

I wasn’t thrilled with the gearing at high speed either. Long freeway drives with the 4.10 gears could sure use an overdrive. But this was fine for around town driving and it was good enough until I saved up the money for an NV3550 and an Atlas.
 
OP
OP
Nothing Special

Nothing Special

Sr. Member
Joined
Nov 25, 2016
Messages
804
Steering box - 2009

The Bronco developed a death wobble in 2009. The steering had been surprisingly tight for an old Bronco with a lift. Going through it now I traced it back to the steering box. I adjusted the freeplay out of the box, but a month or two later it was back. So it was time for a rebuild.

I mentioned before that a previous owner had converted it to power steering with an F-100 box. Napa had rebuilt boxes, but they weren't cheap! Still, it needed to be done, and just replacing it with the same thing was certainly the easiest.

That did solve my death wobble. The steering's been tight ever since. But I do kind of wish I had looked into a different box. I mentioned before that the F-100 box got in the way of the lower corner of the radiator tank on a radiator with reversed outlets for a serpentine system. When I later upgraded to a 4 core radiator I ran into more interference, even with the standard outlets. It also sticks down really far, which is nice with the lift (I don't need a drop pitman arm), but might be less nice if/when I lower it. I'm not sure what other steering boxes I could have gone with, but it would be nice not to have that huge F-100 box.

I posted this picture before, but it also shows the steering box where it hangs down just inside of the track bar bracket. You can't see it but the biggest part of the box is up above the frame where the lower radiator tank is.
picture.php
 
OP
OP
Nothing Special

Nothing Special

Sr. Member
Joined
Nov 25, 2016
Messages
804
Test drive – 2010

Things started slowing down a lot more on the project at this point. It was pretty drivable, pretty reliable and it was time to use it. As I said back in the "driveshafts" post, the scope of this project kept us from being able to make as many trips as we might have. Back with the Jeep we usually went fourwheeling on family vacations about 2 out of every 3 years. The last trip with the Jeep had been in 2006. We made one trip with the Bronco in 2007, and now we were in 2010 making the second. Plus now my kids were 14 and 16, the older one was talking about getting a job. Since we knew it might be the last family vacation we ever took, we tried to make it count.

We towed the Bronco back out to the Black Hills and spent most of a week there, being touristy but also getting in quite a bit of fourwheeling. Then we hooked up again and went out to Yellowstone where the Bronco was just the daily driver, including a highway run down to the Tetons.

It was a really good trip, and the Bronco hardly detracted from it at all. As noted earlier, the rebuilt 302 didn't idle down well enough to rockcrawl very easily with the 38:1 crawl ratio. But we still had fun with it, I drove it everywhere I would have driven the Jeep (just had to restart it more often) and both of my sons did some rockcrawling too (actually working the pedals for themselves some now). My older son even got to bury it in the mud (OK, full disclosure, he didn't think he'd make it and wanted to stop, but I told him to keep going, so he blames me for it).

Here are some pics from the trip.

picture.php


picture.php


picture.php


picture.php
 
OP
OP
Nothing Special

Nothing Special

Sr. Member
Joined
Nov 25, 2016
Messages
804
Carburetor - 2011

Earlier I mentioned the dead spot in the Holley ProJection fuel map. Relatively deep in the throttle around 2000 rpm the fuel completely shut off. This happened pretty frequently in moderately heavy acceleration. With the auto trans it was annoying, but with the manual, going from moderately heavy acceleration to strong compression braking was rather neck-snapping. It would actually skid the tires pretty frequently, and would sometimes chirp them when the fuel kicked in again.

I'm sure if I'd have called Holley about this back in about 2005 when I bought it they'd have taken care of it. And who knows, maybe they would have at this point, 6 years later. So I'm not trying to put down Holley since I didn't give their customer service a chance. But I decided to go back to a carb.

Some friends told me that the 2 bbl Autolite was one of the best carbs for rock crawling, that it stayed running when tipped all sorts of directions, or being shaken around. Plus it went with my desire to simplify things now. Unfortunately the original carb and intake manifold had gone away with the original engine (sigh...), so I found replacements in a virtual junkyard (used parts on the internet). A whole lot of carb cleaner later, as well as a rebuild kit, and they were good as new.

The carb didn't have all of the choke linkage, so I put a manual choke on it. I'd had an electric choke on my Jeep for a while and it never seemed to work right, always trying to be on too far or not far enough during warm-up. I fixed that by putting a manual choke on the Jeep, so I started there on the Bronco.

When I put the fuel injection on I had put an in-line high pressure fuel pump on the frame rail, ahead of the solenoid switching valve I had also added (now the dash switch takes care of actually switching the tanks as well the gage). So I just replaced it with a low pressure electric pump in the same location. The serpentine belt system spins the water pump the opposite direction so it requires a different timing cover which doesn't have a provision for a mechanical fuel pump, otherwise I'd have probably done that (spoiler alert, the Bronco now does have the original V-belt accessory drive and a mechanical fuel pump).

This all turned out pretty well. It started right up the first time I tried it, and the spark plug color looks good so even the mixture was right on. No more dead spot obviously. It hasn’t given me any fuel delivery problems, even rock crawling. The fuel mileage improved significantly, from 11.5 to 13.5. Cold starts are the one place the fuel injection really shined. I don't have any real trouble with it now, but my sons can't figure out the "dance" with the throttle and choke required to cold start it. And mixture issues at high elevation could be an issue if I ever get it out to Colorado. It would be nice to get back to the convenience of fuel injection. Or at least an automatic choke for the cold starts. But my oldest son was off to college by this point and my younger wasn't far behind, so I was the only one that needed to be able to start it anyway. EFI is pretty low on the budgetary priority list.
 
OP
OP
Nothing Special

Nothing Special

Sr. Member
Joined
Nov 25, 2016
Messages
804
V-belts - 2013

Remember that the water pump now was so far forward that there wasn't room for a fan between it and the radiator. The cooling system was still pretty marginal with the little electric fans that I had squeezed diagonally across the radiator. It wasn't overheating very often, but long, hard uphill pulls on a hot day would send the gage climbing. I wasn't in any hurry to do anything about it, but when I got the bellhousing and clutch linkage from the junkyard Bronco to put the manual trans back in, I also pulled everything from the timing cover forward so I could eventually go back to V-belts.

A leaking water pump in 2013 gave me the impetus to finally do this. By the time I had the radiator, fans, belt and water pump out there wasn't much more to remove.

I ran into a bunch of complications because it turned out the donor Bronco didn't have all original parts, so I had to source a few new parts, but eventually got it back together.

Once all was said and done, the only regret here was getting a 4 core radiator with my F-100 steering box. It's really not mounted quite correctly, but it's in and working.

And it completely took care of my overheating problems. Rockcrawling, even towing a 2000 lb trailer on a hot summer day leaves the temperature right where it belongs!

As a reminder, here's the same picture from an earlier post showing how crowded it was with the serpentine system. You all know what it looks like now that it's back to stock.
picture.php
 
OP
OP
Nothing Special

Nothing Special

Sr. Member
Joined
Nov 25, 2016
Messages
804
5 speed transmission - 2014

In 2014 I got the funds together for a 5 speed / Atlas swap! I decided against a ZF (didn't want to mess with a hydraulic clutch linkage or need to get a spacer or shorten the output shaft to mount an Atlas) and an NV4500 (more expensive, heavier and harder shifting). So an NV3550 got the nod. That should be plenty of trans behind my stock 302 and would almost bolt right up. I needed an adapter between the bellhousing and trans and a new clutch disk. Jeff's Bronco Graveyard had what I needed from Advance Adapters.

80-picture_php_pictureid_152016_7305db7a08410a1d3dfa08ad6a46c92734bd1d2a.jpg


Putting the trans in was difficult only because I'm cheap and didn't get a transmission jack. I put threaded rods in two of the bellhousing bolt holes, laid under the Bronco and bench-pressed the trans up into place. Getting it onto the threaded rods let me not have to hold the entire weight as I slid it forward. Of course I was only putting it in place so I could mark where I needed to cut the hole in the floor for the shifter, so I had to take it right back out again.

The hole for the shifter was entirely behind the reinforcing rib, which was nice.

After cutting the hole the tranny went back in again, hopefully to stay this time ;D The shifter went on with no issues. I had plenty of clearance to the dash in 1st, 3rd and 5th, and no problems in the "back" positions either! The shifter felt like it was a long way to the right, especially compared to the Hurst floor shift conversion on the stock 3-speed which put the tranny shifter right against my knee in 1st gear. Ultimately I did decide that it felt wrong (I kept missing the shifter when I needed to downshift out of 5th). So a few months later I ended up heating and bending it. Problem solved!

80-picture_php_pictureid_152655_db86953ee406d472e7180d493a2bde8a97982ded.jpg

80-picture_php_pictureid_152657_1750e5cf42fd1f7624c5fd255dbdcc1d6d09a3cb.jpg
 
OP
OP
Nothing Special

Nothing Special

Sr. Member
Joined
Nov 25, 2016
Messages
804
Atlas transfer case – 2014

Next was to decide on the transfer case, or more accurately, the gearing. I had already decided on an Atlas. I figured the crawl gears ought to make my 302 just fine for rock crawling so I didn't have to think about a 351 swap. I waffled around on the ratio, not sure if 4.3:1 gears would leave me hunting between low and high range too much. I considered 3.8:1, but that didn’t seem like it would buy me much at the high end of low range (20 mph at 2500 rpm in 5-low vs 18 mph with 4.3:1 gears). I also considered a 4 speed Atlas to get both 2.72:1 and 4.3:1 (and 11.7:1 as a bonus!), but I couldn’t even justify the cost to myself, much less to my wife. So ultimately I went with the 4.3:1.

I ordered the Atlas from Wild Horses and was told they were 1-2 weeks out on builds, but it showed up only a week later! So suddenly I had a busy weekend ahead of me!

I decided to read the instructions first, rather out of character for me. I was a little disappointed by the instructions relating to the shifters. Under "preparations" it says "detailed shifter assembly instructions can be found in The Final Installation section." But they aren't there. So I'm back to my normal method of just looking at it and trying to figure out where it goes.

I hoisted the case up into place to figure out which of the four clocking options I wanted to use and found that there was only one option. Only the lowest position cleared the frame, and even there it only cleared by about 1/8"! (pics below) As with the transmission, I lifted the case into place the (hopefully) cheap way, by laying on my back and bench-pressing the 110 lb case. I don't recommend doing it that way! I hurt all over after that (except in the wallet). But it did work.

Once I figured out where I wanted it clocked I had to lift it back out (more "ow"). Then I did the rest of the assembly on the work bench. It all went pretty easily with the exception of the shifters. Not having the case in the vehicle I couldn't figure out where the levers were going to end up, so I couldn't figure out what went where. I did get the basic layout understood though, so I figured I was ready to put it back in.

Putting the case back in took a few tries (my arms were still worn out from the first time). But I eventually made it. But with the case in position it was clear that there was no way the shifters were going to work. After some interweb searching it seems that the "Bronco" shifter is really only for Broncos with the C4 trans. Having the levers come out the side of the tunnel seems to be necessary when using other transmissions, and the "Bronco" levers are bent wrong to do that well. I called Wild Horses and they sent me a pair of straight "universal" levers right away, no charge (great customer service!). I also decided to upgrade to the Heim joint linkage as well.

OK, time for pictures! Here is a picture showing how big the Atlas is compared to the Dana 20.

picture.php


Here are a couple showing how little clearance there is between the Atlas and the left frame rail (and this is with it clocked in the lowest position)!

picture.php


(I added the arrows to this pic to make it more clear how it's oriented)
picture.php


Looking in from the side

picture.php


The "Bronco" shift levers installed correctly but coming out the side of the tunnel.

picture.php
 
OP
OP
Nothing Special

Nothing Special

Sr. Member
Joined
Nov 25, 2016
Messages
804
Transmission crossmember and t.case shifters - April 2014

There’s an Advance Adapters trans crossmember to use with the 3550 trans. I considered using it, but it said it needed to be modified to use with an Atlas transfer case. I also have dropped radius arm brackets which are kind of wrapped around the stock crossmember brackets, so I was afraid I'd need to modify it for those as well. So I decided I could make my own for less money anyway.

As I expected, it wasn't that hard to do myself, it just took a LONG time. Since I don't have a welder at home I was cutting, marking and clamping at home, taking it to work to tack it, bringing it back home and test fitting it, and then repeating the cycle with the next section. But I finally got it done, slopped a little paint on it and got it installed! Before you look at the picture below I need to warn you, my fabrication is DEFINITELY function before form. Some fabricators make even the hidden brackets look like works of art. That ain't me. But it'll hold together.

I did need to take the t.case back out to get the crossmember in (and out, and in, and out, and in...). So after getting the crossmember buttoned up I bench pressed the t.case back in again, I think for the last time:)

The straight sticks Wild Horses sent are a lot shorter than the "Bronco" sticks. They’re kind of a long way down when I need to reach for them, but they aren’t bad. And the left stick (for the front driveline) is pretty close to my right leg. My leg kind of leans on the shifter for the front when it's in 2WD. It's mildly annoying at times, but not enough that I'm not just going to live with it. It's fine in 4-high and 4-low.

OK, time for pictures. Here is my work of... well, not art, that's for sure. This is in the yard after being painted.

picture.php


And here it is installed. I used a transmission mount from a 2002 Jeep Wrangler (the vehicle the tranny came from) and built the crossmember around it. I bolted the left end of the crossmember to the 4 holes that the original crossmember bracket bolted to. And I used the original bracket on the right side, bolting the new crossmember to it. The front driveshaft will go under the crossmember to the left of the tranny, and the exhaust will run above the crossmember to the right of the tranny.

picture.php


And last, here's where the shifters all ended up. The t.case is in 2WD high (right stick back, left stick in the middle) and the tranny is in 1st in this pic.

picture.php


I also got a couple of little things taken care of. I bought the back-up light switch connector for the Jeep. It plugged right into the tranny and I spliced it into my harness and my backup lights worked, first try!

And I ordered the Atlas with a speedo pickup, but it's a Jeep style, so the Ford speedo cable doesn't attach to it. But Wild Horses sells speedo cables with the Jeep end at the t.case and the Ford end at the speedo. I got one of those and it went in pretty easily (working under the dash was never easy, but it gets harder as I get older and stiffer and more far-sighted). My speedo was pretty far off before (neither the previous owner or I ever bothered to correct for the bigger tires). But I ordered the gear off the chart Advance has, based on my tire size and axle ratio and ended up with a speedo that reads pretty much right on!
 
OP
OP
Nothing Special

Nothing Special

Sr. Member
Joined
Nov 25, 2016
Messages
804
New exhaust and odds ‘n’ ends - April 2014

I towed it to a muffler shop and had them try to figure out how to fit the exhaust in. The problem is crossing over from the driver's side. The Atlas is too wide to run a pipe past it (see pics earlier). After searching on the internet and staring up from a creeper for a while I came up with three options, none of which was perfect: above the front diff in the oil pan cut-out, between the pan sump and the bellhousing, or under the bellhousing. I gave all of those options to the shop and they picked behind the sump. Down sides are that it's right behind the oil drain plug (which is a pain changing the oil) and that it's in the way for dropping the pan and maybe changing the starter. But it was tucked up out of the way and it was in, so that worked for me!

Here's a picture

picture.php


I had to get both driveshafts shortened. The Atlas front output is in the same place as the Dana 20, but the NV3550 is 1" shorter that the stock 3 speed, so the front shaft needed to be shortened an inch. And the Atlas is about 4" longer than the Dana 20, so the rear needed to be shortened about 3".

Two single stick shifter boots from Wild Horses worked a lot better than a single twin stick boot with the sticks coming out of the side of the tunnel. And a trans shifter boot for a '73 - '76 F-Series worked for the trans.

I reinstalled the hand throttle on the trans shifter (it had been on the t.case shifter before the trans/t.case swap).

'Nuff talking, here're the pics. The trans is in 1st (left and up), and the t.case is in 2-high (left stick in center, right stick back) in these pics.


80-finished_shifters_9d9feacd7ef859eab6f64ef6c6c5b3708b7ee2b0.jpg


80-finished_shifters_2_3b9d46d30ad58418b512a44c1838549dfa4693e3.jpg
 
OP
OP
Nothing Special

Nothing Special

Sr. Member
Joined
Nov 25, 2016
Messages
804
NV3550 – Atlas retrospective – July 2014

A couple months after getting it all buttoned up we took it on a trip to the Black Hills for a shake-down run / family vacation (our second “last family vacation” with the “kids”, 18 and 20 at this point).

This was a GREAT addition to my Bronco! It sure wasn’t cheap, but I’ve never regretted having spent that money!

The NV3550 is more truck-like than I expected. It shifts pretty lightly, but with really long throws, and you can't shift it very fast. I remember my buddies NV3500 (basically the same trans but in a Ch*vy S10, and with an integral bellhousing) shifting more car-like. It's not at all bad, but it could be better. And for how un-car-like it shifts I feel like I could have a more bullet-proof trans. Still, I’m sure it’s strong enough for my application and it does shift well enough that it doesn’t detract from the driving experience. The gear spacing is good too. With my 4.10 gears and 33” tires I usually start in 2nd, but 1st is there when I’m towing the boat, or starting on a hill. And it’s sure nice having one more gear to shift into on the highway! It’s noticeably less buzzy / busy at 55 – 65 mph, simply more pleasant to drive! Even with the overdrive I could still pull a taller axle ratio. 3.55:1 might be ideal for the street, but the 4.10s aren't bad, and I'm not giving up any of my new crawl ratio!

Because the Atlas is the real winner! I didn't do much with the original linkage, but it does seem better with the heims. No slop, but no bind either. It shifts in and out of gear a lot better than the Dana 20 did too. My biggest concern was that I'd end up hunting between low and high range a lot on the trails. I did a little, but not too much and the t.case shifts easy enough that it wasn't bad when I had to. I did end up running in low range 5th a fair amount, but hey, that's what it's there for. And the lower 1st gear (4.01:1) meant I didn't have to grab for low range as soon as I might have.

But in 1st gear-low range it's a completely different vehicle! Where before I needed to keep the engine rpm above about 1200 (3.4 mph) to keep from stalling too often in the technical sections, now it will idle at 800 rpm, which with the lower gears is 1.1 mph. Energy is proportional to the square of the speed, so that means I'm hitting the rocks with one tenth of the energy as I used to. And I stall the engine less doing it! That's HUGE! I can't begin to tell you how much I love this set-up off road!

OK, picture time! This first one is on a hill that was so steep it was difficult to walk down on foot. The low gearing made it a breeze to stay in control.

80-2014_hill_92cc29cbfaae0dc36833933ee16000e42b605945.jpg


The next two are walking over some bigger rocks. Set the hand throttle up a bit if 1.1 mph was too slow and it just walked over everything I was willing to attempt (I was running solo and really didn't want to roll it or break anything important).

80-2014_rocks_4da1dc9065645907b1a798daaba5c8461b2e098b.jpg


80-2014_rocks_2_0d67c8abac8082d61c5b39627d1a335b0f649da5.jpg


And yes, it's a Bronco with short radius arms and urethane bushings, so it doesn't have much front-end flex.

80-2014_tire_pick_afbc29aeb56ebd7fea0a1aeda6a252b87e242028.jpg


I finished the trip with the most damage I've ever had from a fourwheeling trip. Two crunched rear quarter panels, a broken-off antenna (and both wipers) and some pretty bad "pinstriping" down the sides. But I have the Bronco to use it, so I didn't feel too bad.
 
OP
OP
Nothing Special

Nothing Special

Sr. Member
Joined
Nov 25, 2016
Messages
804
Rear fender flares – April 2015

Things slowed down on this as a project at this point. The biggest project since the trans / t.case was to add rear fender flares. After paying for an expensive vacation, when I unexpectedly got a bonus I told my wife that I thought we should just put it in the bank. But she said "can't we use some of it to put fender flares on the Bronco?" OK, twist my arm ;D

A previous owner had cut out the rear fenders and installed fiberglass flares. I took the flares off to paint it back in 2004. The flares were kind of cracked, so I tossed them, figuring eventually I'd put urethane flares on it. Well, that never made it to the top of my budgetary priority list, so the ugly cut-out fenders still showed. My wife was tired of that, so now I didn't need to pay for it out of my Bronco budget!

I ordered a set of "Gorilla Warflares" from Wild Horses. They came with steel sheet metal screw to attach them. I wasn't thrilled with that, so I picked up some stainless machine screws, washers and nuts. I was able to re-use the holes from the original flares along the top and most of the way down the back, but these flares didn't come down as close to the front of the tire as the originals had, so I had to drill new holes there, and even cut away more sheet metal. The biggest part of the job was trying to straighten out some of the damage to the rear quarters (since the flares attach there).

OK, here are the pics. First is the driver's side before putting the flare on.

80-drivers_before_1f74e27acd05b12024968b57d88aed6b81633f5b.jpg


And here's the driver's side with the flare:
80-drivers_flare_4eba751905e8e1d6075e3e45b8f00fe248a0a038.jpg


The passenger side before (you can see the worst of my fourwheeling damage here):
80-passenger_before_e0ed7882329a52700f7cec9fb4eae3c4b54a4f71.jpg


... and after (where you can also see my gorilla tape rust repair on the rocker)
80-passenger_flare_73c46dbc8abc2822340c659e6c493f2dce223e83.jpg


Not a lot of “retrospective” on the flares. The Bronco has only been ‘wheeling once since then, and they held up fine. It does give a much more "finished" look, and my wife is happy! And any time spending money on one of my projects makes my wife happy, that's a double win!
 
OP
OP
Nothing Special

Nothing Special

Sr. Member
Joined
Nov 25, 2016
Messages
804
Maintenance and repair – July 2015

At this point it was time for some maintenance and repair work, starting with a front brake job. The pads were down to the rivets, so it was definitely time. I have the same Ch*vy calipers and pads on the rear and (obviously) they were hardly worn at all, so I only did the front. One funny (or sad?) thing was that I took the rotors in to a shop to be turned and they said they didn't know if they could turn them because they didn't know what the minimum allowed thickness was. I had to point out to them where it was cast into the rotor!

Then I started having trouble getting the hood to unlatch. It turned out that the "tube" in the main latch assembly was cracked, allowing the "pin" on the hood to push backward, so the catch wouldn't release. I decided to get a new latch rather than try to fix it.

So again, a couple of nothing projects, but that's what you get when you use a 44 year old truck as a daily driver!
 
OP
OP
Nothing Special

Nothing Special

Sr. Member
Joined
Nov 25, 2016
Messages
804
Fourwheeling – August 2015

We were able to get in a third “last family vacation” last summer. More of a mini-vacation as we spent three days in Northern Minnesota at the Iron Range OHV park. It was a great time! I again was blown away by how well the 70:1 crawl ratio works. The Bronco just slowly walks over everything. Other than on hills I almost never touched the throttle. When it did stall I could just restart it (without the clutch) and it would just trundle over whatever had stalled it as it restarted. And when I did hit a diff into a big rock it wasn't a hard hit. After getting home we watched the video we took, as well as video of taking the same trails in my old CJ5 9 years ago (35:1 crawl ratio). Man that Jeep was moving fast! Not a good thing in rock crawling! Have I said how much I love the Atlas 4.3:1?

We did have a few minor mishaps. The driver's side rocker has some new creases, the aluminum rims have some pretty big gouges and the front diff cover has a new dent. The passenger front tire slipped off a rock and the Warn hub took the brunt of the hit, even shoving the front end over a little as it hit! Surprisingly there's just some minor cosmetic damage to the cap. And once the t.case levers jammed up on me. I pulled the cover off and found that they were hitting the cover pretty hard. I loosened the nut that holds the levers in place (it was TIGHT) and repositioned them, which took care of it, but it begs the question of what caused it. I don't think the levers themselves shifted, so likely it was the motor mounts or the trans mount. Everything looks good, and there are no weird noises or vibrations, so I'm still just driving it. But sometime I'll have to take a closer look.

Anyway, here are some pictures:

"Keep your hands inside the vehicle at all times while the ride is in motion" (in other words, don't grab onto the roll cage when things get tippy like both my son and I are doing here). And looking at the left front tire, I'm sure glad I didn't pop the bead!
80-dsc_3521_bedf62b013335a40e4b89d8c54b69c82f1493cab.jpg


80-dsc_3573_07010ccc72aa205bca803d209a6d3f8de4a95865.jpg


80-dsc_3606_23d914e200ba8f0f8eebaea5836c5addeeb11fdf.jpg


My younger son drove on a lot of the rough stuff too!
80-dsc_3684_fe51581950d10b4ad5390c8a8f5929a68651bc13.jpg


80-dsc_3695_c84c7eba0a8e288cf8adbae36144b1b47cf69f47.jpg


One of the rare "steep hill" pictures where the hill actually looks steep in the picture!
80-dsc_3717_afc0a0eaefb7abf9734b2cc13776dd911c1bdb77.jpg


80-dsc_3739_0b7e52bcd9796ffa98f5eb48db424ea48aad4e4a.jpg


The only time I had to use a jack. I was able to back off of anything else I got stuck on.
80-dsc_3770_e8e5d4c270d227882a4f8a02c3971a7d7ed987db.jpg


80-dsc_3780_d8ed0d463470f79837725eb0c7d2ceecc6197f2c.jpg
 
OP
OP
Nothing Special

Nothing Special

Sr. Member
Joined
Nov 25, 2016
Messages
804
Seat repair – April 2016

It was time for a little more work on the Bronco. The previous summer my son, sitting in the back seat, asked why it looked like something sharp was trying to poke out of the back of my driver's seat. It seemed clear that something had broken with the lumbar support. So I cranked the lumbar support all the way down and whatever it was quit trying to cut through the seat cover.

I meant to fix it over the winter, but you know how plans like that go. All of a sudden it was spring, and almost time to pull the Bronco out of the garage! So I finally pulled the seat out and took the seat cover off.

I've got pretty nice MasterCraft seats in the front of my Bronco. They are suspension seats, so it turns out they come apart pretty easily. Everything is tied together.

Once I got the cover off I found the problem right away. The metal frame of the lumbar support was supported on some mesh fabric and the sharp edge had cut through. Then it cut the cords that were holding the tension in the seat fabric and was now supported just by the seat cover. You can see it poking through the big cut in the mesh fabric in the picture in the upper left.

Eventually I pulled the passenger seat out and took the cover of it. That seat had a thick piece of vinyl between the lumbar support and the mesh, so it seems like my driver's seat was a quality control problem, not a bad design. I did contact MasterCraft and, after some delays in the conversation (mostly due to me) they said that if I sent the 13 year old seat in to them they'd fix it for free.

That seemed fair, but I didn't want to wait that long. So I quilted some denim material over both sides of the cut in the mesh (upper right and lower left pictures), then I pop riveted a piece of plastic over it (I cut the plastic out of an old mini-boggan sled). The denim should hold the mesh together pretty well, and the lumbar support assembly will slide nicely on the plastic without cutting anything. After lacing it back up with some new cord and putting the seat cover back on it's as good as new!


80-seat_repair_31d39a880900d853ae196ccf411585b36559d79d.jpg
 
OP
OP
Nothing Special

Nothing Special

Sr. Member
Joined
Nov 25, 2016
Messages
804
Mechanical fuel pump – May 2016

This started as another repair project. Driving home from work in the rain I ran out of gas in the aux tank. When I switched to the main it wouldn't start. So I got to take a walk in the rain and then come back with my truck and tow bar to hook it up on the shoulder (in rush hour) and tow it back home.

Turned out to be the fuel pump (no surprise). When I had the EFI on it I needed a high pressure electric pump. Which worked out well because with the serpentine belt system it had then it didn't have a provision for the mechanical fuel pump. When I switched back to a carb I had to go with a low pressure electric pump because of the serp system. I put it right after the tank switching valve, so it wasn't as close to the tank(s) as would be ideal, but it seemed like the best bet.

That fuel pump actually died very early, so I replaced it with another (but different brand). That's the one that died on me now after maybe 5 - 6 years.

But I don't have the serp system anymore, so I'm back to a timing cover for a standard rotation water pump which has a provision for a fuel pump. And I verified that my rebuilt engine has the fuel pump eccentric when I replaced the timing cover.

So rather than putting another electric pump in I went back to a mechanical fuel pump. A pretty easy 1-evening project. On the first test drive it ran fine (as expected), and the fuel pressure stayed rock-steady at 3.5 psi rather than wandering around between 2 and 4 psi like the electric did. This should be a lot more reliable than the electric!

After a little more driving, I realized that the electric fuel pump might have been causing some drivability problems that now seemed to be gone! The first one made some sense to me. Before the engine was really touchy about how much choke I gave it (manual choke) while warming up. Now it seems a lot more tolerant of a little more or a little less choke. The higher fuel pressure effectively gives a higher float level, and I know from my putzing with the Holley I had on my old Jeep that a low float level could give some annoying drivability issues, especially when cold.

The second has me a little confused (but I'll take it anyway). Before, after heat-soaking a while when shut down after it was up to temperature, it would typically act like it was flooded. It didn't want to start without holding the throttle open, and there'd be a gassy smell to the exhaust right away. I always figured that the carb was heating up, so the gasoline expanded and pushed its way into the throat, puddling in the intake manifold and leading to the flood. I could prevent that from happening by shutting off the electric pump a little while before I shut the engine off (reducing the amount of gas in the carb). But now it seems to start right up after a hot soak. If anything I think it ought to be worse now. The higher float level should mean more gas will push into the intake manifold. So I really don’t understand why it’s better, but I'm liking driving it a lot more!
 
OP
OP
Nothing Special

Nothing Special

Sr. Member
Joined
Nov 25, 2016
Messages
804
Wish list and pipe dreams - 2017 on

That catches you all up to where I am with it now. As a “project” it's been pretty much wrapped up for a while now. That said, no project vehicle is ever finished, and I do have some things in mind for the future. As I do more I'll add them onto this as a more typical build thread. So look for updates, but don't hold your breath.

Winch
I have front and rear receivers, so a receiver mount is probably the way I’ll go. Just waiting for it to top the budgetary priority list.

Rust repair
I'm getting some rust eating through the rocker right below both doors. I’ve put Gorilla tape over the worst of it, but I'll have to go at it for real at some point. The B-pillars aren’t great either, and I'd like to have something I wouldn't worry about driving in Minnesota winters. So I’m leaning toward a ‘glass tub.

Tires
The 33-10.50x15 BFG ATs aren't a bad compromise. But I'd like to get skinny 33s with all-season tread for the street and wider 33s (or maybe 35s) with a much more aggressive tread (maybe a Swamper TSL radial) for fourwheeling. Bead locks would be sweet on the aggressive tires too.

Suspension
I’m not thrilled with the height, and as my wife and I get older it doesn’t get easier to get in. So sometime I might lose the lift. I certainly don't need this much lift to clear my 33/10.50-15 tires, not sure if I do get bigger tires.

Articulation
This might conflict with lowering the ride height, but I wouldn’t mind more articulation in the front. Maybe long arms? Or going back to rubber C-bushings?

Rear locking hubs
They make it so much easier to flat tow when you don't have to crawl underneath to remove and then reinstall the rear driveshaft. This might require switching to a different axle, like maybe a D44, if I can't figure out how to do it on a 9". We'll have to see how often we go fourwheeling as empty-nesters to see if it'll be worth doing this.

Front selectable locker
I've got a Detroit in the rear but the front is open. I'd like to put something like an OX or ARB in the front.

Roll cage mods
I'd like to add grab handles and some speaker mounts to the cage.

Fuel injection
Pretty low on the list, but it would be nice to get back to the nice cold-starting of a fuel injection system. But other than that the carb works really well, so this one's not too likely to make it to the top ever.

So that's about it for now. Thanks for following along, and I'll let you know as things change!
 
Top