


Community
Message Forum
Photo Gallery
Event Calendar
Book Reviews
Bronco Wallpaper
Bronco FAQ
Link Back to CB!
Photo Gallery
Event Calendar
Book Reviews
Bronco Wallpaper
Bronco FAQ
Link Back to CB!
Buy / Sell


Bronco Tech
3 Arm Wiper Setup
Fix Motor Mount
Roll Cage Braces
Throttle Body 65mm
Wheel Alignment
Heat Riser Replacement
Vent Window Repair
Center Console Mount
Straighten Bumper
Ford 6R80 6 spd
More Tech...
Fix Motor Mount
Roll Cage Braces
Throttle Body 65mm
Wheel Alignment
Heat Riser Replacement
Vent Window Repair
Center Console Mount
Straighten Bumper
Ford 6R80 6 spd
More Tech...

Install the app
-
Welcome to ClassicBroncos! - You are currently viewing the forums as a GUEST. To take advantage of all the site features, please take a moment to register. It's fast, simple and absolutely free. So please join our community today!If you have problems registering or can't log into your account, please contact Admin.
You are using an out of date browser. It may not display this or other websites correctly.
You should upgrade or use an alternative browser.
You should upgrade or use an alternative browser.
BroncoBub Build
- Thread starter BroncoBub
- Start date
- Joined
- Mar 8, 2007
- Messages
- 81,747
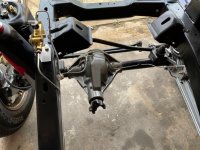
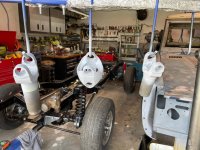
Have a rolling chassis again.
outstanding....
OP
OP
- Joined
- Oct 14, 2018
- Messages
- 708
If a clean chassis is a happy chassis, yours must be ecstatic - nice work!
Thank you!
OP
OP
- Joined
- Oct 14, 2018
- Messages
- 708
outstanding....
Thanks it’s been worth the effort!
OP
OP
- Joined
- Oct 14, 2018
- Messages
- 708
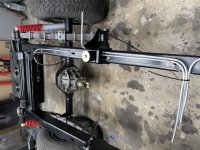
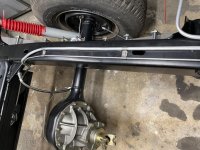
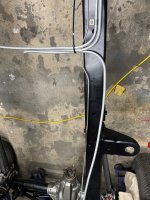
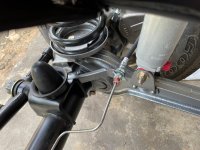
Since I'm keeping the stock 2 tanks system I was playing with line routing. This is a mockup. Would there be anything wrong with this configuration? Than going along frame to fuel pump and brakes.
Attachments
- Joined
- Oct 25, 2016
- Messages
- 941
Hey Bub, I also have the two tank set up and used the top of the frame rail for routing a vent line from the aux tank. The only drawback that I can see would be if you had to work on any of the lines later, would you be able to access them ok when the body is back on.
OP
OP
- Joined
- Oct 14, 2018
- Messages
- 708
Hey Bub, I also have the two tank set up and used the top of the frame rail for routing a vent line from the aux tank. The only drawback that I can see would be if you had to work on any of the lines later, would you be able to access them ok when the body is back on.
I thought about that also, I am installing a 1" body lift and if I had to work on the lines I should have enough room to get a allen wrench on the screw heads.
Thanks Chuckyb for responding,
Bub
OP
OP
- Joined
- Oct 14, 2018
- Messages
- 708
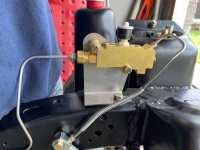
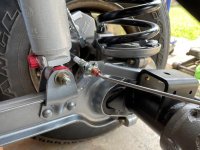
Installed the rest of the brake lines and test fitted the proportioning valve. Need to take the bracket off that holds the valve on and paint it so it won't rust.
Attachments

Last edited:
OP
OP
- Joined
- Oct 14, 2018
- Messages
- 708
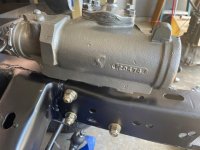
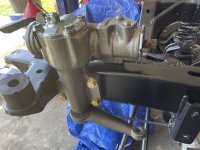
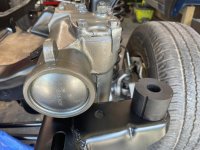
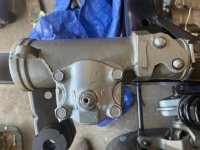
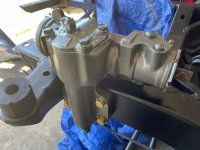
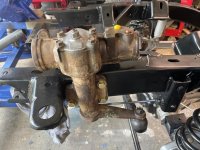
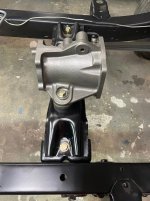
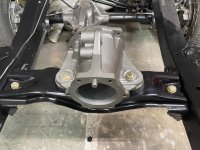
Steering Box Rebuild
Rebuilt the steering box and restored it back to new condition..
Rebuilt the steering box and restored it back to new condition..
Attachments

OP
OP
- Joined
- Oct 14, 2018
- Messages
- 708
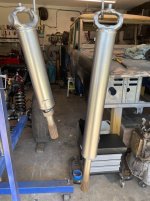
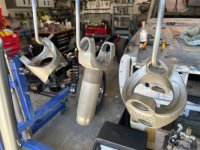
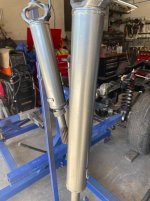
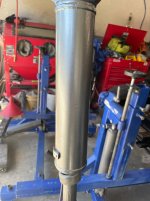
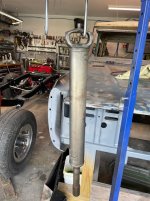
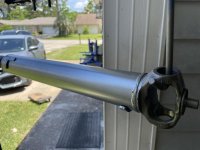
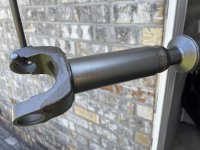
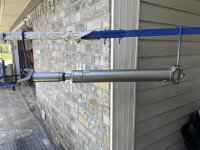
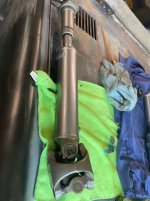
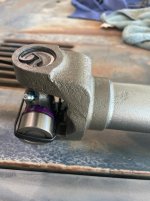
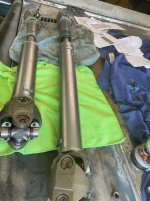
Started the resto of the drive shafts. Painted the shaft with steel color and the yokes with a cast iron grey color. Need to finish up some more details.
Attachments
OP
OP
- Joined
- Oct 14, 2018
- Messages
- 708
- Joined
- Mar 8, 2007
- Messages
- 81,747
Just need to assemble them and install new universal joints. On to the next phase...Engine and trans next. Just to let you guys know....my wife calls me anal too!
nothing wrong with being particular.. lol

OP
OP
- Joined
- Oct 14, 2018
- Messages
- 708


OP
OP
- Joined
- Oct 14, 2018
- Messages
- 708
Everything is coming together nicely
Thanks Rocko
OP
OP
- Joined
- Oct 14, 2018
- Messages
- 708
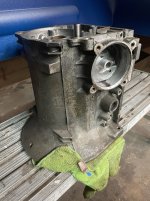
C4 Housing
Prepped the C4 for painting. Degreased it cleaned it degreased it cleaned it! Painted. The transmission is getting rebuilt as of this posting.
Prepped the C4 for painting. Degreased it cleaned it degreased it cleaned it! Painted. The transmission is getting rebuilt as of this posting.
Attachments


Last edited:
OP
OP
- Joined
- Oct 14, 2018
- Messages
- 708
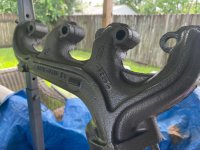
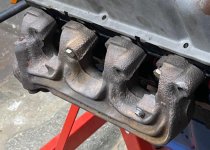
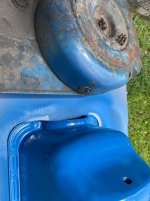
After bead blasting the exhaust manifolds, cleaning process ready for paint.
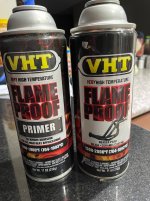
I used the exhaust paint by VHT and followed the off engine directions for curing the paint. I must say they came out great!
Off the Vehicle
Paint must be completely dry before curing
Heat to 250°F (121°C) for 30 minutes
Cool for 30 minutes
Heat to 400°F (204°C) for 30 minutes
Cool for 30 minutes
Heat to 650°F (343°C ) for 30 minutes
Pictures are after bead blasting, than during curing and final product.
Attachments


OP
OP
- Joined
- Oct 14, 2018
- Messages
- 708
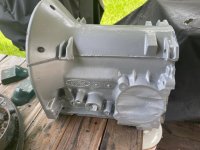
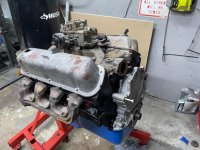
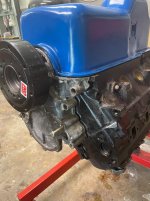
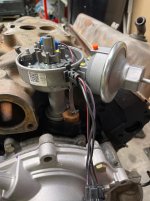
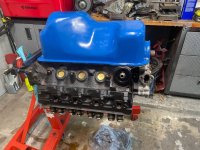
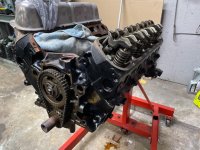
Prepping the engine for assembly and paint. Need a few more parts (alternator brackets and water pump pulley). Making sure all pulleys align correctly etc..More to come later.
Attachments
-
 IMG_0230.jpg121 KB · Views: 37
 -
 IMG_0225.JPG156.3 KB · Views: 34
 -
 64626047258__58C04CE7-2529-4A04-8A89-67BD82C589E2.JPG140.2 KB · Views: 35
 -
 64608372638__14B92FCF-1CC1-46C3-9CD6-00587E862760.jpg114.3 KB · Views: 35
 -
 64555886455__72C45B30-DF5D-41C2-A94A-7C435A8744E8.jpg130 KB · Views: 37
 -
 64548938751__34393E6A-D160-42BE-B826-D3F6186FF492.jpg125.2 KB · Views: 36
 -
 64521586139__C9E5374F-1696-41FE-BAE1-23733E9E1DA5.JPG172.1 KB · Views: 37
OP
OP
- Joined
- Oct 14, 2018
- Messages
- 708

Similar threads
- Replies
- 11
- Views
- 329