Wow! You are really moving along.


Community
Message Forum
Photo Gallery
Event Calendar
Book Reviews
Bronco Wallpaper
Bronco FAQ
Link Back to CB!
Photo Gallery
Event Calendar
Book Reviews
Bronco Wallpaper
Bronco FAQ
Link Back to CB!
Buy / Sell


Bronco Tech
3 Arm Wiper Setup
Fix Motor Mount
Roll Cage Braces
Throttle Body 65mm
Wheel Alignment
Heat Riser Replacement
Vent Window Repair
Center Console Mount
Straighten Bumper
Ford 6R80 6 spd
More Tech...
Fix Motor Mount
Roll Cage Braces
Throttle Body 65mm
Wheel Alignment
Heat Riser Replacement
Vent Window Repair
Center Console Mount
Straighten Bumper
Ford 6R80 6 spd
More Tech...

Install the app
-
Welcome to ClassicBroncos! - You are currently viewing the forums as a GUEST. To take advantage of all the site features, please take a moment to register. It's fast, simple and absolutely free. So please join our community today!If you have problems registering or can't log into your account, please contact Admin.
You are using an out of date browser. It may not display this or other websites correctly.
You should upgrade or use an alternative browser.
You should upgrade or use an alternative browser.
1974 fiberglass tub dd build
- Thread starter MrT
- Start date
Thanks!Looking Good!
I need to be driving it soon ;DWow! You are really moving along.
AbsolutelyGreat to know folks w/skills we don't have right")
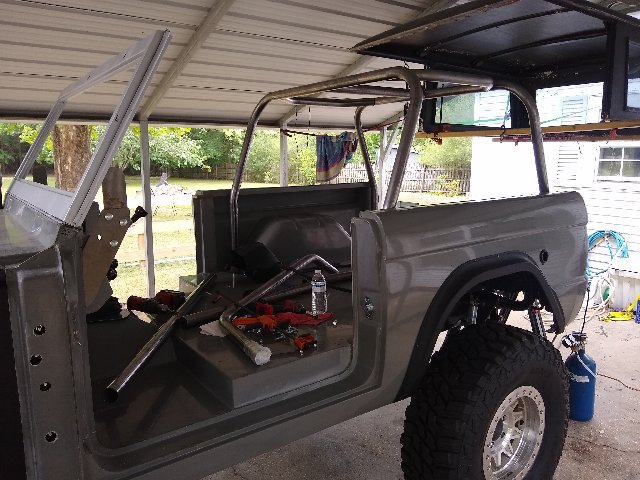
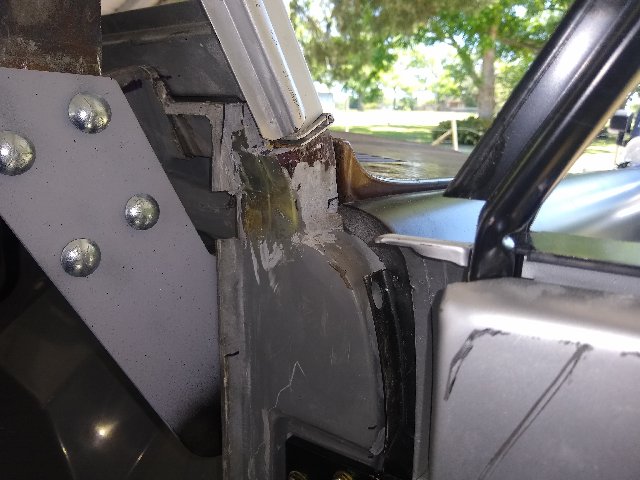
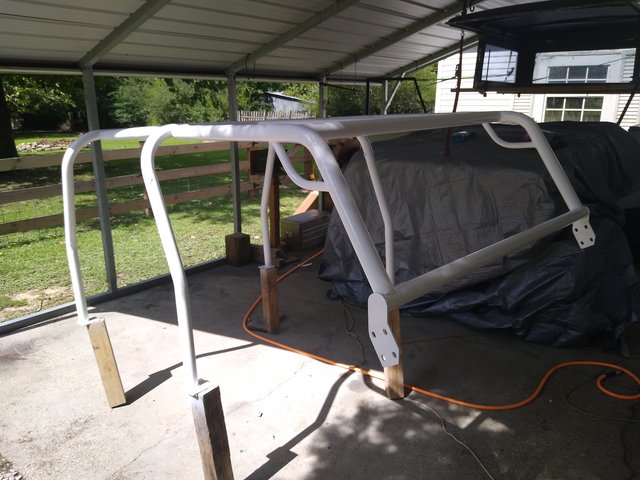
I started fitting up the plate style cage from TBP's

I didn't know how any cage would work with the glass body but this couldn't have worked out any better if both companies had collabralated together. There is a steel frame of sorts sandwiched in the glass. There is a 2x2 post on each side of the door openings and another on each side of the tailgate. These are tied together front to back and side to side at multiple points. All four of the bolts on each side plate are through bolted through the front post. I drilled 1" holes for access and will use plugs to fill before the fenders go on. The rear legs have one grade 8 bolt going through a bar that connects the two tailgate post and also the rear body mounts. It's not Nascar ready but it is connected pretty well. I am going to tie the legs behind the front seats to the frame later.

There was some minor trimming.

Lots of fitting...
All tacked together.

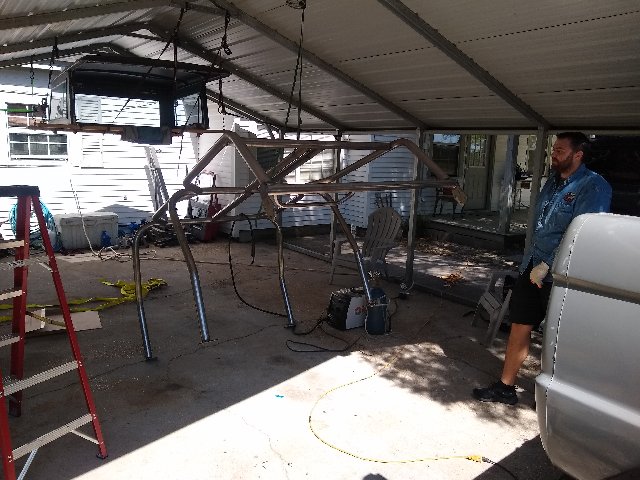
Pulled the cage.
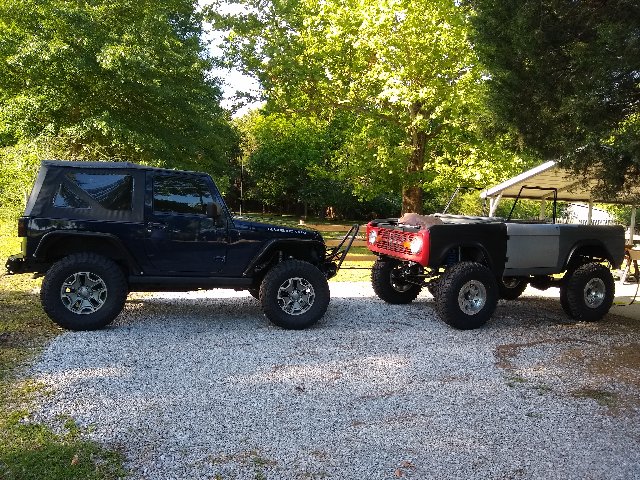
I had to winch the Bronco out with the Jeep...
And welded it all up. We were able to use the straps to rotate the cage for good positions for welding.
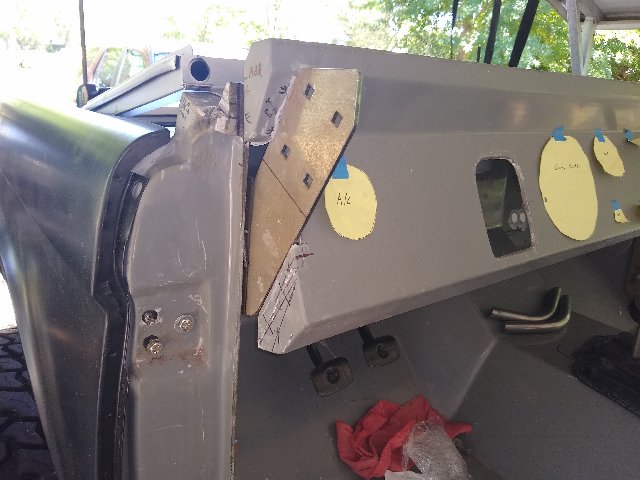
I spent a good bit of time fitting the dash and the plate. I also worked on the sides where the door seal goes but I guess I forgot to take any pictures.
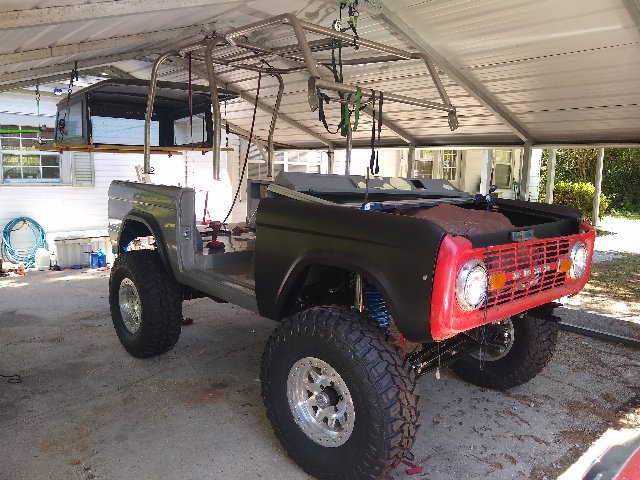
My front fenders were both going up in the front so I shimmed the body mounts by the front door post and still ended up having to drill out the spot welds to remove the mounting flanges. I will weld them back on after I get the hood to line up.

I ended up buying new hinges and doors. I am glad I did they line up better but they did show up with a little damage.

I trimmed the radiator to fit the stock brackets.

I drilled and tapped for the hood hinges and got it bolted on.

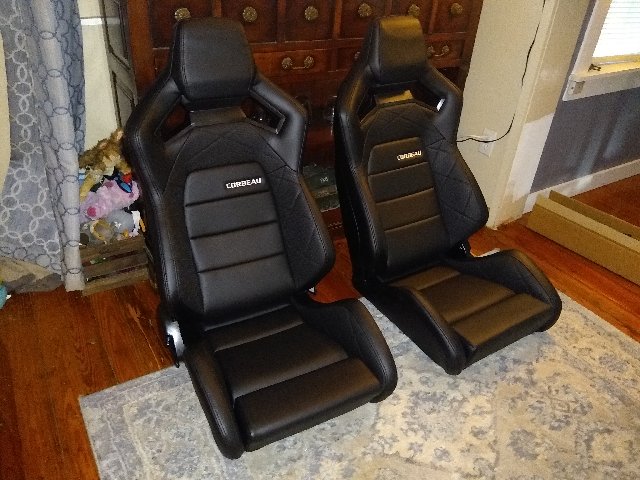
My new seats came in(except the rear) These sit low, the bottoms are a little firm but overall I like them. I used Mastercraft sliders. They were easily adapted with 3/16 bar stock.

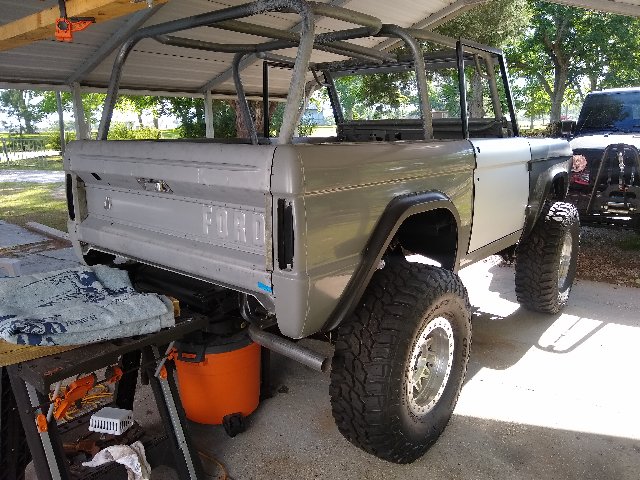
I spent two days getting the tailgate on. I had to drill and tap 10 holes in awkward spots like this. I bought HD non rattle hinges that ended up not working out. The way the glass body is they were too thick. I made my own just 1/16 thinner on each side and got it working. I had already trimmed everything as much as I could get away with. The next surprise was the top bolt wouldn't clear so I cut a little pocket for them to pass through.

Next up are the front fenders, inner fenders, door alignment, dash final fitment and cutting out holes for everything...a lot of stuff. I ordered paint from TCP Global and I am drilling all my holes for A/C, seats etc.
Last edited:
I really appreciate your thread. I just received my Bronco Design tub and will be referencing your thread soon when I assemble mine. Keep it up!
What a huge difference in that tub vs the old Kentrol one I have. Mine is a piece of crap compared to that! No way to hang steel doors on my tub. they would sag so bad you could never get them to close.
Coming along really nice, Good job!
Thanks I will try to add some things specific to this tub.I really appreciate your thread. I just received my Bronco Design tub and will be referencing your thread soon when I assemble mine. Keep it up!
I had a really nice CJ-5 body back in the day, my friend saved some money buying his and it wasn't near the quality. It was lightweight, more for racing or just offroad specific. This one has been pretty nice.What a huge difference in that tub vs the old Kentrol one I have. Mine is a piece of crap compared to that! No way to hang steel doors on my tub. they would sag so bad you could never get them to close.
Thanks!Coming along really nice, Good job!
Thanks! right back at ya, watching your thread closely.very inspiring!! keep after it!
I started on the dash. I cut all the holes including the glove box. I may have cut too much material so I had to add taps for everything I may have had to anyway, not 100% sure.

I found this, thought it was pretty cool so I am just going to clear over it and keep it.
Epoxied tabs.
I got the platform that goes under the passenger seat from WH. The fit isn't perfect with the glass body but a little grinding and BFH and it's close enough it should look good.

I did some trimming for the lower door seals.
I spent a full day getting the tail lights to fit decent.


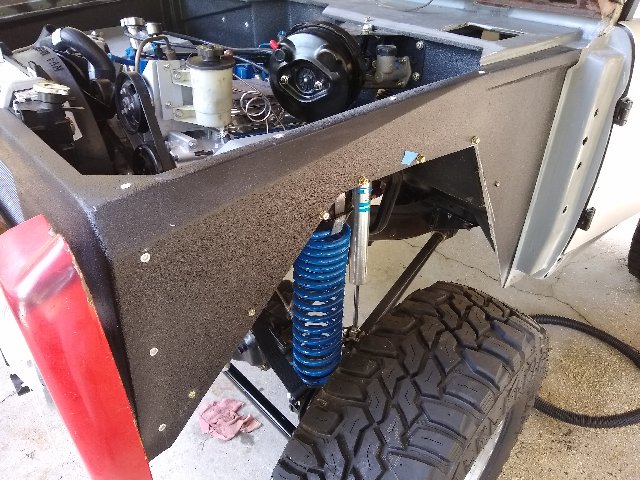
I have also been spending a lot of time trying to line up the doors, fenders and hood. I have a weird thing going on now. Everything looks pretty good but I have a 1" body lift everywhere but the front. The front is only about 1/2" from the frame which throws off my fan shroud to engine alignment power steering is touching, the hood is touching the front. I did cut off the fender flanges and lower them. I decided to get a new hood so I am waiting on it to finish it up.
Not real impressed with the DC doors...touching on ends 1/4" gap in the middle.

Otherwise good.

I cut the back of the dash for the stock defrost vents.


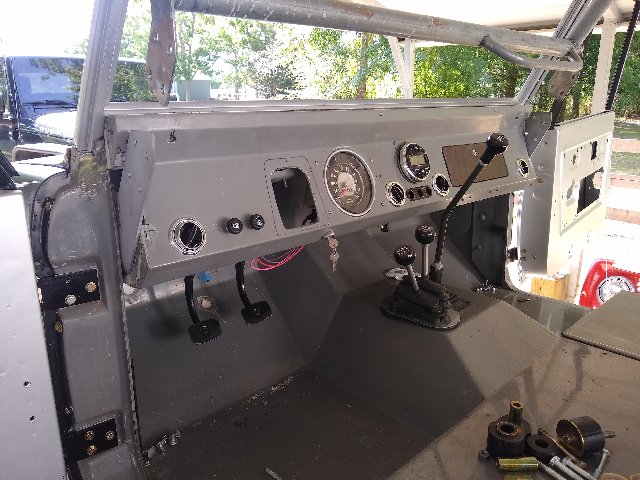
Dash mocked up. I have some bodywork to do on it but pretty happy. I got a refurbished oem cluster, JBL marine stereo, Vintage air vents(ok kinda cheap looking) and Painless ignition, light and wiper switches.
I put all the nutcerts for the fenders in and drilled for the inner fenders.
I got the radiator mounted but now the shoud is adjusted sll th way up so it doesn't look as good as it does here.

I made a drop bracket for the power steering but it's touching the hood now. I am considering 2" body lift everywhere but the front to help this stuff.

I welded the tabs and put on my limiting straps.

Spot welded the flanges back on the fenders.
I am trying to decide on changing from oem efi(86) or switching to a Holley Sniper for a cleaner setup.
I ordered paint from TCP global and had a bad experience. They sent the wrong color and blamed me. They said they don't go by year make or model or the name of the paint? All things asked when I ordered. The code I get online somehow gives them the wrong color. That was for a quart for the top and grill. The gallon I ordered hadn't shipped after 30 days so I was able to cancel it.
I need to get the Jeep up for sale and make a decision on my efi.
I found this, thought it was pretty cool so I am just going to clear over it and keep it.
Epoxied tabs.
I got the platform that goes under the passenger seat from WH. The fit isn't perfect with the glass body but a little grinding and BFH and it's close enough it should look good.
I did some trimming for the lower door seals.
I spent a full day getting the tail lights to fit decent.
I have also been spending a lot of time trying to line up the doors, fenders and hood. I have a weird thing going on now. Everything looks pretty good but I have a 1" body lift everywhere but the front. The front is only about 1/2" from the frame which throws off my fan shroud to engine alignment power steering is touching, the hood is touching the front. I did cut off the fender flanges and lower them. I decided to get a new hood so I am waiting on it to finish it up.
Not real impressed with the DC doors...touching on ends 1/4" gap in the middle.
Otherwise good.
I cut the back of the dash for the stock defrost vents.
Dash mocked up. I have some bodywork to do on it but pretty happy. I got a refurbished oem cluster, JBL marine stereo, Vintage air vents(ok kinda cheap looking) and Painless ignition, light and wiper switches.
I put all the nutcerts for the fenders in and drilled for the inner fenders.
I got the radiator mounted but now the shoud is adjusted sll th way up so it doesn't look as good as it does here.
I made a drop bracket for the power steering but it's touching the hood now. I am considering 2" body lift everywhere but the front to help this stuff.
I welded the tabs and put on my limiting straps.
Spot welded the flanges back on the fenders.
I am trying to decide on changing from oem efi(86) or switching to a Holley Sniper for a cleaner setup.
I ordered paint from TCP global and had a bad experience. They sent the wrong color and blamed me. They said they don't go by year make or model or the name of the paint? All things asked when I ordered. The code I get online somehow gives them the wrong color. That was for a quart for the top and grill. The gallon I ordered hadn't shipped after 30 days so I was able to cancel it.
I need to get the Jeep up for sale and make a decision on my efi.
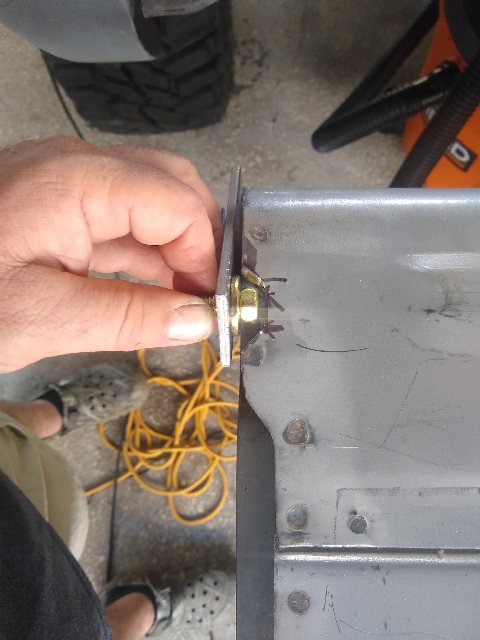
where did you get the seat sliders? bolting to floor or cage?
Here:
https://www.summitracing.com/parts/...MIj9uqr4W-6QIVDvDACh3-CQMaEAQYAiABEgLd8vD_BwE
They will be bolted to the floor with large washers like the body mounts use.
Edited to add: I may use bar stock to tie the seat tracks together under the tub.
Last edited:
Is the trimming you had to do to fit the TB roll cage plates a result of the fiberglass tub and the fiberglass dash? I have a fiberglass tub and a metal dash. I'm hoping I don't need to trim the metal dash, but it looks like I might. Thanks again!
Is the trimming you had to do to fit the TB roll cage plates a result of the fiberglass tub and the fiberglass dash? I have a fiberglass tub and a metal dash. I'm hoping I don't need to trim the metal dash, but it looks like I might. Thanks again!
The trimming I did to the metal side plates was due to lining up the pre drilled holes with the door post. When I did they stuck out slightly beyond the door opening(less than 1/2") I was concerned about the lower door seals so I trimmed to match the way it's shown in the instructions.
I watched a video by Tom's on Youtube and I don't think the steel dash needed to be trimmed.
- Joined
- Feb 2, 2014
- Messages
- 170
Nice work! You are making great progress!
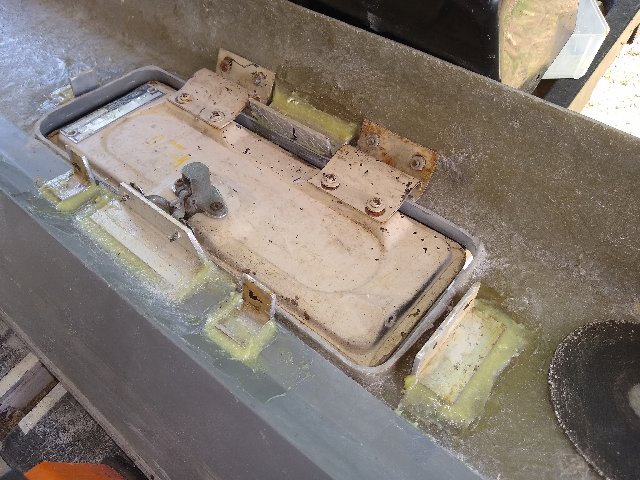
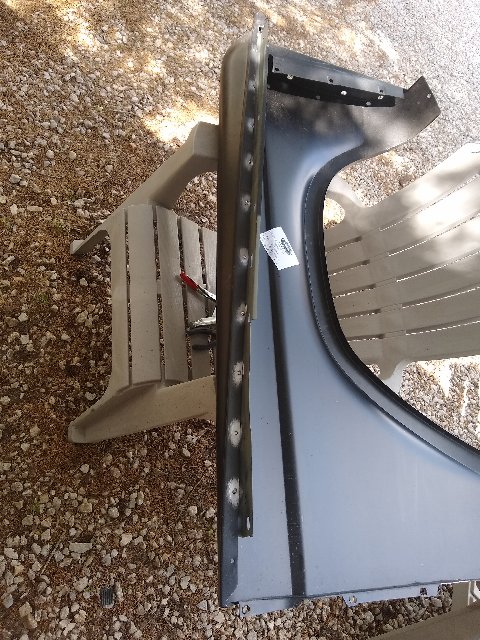
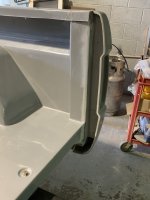
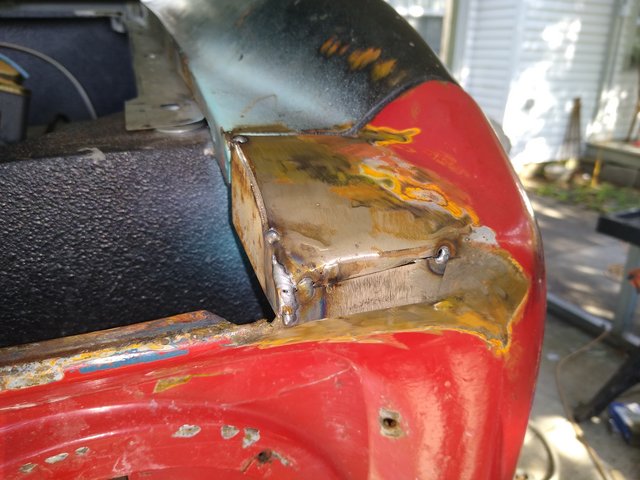
We have changed the way the tailgate all goes together now. It is similar to a OEM tub now where the hinges, support cables/arms and striker plates all recess into the taillight bucket now (see the attached picture). This is a huge improvement over the old way with the flush mounting lip. We also put the taillight bucket/quarter panel seam in the side (second pic).
We have changed the way the tailgate all goes together now. It is similar to a OEM tub now where the hinges, support cables/arms and striker plates all recess into the taillight bucket now (see the attached picture). This is a huge improvement over the old way with the flush mounting lip. We also put the taillight bucket/quarter panel seam in the side (second pic).
Attachments
jmhend
Bronco Guru
- Joined
- Dec 25, 2007
- Messages
- 2,736
Great work CoreyNice work! You are making great progress!
We have changed the way the tailgate all goes together now. It is similar to a OEM tub now where the hinges, support cables/arms and striker plates all recess into the taillight bucket now (see the attached picture). This is a huge improvement over the old way with the flush mounting lip. We also put the taillight bucket/quarter panel seam in the side (second pic).
Sent from my SM-N960U using Tapatalk
Thank you!Great work Corey
Sent from my SM-N960U using Tapatalk
So I have mainly been working on panel gaps. It's a lot of work and they still aren't perfect but I think it's time to keep moving.
My first paint project was the roll cage. I used single stage for the cage and did epoxy primer then 2 coats. It turned out super nice, cleaned my gun and mess, took a shower then went back out to admire my work. *!^#%!#$# the top of one tube didn't get painted very well. I could still see primer through it so I took my remaining paint and decided to fix it. Well I kept painting more and more tubes, got runs and curtains...ugh. It's on hold now until later. I had to order more paint.
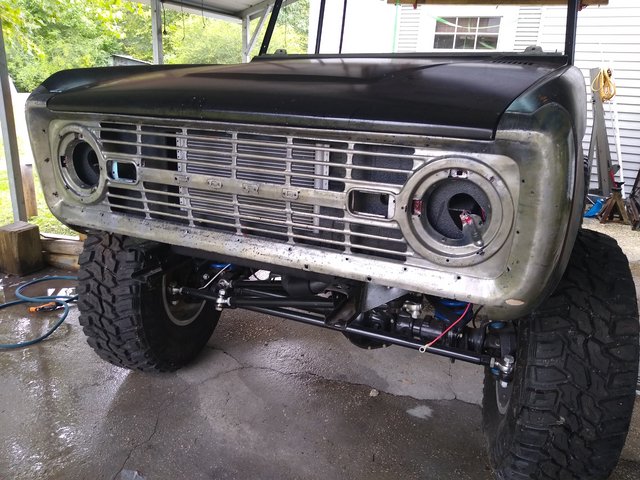
I ended up getting a new hood. The ends of the grill didn't match so I had to cut slits and welded some pieces in. They are pretty close now.


I spent days getting all the layers of paint of the grill and cleaning the backside of it.
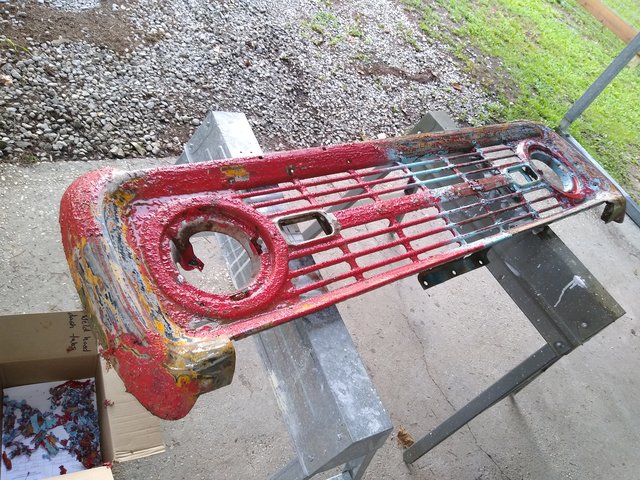
I drilled out for my side trim, emblems and cut out for the marker lights.

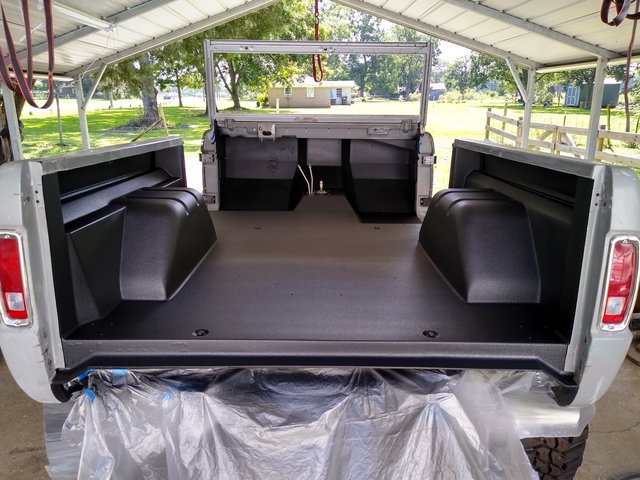
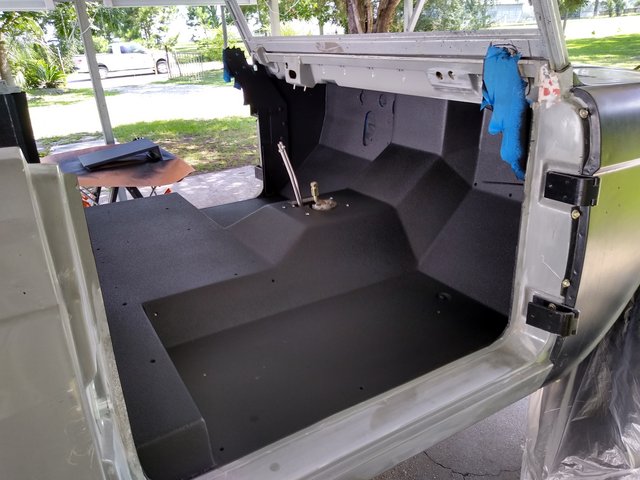
Today I bagged it up and sprayed raptor liner on the interior. It turned out pretty nice imho.

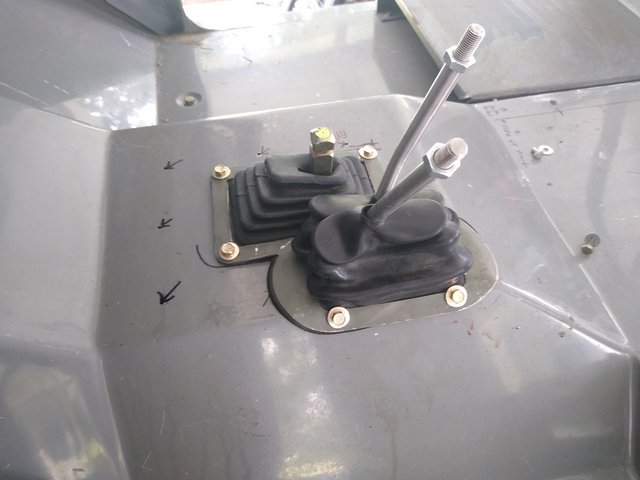
I made a shifter boot trim ring to tie them together.
I hooked up my Sniper and new ignition temporarily. I spent 2 weeks on this. The first one fired up ran for 30 seconds and died. I spent a good bit of time trying to figure out what was going on before calling Holley. They said the ecu was bad and overnighted a complete new one. They said take my time sending the other one back. They couldn't have done any better in helping resolve the issue.
The engine runs pretty good now. I think it will get better as it learns but not bad as is.

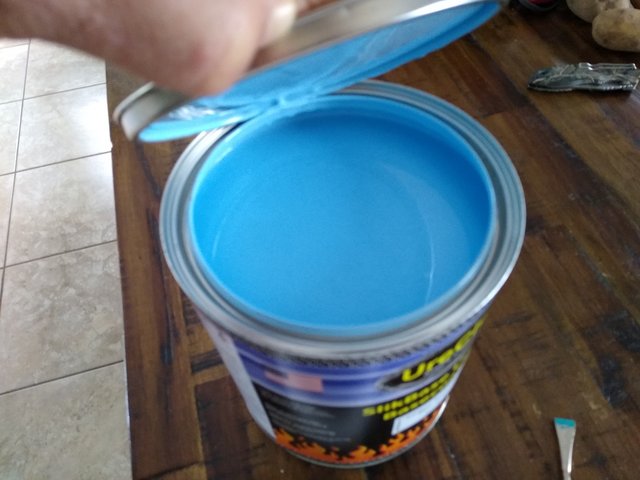
And by far the hardest thing so far was picking and getting the paint. Not happy at all with TCP global(long story) but TheCoatingStore.com was awesome.
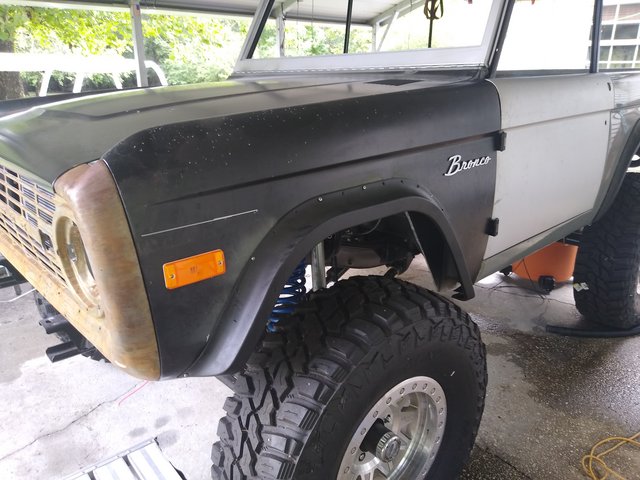
So here it is...it looks more blue in the shade(pic) and lighter blue in the sun.
I have put in a ton of hours it just doesn't look a lot different. I hope to get inner fenders, cowl, windshield frame, dash, jambs and tailgate painted soon.
Last edited:
Similar threads
- Locked
- Replies
- 2
- Views
- 807
- Locked
City: Crimora
Price: $1600
- Replies
- 5
- Views
- 124
City: Rising Sun
Price: $12500
- Replies
- 1
- Views
- 190
- Locked
City: Palm springs Ca 92262
Price: $13900
- Replies
- 6
- Views
- 340