• Welcome to ClassicBroncos! - You are currently viewing the forums as a GUEST. To take advantage of all the site features, please take a moment to register. It's fast, simple and absolutely free. So please join our community today!
    If you have problems registering or can't log into your account, please contact Admin.

68 half cab retro build

OP
OP
ratbilt

ratbilt

Jr. Member
Joined
Dec 29, 2019
Messages
139
rbushey41 did I miss something?
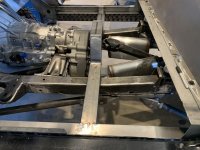
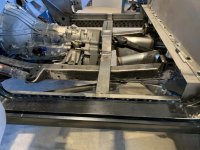
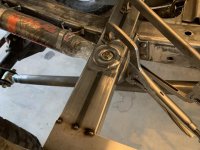
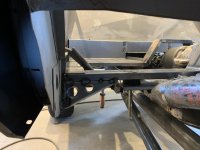
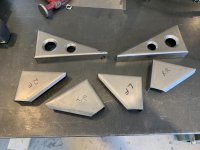
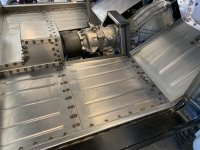
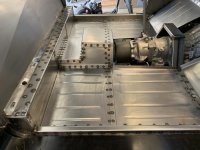
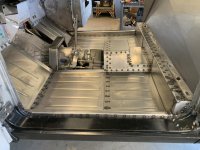
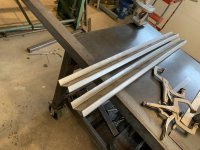
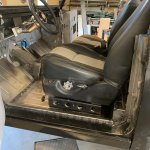
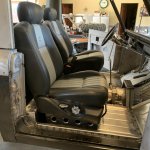
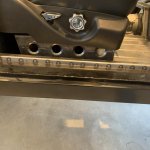
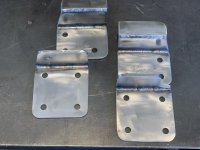
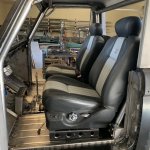
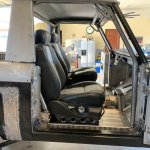
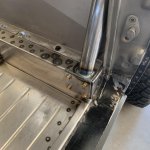
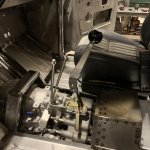
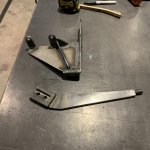
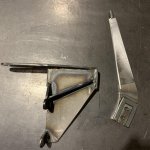
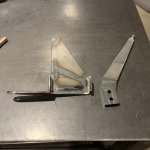
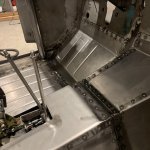
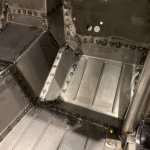
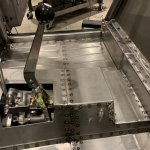
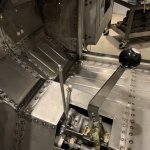
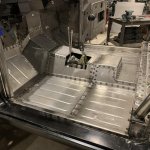
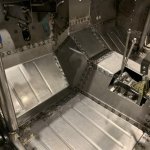
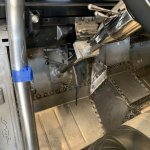
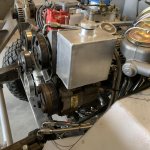
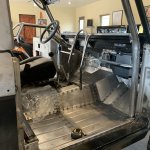
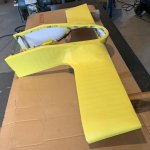
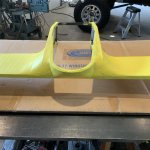
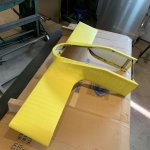
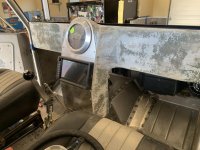
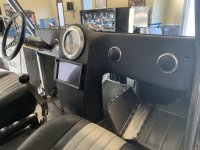
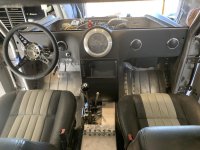
Cut the floor out (lowering 2" / 6" under drivers seat), made new cross braces & brackets.
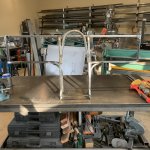
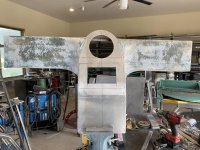
made rear panels
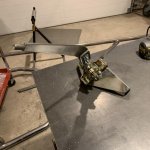
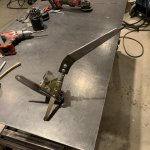
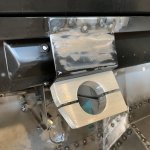
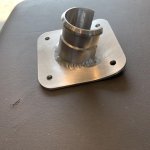
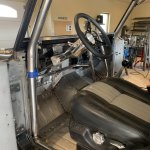
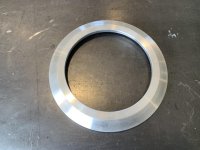
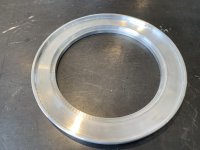
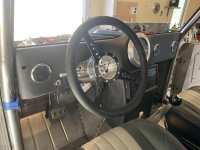
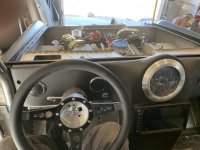
got my steering wheel. lathed horn button & install a challenge coin a customer gave me for helping his son (he designed the coin)
the photos won't load I'll try later
 
OP
OP
ratbilt

ratbilt

Jr. Member
Joined
Dec 29, 2019
Messages
139
pics got some more pans built & installed, i'll get pics later
 

Attachments

  • IMG_0651.jpg
    IMG_0651.jpg
    107.8 KB · Views: 143
  • IMG_0652.jpg
    IMG_0652.jpg
    111.9 KB · Views: 268
  • IMG_0654.jpg
    IMG_0654.jpg
    97.7 KB · Views: 138
  • IMG_0646.jpg
    IMG_0646.jpg
    103.6 KB · Views: 153
  • IMG_0672.jpg
    IMG_0672.jpg
    81.3 KB · Views: 136
  • IMG_0671.jpg
    IMG_0671.jpg
    117.2 KB · Views: 142
  • IMG_0670.jpg
    IMG_0670.jpg
    107.8 KB · Views: 147
  • IMG_0656.jpg
    IMG_0656.jpg
    91.8 KB · Views: 134
OP
OP
ratbilt

ratbilt

Jr. Member
Joined
Dec 29, 2019
Messages
139
Thanks Jim it was good to meet you. My place no longer looks trashed, yours probably does now.
Just made the seat mounts (like fitting 2 lbs of sh in a 1 lb container) running out of room fast. Still have to make a roll bar fit.
Forgot to show the floor pan, not doing the center until the trans fill tube, cooler lines, linkage gets hooked up.
 

Attachments

  • IMG_0708.jpg
    IMG_0708.jpg
    103.7 KB · Views: 141
  • IMG_0707.jpg
    IMG_0707.jpg
    98.4 KB · Views: 140
  • IMG_0706.jpg
    IMG_0706.jpg
    108.6 KB · Views: 270
  • IMG_0701.jpg
    IMG_0701.jpg
    109.4 KB · Views: 129
  • IMG_0727.jpg
    IMG_0727.jpg
    143.8 KB · Views: 152
  • IMG_0728.jpg
    IMG_0728.jpg
    139.8 KB · Views: 282
  • IMG_0729.jpg
    IMG_0729.jpg
    88.7 KB · Views: 142
OP
OP
ratbilt

ratbilt

Jr. Member
Joined
Dec 29, 2019
Messages
139
Roll bar finally done, 5 bends in each loop (A&B pillars) 3" shy of 10' per loop, holes at each cross bar & feed wire already installed for wiring (lights & switches). Had to jack up & stand my bender to do the last bend wouldn't clear the floor. I took a pic of the markings for all the bends except the last bend (the 1st bar took about 4-5 hrs 2nd took 10 min. Had to tuck the bar as close as possible to clear the seats & I didn't want to bump my feet getting in & or out. took a porta-power to straighten the right lower rear leg (warped while welding). Need to punch the forward floor boards another 2" out (still a little tight) That's next weeks project along with starting on the dash.
 

Attachments

  • IMG_0748.jpg
    IMG_0748.jpg
    102 KB · Views: 118
  • IMG_0739.jpg
    IMG_0739.jpg
    124.7 KB · Views: 113
  • IMG_0740.jpg
    IMG_0740.jpg
    130 KB · Views: 119
  • IMG_E0749.jpg
    IMG_E0749.jpg
    114.2 KB · Views: 137
  • IMG_0768.jpg
    IMG_0768.jpg
    146 KB · Views: 121
  • IMG_0769.jpg
    IMG_0769.jpg
    137.7 KB · Views: 125
  • IMG_0766.jpg
    IMG_0766.jpg
    120.4 KB · Views: 110
  • IMG_0764.jpg
    IMG_0764.jpg
    113.4 KB · Views: 123
  • IMG_0759.jpg
    IMG_0759.jpg
    106.2 KB · Views: 121
  • IMG_0758.jpg
    IMG_0758.jpg
    162.4 KB · Views: 147
OP
OP
ratbilt

ratbilt

Jr. Member
Joined
Dec 29, 2019
Messages
139
Worked on the shift assy. made a bracket and the lever. Also supported the twin stick bolt. need to make the link to trans
 

Attachments

  • IMG_0780.jpg
    IMG_0780.jpg
    117.1 KB · Views: 61
  • IMG_0779.jpg
    IMG_0779.jpg
    129.9 KB · Views: 63
  • IMG_0778.jpg
    IMG_0778.jpg
    130.9 KB · Views: 71
  • IMG_0777.jpg
    IMG_0777.jpg
    114.2 KB · Views: 59
  • IMG_0776.jpg
    IMG_0776.jpg
    126.4 KB · Views: 58
  • IMG_0774.jpg
    IMG_0774.jpg
    148.8 KB · Views: 58
  • IMG_0773.jpg
    IMG_0773.jpg
    154.9 KB · Views: 62
  • IMG_0772.jpg
    IMG_0772.jpg
    122.6 KB · Views: 66
OP
OP
ratbilt

ratbilt

Jr. Member
Joined
Dec 29, 2019
Messages
139
Pushed the floor boards 2" forward & dropped 3" at the firewall. Finished the trans tunnel had to make an extra cover to clear the right side header.
Now has a lot of room
now i have to move the steering column to the left 1.5"
 

Attachments

  • IMG_0822.jpg
    IMG_0822.jpg
    126.7 KB · Views: 79
  • IMG_0821.jpg
    IMG_0821.jpg
    109.9 KB · Views: 71
  • IMG_0820.jpg
    IMG_0820.jpg
    113 KB · Views: 73
  • IMG_0819.jpg
    IMG_0819.jpg
    123.6 KB · Views: 76
  • IMG_0818.jpg
    IMG_0818.jpg
    116 KB · Views: 83
  • IMG_0817.jpg
    IMG_0817.jpg
    143.8 KB · Views: 89
  • IMG_0816.jpg
    IMG_0816.jpg
    120.9 KB · Views: 90
OP
OP
ratbilt

ratbilt

Jr. Member
Joined
Dec 29, 2019
Messages
139
Drilled spot welds and moved the upper steering mount to the left 1 1/4", bent the mount so the column sits higher approx 1", drilled the firewall, now have to trim the inner fender. As soon as the steering is done then I can start the dash (installing a dakota ditigal speedo and climate control, a 10" stereo touch screen with 3 camera imput.
I've been working with Taylor at accutune offroad (where I bought my shocks) and ordered lighter rear springs (their spring swap program) I'm too stiff in the rear. Want the shocks riding at 5" of shaft showing. They can estimate weight at each wheel by spring compression.
 
OP
OP
ratbilt

ratbilt

Jr. Member
Joined
Dec 29, 2019
Messages
139
I got the lower steering mount finished, bent the brake pedal arm 2" to the left and made a new larger pad(took 15 tons of pressure to dimple 3/16) (a lot more room for the gas pedal)
Made the power steering reservoir & the lines all hooked up. Starting on the dash. My new springs just came in & the power steps that i'm going have to modify the shit out of because of the floor drop. Only 53 more steps until the next list. crap the pics won't load
 
OP
OP
ratbilt

ratbilt

Jr. Member
Joined
Dec 29, 2019
Messages
139
Hope i can get the pics up now
 

Attachments

  • IMG_0824.jpg
    IMG_0824.jpg
    107.9 KB · Views: 123
OP
OP
ratbilt

ratbilt

Jr. Member
Joined
Dec 29, 2019
Messages
139
Thanks I live for comments good or bad makes me feel alive. Still trying to get pics up 4th time I'm on hughs net sat internet (smoke signals are faster)
 

Attachments

  • IMG_0823.jpg
    IMG_0823.jpg
    171.2 KB · Views: 84
  • IMG_0825.jpg
    IMG_0825.jpg
    124.7 KB · Views: 83
  • IMG_0828.jpg
    IMG_0828.jpg
    108.8 KB · Views: 73
  • IMG_0827.jpg
    IMG_0827.jpg
    155.7 KB · Views: 66
  • IMG_0826.jpg
    IMG_0826.jpg
    159.4 KB · Views: 76
  • IMG_0831.jpg
    IMG_0831.jpg
    128.4 KB · Views: 71
  • IMG_0832.jpg
    IMG_0832.jpg
    129.4 KB · Views: 85
  • IMG_0833.jpg
    IMG_0833.jpg
    131.3 KB · Views: 84
  • IMG_0835.jpg
    IMG_0835.jpg
    152 KB · Views: 115
  • IMG_0841.jpg
    IMG_0841.jpg
    149.8 KB · Views: 98
OP
OP
ratbilt

ratbilt

Jr. Member
Joined
Dec 29, 2019
Messages
139
Finally back on the bronco, got the frame for the dash done spent more time trying to get the look I like,putting the speedo above the bottom of windshield so the stereo isn't to low. had to make the center 11.5" wide to clear the stereo. Next i,m going to skin with alum. by the way I used tig wire for the inside of the roll bar (to feed electrical wire), I rolled it up and taped to the bar. after poking my arm for 3 weeks (maybe 50 times) finally bent the tips inward.
 

Attachments

  • IMG_0882.jpg
    IMG_0882.jpg
    135.5 KB · Views: 141
  • IMG_0881.jpg
    IMG_0881.jpg
    159.4 KB · Views: 121
  • IMG_0880.jpg
    IMG_0880.jpg
    146.6 KB · Views: 129
  • IMG_0879.jpg
    IMG_0879.jpg
    144.8 KB · Views: 138
OP
OP
ratbilt

ratbilt

Jr. Member
Joined
Dec 29, 2019
Messages
139
I tried to bend aluminum over the dash frame (didn't work), decided to fiber glass. I used cardboard, tape & mold release. Put 3 coats of glass on everything except the center (what a mess). Making the gauge mounts & bezel for the speedo. Hope to have pictures the next couple of days
 
OP
OP
ratbilt

ratbilt

Jr. Member
Joined
Dec 29, 2019
Messages
139
Finished the bezel except mounting made the center face & cut out for the gauge & stereo
I have more glass work to do (what a pain - destroyed my garage) the yellow is the tape & cardboard, after I fiber glassed - took it apart cleaned all the tape & cardboard. Need to cut out for steering, vents & switches
 

Attachments

  • IMG_0914.jpg
    IMG_0914.jpg
    83.3 KB · Views: 66
  • IMG_0915.jpg
    IMG_0915.jpg
    112.9 KB · Views: 56
  • IMG_0916.jpg
    IMG_0916.jpg
    93.2 KB · Views: 59
  • IMG_0938.jpg
    IMG_0938.jpg
    134 KB · Views: 87
  • IMG_0939.jpg
    IMG_0939.jpg
    93.6 KB · Views: 51
  • IMG_0940.jpg
    IMG_0940.jpg
    96.6 KB · Views: 45
OP
OP
ratbilt

ratbilt

Jr. Member
Joined
Dec 29, 2019
Messages
139
Installed the gauges and stereo
 

Attachments

  • IMG_0943.jpg
    IMG_0943.jpg
    111.5 KB · Views: 109
  • IMG_0944.jpg
    IMG_0944.jpg
    118.5 KB · Views: 118

JeffG

Contributor
Sr. Member
Joined
May 7, 2004
Messages
510
Loc.
San Antonio, TX
The dash is coming out nice! From the pics its hard to tell, but have you tried shifting your T-case into low with the stereo in place? Looks very close when you put a shift knob on.

However, easy fix if it is too close.
 
OP
OP
ratbilt

ratbilt

Jr. Member
Joined
Dec 29, 2019
Messages
139
Hi Jeff there is plenty of room (you can't see in the pictures). I'm going to bend later when the dash is complete, I do need to raise the stereo up 1 inch. I'm going to have the dash covered. Thanks for your comment. I'll keep the pics coming
 
OP
OP
ratbilt

ratbilt

Jr. Member
Joined
Dec 29, 2019
Messages
139
The dash is done except the climate control & seat heater switches, I'm going to have it covered later.
 

Attachments

  • IMG_0964.jpg
    IMG_0964.jpg
    90.3 KB · Views: 124
  • IMG_0965.jpg
    IMG_0965.jpg
    90.8 KB · Views: 112
  • IMG_0967.jpg
    IMG_0967.jpg
    104.5 KB · Views: 107
  • IMG_0968.jpg
    IMG_0968.jpg
    109.8 KB · Views: 108
  • IMG_0969.jpg
    IMG_0969.jpg
    102.5 KB · Views: 96
Top