• Welcome to ClassicBroncos! - You are currently viewing the forums as a GUEST. To take advantage of all the site features, please take a moment to register. It's fast, simple and absolutely free. So please join our community today!
    If you have problems registering or can't log into your account, please contact Admin.

Project: Wolf in Sheep's Clothing

OP
OP
BruiserOutdoors

BruiserOutdoors

Full Member
Joined
Aug 22, 2013
Messages
741
How much did you have to move them?

Got pics?
Didn't get pictures. We got the arms installed, just seemed a little wrong to have to force them 2-4" wider than they laid on their own. Perhaps this is normal. Watched the t-rex arm install video and Nashville + Mike mentioned having to loosen the head unit bolts to make their arms fit.

We installed one bolt at a time, then went back and added the heim joint spacers.


Also: no torque specs were given for the 1" bolt. And if I read the instructions correctly, the jam nut goes all the way on, then back it off 0.25"? I remember reading 1.25" weeks ago but my memory must have slipped
 
OP
OP
BruiserOutdoors

BruiserOutdoors

Full Member
Joined
Aug 22, 2013
Messages
741
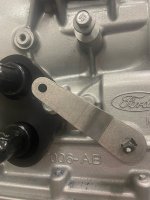
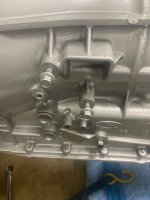
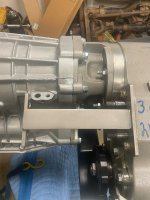
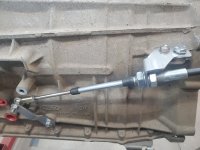
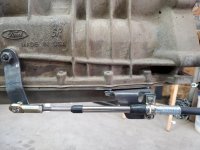
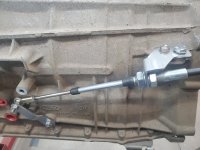
ran into some hiccups yesterday with transmission and tcase shift linkage...

the Power by the Hour trans cooler ports interfere with the RAD designs VX shifter linkage. I think this linkage would interfere with any trans cooler port bolt though. Not sure how to solve this issue?

Next issue: VX shifter linkage mount interferes with JB fab twin stick cable shifter bracket. again, not sure how to solve this. It mounts to the two holes on the side of the transmission case. (edit: I might be able to mount the VX shifter linkage next to the bottom of the pan, see photo, but I am afraid my driveshaft will interfere. photo shown is for a winters shifter, I don't think I have those brackets).
 

Attachments

  • image8 (1).jpeg
    image8 (1).jpeg
    202.6 KB · Views: 27
  • image0 (3).jpeg
    image0 (3).jpeg
    183.6 KB · Views: 29
  • image1 (3).jpeg
    image1 (3).jpeg
    196.5 KB · Views: 31
  • VX setup.jpg
    VX setup.jpg
    202.6 KB · Views: 29
  • Winters setup.jpg
    Winters setup.jpg
    199.7 KB · Views: 27
OP
OP
BruiserOutdoors

BruiserOutdoors

Full Member
Joined
Aug 22, 2013
Messages
741
Rory from RAD Designs wrote this:

"The cooler lines hasn't been an issue since most customers only use the 3&4 gears positions. The 2 just back of Neutral.
I have a different bracket that has worked for the Atlas issue I can send you. Please provide me with a mailing address.
Rory_RADesigns"


So i may have a solution for the atlas issue but I am not sure what he means by the 3&4 gears positions. Can anybody explain? I suppose if this transmission (6r80w) is electronically controlled, the shift arm only needs to rotate from park to reverse to neutral to drive? Are there any good videos out there explaining how it works?
 

Yeller

Contributor
Bronco Guru
Joined
Mar 27, 2012
Messages
5,940
Loc.
Rogers County Oklahoma
The only needed position below Drive is 1 position for Manual. The trucks do offer 2 and 1. Have never used it, have always just used D or M. I manually shift my truck when in low range, which it is a fair amount around the farm, and I guess wheeling in Moab, school bus on the rocks makes people look lol
 
OP
OP
BruiserOutdoors

BruiserOutdoors

Full Member
Joined
Aug 22, 2013
Messages
741
@Monster Mike


Duff long arms. Single shock. The shock is angled in the lower shock bracket on the long arm. is this normal? looks off. if this is normal, why arent the brackets welded on straight?

IMG_4155.jpg
 

Yeller

Contributor
Bronco Guru
Joined
Mar 27, 2012
Messages
5,940
Loc.
Rogers County Oklahoma
is that at ride height? looks drooped out to me. Drooped out that would be the correct orientation of the bolt and bushing. As the suspension cycles up and down it runs in an arc, the bushing is there to provide for misalignment caused by that arc.
 
OP
OP
BruiserOutdoors

BruiserOutdoors

Full Member
Joined
Aug 22, 2013
Messages
741
is that at ride height? looks drooped out to me. Drooped out that would be the correct orientation of the bolt and bushing. As the suspension cycles up and down it runs in an arc, the bushing is there to provide for misalignment caused by that arc.
i raised it up and compressed the suspension (mind you, body is off), and nothing changed.
 

DirtDonk

Contributor
Bronco Guru
Joined
Nov 3, 2003
Messages
47,486
It has to change during a stroke, because the radius arm travels in an arc. So no matter how far you go in one direction or the other, that arc will change the angle of the bracket.
Whether or not it's enough to be straight, that remains to be seen. And from your description, it's not. But that may also depend on the height of your suspension.
In your other thread I asked how much suspension lift, and how to set it up at ride height.
How did you measure for ride height, and how much lift?

Maybe they are only straight up and down with a certain lift? May be optimized for 3.5 inches? Maybe stock height? I don't know.
When you raised it up, did you just lift the axle, or did you actually use some method of compressing the springs?
Even with the engine in place, not having the body on is never going to let you get to ride height by just lifting the axle with a jack.
Maybe you did that, but I wanted to ask in case you were just lifting with a jack.

Paul
 
OP
OP
BruiserOutdoors

BruiserOutdoors

Full Member
Joined
Aug 22, 2013
Messages
741
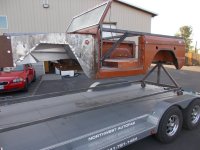
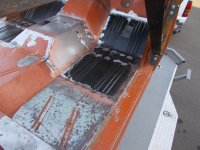
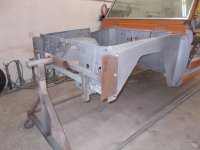
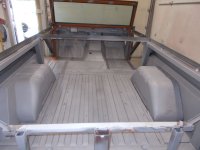
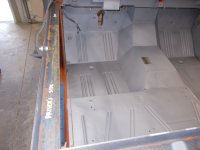
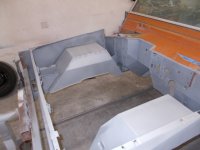
Well, I have to change the name of this thread after a series of unfortunate events. this build is no longer "old-school revival" since the original paint got wiped out by a careless sand blast technician. So now I have to paint the bronco.

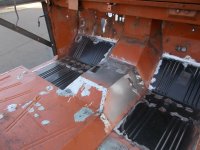
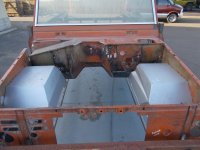
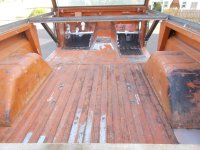
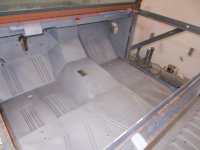
Here are some progress pictures from this past summer. It has evolved into a complete frame off, nut and bolt restoration. My poor wallet.....

DSCN4914.JPG

DSCN4910.JPG
 

Attachments

  • DSCN4911.JPG
    DSCN4911.JPG
    198.8 KB · Views: 6
  • DSCN4912.JPG
    DSCN4912.JPG
    171.3 KB · Views: 5
  • DSCN4913.JPG
    DSCN4913.JPG
    168.3 KB · Views: 5
  • DSCN4915.JPG
    DSCN4915.JPG
    180.3 KB · Views: 5
  • DSCN4916.JPG
    DSCN4916.JPG
    189.3 KB · Views: 6
OP
OP
BruiserOutdoors

BruiserOutdoors

Full Member
Joined
Aug 22, 2013
Messages
741
More progress, Summer 2023. Sand blasted. Now rust and bondo free.
 

Attachments

  • DSCN4941.JPG
    DSCN4941.JPG
    112 KB · Views: 3
  • DSCN4944.JPG
    DSCN4944.JPG
    137.3 KB · Views: 3
  • DSCN4940.JPG
    DSCN4940.JPG
    121.3 KB · Views: 3
  • DSCN4942.JPG
    DSCN4942.JPG
    110.9 KB · Views: 3
  • DSCN4943.JPG
    DSCN4943.JPG
    111.2 KB · Views: 3
OP
OP
BruiserOutdoors

BruiserOutdoors

Full Member
Joined
Aug 22, 2013
Messages
741
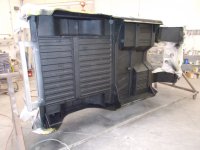
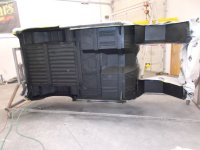
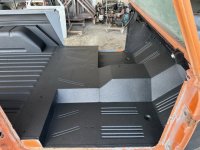
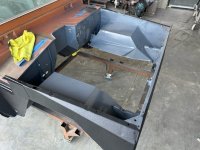
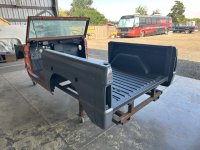
Raptor Liner inside and out.
 

Attachments

  • DSCN4954.JPG
    DSCN4954.JPG
    147.5 KB · Views: 8
  • DSCN4955.JPG
    DSCN4955.JPG
    134.6 KB · Views: 8
  • IMG_4754 (1).jpg
    IMG_4754 (1).jpg
    184.4 KB · Views: 7
OP
OP
BruiserOutdoors

BruiserOutdoors

Full Member
Joined
Aug 22, 2013
Messages
741
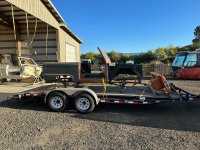
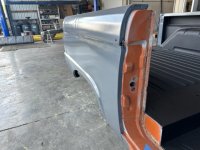
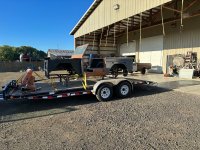
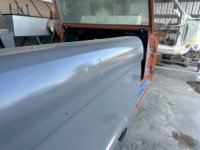
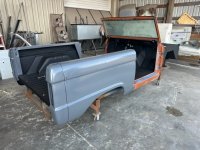
CRE Epoxy. Some body work needed. Coming home..... I think I am going to attempt to paint it myself, as I am running low on funds.
 

Attachments

  • IMG_4794.jpg
    IMG_4794.jpg
    327.6 KB · Views: 7
  • IMG_4755 (1).jpg
    IMG_4755 (1).jpg
    148.5 KB · Views: 8
  • IMG_4753 (1).jpg
    IMG_4753 (1).jpg
    127 KB · Views: 8
  • IMG_4752 (1).jpg
    IMG_4752 (1).jpg
    82.9 KB · Views: 9
  • IMG_4751 (1).jpg
    IMG_4751 (1).jpg
    151.3 KB · Views: 7
  • IMG_4749 (1).jpg
    IMG_4749 (1).jpg
    149.5 KB · Views: 8
  • IMG_4796.jpg
    IMG_4796.jpg
    358.8 KB · Views: 7
Top