• Just a reminder that you won't be able to start new posts or reply to existings posts in the Archive forum.

    This is where all the old posts go so they can still be used for reference and searched.
  • Welcome to ClassicBroncos! - You are currently viewing the forums as a GUEST. To take advantage of all the site features, please take a moment to register. It's fast, simple and absolutely free. So please join our community today!
    If you have problems registering or can't log into your account, please contact Admin.

The orange beast isn't very orange anymore

kuch68

Jr. Member
Joined
Aug 8, 2001
Messages
135
Loc.
Waterford, MI
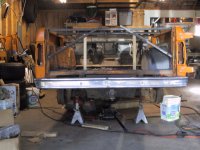
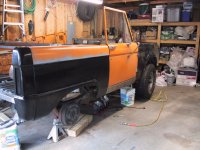
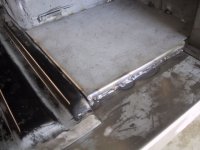
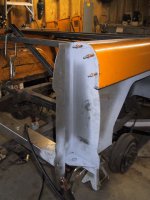
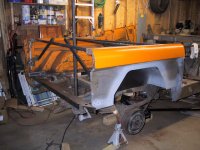
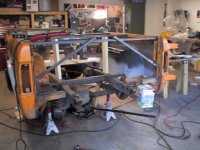
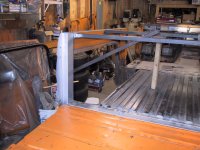
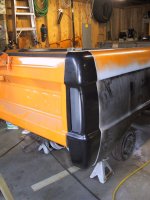
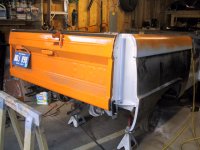
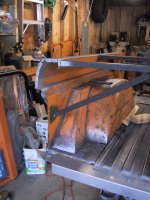
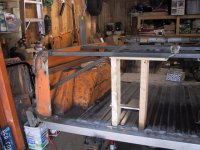
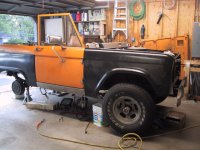
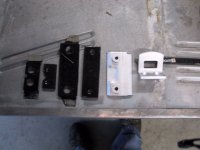
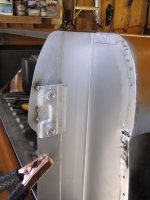
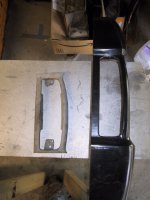
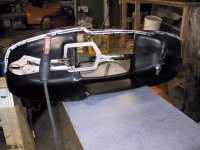
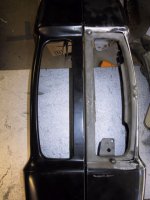
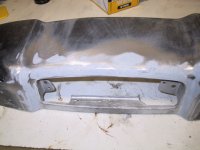
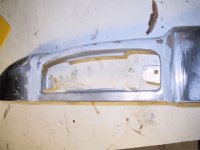
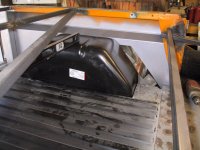
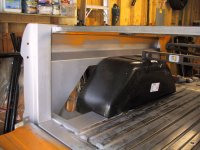
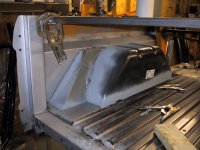
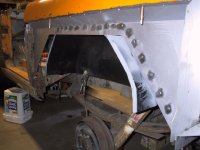
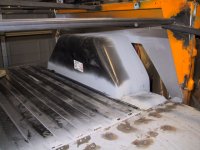
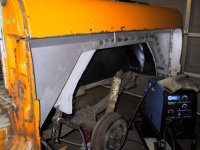
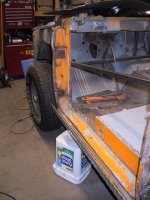
It has been a long time coming, but work has slowed down a little and I have been making some major progress on the bronco lately. I never knew the project would become this extensive, but it is fun and I am learning every step of the way. I guess major body rework is becoming commonplace anymore, but check out some of my recent progress.

Oh yeah, if you want to see some of the earlier sheet metal work, it is all up on my website:

OrangeStallion

thanks
 

Attachments

  • Large_IMG_2060.jpg
    Large_IMG_2060.jpg
    96.4 KB · Views: 85
  • panelfittest.jpg
    panelfittest.jpg
    185.3 KB · Views: 238
  • Large_IMG_2101.jpg
    Large_IMG_2101.jpg
    74 KB · Views: 166
  • Large_IMG_2085.jpg
    Large_IMG_2085.jpg
    87 KB · Views: 152
  • Large_IMG_2074.jpg
    Large_IMG_2074.jpg
    102 KB · Views: 165
  • Large_IMG_2069.jpg
    Large_IMG_2069.jpg
    98.9 KB · Views: 132
  • Large_IMG_2064.jpg
    Large_IMG_2064.jpg
    98.3 KB · Views: 109
OP
OP
K

kuch68

Jr. Member
Joined
Aug 8, 2001
Messages
135
Loc.
Waterford, MI
mp said:
Wow. Great job. I wish I had the metal working skills you have......


Ha!

That's funny and flattering that you say that! This is actually my first attempt at any sort of restoration, and I have very little previous experience with body work. I owe a lot of it to learning from everyone's post on this website, and have a lot of patience. Oh, and having the right tools helps as well too.

thanks
 

SC74

Contributor
Bronco Guru
Joined
May 24, 2004
Messages
3,413
Mine used to be that factory orange too! Keep up the good work it looks really good.
 

Hogback

Sr. Member
Joined
Sep 19, 2004
Messages
524
yea keep those pics coming
when your done i'll pull mine in there and let you get started on it :D
 
OP
OP
K

kuch68

Jr. Member
Joined
Aug 8, 2001
Messages
135
Loc.
Waterford, MI
Well today was a big day. The in-laws were in town up until this morning, so I could not make any major progress. But a lot of hard work today and I believe I am back on track.

Here's some new pictures of the progress. I encountered some problems lining up the tailgate with the new tail light housings, so there will need to be triming later on. Regardless, I was able to cut out the drivers side tail light post, tack in the new one. Then I welded in the reinforcements to the support channel. After that was sturdy and I double checked my bracing, I cut out the whole drivers rear quarter section in one shot. Finally on the passenger side I have some pictures of lining up the door, fender, rocker, tail light housing. I should be able to weld the rocker in soon. It looks like it almost might go back together straight!

I am banking on tomorrow being another big day too. Hopefully I will have some progress to report.
 

Attachments

  • Large_IMG_2133.jpg
    Large_IMG_2133.jpg
    106.6 KB · Views: 52
  • Large_IMG_2132.jpg
    Large_IMG_2132.jpg
    131.9 KB · Views: 69
  • Large_IMG_2131.jpg
    Large_IMG_2131.jpg
    93.6 KB · Views: 60
  • Large_IMG_2127.jpg
    Large_IMG_2127.jpg
    129.9 KB · Views: 53
  • Large_IMG_2126.jpg
    Large_IMG_2126.jpg
    102.6 KB · Views: 50
  • Large_IMG_2121.jpg
    Large_IMG_2121.jpg
    105.4 KB · Views: 47
  • Large_IMG_2111.jpg
    Large_IMG_2111.jpg
    97.7 KB · Views: 86
OP
OP
K

kuch68

Jr. Member
Joined
Aug 8, 2001
Messages
135
Loc.
Waterford, MI
Another picture for you, since the tail light posts do not come complete with all the brackets for bolting in the tailgate hardware, I salvaged the pieces from my old post. Here they are after sand blasting, por15, and weldable primer where they need to be welded. I also cleaned out the threads with some taps. Work great now!
 

Attachments

  • Large_IMG_2117.jpg
    Large_IMG_2117.jpg
    68.2 KB · Views: 67

GRIZZLY

Bronco Guru
Joined
Jul 31, 2001
Messages
3,221
Loc.
Lakewood, CA
Looks good so far. After seeing those colors together an orange and black paint job would look good....
 

72moore

Sr. Member
Joined
Sep 17, 2003
Messages
392
re

That looks good, hurry and you may be able to finish by halloween ha ah ha
Seriously though great work.
 
OP
OP
K

kuch68

Jr. Member
Joined
Aug 8, 2001
Messages
135
Loc.
Waterford, MI
More progress today, not without frustration though. The tailgate seems to be a little wide for the new tail light posts. Perhaps the body shifted slightly, but the measurements still seem to be the same. Hopefully a little tweaking will take care of the rubbing.

I started to fit the new inner quarter, and I prepped the wheel housing but can't really position anything until I pickup the new gas filler covers. I also welded some brackets in place for tailgate hardware.

Then I turned my attention to the low quality tail light housings. I decided to just patch in a section from my old housing. The repro pieces don't even fit the tail light lenses properly. Someone needs to make a higher quality piece. During the process I clamp the driver and passenger side together to make sure the piece didn't move after I cut. Need to continue to put tacks wherever they will fit and then smooth over with body filler. I wish I was a little more patient, as some of the gaps are a little larger than I wanted.

Any suggestions on the best type/manufacturer on body filler?

thanks
 

Attachments

  • Large_IMG_2147.jpg
    Large_IMG_2147.jpg
    73.3 KB · Views: 52
  • Large_IMG_2139.jpg
    Large_IMG_2139.jpg
    78.5 KB · Views: 44
  • Large_IMG_2141.jpg
    Large_IMG_2141.jpg
    90.3 KB · Views: 54
  • Large_IMG_2143.jpg
    Large_IMG_2143.jpg
    83.1 KB · Views: 76
  • Large_IMG_2145.jpg
    Large_IMG_2145.jpg
    78.8 KB · Views: 61

72_EB

66to77
Joined
Feb 4, 2003
Messages
4,963
Can you tell my about what you thought of those outer quarters quality and fit. I keep thinking of bringing my green machine back to uncut. Doesn't sound like you were too happy with the taillight housings. What about the quarters? Looks like it's not quite lining up in back with the rear taillight housing. Maybe with stock ones, it might be better??? Thanks! Keep up the good work!
 
OP
OP
K

kuch68

Jr. Member
Joined
Aug 8, 2001
Messages
135
Loc.
Waterford, MI
72_EB said:
Can you tell my about what you thought of those outer quarters quality and fit. I keep thinking of bringing my green machine back to uncut. Doesn't sound like you were too happy with the taillight housings. What about the quarters? Looks like it's not quite lining up in back with the rear taillight housing. Maybe with stock ones, it might be better??? Thanks! Keep up the good work!


72_EB:
I thought the quality of the quarter panels was better than average. There was not any significant modifications need to fit up the panel. It did match the stock housing a little better, however you still need to take your time fitting the panels. The most important part is to cinch the seam between the upper and lower quarter as tight as possible and that should help align it perfectly.
 

72_EB

66to77
Joined
Feb 4, 2003
Messages
4,963
You got everything from Jeff's I assume, since you are right there in Michigan, yes?
 
OP
OP
K

kuch68

Jr. Member
Joined
Aug 8, 2001
Messages
135
Loc.
Waterford, MI
I am over at Jeff's more than my wife goes food shopping.

Can't say enough good things about them. I can say that most of the panels I have used so far from them are good quality. The rear wheel tubs and tail light housings leave something to be desired, but they can be used if you spend some time working on them and turn the welder down a little since the metal is thinner gauge.
 
OP
OP
K

kuch68

Jr. Member
Joined
Aug 8, 2001
Messages
135
Loc.
Waterford, MI
Well there was some more progress made this weekend. I am a little bummed though, I am out of town for the next two weekends and won't be able to make any more progress.

Here's the details: I was able to fit in the the wheel housing, inner rear quarter, and extension panels but I did not have the rear filler neck cover so I only welded in the rear extension panel and the inner quarter.

Then I started working on the tail light housing that I patched in the area surrounding the tail light. I completely filled the gap with weld around the area and grinded it down. Then I applied the first coat of duraglass and sanded with 80 grit. The pictures show what it looks like now, I think I can get a way with one more skim coat.
 

Attachments

  • Large_IMG_2162.jpg
    Large_IMG_2162.jpg
    73.5 KB · Views: 33
  • Large_IMG_2161.jpg
    Large_IMG_2161.jpg
    66.9 KB · Views: 27
  • Large_IMG_2160.jpg
    Large_IMG_2160.jpg
    89 KB · Views: 43
  • Large_IMG_2158.jpg
    Large_IMG_2158.jpg
    95.2 KB · Views: 39

73explorer

Jr. Member
Joined
Mar 26, 2004
Messages
115
Loc.
Fayetteville, NC
hey josh, went to your website - its great. since you have done what i plan on doing to my ORANGE 73 this winter - what is your recommendation for the order of front pan replacement panels (i'm getting the entire front section from jeff's just like you did). plus, what would you possibly do different if you had it to do over again.
thanks bro!
 
OP
OP
K

kuch68

Jr. Member
Joined
Aug 8, 2001
Messages
135
Loc.
Waterford, MI
Thanks for the compliment....I am glad it is helping someone out.

I think the most important part is lining up the tunnel area and front floorpans first, although I am sure opinions will differ. If you have a good firewall section and are just replacing the JBG floor pan kit, then just cut out enough to do the front piece first. Then, when you get that in place and tack a couple welds in, you can cut out more of the rear sections and line them up.

Things I would do differently:
Use some sheet metal screws to pull the metal down to the support channels before welding.
Be careful with the overlapping seams on the inner rocker panels when cutting out the old floor pans. If the seams are good, use a spot weld cutter and pry the old floor pans away a little at a time.

Also, if you are replacing the support channels need to be replaced, it will take a little time to fit them properly. Some might be too long and need to be trimmed in the middle. Don't sweat it though, take your time, measure twice and cut once.

Send me any other questions you have.

Good Luck!
 
OP
OP
K

kuch68

Jr. Member
Joined
Aug 8, 2001
Messages
135
Loc.
Waterford, MI
After two weeks of travel for work and a buddies wedding, my anticipation finally manifested itself in a good deal of welding tonight. I was able to get almost all of the drivers side wheel well, filler necks, and extension panels in place. Sheet metal goes in so much easier when it is surrounded by good sheet metal.

I had a slight problem with the rear filler neck as the wheel well profile did not match up. I grinded down the best I could and will make a small patch where there is a 1/2" discrepancy. I took a little persuasion with a piece of wood and hammer, but got it close enough.

My hope is to button up the welding in that area tomorrow and start modifying my other tail light housing. From there it is only drivers side door post, kick panel, rocker panel. Then the front clip. The body might just be done before the year is up.
 

Attachments

  • Large_IMG_2192.jpg
    Large_IMG_2192.jpg
    93.7 KB · Views: 18
  • Large_IMG_2193.jpg
    Large_IMG_2193.jpg
    75.9 KB · Views: 33
  • Large_IMG_2196.jpg
    Large_IMG_2196.jpg
    85 KB · Views: 21
  • Large_IMG_2197.jpg
    Large_IMG_2197.jpg
    86.4 KB · Views: 23
  • Large_IMG_2198.jpg
    Large_IMG_2198.jpg
    101.1 KB · Views: 22
Top