Community
Message Forum
Photo Gallery
Event Calendar
Book Reviews
Bronco Wallpaper
Bronco FAQ
Link Back to CB!
Photo Gallery
Event Calendar
Book Reviews
Bronco Wallpaper
Bronco FAQ
Link Back to CB!

Buy / Sell


Bronco Tech
3 Arm Wiper Setup
Fix Motor Mount
Roll Cage Braces
Throttle Body 65mm
Wheel Alignment
Heat Riser Replacement
Vent Window Repair
Center Console Mount
Straighten Bumper
Ford 6R80 6 spd
More Tech...
Fix Motor Mount
Roll Cage Braces
Throttle Body 65mm
Wheel Alignment
Heat Riser Replacement
Vent Window Repair
Center Console Mount
Straighten Bumper
Ford 6R80 6 spd
More Tech...

Install the app
-
Welcome to ClassicBroncos! - You are currently viewing the forums as a GUEST. To take advantage of all the site features, please take a moment to register. It's fast, simple and absolutely free. So please join our community today!If you have problems registering or can't log into your account, please contact Admin.
You are using an out of date browser. It may not display this or other websites correctly.
You should upgrade or use an alternative browser.
You should upgrade or use an alternative browser.
ARA A/C Rebuild
- Thread starter JaxLax
- Start date
JaxLax
Bronco Guru
Everyone went to bed early, so I got a chance to get the first side of each hose and the two splices in.
PROGRESS!
So now I'll just keep prepping.
Next I will get out the firewall grommets and cut out the holes for the hoses.
Then install the drier.
Then the compressor (with oil added).
Then the hose install can start as I'll be cutting them to length once I figure out routing and such.
Hopefully having everything on hand and test fitted and such will make the install go pretty fast. %)
I'll probably get it all in and test for leaks before bothering with renting the gauges and pump again.
Attachments
Rustytruck
Bronco Guru
- Joined
- Feb 24, 2002
- Messages
- 10,875
kudos to you to take on a project like this and keep it a daily driver. I would go insane with the off and on and all the running changes. Looks like your on a roll now.
JaxLax
Bronco Guru
kudos to you to take on a project like this and keep it a daily driver. I would go insane with the off and on and all the running changes. Looks like your on a roll now.
Thanks man!
It's either make it work/happen or don't. I always need a project (idle hands and head are my mortal enemy).
I think I've got it all under control now.
Just a matter of finding the big chunks of time. I can do all the little things, but it's the elusive 4 hour blocks the slow it down.
The daily driving portion makes things a lot harder than they need be, but my kids need transportation too. I have located a new leak on my input shaft of my steering box. I know where and how and what to do it fix it, it's just staying on the list since ripping the box off can't happen in an evening. So it's another ounce of fluid every other week to keep it full for now....
JaxLax
Bronco Guru
Hey Matt, were you able to get that condenser clearance right with the pics I sent? The hood latch guard was definitely a must.
The new condenser is about 3/8 thinner than the old one. Since I’m using the old brackets the hood latch clears without the need for a guard.
I thought I might alter the brackets and get more clearance from the radiator, but that was the ultimate reason I will not now.
JaxLax
Bronco Guru
Great day that just didn’t end well.
Well, I was forced to take a vacation day or lose it; so I set out to get the AC done.
For once I’ll soare y’all the details for now as I’m not in the mood.
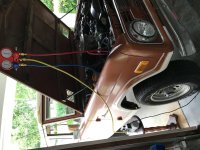
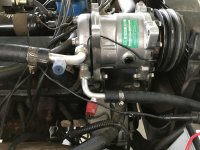
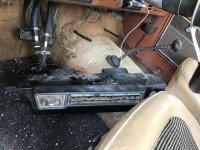
I got the new condenser in. I got the new drier in. I got the new-to-me compressor in. I installed all the new lines. I reinstalled the evaporator.
Buttoned up the little things.
Got the belt reinstalled. Powered up the fans. Clutch engages.
So it was time to pull vacuum. Sat at -29 for about 15 minutes and closed it off. A half hour later it’d lost 5 psi. So I shot some uv dye in and drive around for a while running errands. Got home and checked. Nothing. No dye.
So I ate lunch and let the bay cool down.
Came back out and looked again. Nothing. Started checking connections and the two on the compressor bumped a quarter or more each.
Pull test vacuum again for 15 at -30 psi. Lock it out and do some chores. About 49 minutes later we’re still at -30! I suppose one of the two wasn’t fully seated. So start vacuum again and let it go for just shy of two hours.
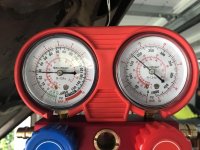
Close everything off. Start up the car. Attach a can. Purge the line. Open the low side and immediately it jumps to 80 psi and stays there.
It won’t take any refrigerant out of the can. Close the valve and it drops back down to 5 or so. Open and it shoots back to 80?
I closed everything back off and double checked that I could get refrigerant out and I could. Purge valve and can top both release. Try again with the same result.
I closed the manifold and turned off the engine and ac and it was pegged at 80 psi on both sides?
I’m at a loss again.
So I cleaned up. Removed everything so I can drive her to work tomorrow.
Trying to figure out what to do next.
I guess I’ll seal the can I have open and pull vacuum again tomorrow evening? Then double and triple check my steps for charging and hope for a netter result.
Any thoughts or advice is appreciated.
Attachments
-
 C08DFA40-3158-4CF0-B12C-0FAE40B145B6.jpg124.2 KB · Views: 35
 -
 2A22ED67-09A8-400F-A5D5-4578A71CF844.jpg108.8 KB · Views: 45
 -
 C38F70E4-4B76-4257-A85C-023A98657A18.jpg86.3 KB · Views: 44
 -
 06D19F44-0E36-4AEB-B18F-D8B13F9DF75E.jpg103.8 KB · Views: 44
 -
 8106C9BD-EADA-4099-A77C-E6947D4084BF.jpg90.1 KB · Views: 41
 -
 3D842FB0-AB03-4428-A1C0-28E5A518537E.jpg109.9 KB · Views: 35
 -
 079366F4-A083-4A81-A67E-90A0ABAF1572.jpg149.7 KB · Views: 46
Rustytruck
Bronco Guru
- Joined
- Feb 24, 2002
- Messages
- 10,875
Is your rotation right for your compressor?
JaxLax
Bronco Guru
Is your rotation right for your compressor?
Perhaps I don’t understand.
Are you thinking that it’s a ccw versus the assumed cw rotation?
The previous owner of the compressor had it mounted on the passenger drivers side (like others) but the direction of the belt would be the same.
Searching gives me a thoughts of double checking the seals (everywhere) as maybe one is causing a blockage (most notably in the manifold), pre charging the high side, moving the yellow line from the bottom to the upper connection, amongst other things.
Right now I’m thinking I’ll disassemble the manifold and reassemble. Pull a new vacuum. Check for leaks again. Then see where we stand.
A lot of people seem to have the same problem, but not the same symptoms. My clutch engages fine. Purge line shows it’s pressurized. Low side jumps like it should, but it just won’t accept anything from the can...I don’t have equal pressures when testing (so the compressor isn’t shot). Going to check for blockages, but if there was one maybe I’ll try and pull vacuum on one side and then the other separately? Could there be a low side blockage and I was pulling solely from the high side?
Rustytruck
Bronco Guru
- Joined
- Feb 24, 2002
- Messages
- 10,875
Rustytruck
Bronco Guru
- Joined
- Feb 24, 2002
- Messages
- 10,875
I don't know about rotation just threw it out as a possibility since your high and low pressures are the same. This is assuming that the unit is actually on and calling for cool on the thermostat.
When you introduced the 134 the system was still under vacuum right?
When you introduced the 134 the system was still under vacuum right?
JaxLax
Bronco Guru
When you introduced the 134 the system was still under vacuum right?
Yes.
Pulled vacuum. Closed manifold (gauges remained -30 psi). Moved yellow hose from vacuum to Freon can. Pierced can and pressurized yellow line. Purged yellow line of air. Started engine then fans then turned temp knob to max. Immediately the clutch engaged.
I did not make a mental note of the pressures at that time.
Then slowly opened the low side only. It jumped and initially I was ok as that’s what happens when the refrigerant is first introduced and then it settles as it pulls and empties the can.
This time it went to 80 (the high set in around 125 during operation) on the low side and would not take anything out of the can. If I closed the valve the low side would drop to 10psi.
I just went outside and disassembled the manifold and put it back together. No visible blockages.
I’ll play with the vacuum tomorrow and see if one side or the other can’t pull.
Rustytruck
Bronco Guru
- Joined
- Feb 24, 2002
- Messages
- 10,875
One note every dryer I have see have been close to the condenser and not mounted up high on the firewall.
Rustytruck
Bronco Guru
- Joined
- Feb 24, 2002
- Messages
- 10,875
One the dryer is there a directional arrow and plumbed properly.
JaxLax
Bronco Guru
That’s the location of the original drier. I guess I could move it.
Yes. The “in” side is on the condenser side. The non-labeled side is on the evap side.
Yes. The “in” side is on the condenser side. The non-labeled side is on the evap side.
charlie6976
Sr. Member
Yes.
Pulled vacuum. Closed manifold (gauges remained -30 psi). Moved yellow hose from vacuum to Freon can. Pierced can and pressurized yellow line. Purged yellow line of air. Started engine then fans then turned temp knob to max. Immediately the clutch engaged.
I did not make a mental note of the pressures at that time.
Then slowly opened the low side only. It jumped and initially I was ok as that’s what happens when the refrigerant is first introduced and then it settles as it pulls and empties the can.
This time it went to 80 (the high set in around 125 during operation) on the low side and would not take anything out of the can. If I closed the valve the low side would drop to 10psi.
I just went outside and disassembled the manifold and put it back together. No visible blockages.
I’ll play with the vacuum tomorrow and see if one side or the other can’t pull.
I just did a/c. During the charge cycle you do not open the high (red) side. I follow that you are taking a high side reading during your charge. Read your directions again if that's what you did.
That’s the location of the original drier. I guess I could move it.
Yes. The “in” side is on the condenser side. The non-labeled side is on the evap side.
All the dealer added ARA systems I have seen/owned have the drier on the passenger side firewall.
JaxLax
Bronco Guru
I just did a/c. During the charge cycle you do not open the high (red) side. I follow that you are taking a high side reading during your charge. Read your directions again if that's what you did.
Correct.
Only opening low side and during charge.
High side is closed and only visually monitored to make sure the pressures stay in range.
I’m aiming for a steady state of about 40psi on low and 125psi on high with the ac running wide open.
JaxLax
Bronco Guru
Tried again today.
Must have been a clog or blockage in the manifold because IT TOOKTHE CHARGE.
I HAVE AIR CONDITIONING
THIS IS NOT A DRILL
WE HAVE COLD AIR.
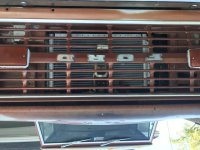
Of course, now I a condensation issue from the middle of my evap. Hoping that it’s just due to the prolonged open windows and run time. But it half filled a frisbee from when I saw it until I was done!
Left the gauges hooked up and checking every hour to make sure there aren’t any slow leaks, but so far so good.
Need to clean up and seal up the firewall, but the big stuff seems to be done.
Attachments
Rustytruck
Bronco Guru
- Joined
- Feb 24, 2002
- Messages
- 10,875
Looking good are you about 30 degrees below ambient? Just before the weekend too so you can button it up and be done with this project.
Similar threads
- Replies
- 1
- Views
- 122




![IMG_0825[1].jpg](/forums/data/attachments/406/406059-3f6e145aa9c4283e923f553d99d6d92f.jpg)


