• Welcome to ClassicBroncos! - You are currently viewing the forums as a GUEST. To take advantage of all the site features, please take a moment to register. It's fast, simple and absolutely free. So please join our community today!
    If you have problems registering or can't log into your account, please contact Admin.

Pebbles: 1 Family Mostly Stock 68 Build

OP
OP
chuckyb

chuckyb

Contributor
Sr. Member
Joined
Oct 25, 2016
Messages
941
Yes, I have peace of mind about it based upon what has happened. The situation was I had the original NJ title from 1968 in my Grandfather's name. My mom years ago signed his name on the seller's line as the executrix of his estate. It was not dated or notarized, which is the NC requirement. I took the title to DMV and explained that my Grandfsther had died and I moved from out of state. They scheduled an inspector to come to my house. The inspector verified that the VIN on my title application matched the glovebox AND frame. She asked to see the frame VIN immediately. I then received an Inoperable Vehicle title. When the rig is roadworthy, I need to schedule another inspection. Upon the second inspection, I will get a standard NC title to replace the Inoperable title. Based on some of the other issues I have read about here and what the DMV inspector told me, I think I avoided getting a rebuild title by having them come out when the truck was more intact with body panels, interior and drive train instead of a frame and a slew of parts.
So were you able to get ur DMV to re-evaluate your title since you found ur vin? I hope you get a legit and clean title instead of some salvage or other kind of title.
 
OP
OP
chuckyb

chuckyb

Contributor
Sr. Member
Joined
Oct 25, 2016
Messages
941
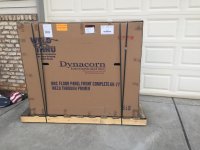
Took delivery of this shipment yesterday- looks nice!
 

Attachments

  • IMG_0151.jpg
    IMG_0151.jpg
    85.1 KB · Views: 83
  • IMG_0154.jpg
    IMG_0154.jpg
    81.3 KB · Views: 125
OP
OP
chuckyb

chuckyb

Contributor
Sr. Member
Joined
Oct 25, 2016
Messages
941
Time for a Chemical Dip

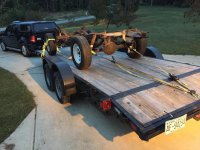
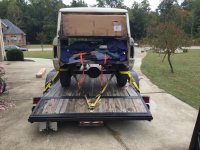
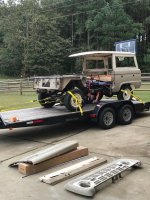
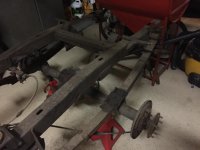
Well, big weekend as the Bronco saw the light of the day for the first time in a long time and got trailered down the road, along with all the sheet metal I have accumulated for 15+ years.

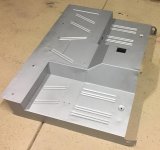
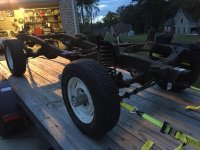
Attached are some pictures. I went into overkill mode on the ratchet tie downs but wanted to be extra safe as she is a free roller with no brakes emergency or otherwise. Note how nicely the entire boxed one piece floor pan assembly fits into the cargo area!

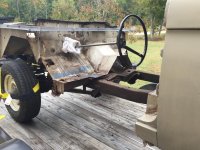
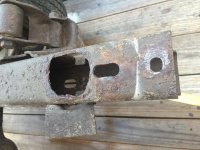
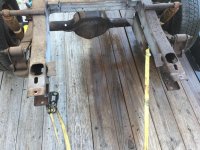
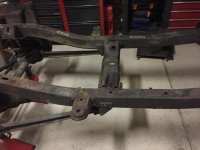
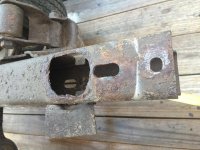
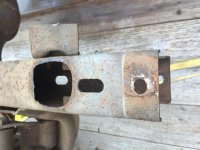
As shown, the two pieces of the tub were hoisted off the frame. They will get chemically dipped along with all of my other used sheet metal to see what is really salvageable and then will go from there. As is often the case, removal of one part has revealed unknown damage behind it. When the tub was removed, I learned that I have frame damage as the rear body mount supports have completely rusted apart. I have brought the chassis back home and will begin to think through my game plan.
Attached Thumbnails
 

Attachments

  • IMG_0234.jpg
    IMG_0234.jpg
    106.6 KB · Views: 122
  • IMG_0231.jpg
    IMG_0231.jpg
    116.6 KB · Views: 125
  • IMG_0251.jpg
    IMG_0251.jpg
    82.4 KB · Views: 128
  • IMG_0245.jpg
    IMG_0245.jpg
    65.6 KB · Views: 131
  • IMG_0209.jpg
    IMG_0209.jpg
    139.7 KB · Views: 129
  • IMG_0208.jpg
    IMG_0208.jpg
    132.9 KB · Views: 139
  • IMG_0236.jpg
    IMG_0236.jpg
    159.5 KB · Views: 150
OP
OP
chuckyb

chuckyb

Contributor
Sr. Member
Joined
Oct 25, 2016
Messages
941
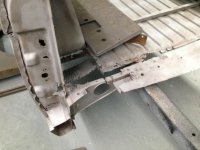
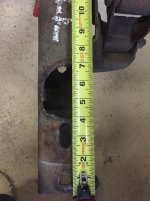
Here are some pictures of the rust damage on the frame at the rear body mount points.
 

Attachments

  • IMG_0260.jpg
    IMG_0260.jpg
    109.1 KB · Views: 123
  • IMG_0259.jpg
    IMG_0259.jpg
    92 KB · Views: 124
  • IMG_0258.jpg
    IMG_0258.jpg
    142.4 KB · Views: 123
OP
OP
chuckyb

chuckyb

Contributor
Sr. Member
Joined
Oct 25, 2016
Messages
941
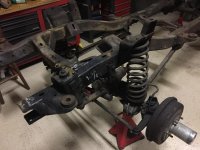
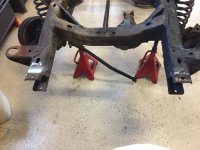
Slowly making progress. On jack stands and shocks removed. Unfortunately, one broken shock mount in the process. Both Frame VINs found (outlined in yellow chalk).
 

Attachments

  • D75F8AD7-38EB-4A7C-804F-03FC2544F863.jpg
    D75F8AD7-38EB-4A7C-804F-03FC2544F863.jpg
    97.7 KB · Views: 128
  • B3781D20-69EF-4162-BAD4-7BD784998428.jpg
    B3781D20-69EF-4162-BAD4-7BD784998428.jpg
    72.2 KB · Views: 115
  • F559AAE9-0D3B-446C-83BE-7754BD92319E.jpg
    F559AAE9-0D3B-446C-83BE-7754BD92319E.jpg
    79.5 KB · Views: 128

rydog1130

Sponsor/Vendor
Bronco Guru
Joined
Jun 19, 2014
Messages
4,079
Here are some pictures of the rust damage on the frame at the rear body mount points.

Mine had that too...just made a patch and used a 1/2/4” hole saw to cut new body bushing mount holes!
 

sprdv1

Contributor
REBEL
Joined
Mar 8, 2007
Messages
81,961
Long as you're making progress right.. Hang in there

Slowly making progress. On jack stands and shocks removed. Unfortunately, one broken shock mount in the process. Both Frame VINs found (outlined in yellow chalk).
 
OP
OP
chuckyb

chuckyb

Contributor
Sr. Member
Joined
Oct 25, 2016
Messages
941
Body Mount Removal

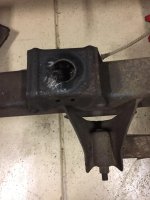
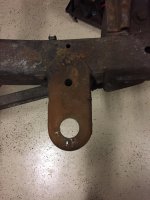
All the body mounts are now off. I read here about the various ways to remove. I opted for the drill method instead of sawzall. I started with a 1/4 bit drilling down through the center then went up one size at a time to three slightly larger sizes until they started to come apart. Once loose, they were pretty easy to pry off. The front row and rear row will need repairs to the mount bases due to rusting where the rubber attached to the base. Second and third rows look solid. Pictures moving from front to back of both fronts, driver 2nd row, driver 3rd row and both rears. As Ryan has suggested, I will get these patched and also considering a set of the repair washers to put on top.
 

Attachments

  • 0CF0EC59-DF3F-46B1-B65C-9CB598CF9506.jpg
    0CF0EC59-DF3F-46B1-B65C-9CB598CF9506.jpg
    109.1 KB · Views: 74
  • D04B613E-1345-496C-9A54-B8085D5D278F.jpg
    D04B613E-1345-496C-9A54-B8085D5D278F.jpg
    92 KB · Views: 83
  • C1CCA798-2258-4B5F-8E39-FC9E27B1C546.jpg
    C1CCA798-2258-4B5F-8E39-FC9E27B1C546.jpg
    79.9 KB · Views: 89
  • 6D0F3DA2-3BB7-44F1-BD04-45840FD0091D.jpg
    6D0F3DA2-3BB7-44F1-BD04-45840FD0091D.jpg
    94.2 KB · Views: 90
  • 720F444B-8AE9-402B-A716-28AA8EEBB9B6.jpg
    720F444B-8AE9-402B-A716-28AA8EEBB9B6.jpg
    78.1 KB · Views: 87
  • 5A09612D-D4CA-4440-93B9-506A1F47F2C7.jpg
    5A09612D-D4CA-4440-93B9-506A1F47F2C7.jpg
    77.7 KB · Views: 95
OP
OP
chuckyb

chuckyb

Contributor
Sr. Member
Joined
Oct 25, 2016
Messages
941
Steering and Front Hub tear-down

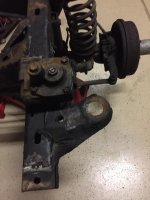
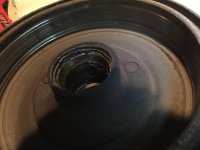
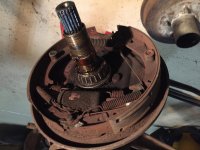
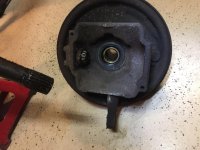
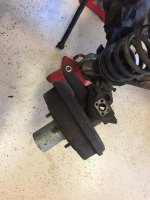
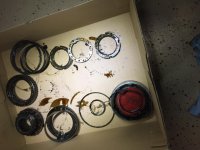
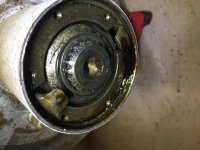
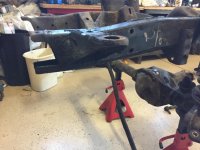
I have worked to remove the steering linkage, and the trac bar. Also removed the manual PS box and the pitman arm. From there I moved on to the front drums and hubs. Thanks to dirtdonk and all of the others that have posted in detail about this process previously. On the driver’s side I removed all the hub pieces and also removed the top ball joint prior to attempting to pull the brake drum off. This resulted in separating the entire hub and drum as one unit from the splines of the axle. I think this will be fine since I plan on upgrading to Front disc brakes anyway. On the passenger side I was able to remove the drum from the hub after loosening the brake adjusting wheel through the slot. The drum is in very bad shape with deep grooves as seen in the picture. The end is in sight for the tear down process and I am looking forward to being done with rust and grime and beginning to bolt together clean and shiny parts.
 

Attachments

  • 996005A9-44A8-4A4F-BD97-DA07EF73BD97.jpg
    996005A9-44A8-4A4F-BD97-DA07EF73BD97.jpg
    72 KB · Views: 52
  • B5BB5122-51B7-4B98-A782-22A90A74C917.jpg
    B5BB5122-51B7-4B98-A782-22A90A74C917.jpg
    91.3 KB · Views: 51
  • B280A029-0EFB-40AD-A239-1D1813D74E2A.jpg
    B280A029-0EFB-40AD-A239-1D1813D74E2A.jpg
    87.8 KB · Views: 54
  • 0BC9CA7D-3875-47C1-8B76-B46766622785.jpg
    0BC9CA7D-3875-47C1-8B76-B46766622785.jpg
    108.8 KB · Views: 54
  • 2048F081-DBD3-42EA-8F10-B9114EA1315B.jpg
    2048F081-DBD3-42EA-8F10-B9114EA1315B.jpg
    90.2 KB · Views: 58
  • FBF41E51-45AD-489F-B8BA-319C28CC8C1C.jpg
    FBF41E51-45AD-489F-B8BA-319C28CC8C1C.jpg
    89.3 KB · Views: 61
  • 3CA69F99-E1A5-4F09-8AC1-2306F95FC54F.jpg
    3CA69F99-E1A5-4F09-8AC1-2306F95FC54F.jpg
    100.2 KB · Views: 55
  • 9BE6A05C-B746-459E-AE1D-6E8A266B725A.jpg
    9BE6A05C-B746-459E-AE1D-6E8A266B725A.jpg
    114.9 KB · Views: 61
OP
OP
chuckyb

chuckyb

Contributor
Sr. Member
Joined
Oct 25, 2016
Messages
941
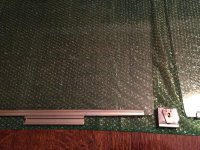
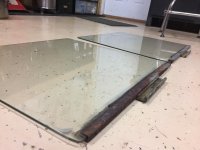
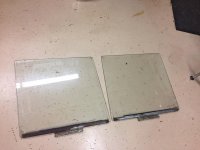
Door Windows

Before and after on the door windows. Aside from soaking the windows to loosen the old supports, the time consuming item was removing rust and old tape residue from the bottom of the windows. I used the Scott Drake channel supports and the setting tape from Dennis Carpenter. Vent window frames are on the bench waiting to be tackled.
 

Attachments

  • D0AB587F-13ED-4181-9558-93DE35D263DD.jpg
    D0AB587F-13ED-4181-9558-93DE35D263DD.jpg
    118 KB · Views: 51
  • FFD5E3EC-A216-4338-9A93-0809D306C598.jpg
    FFD5E3EC-A216-4338-9A93-0809D306C598.jpg
    147.6 KB · Views: 67
  • 9BCCE32D-077F-4A18-9974-E95865DF9859.jpg
    9BCCE32D-077F-4A18-9974-E95865DF9859.jpg
    68.4 KB · Views: 60
  • 96174BE2-CCCC-4786-8703-2EC9BD16FBB0.jpg
    96174BE2-CCCC-4786-8703-2EC9BD16FBB0.jpg
    71.6 KB · Views: 61
OP
OP
chuckyb

chuckyb

Contributor
Sr. Member
Joined
Oct 25, 2016
Messages
941
Shake and Bake

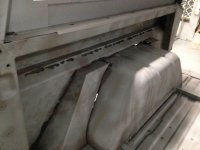
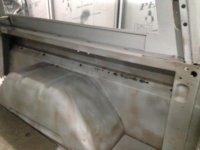
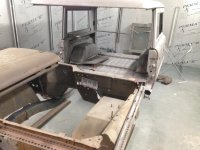
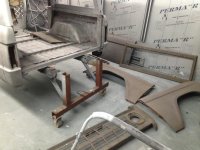
I had announced these as on their way for a chemical dip but instead they were cooked in an oven. It is good to have all the rust gone. I am hoping that the firewall and rad support, roof, doors, hood, fenders TG and windshield at least can be reused. I have Dynacorn quarters and one piece floor, door and TG posts and I think most of the rest of the panels needed. I need to get busy with the frame so i have a clean slate for when it gets bodywork and paint.
 

Attachments

  • AB1211C9-E27B-44FB-A4FC-4F03A5A60A85.jpg
    AB1211C9-E27B-44FB-A4FC-4F03A5A60A85.jpg
    88.9 KB · Views: 117
  • D263BDFB-FDC2-4908-BF87-4B25AAABA578.jpg
    D263BDFB-FDC2-4908-BF87-4B25AAABA578.jpg
    75.2 KB · Views: 115
  • BB7F2E7F-C6CE-4ECB-A56E-556AAA419A00.jpg
    BB7F2E7F-C6CE-4ECB-A56E-556AAA419A00.jpg
    79.4 KB · Views: 126
  • 2E61136D-9E77-4930-A5ED-4722253F4BBE.jpg
    2E61136D-9E77-4930-A5ED-4722253F4BBE.jpg
    74.2 KB · Views: 124
  • 917F37AA-1AA0-4402-9B00-51556EAC2F06.jpg
    917F37AA-1AA0-4402-9B00-51556EAC2F06.jpg
    96 KB · Views: 133
  • BADC0476-B3CB-432F-9BDE-49360CC7D8E3.jpg
    BADC0476-B3CB-432F-9BDE-49360CC7D8E3.jpg
    99.3 KB · Views: 135
Last edited:

rydog1130

Sponsor/Vendor
Bronco Guru
Joined
Jun 19, 2014
Messages
4,079
That's how my bed looked and I decided to just go ahead and replace everything. You might be able to patch those spots but it will be some work!Good luck!
 
OP
OP
chuckyb

chuckyb

Contributor
Sr. Member
Joined
Oct 25, 2016
Messages
941
The bed is toast, I just didn’t get around to completely removing it. I have the replacement bed panel with the weld nuts for a rear seat along with the four corner pieces to mate up with the new inner quarters.
 
OP
OP
chuckyb

chuckyb

Contributor
Sr. Member
Joined
Oct 25, 2016
Messages
941
I have not seen the sheet metal in person since the baking but I am hoping the outer quarters are ok. They are accident free and seemed pretty solid. The only issues I saw pre-bake was a bit of rot where the reflectors attach and some rust in the outer seam where the inner and outer quarters connect. Stay tuned!
 
OP
OP
chuckyb

chuckyb

Contributor
Sr. Member
Joined
Oct 25, 2016
Messages
941
Frame Repair

Getting lined up to do some frame repair. I have 8 repair washers and replacement stock upper rear shock mounts from JGB. Brian (CB member: migs) is making me some frame patches for the rot holes at the rear mounts.
 

Attachments

  • F080D7BA-CD48-4A70-ADE7-1AE3BDB3E708.jpg
    F080D7BA-CD48-4A70-ADE7-1AE3BDB3E708.jpg
    91.8 KB · Views: 43
  • AEC64201-513A-4BE7-831C-BADD184117E0.jpg
    AEC64201-513A-4BE7-831C-BADD184117E0.jpg
    91.6 KB · Views: 41
Top