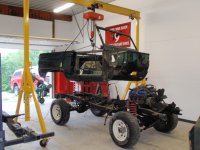
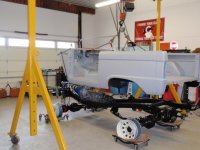
Whoever ended up with that crawler is one lucky person. Even more badass now than when I had it. 
Community
Buy / Sell


Bronco Tech
3 Arm Wiper Setup
Fix Motor Mount
Roll Cage Braces
Throttle Body 65mm
Wheel Alignment
Heat Riser Replacement
Vent Window Repair
Center Console Mount
Straighten Bumper
Ford 6R80 6 spd
More Tech...
Fix Motor Mount
Roll Cage Braces
Throttle Body 65mm
Wheel Alignment
Heat Riser Replacement
Vent Window Repair
Center Console Mount
Straighten Bumper
Ford 6R80 6 spd
More Tech...

-
Welcome to ClassicBroncos! - You are currently viewing the forums as a GUEST. To take advantage of all the site features, please take a moment to register. It's fast, simple and absolutely free. So please join our community today!If you have problems registering or can't log into your account, please contact Admin.
You are using an out of date browser. It may not display this or other websites correctly.
You should upgrade or use an alternative browser.
You should upgrade or use an alternative browser.
Harbor Blue Build Thread
- Thread starter JeffG
- Start date
- Joined
- Nov 3, 2013
- Messages
- 1,180
Great thread! Now I want a Casita camper for my '74. But I would need to put a hitch on it... Also like the zinc coating you did.
I went with KBS on the frame but yours looks better than mine. I ran a little short as I coated a couple other items prior to the frame. My brush strokes are more visible on the top coat. I could have sanded it and put another coat but I was on a time constraint.
I went with KBS on the frame but yours looks better than mine. I ran a little short as I coated a couple other items prior to the frame. My brush strokes are more visible on the top coat. I could have sanded it and put another coat but I was on a time constraint.
I haven't done much to report on the Bronco other than cleaning up the wiring harness. The harness was in pretty good shape and not a lot of PO hacks or cuts.
I did remove the original harness wrap and fixed a few areas with crimpless connectors and shrink wrap. I also purchased some harness wrap off Amazon that I will be using to re-wrap prior to going back in.
I did remove the original harness wrap and fixed a few areas with crimpless connectors and shrink wrap. I also purchased some harness wrap off Amazon that I will be using to re-wrap prior to going back in.
Attachments
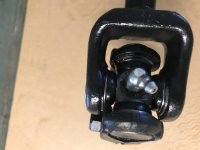
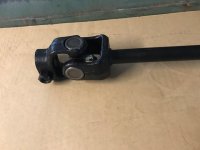
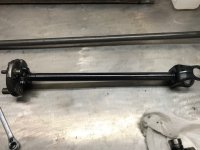
A little more progress to add to the thread. Cleaned up the lower steering shaft and purchased a new u-joint off Ebay.
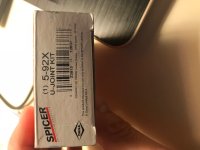
For reference, the Spicer part # is 5-92X. Interesting thing is the OE u-joint didn't have needle bearings. At first I was thinking what happened to the bearings, but it appears the caps were sleeved and wasn't designed with bearings. Either way, it had slop at all four corners and the new one is much tighter.
For reference, the Spicer part # is 5-92X. Interesting thing is the OE u-joint didn't have needle bearings. At first I was thinking what happened to the bearings, but it appears the caps were sleeved and wasn't designed with bearings. Either way, it had slop at all four corners and the new one is much tighter.
Attachments
I never drove this bronco before beginning the build, but I do want to rebuild the steering box. I will use West TX Offroad, but I wanted to check in with the group to get your thoughts on 6 turn vs. 4 turn.
For my other bronco, I did the 4x4x2 conversion and have never driven a bronco with a 6 turn box. Last time I checked West TX charges an additional $100 to convert your box to a 4 turn.
I'm thinking I will go this route but please share any feedback on 6 vs 4.
Thanks!
For my other bronco, I did the 4x4x2 conversion and have never driven a bronco with a 6 turn box. Last time I checked West TX charges an additional $100 to convert your box to a 4 turn.
I'm thinking I will go this route but please share any feedback on 6 vs 4.
Thanks!
A little more rust repair. I almost missed this area on the passenger door post.
I was going around the tub to see if I had missed anything and saw a tiny pinhole at the lower part of the door post. I pocked a screwdriver through and sure enough it was weakened by rust from the inside. Cut out a small section to replace with new sheet metal.
I was going around the tub to see if I had missed anything and saw a tiny pinhole at the lower part of the door post. I pocked a screwdriver through and sure enough it was weakened by rust from the inside. Cut out a small section to replace with new sheet metal.
Attachments
Also, I saw on another post where someone was asking about the lower "caps" at the bottom of both door posts. Someone commented on removing and not replacing if not a show build.
I would have to agree as I popped the passenger side off prior to repairing the rust and there was quite a bit of junk that came out. Blew the rest out with air hose, but I think I will leave it open to prevent moisture getting trapped.
I would have to agree as I popped the passenger side off prior to repairing the rust and there was quite a bit of junk that came out. Blew the rest out with air hose, but I think I will leave it open to prevent moisture getting trapped.
I haven't yet decided on a paint shop, but I plan on taking care of all panel replacement and as much as I can on my own.
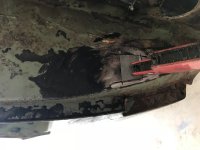
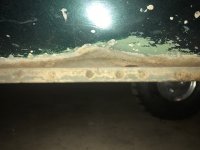
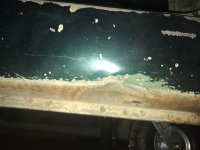
Here is a pic of the passenger rocker panel. The panel is very solid with no signs of rust, but it has dent toward the front. The dent is near one of the drain holes. Any advise on how to fix a dent like this? I can't get behind it to hammer/dolly it. Plus, the rocker is thick material.
I may leave this one for the paint shop unless I can figure out a way to pull it out. Perhaps weld a bolt or nut on it and use a slide hammer on it?
Thanks.
Attachments
I usually drive a drift pin through the metal behind it an pry it out. Ken
I usually drive a drift pin through the metal behind it an pry it out. Ken
Just so I'm clear, would I drill a hole in the door sill big enough for a drift and hammer it out? Then weld up the hole?
Where ever you have a clear access point to the dent. I would try and do it through the backside on the inner rocker and pry the dent out. I have done it through the top of rocker too and weld up hole when done. Ken
Got a little more progress this past weekend. I'm not sure what year my tub is, but it had a rubber plug covering the hole where some have the plastic bottle venting the gas tanks. My '69 didn't have this so maybe PO added the plug or it was destined for a location that didn't require it?
Either way, I will be filling in that hole.
Either way, I will be filling in that hole.
Attachments
My old man picked up a sweet aluminum gantry crane at an auction awhile back. It has what looks like military lettering on the legs. I was hoping it would fit in my garage to help me with heavy lifting when no one else is around. Worked great to lift the tub.
Attachments
The crane allowed me to mount the tub to the rotisserie by myself. I had a few stressful moments, but in the end it all worked out.
I could just see the tub falling from 4 feet in the air and crashing on the concrete floor! %)%)
I could just see the tub falling from 4 feet in the air and crashing on the concrete floor! %)%)
Attachments
Didn't realize the pics were so dark. By the time I finished, the sun was going down. I will take better pics in the daylight.
Next step is to remove the gunk from the bottom of the tub and tend to any areas that need fixing from the floor pan install. One area is where PO cut a hole through the floor brace for what looked like a PTO lever.
Luckily I have some pieces of another donor tub so that I can graft that in.
Next step is to remove the gunk from the bottom of the tub and tend to any areas that need fixing from the floor pan install. One area is where PO cut a hole through the floor brace for what looked like a PTO lever.
Luckily I have some pieces of another donor tub so that I can graft that in.
American180
Jr. Member
My old man picked up a sweet aluminum gantry crane at an auction awhile back.
You project is looking good. Having an aluminum gantry is very handy, I wish I had one.
Similar threads
City: Stanfield
- Replies
- 0
- Views
- 121
- Replies
- 17
- Views
- 6K
- Replies
- 17
- Views
- 8K


![IMG_3707[1].jpg](/forums/data/attachments/394/394784-fffe56f146accdc396d303ff7994faaa.jpg)
![IMG_3708[1].jpg](/forums/data/attachments/394/394792-c5b1cf9093278b510dff4835717a57eb.jpg)
![IMG_3709[1].jpg](/forums/data/attachments/394/394798-0dbc6a8b8befbd7d22d02d96b0af94e5.jpg)



![IMG_3816[1].jpg](/forums/data/attachments/401/401178-91c7f6a083cf2c60d0ff9cc0ddbe253f.jpg)
![IMG_3817[1].jpg](/forums/data/attachments/401/401185-e3e187c733223f4d073e188910e83ae5.jpg)
![IMG_3820[1].jpg](/forums/data/attachments/401/401196-f3b0a105f1a9f6ff6492bb12e4c46255.jpg)
![IMG_3819[1].jpg](/forums/data/attachments/401/401193-ecfd161e4bb930c6bfd8d4f83a15245e.jpg)
![IMG_3822[1].jpg](/forums/data/attachments/401/401201-6d2228b0ee40c307b6a54b4f565365a0.jpg)
![IMG_3823[1].jpg](/forums/data/attachments/401/401204-9f86b8b385bbfc8a29e8c38072c8d6d7.jpg)
