• Welcome to ClassicBroncos! - You are currently viewing the forums as a GUEST. To take advantage of all the site features, please take a moment to register. It's fast, simple and absolutely free. So please join our community today!
    If you have problems registering or can't log into your account, please contact Admin.

Rebuild: Bronco the Debilitated

904Bronco

Contributor
Bronco Guru
Joined
Sep 28, 2004
Messages
5,862
Loc.
San Martin, CA
I am sorry to here this... Nobody likes doing things twice.
That happened with the new motor in my former 68. Machinist was good and stood by his work. No One could figure out why the cylinder walls got scored?

K&N filters... Oil soaked? I will never run them again. IMHO
They do not keep the incoming air clean. They get plugged up with dirt quickly and no matter how light you oil they, oil seems to get into and mess up the mass air meter. Three different rigs, and a grenaded run lean motor due to contaminated MAS.

Dry filters only for me.
 
OP
OP
T

tirewater

Sr. Member
Joined
Jan 28, 2011
Messages
1,044
Loc.
San Francisco Bay Area
Thanks for the sentiment. :) We will see once I dig in. I had put on a K&N Oil Filter (not air filter). The K&N oil filters have a nut attached to the end to facilitate removal. The oil filter seemed fine when I took it apart, but I never verified that there wasn't anything stuck in it when I installed it. :p

I'll check the oil bores for blockages. Also, once I see inside I can determine if I didn't measure something properly, or installed something incorrectly.

I also wouldn't mind switching to a newer block (non 8.229" deck) and possibly going roller cam.

I am sorry to here this... Nobody likes doing things twice.
That happened with the new motor in my former 68. Machinist was good and stood by his work. No One could figure out why the cylinder walls got scored?

K&N filters... Oil soaked? I will never run them again. IMHO
They do not keep the incoming air clean. They get plugged up with dirt quickly and no matter how light you oil they, oil seems to get into and mess up the mass air meter. Three different rigs, and a grenaded run lean motor due to contaminated MAS.

Dry filters only for me.
 
OP
OP
T

tirewater

Sr. Member
Joined
Jan 28, 2011
Messages
1,044
Loc.
San Francisco Bay Area
Pictures are always fun.

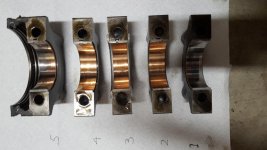
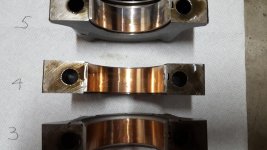
These are the bottom halves of the main bearings. They are oriented correctly. There is uneven wear on #1 and #5. A lot of wear on #s 2,3,4. The thrust surface on #3 is not worn.

There are no obvious scratches on the crank journals.
 

Attachments

  • 20170518_234939.jpg
    20170518_234939.jpg
    121.9 KB · Views: 61
  • 20170518_235447.jpg
    20170518_235447.jpg
    74.7 KB · Views: 61
  • 20170518_235454.jpg
    20170518_235454.jpg
    72.9 KB · Views: 54
  • 20170518_235459.jpg
    20170518_235459.jpg
    72.2 KB · Views: 47
OP
OP
T

tirewater

Sr. Member
Joined
Jan 28, 2011
Messages
1,044
Loc.
San Francisco Bay Area
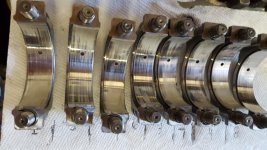
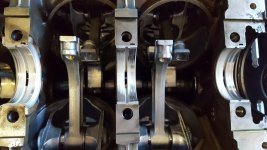
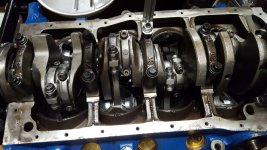
A few more pictures. Rod end bearings and top halves of main bearings. Top half of main bearings do not exhibit as much wear as the bottoms halves. Mahl has a nice write up of different bearing wear.

http://www.mahle-aftermarket.com/me...b-2-1114-engine-bearing-failures-brochure.pdf

The main bearing wear patterns fit the distorted crankcase scenario. I did not align bore the mains when I had the block machined. Another contributing factor could be the ARP head bolts.

I still haven't gone through all the oil passages to look for blockage or debris. I also need to look at camshaft bearings. I'm guessing they look a lot like the rod bearings, exhibiting debris marks.

The wear on the rod bearings is shiny/chrome colored. There is a lot of reflection from the wood ceiling and lights.
 

Attachments

  • 20170519_134350.jpg
    20170519_134350.jpg
    89.9 KB · Views: 42
  • 20170519_134302.jpg
    20170519_134302.jpg
    78.9 KB · Views: 35
  • 20170519_134307.jpg
    20170519_134307.jpg
    82.3 KB · Views: 36
OP
OP
T

tirewater

Sr. Member
Joined
Jan 28, 2011
Messages
1,044
Loc.
San Francisco Bay Area
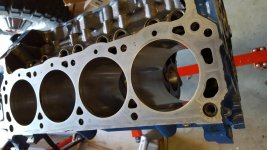
Picked up the block and crank from the engine shop. Crank straightness and bore alignment checked out. I had the shop polish the crank.

Shop felt that detonation was the culprit for the bearing wear. I'm still uncertain. My calculation for CR was 8.6:1 with the D4xx block (8.229 deck). I did not measure the deck height though. Shop felt CR was closer to 9:1. With my very mild cam (Melling SYB26), perhaps high dynamic CR?

Back to putting it together. I cleaned the block, replaced the camshaft bearings. Shop recommended I run a ball hone through the cylinders to remove any glaze...I used the three legged hone from HF.

I measured main bearing clearances, unfortunately they are too high. 1-5: .002", .0025", .0025", .0028", .003". So new crank is in order, or grind my existing crank to .020. I swapped bearing shells to no avail...
 

Attachments

  • 20170702_114519.jpg
    20170702_114519.jpg
    102.3 KB · Views: 34
  • 20170701_154655.jpg
    20170701_154655.jpg
    80.5 KB · Views: 32
  • 20170703_172233.jpg
    20170703_172233.jpg
    72 KB · Views: 34
OP
OP
T

tirewater

Sr. Member
Joined
Jan 28, 2011
Messages
1,044
Loc.
San Francisco Bay Area
Thought I'd post - at least prevent thread from going to archive. :)
Slooowwww going on the engine re-rebuild. So, in researching why my engine went south. The engine builder I took crank & block to have looked over said detonation. When I brought engine parts home I measured crank & engine bearings and found that #2, #4, #5 journals had ~.003" clearance. Mic'ing the crank found that the crank was below tolerance at those journals.

So, my fault for not mic'ing the crank when I got it back from crankshaft milling shop the first time when it was ground 10/10. It appeared they took .010" off the existing wear instead of attempting to grind the crank to be in the middle of the undersize tolerance range. I'm disappointed that the crankshaft shop did a poor job of grinding, disappointed the second shop that checked block & crank didn't mic the crank (they checked for trueness). As assembler, ultimately my fault for not double checking everyone's work the first time.
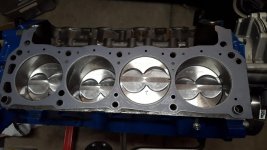
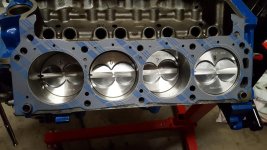
Well, measured everything this time....bought a new Eagle 302 crankshaft, bought new pistons (eh, why not...), re-balanced assembly. All clearances documented and within spec. Reassembled...
 

Attachments

  • 20170906_221732.jpg
    20170906_221732.jpg
    104.6 KB · Views: 28
  • 20170907_220011.jpg
    20170907_220011.jpg
    70.3 KB · Views: 25
  • 20170908_223124.jpg
    20170908_223124.jpg
    90.3 KB · Views: 28
OP
OP
T

tirewater

Sr. Member
Joined
Jan 28, 2011
Messages
1,044
Loc.
San Francisco Bay Area
Engine assembled, waiting installation.

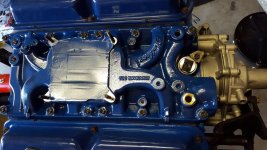
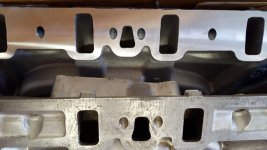
I ended up buying an Edelbrock 302 Performer manifold. My choices were using the original manifold, a 1984 mustang aluminum manifold, or the Edelbrock 302 (stock replacement for our engines, so CA legal).

The mustang manifold had quite a bit smaller ports than both the Edelbrock 302 & my original manifold. The Edelbrock & original '76 manifold had roughly the same size ports. The Edelbrock ports were taller, but narrower.

Eh, the comparison picture is skewed due to camera lens distortion. It makes the mustang manifold ports look bigger...
 

Attachments

  • 20170924_151623.jpg
    20170924_151623.jpg
    107.2 KB · Views: 42
  • 20170924_133824.jpg
    20170924_133824.jpg
    75.9 KB · Views: 40
OP
OP
T

tirewater

Sr. Member
Joined
Jan 28, 2011
Messages
1,044
Loc.
San Francisco Bay Area
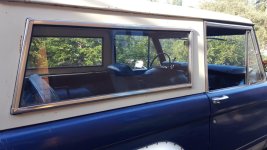
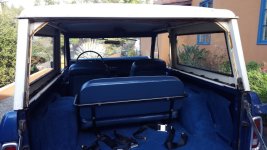
Installed top

Installed top w/ lift gate. This past summers 'job' was to refinish the hard top. Unfortunately the engine re-rebuild got in the way. Next summer I hope.
 

Attachments

  • 20171209_144507.jpg
    20171209_144507.jpg
    86.1 KB · Views: 39
  • 20171209_144522.jpg
    20171209_144522.jpg
    87.3 KB · Views: 47
OP
OP
T

tirewater

Sr. Member
Joined
Jan 28, 2011
Messages
1,044
Loc.
San Francisco Bay Area
New steering wheel - rebuilt front driveshaft.

New wheel. The original wheel had a split through the column piece - while it seemed sturdy enough I didn't really feel that safe with it.

Disassembled the front drive shaft. Cleaned. Soaked in evapo-rust for a week. Cleaned. Painted. Re-assembled with new Spicer ujoints + CV.
 

Attachments

  • 20171209_144535.jpg
    20171209_144535.jpg
    83.9 KB · Views: 54
  • 20171209_144624.jpg
    20171209_144624.jpg
    55.7 KB · Views: 52
OP
OP
T

tirewater

Sr. Member
Joined
Jan 28, 2011
Messages
1,044
Loc.
San Francisco Bay Area
Engine update

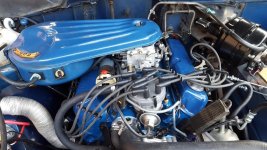
Installed the re-rebuilt engine. Pushed the truck out for the 20 minute cam break-in. The engine ran fairly warm, ~210. At the end of break-in an oil leak appeared at the rear of the engine. Oil dripped at a fairly good clip

After some thought I decided to replace the rear main seal. I dropped the oil pan, removed the rear bearing cap, tapped the seal out. The top half of the seal had a split on the lip. I lubed the seal prior to assembly - but got unlucky.

After inspecting the crank for any marks or for anything that may have torn the seal - I installed a new seal. Using the upgraded Fel-Pro seal.

Ran the engine, leak was fixed (I wasn't 100% sure it was the rear main, but glad that it got fixed without pulling the engine again).

I had installed a new 'flex-fan' on the engine prior to break-in. I put the stock (solid) fan back on and now temps are in the 185-190 range. I shouldn't have broke-in the engine using the flex-fan.
 

Attachments

  • 20171209_144603.jpg
    20171209_144603.jpg
    120.3 KB · Views: 56
OP
OP
T

tirewater

Sr. Member
Joined
Jan 28, 2011
Messages
1,044
Loc.
San Francisco Bay Area
Engine runs smoother this time around. I'm running the same flex plate and balancer as before. The crankshaft is a new Eagle crankshaft. Oil pressure maxes at 55-60 cold and stays at 50 when warm.

I used a different engine builder to balance the rotating assembly than before. Since I attributed most of the issues of the first rebuild to the undersized crank - I wanted to use a different person to balance the assembly. Ultimately it was my fault for not measuring every bearing tolerance the first rebuild. I checked all tolerances this time and they were in spec.

I'm running a different camshaft that before. It only pulls about 16hg of vacuum at idle, compared to the 20hg. This results in a noticeable drop in brake assist at idle. :(
 

sprdv1

Contributor
REBEL
Joined
Mar 8, 2007
Messages
81,961
Engine runs smoother this time around. I'm running the same flex plate and balancer as before. The crankshaft is a new Eagle crankshaft. Oil pressure maxes at 55-60 cold and stays at 50 when warm.

I'm running a different camshaft that before. It only pulls about 16hg of vacuum at idle, compared to the 20hg. This results in a noticeable drop in brake assist at idle. :(

Glad she runs smoother...
 

904Bronco

Contributor
Bronco Guru
Joined
Sep 28, 2004
Messages
5,862
Loc.
San Martin, CA
Not that you need another project... But hydroboost is way better.

You can use a Astro van booster, with the replacement bell crank assembly that they sell on EBay. That way you can keep the factory off-set bracket

Just a thought...

By the way Nice work Sir.
 
OP
OP
T

tirewater

Sr. Member
Joined
Jan 28, 2011
Messages
1,044
Loc.
San Francisco Bay Area
Glad she runs smoother...

Not that you need another project... But hydroboost is way better.
By the way Nice work Sir.

Thanks!

To be honest, since the vehicle hadn't been driven in a few months and the pads/rotors were new, we'll see if the brakes get better as they bed in. Hydroboost would be far in the future.

The trucks pretty well sorted. I need to start back on the cosmetics. While I love the original paint, it does have a lot of wear.

Plus my wife keeps asking when it'll quit looking like a bucket of bolts...
 
OP
OP
T

tirewater

Sr. Member
Joined
Jan 28, 2011
Messages
1,044
Loc.
San Francisco Bay Area
Gotta update every now and then. Although I think most of my stuff can go into the 'what did you do to your bronco' thread...

Replaced front springs with moog 812 (stock height, progressive) springs. Ride is *much* improved over the previous springs which had no compression whatsoever.

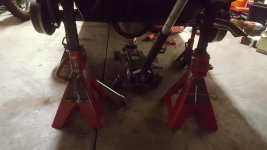
Also replaced the rear radius arm bushings. Something I thought would be pretty easy with the springs out...but was a pain in the ass trying to get the arms out of the holes.

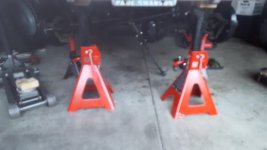
Currently replacing the rear springs with stock type rears. At this time I think it'll make little difference in how the rear rides. Quit a bit of work though. Lots of grunting and rolling around on the ground. :(

Eh, broke the little lens on my phone's camera...
 

Attachments

  • 20180127_143330.jpg
    20180127_143330.jpg
    83.9 KB · Views: 27
  • 20180128_093442.jpg
    20180128_093442.jpg
    37.6 KB · Views: 27
OP
OP
T

tirewater

Sr. Member
Joined
Jan 28, 2011
Messages
1,044
Loc.
San Francisco Bay Area
A couple of more photos.

Installed the rear quarter interior panels. Stock panels are a bit wavy from time.

I've owned the bronco for over two years now, and have never gotten a chance to give the underside a good clean. Oddly enough what I thought was rust was mostly dirt. It'll be interesting to see how the frame comes out after a good cleaning. Frame paint is original.

Eh, rear spring replacement...
 

Attachments

  • 20180208_214210.jpg
    20180208_214210.jpg
    43.6 KB · Views: 51
  • 20180208_215126.jpg
    20180208_215126.jpg
    81 KB · Views: 51
  • 20180208_213510.jpg
    20180208_213510.jpg
    52.8 KB · Views: 50
OP
OP
T

tirewater

Sr. Member
Joined
Jan 28, 2011
Messages
1,044
Loc.
San Francisco Bay Area
Let's see....still doing mechanical work...

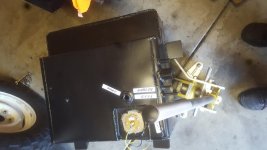
New tank from Aerotank. Tank was pretty clean inside, but I sloshed acetone inside it and dumped it out. After installing the tank I installed a clear inline filter, which is in addition to the one screwed into the carburetor. The carburetor filter is simply a plastic mesh.

Glad I installed the extra filter, still a lot of sand/sediment in the tank even though the tank seemed pretty clean. Picture is from underneath the filter.
 

Attachments

  • 20180414_174052.jpg
    20180414_174052.jpg
    55.1 KB · Views: 52
  • 20180510_231020.jpg
    20180510_231020.jpg
    48 KB · Views: 59
Top