Very nice bronkenn! The electric chain hoist would be a very handy addition. The tall ceilings are nice too. I don't think I have enough room to lift the tub high enough to set on the frame.
Community
Message Forum
Photo Gallery
Event Calendar
Book Reviews
Bronco Wallpaper
Bronco FAQ
Link Back to CB!
Photo Gallery
Event Calendar
Book Reviews
Bronco Wallpaper
Bronco FAQ
Link Back to CB!
Buy / Sell


Bronco Tech
3 Arm Wiper Setup
Fix Motor Mount
Roll Cage Braces
Throttle Body 65mm
Wheel Alignment
Heat Riser Replacement
Vent Window Repair
Center Console Mount
Straighten Bumper
Ford 6R80 6 spd
More Tech...
Fix Motor Mount
Roll Cage Braces
Throttle Body 65mm
Wheel Alignment
Heat Riser Replacement
Vent Window Repair
Center Console Mount
Straighten Bumper
Ford 6R80 6 spd
More Tech...

Install the app
-
Welcome to ClassicBroncos! - You are currently viewing the forums as a GUEST. To take advantage of all the site features, please take a moment to register. It's fast, simple and absolutely free. So please join our community today!If you have problems registering or can't log into your account, please contact Admin.
You are using an out of date browser. It may not display this or other websites correctly.
You should upgrade or use an alternative browser.
You should upgrade or use an alternative browser.
Harbor Blue Build Thread
- Thread starter JeffG
- Start date
- Joined
- Mar 8, 2007
- Messages
- 81,961
The crane allowed me to mount the tub to the rotisserie by myself. I had a few stressful moments, but in the end it all worked out.
I could just see the tub falling from 4 feet in the air and crashing on the concrete floor! %)%)
Nice Jeff...
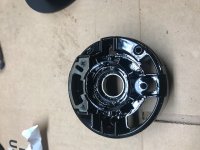
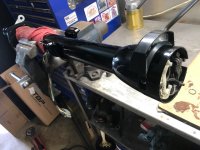
It has been awhile since I have updated this thread, but I have been doing some work on the bronco. I had the steering column a few engine brackets powder coated in black.
I'm really happy with the way the steering column came out! ;D;D
I'm really happy with the way the steering column came out! ;D;D
Attachments
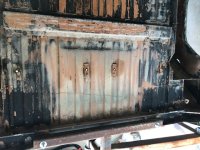
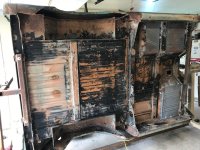
The rotisserie has been a life saver with cleaning the underside of the tub. This tub is in great shape so the biggest effort after replacing the floor pans is removing the undercoat material.
Yes I should probably have it blasted, but trying to keep costs down. I still may go in that direction, but haven't committed yet.
Yes I should probably have it blasted, but trying to keep costs down. I still may go in that direction, but haven't committed yet.
Attachments
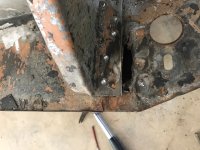
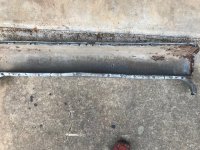
The outer and inner rockers were in great shape with the exception of the area where the inner rocker meets the kick panel. I decided to patch this area instead of replacing the entire section.
Plus, passenger kick panel was creased in one area and the limiting strap had pulled the welded nuts through and the PO attempted to repair with nut serts.
I went ahead and ordered a new kick panel and this allowed me to fix the dent in the out rocker panel since I had to remove this to access the kick panel.
Attachments
Pics of the new kick panel and inner rocker cleaned up. I need to get more picks of the outer rocker installed and the doors hung.
I wanted to make sure I got the hinge post back in the right position so I put the tub back on the frame to ensure everything lined up.
I will tell you it was frustrating to trying to align the doors!!

I wanted to make sure I got the hinge post back in the right position so I put the tub back on the frame to ensure everything lined up.
I will tell you it was frustrating to trying to align the doors!!
Attachments
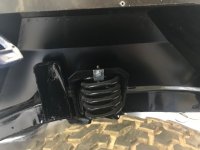
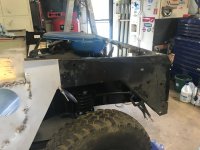
The inner fenders were shot so I had ordered replacements awhile back for those. The passenger wheel well was in need of some pitting repair and I was all set to patch this up when I found a local selling a new passenger wheel well for a great deal.
I haven't tacked on the front clip as the rotisserie I have will not accommodate that part. This past weekend I picked up some tintable spray liner and other supplies at the local paint store so I plan on spraying the liner under the tub before setting back on the frame and attaching the front clip.
I hope to get the liner on soon to update this build!!
Attachments
I have been very lazy updating this build thread, but I have been able to make some progress. I had to take a break during the hottest parts of the summer.
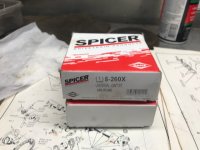
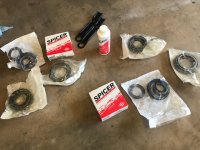
I was able to purchase the parts to rebuild the D44 thru Ventures Truck Parts and I have to give good remarks on their service. Attaching pics of the u-joints, seals and bearings.
I was able to purchase the parts to rebuild the D44 thru Ventures Truck Parts and I have to give good remarks on their service. Attaching pics of the u-joints, seals and bearings.
Attachments
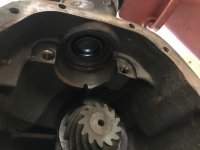
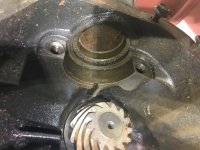
I would strongly advise everyone to remove your axles and diff cover and inspect the axle tubes. The first pic is just some of the junk that came out of the axle tubes!
Removing the old inner axle seals and carrier allows you to push the crap from the outside in. Third pic is of the new inner seal installed.
Removing the old inner axle seals and carrier allows you to push the crap from the outside in. Third pic is of the new inner seal installed.
Attachments
The rust repair work on the tube is complete. I had Bob from Bob Haynes Custom Coach Works stop by place to look over the project to determine if it was something they would take on.
He agreed and I should be able to drop the tub and other parts off in about 2 months!! Very excited to get to this point and turn the body work and paint over to the professionals. I will try and keep this thread updated with that progress.
He agreed and I should be able to drop the tub and other parts off in about 2 months!! Very excited to get to this point and turn the body work and paint over to the professionals. I will try and keep this thread updated with that progress.
- Joined
- Mar 8, 2007
- Messages
- 81,961
I would strongly advise everyone to remove your axles and diff cover and inspect the axle tubes. The first pic is just some of the junk that came out of the axle tubes!
Removing the old inner axle seals and carrier allows you to push the crap from the outside in. Third pic is of the new inner seal installed.
Yikes.. Always something ain't it..
Not a lot of huge progress but I did want to keep this thread active. I was supposed to drop the tub off at the paint shop on Dec 3, but they bumped me back to mid January. Oh well.
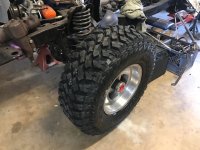
I did get a chance to polish the slot wheels and get some tires mounted. I went with 32x11.50x15 Maxxis Buckshot Mudder II. I like the tread design and think they will be perfect for this build. No lift, fenders cut with flares.
I did get a chance to polish the slot wheels and get some tires mounted. I went with 32x11.50x15 Maxxis Buckshot Mudder II. I like the tread design and think they will be perfect for this build. No lift, fenders cut with flares.
Attachments
Prizefighter
Bronco Guru
- Joined
- Feb 24, 2010
- Messages
- 1,192
I like this build. Good progress, keep it coming.
A big milestone in the build. The tub was picked up and delivered to the paint shop. Boy was I nervous following the roll-back truck! He was going way faster than I would have liked and the rotisserie was moving back and forth a little on the bed.
But, it made it there in one piece and they have had it for about 3 weeks. I hope to get updated pics soon of the progress.
But, it made it there in one piece and they have had it for about 3 weeks. I hope to get updated pics soon of the progress.
Attachments
Paint guy will complete the body work and get the tub in primer and paint the underside. It can then take the rolling chassis, front clip etc and connect the tub for assembly and body work on the other parts.
PaveBronco
Sr. Member
- Joined
- Oct 30, 2012
- Messages
- 912
Nice build, cant wait to see how the tub comes back.
Exciting time. Good luck with the build.
Keeping this thread active since it is taking longer than expected to complete the tub work. It has allowed me to focus on some garage clean up items and work on my '69. I installed an AOD about 10 years ago and just now got around to hooking up the neutral safety switch with reverse lights.
Similar threads
- Replies
- 17
- Views
- 5K
- Replies
- 17
- Views
- 7K
- Locked
- Replies
- 35
- Views
- 9K


