• Welcome to ClassicBroncos! - You are currently viewing the forums as a GUEST. To take advantage of all the site features, please take a moment to register. It's fast, simple and absolutely free. So please join our community today!
    If you have problems registering or can't log into your account, please contact Admin.

Project "BOB - Big Orange Bronco" Wheeling pics addded

SC74

Contributor
Bronco Guru
Joined
May 24, 2004
Messages
3,413
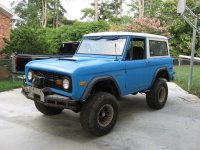
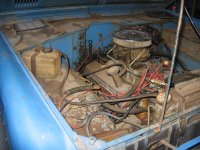
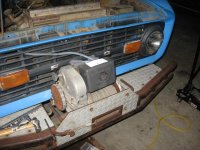
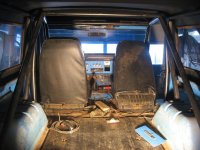
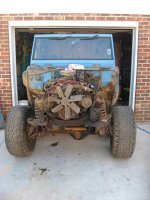
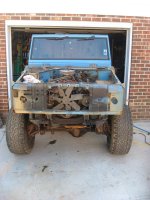
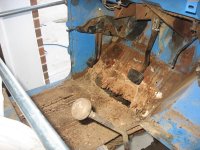
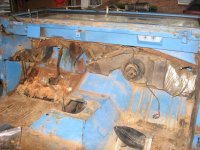
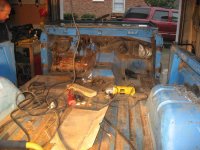
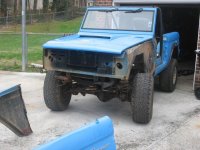
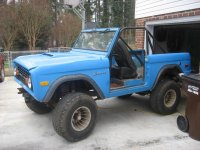
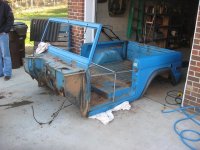
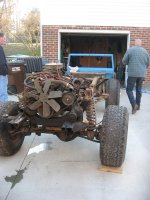
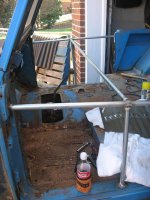
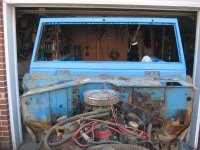
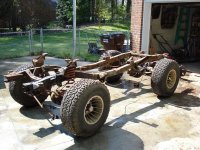
I've been working on this for about a year now and figured I would finally start my own "build thread." It's a '73 and it had 33's, 5.0 (running with carb), Dana 20, 8270 winch, and PS when I got it - I figured a good candidate to build a rock crawler. The PO was the 2nd owner (first being his sister) and it had been parked in a barn for 12 years. The PO got into racing and parked the Bronco, but had already installed the 5.0 with a carb. Fortunately, he still had the 5.0 intake and that came with the truck. The body is in good shape - floor pans are swiss cheese and a little rust in the body line on the rear fenders, but nothing that can't be patched (or in this case cut out).

Here are some pics of how it all started.
 

Attachments

  • IMG_0278.jpg
    IMG_0278.jpg
    161.7 KB · Views: 796
  • IMG_0692.jpg
    IMG_0692.jpg
    138 KB · Views: 713
  • IMG_0694.jpg
    IMG_0694.jpg
    132.7 KB · Views: 537
  • IMG_0710.jpg
    IMG_0710.jpg
    117.7 KB · Views: 661
OP
OP
SC74

SC74

Contributor
Bronco Guru
Joined
May 24, 2004
Messages
3,413
The Demo Begins

It came apart a whole lot quicker and cheaper than it's going back together. I decided to cut the front core support off and plan to tube the front clip. Plus this way I was able to fit it on a dolly and cram it in the garage too! You can see how bad the floorpans are.
 

Attachments

  • IMG_0761.JPG
    IMG_0761.JPG
    99.3 KB · Views: 453
  • IMG_0760.JPG
    IMG_0760.JPG
    97.3 KB · Views: 448
  • IMG_0757.JPG
    IMG_0757.JPG
    111.5 KB · Views: 580
  • IMG_0728.jpg
    IMG_0728.jpg
    139.9 KB · Views: 498
  • IMG_0727.jpg
    IMG_0727.jpg
    134 KB · Views: 483
  • IMG_0722.jpg
    IMG_0722.jpg
    146 KB · Views: 505
  • IMG_0719.jpg
    IMG_0719.jpg
    117.8 KB · Views: 426
  • IMG_0716.jpg
    IMG_0716.jpg
    125.7 KB · Views: 463
  • IMG_0771.JPG
    IMG_0771.JPG
    102.6 KB · Views: 701
  • IMG_0769.JPG
    IMG_0769.JPG
    97.9 KB · Views: 518
  • IMG_0758.JPG
    IMG_0758.JPG
    101.7 KB · Views: 565
  • IMG_0765.JPG
    IMG_0765.JPG
    107.8 KB · Views: 407
OP
OP
SC74

SC74

Contributor
Bronco Guru
Joined
May 24, 2004
Messages
3,413
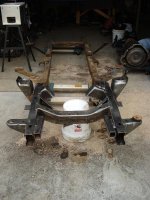
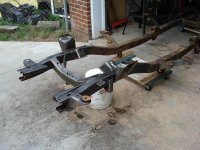
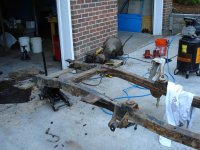
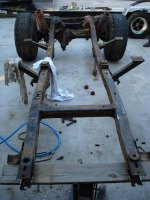
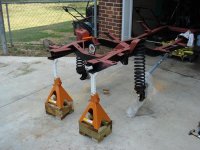
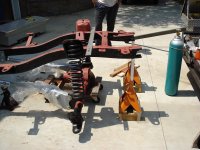
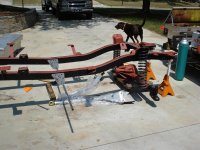
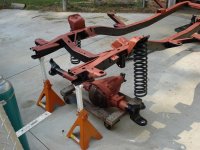
Tear Down Continues

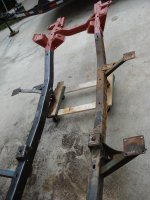
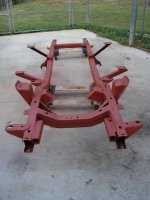
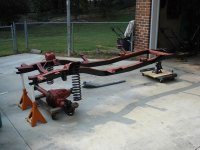
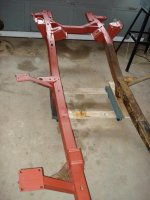
Now that the body was off, I went ahead and pulled the motor, tranny, t-case, and stripped everything I could. I ended up cutting off any brackets I wouldn't use. Since I'm linking the rear, I cut off the leaf spring perches. The PO had tied the cage into the frame with some angle iron - safer than most cages, but I'm going to build a different cage so off the angle brackets came. I figured if I'm going this far, I'll wire wheel the entire frame and paint it. I did not use POR15 since we don't have much snow/salt in this part of the country. I'm using a HD enamel tractor primer and paint.
 

Attachments

  • DSC00090.JPG
    DSC00090.JPG
    99 KB · Views: 389
  • DSC00087.JPG
    DSC00087.JPG
    104.7 KB · Views: 326
  • DSC00086.JPG
    DSC00086.JPG
    121.5 KB · Views: 332
  • Frame on Floor.JPG
    Frame on Floor.JPG
    93.4 KB · Views: 328
  • DSC00047.JPG
    DSC00047.JPG
    138.1 KB · Views: 334
  • DSC00045.JPG
    DSC00045.JPG
    131.2 KB · Views: 361
  • DSC00041.JPG
    DSC00041.JPG
    92.8 KB · Views: 355
  • DSC00022.JPG
    DSC00022.JPG
    127.9 KB · Views: 421
  • DSC00105.JPG
    DSC00105.JPG
    87.8 KB · Views: 520
  • DSC00092.JPG
    DSC00092.JPG
    72.6 KB · Views: 438
OP
OP
SC74

SC74

Contributor
Bronco Guru
Joined
May 24, 2004
Messages
3,413
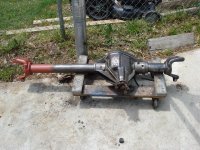
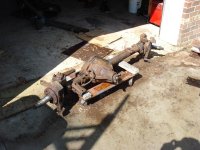
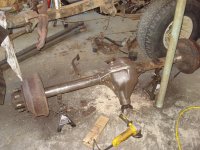
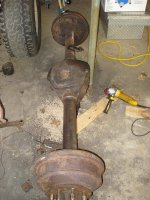
Dana 60's

I ended up buying a Ford F-250 front HP Dana 60 off of ebay. I bought it from a guy in Mass and this was last winter when Mass got hit with a huge snow storm. Between the snow storm and the guy I bought the axles from getting hospitalized, it took about a month before he was able to ship the axle. In return, he threw in the rear 60, PS box, and driveshafts for the cost of shipping only ;D

Since they had been on an old plow truck they looked like they had both been in the Atlantic Ocean for about 10 years. Nothing the wire wheel can't handle and wahlah they look like new again :D

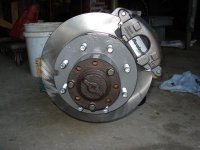
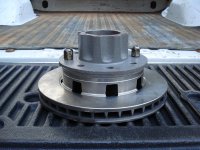
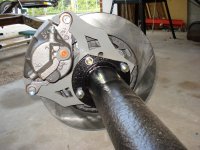
I bought some rear disc brackets off of ebay and did the rear disc conversion. It's obvious that the donor truck had not been driven in years due to the shape of the front axle guts. A wheel bearing or two had definitely been thrown in the past, but the spindles weren't too beat up to use after a little TLC. We went ahead and also replaced the kingpins in the front.


Here are some pics of the axles and disc brake conversion.
 

Attachments

  • DSC00097.JPG
    DSC00097.JPG
    97.4 KB · Views: 556
  • DSC00095.JPG
    DSC00095.JPG
    76.8 KB · Views: 389
  • DSC00038.JPG
    DSC00038.JPG
    91.7 KB · Views: 346
  • 60 Front Primed.JPG
    60 Front Primed.JPG
    88.6 KB · Views: 487
  • DSC00027.JPG
    DSC00027.JPG
    147.1 KB · Views: 590
  • DSC00025.JPG
    DSC00025.JPG
    97.5 KB · Views: 375
  • DSC00009.JPG
    DSC00009.JPG
    115.1 KB · Views: 391
  • DSC00007.JPG
    DSC00007.JPG
    104.7 KB · Views: 396
OP
OP
SC74

SC74

Contributor
Bronco Guru
Joined
May 24, 2004
Messages
3,413
Front 60 Install Begins

I should have said this in the very first thread, but Keith Forest (744x4) has helped me on this rig from day one. I'm sure he'll be chiming in on this thread too and can probably explain things better than I can. He's teaching me as we go!

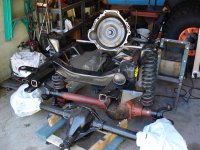
Here's where we start to install the front Dana 60. It's going in the stock location and using the stock coil buckets. We're using Keith's old 5.5" BC Coils - I think these were the first BC Coils sold. He took them off of his rig since they were so stiff, plus he's building a Bronco based buggy so he's going to put his on the road so it worked out well. I don't think they'll be so stiff for me with the extra weight.

I went with Cage arms - what a PITA to install. They are a very nice and very stout product, but between the brackets being warped from the welding and the thick powdercoating they don't fit without A LOT of persuasion (aka big hammer and leverage bars). Instead of using the wedges, I went with the weld on bracket. Oh yea, Cage put the right bracket in the left arm box and vice-versa (that took a little head scratching to figure out.) ?:? Long story short - nothing fit right and it took a lot of grinding, bending, hammering, you name it to get it all on.
 

Attachments

  • DSC00181.JPG
    DSC00181.JPG
    92.7 KB · Views: 753
  • DSC00179.JPG
    DSC00179.JPG
    96.4 KB · Views: 475
  • DSC00178.JPG
    DSC00178.JPG
    97.4 KB · Views: 528
  • DSC00177.JPG
    DSC00177.JPG
    101.1 KB · Views: 494
  • DSC00176.JPG
    DSC00176.JPG
    93.7 KB · Views: 476
  • DSC00175.JPG
    DSC00175.JPG
    85.9 KB · Views: 413
OP
OP
SC74

SC74

Contributor
Bronco Guru
Joined
May 24, 2004
Messages
3,413
Engine & Trans Install

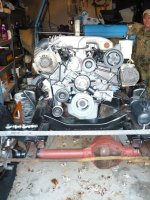
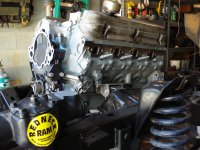
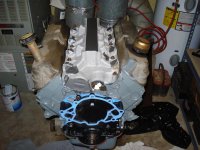
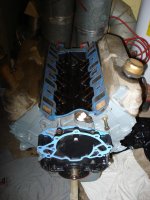
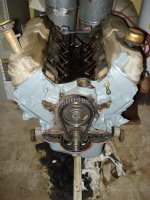
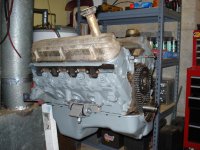
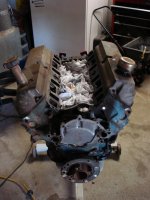
Now that we had something to put the motor back onto, we cleaned up the motor, put all new gaskets, new oil pump, and new timing chain in it. My original plan was to run the V-belt set-up that was on the motor to start with and buy (or fab) a bracket to run a sag PS pump (to run hydroboost brakes). After doing some research though I decided to go with an Explorer Serp. set-up. After some junk yard digging I came up with I needed, minus the timing cover, water pump, and fan clutch. I bought the timing cover and water pump new - still looking for a good fan clutch (the one I had we ended up ruining in order to get the water pump pulley off of it, but it was seized up to start with).

I don't know if I'll run hydroboost anymore or not since I'm running the Explorer PS pump. By the way - I have a dual return Sag if you're looking for one ;)

You can also see in the pics that I sent my PS box off to West Texas to get it re-built and tapped for hydro assist. Is the Explorer pump strong enough to push this and hydroboost brakes?

I'm running a RJM harness (got it during the mass buy). We still have to put the dizzy in - just bought the TFI for it.
 

Attachments

  • P1000212.JPG
    P1000212.JPG
    117.9 KB · Views: 652
  • DSC00208.JPG
    DSC00208.JPG
    108.7 KB · Views: 425
  • DSC00206.JPG
    DSC00206.JPG
    110.3 KB · Views: 387
  • DSC00205.JPG
    DSC00205.JPG
    92.2 KB · Views: 340
  • DSC00204.JPG
    DSC00204.JPG
    86.1 KB · Views: 314
  • DSC00193.JPG
    DSC00193.JPG
    96.5 KB · Views: 313
  • DSC00191.JPG
    DSC00191.JPG
    89.9 KB · Views: 334
  • DSC00183.JPG
    DSC00183.JPG
    77 KB · Views: 378
OP
OP
SC74

SC74

Contributor
Bronco Guru
Joined
May 24, 2004
Messages
3,413
New Wheels & Tires

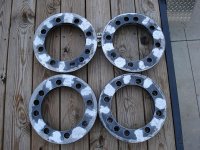
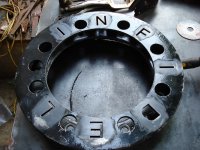
I found a set of H1 wheels in VA Beach on Pirate. They had already been changed to 3.5" BS and had rock rings welded on. What better way to spend Memorial Day weekend than driving to VA Beach and back to get wheels :cool: They came with the magnesium inserts that had already been cut down.

They guy I bought them from (forgot his name but will post it as soon as the Pirate site is back up) was hit by a grenade in Iraq. He had INFIDEL laser cut into the rock rings (sold me the 8 bolt H1's since he found some 12 bolt ones). Keith filled them with weld and I grinded them down.

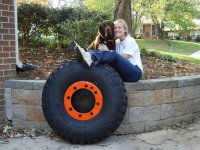
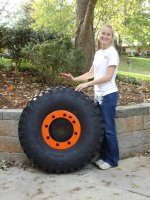
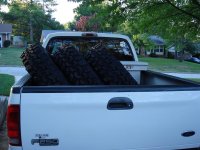
We went down to Atlanta in August to the 4WheelParts Truckfest. I went with a mission, and Mission Completed - new tires! They are 39.5x13.5x16.5 IROKs.

I was surprised how easy it was to mount them to the H1 wheels.

That's my wife, Jessica. None of this could be done without her support ;D She even helps me some evenings ;)

The big headed brown dog is our Chocolate Lab, Trigger.
 

Attachments

  • DSC00255.JPG
    DSC00255.JPG
    166.3 KB · Views: 1,303
  • DSC00251.JPG
    DSC00251.JPG
    151.5 KB · Views: 2,074
  • DSC00194.JPG
    DSC00194.JPG
    122 KB · Views: 407
  • DSC00085.JPG
    DSC00085.JPG
    145.9 KB · Views: 489
  • DSC00083.JPG
    DSC00083.JPG
    138.2 KB · Views: 543

PhantomEB

Sr. Member
Joined
May 25, 2004
Messages
453
Loc.
Calgary, Alberta
Nice progress thread you started here.

Personally I probably would of left the Infidel in the wheels just in rememberanace to the soldier.
 
OP
OP
SC74

SC74

Contributor
Bronco Guru
Joined
May 24, 2004
Messages
3,413
Half of a Rolling Chassis

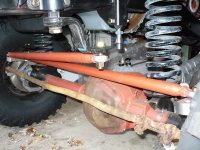
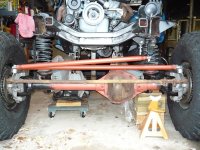
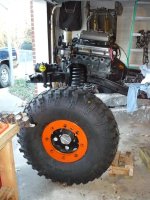
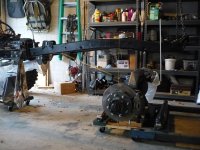
The front axle is in and I have wheels & tires - why not make a half of a rolling chassis :D

We've got the hub housing taped off since no point in putting the shafts and hubs in quite yet knowing it's going to have to come back a part several more times before it's all done. I'm debating whether or not to turn the front knuckles. The Cage arms are just tacked in for now so I still have time to decide what to do.

I wanted the Poison Spyder high steer arms, but after waiting 2 months with them on back order, I canceled and got some BTF arms. It worked out better for me any ways b/c BTF had a bundle that they had screwed up on the logo and I got a discount on them.

I've got the stock tie-rod in (upside down) to keep things lined up straight while getting my steering done. I'm using 1.5" .250 wall DOM with 3/4"x5/8" heims and weld-in inserts. I've got a 4" drop pitman arm so the draglink is pretty flat. We've still got to make the trac-bar. Since the pics we've got some 3x3 square tube .188 wall and cut a 3" radius to make a trac-bar riser. Before making it we've got to do some measuring to make sure there won't be any trouble with the flattened drag link, front pumpkin, or ram when the front articulates. I trying to avoid having to bend it (just because we can't bend tube that thick), but may have to.
 

Attachments

  • Steering Tube 2.JPG
    Steering Tube 2.JPG
    127.6 KB · Views: 620
  • Steering Tube.JPG
    Steering Tube.JPG
    148.5 KB · Views: 747
  • P1000217.JPG
    P1000217.JPG
    121 KB · Views: 578
  • P1000213.JPG
    P1000213.JPG
    99.6 KB · Views: 526
OP
OP
SC74

SC74

Contributor
Bronco Guru
Joined
May 24, 2004
Messages
3,413
Rear Dana 60 Begins!

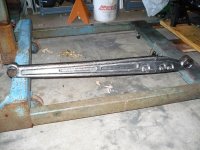
I finally had to move the tub out of the garage to make room to work on the rear end. I've been talking to Jack (IronBender) about his 4Link set-up since he first announced it and was lucky enough to be able to buy one of the prototypes ;D

This kit is TOP NOTCH and very HEAVY DUTY. It is one of his first prototypes and is build way over-kill, but probably a good match for the rear Dana 60.

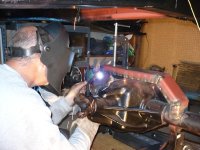
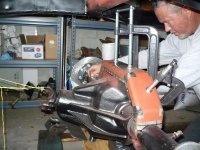
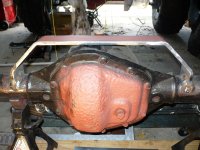
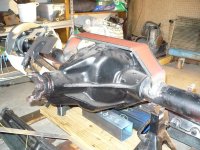
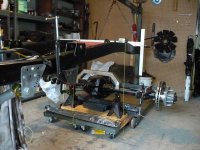
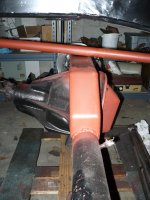
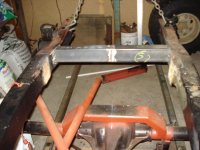
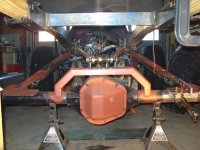
Since it's not going on a 9", we had to come up with a way to mount the upper links. I got a Ruff Stuff truss and we cut 2" off of the bottom. Believe it or not, there is daylight between the top of the diff and bottom of the truss. This truss isn't budging - Keith welded on it forever yesterday! I had also drilled some plug weld holes in the cap part of the truss for extra weld surface since I was afraid of not getting weld on the bottom of the truss next to the diff. Fortunately, we were able to get a good weld all across the bottom of the truss plus the plug welds.

We also got one end of the uppers welded together. I've got to get some reducer bushings before we can do the final placement of the frame brackets and LCA brackets. Once that is done, we'll cut the uppers to length and weld the inserts in.

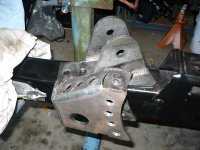
The pic of the frame bracket is just to show how well built it is. It is actually upside down and backwards in the pic, but for lack of 6" C-clamps it is being held by gravity! Since the pic I've got 4 new 6" C-clamps ;)

You can also see in one of the pics that we've tacked in a new rear cross-member (used 3x3 square tube .120 wall). I still need to cut the old one out.

You can see in another pic that I ditched the old rusted diff cover and put on the stout Ruff Stuff cover also. 2 or 3 of the bolt holes don't line up and it'll need some drilling out to get it right.
 

Attachments

  • P1000235.JPG
    P1000235.JPG
    118 KB · Views: 709
  • P1000234.JPG
    P1000234.JPG
    128.1 KB · Views: 742
  • P1000233.JPG
    P1000233.JPG
    128.6 KB · Views: 503
  • P1000231.JPG
    P1000231.JPG
    152.8 KB · Views: 454
  • P1000225.JPG
    P1000225.JPG
    125.7 KB · Views: 469
  • P1000224.JPG
    P1000224.JPG
    122.7 KB · Views: 531
  • Frame Bracket.JPG
    Frame Bracket.JPG
    91.4 KB · Views: 587
  • LCA.JPG
    LCA.JPG
    97.3 KB · Views: 665
  • P1000238.JPG
    P1000238.JPG
    123.4 KB · Views: 541
  • P1000236.JPG
    P1000236.JPG
    147.4 KB · Views: 823

joe

Bronco Guru
Joined
Sep 9, 2001
Messages
1,932
awesome job so far Robert, keep up the beefy progress and pics.

thats what i wana build, i'm gatherin parts for now so hopefully someday..........
 

rjlougee

Bronco Guru
Joined
Dec 26, 2001
Messages
1,959
Nice looking rig!! I'm looking forward to reading more on this build.

On a side note, if you want to lose that lower idler pulley on the passenger side you can just pull the idler and tensioner and reroute the serpentine belt straight up to the alt.
"INFIDEL" I like it!! Who's the guy you got them from? I know what he's talking about, I experienced some crazy shit driving around Iraq, like "Escape from NY" crazy.
Joe
 
OP
OP
SC74

SC74

Contributor
Bronco Guru
Joined
May 24, 2004
Messages
3,413
Thanks for all of the comments. This site definitely helps keep me motivated and has been a huge help and resource for great information.

PhantomEB - He did not die from the war injury. He was actually upgrading from a 8 bolt H1 to a 12 bolt H1 wheel for his Jeep Cherokee project.

Chuck - Come on any time man! We're working on it just about every weekend. It won't be long and we'll be bending some tube for the front clip.

rjlougee - I hadn't thought about that with a serp. belt, but good point. I may look into doing that. The guy's name I got the wheels from has left me and the Pirate site is down so I can't find it now. He has a Jeep Cherokee 1 ton project that he calls the "One Ton Sh*t Missile" - super cool guy with an awesome project going on.

This was one year of work put into one evening's worth of posts, we're steady working on it. I'll keep the pics (and questions) coming!

Robert
 
OP
OP
SC74

SC74

Contributor
Bronco Guru
Joined
May 24, 2004
Messages
3,413
4 Link Progress

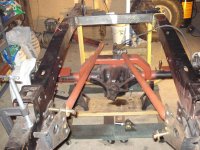
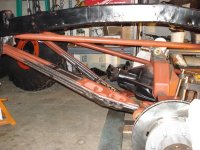
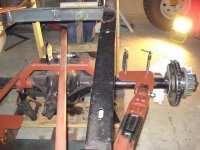
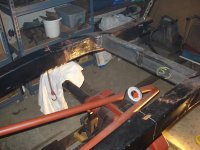
We made some progress today on the IronBender 4 Link.

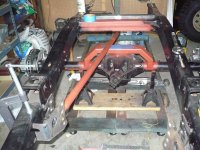
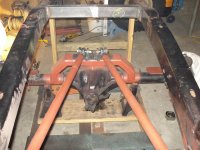
First we got the old crossmember cut out and grinded the old factory bugger welds down. Then we got to work on the 4 Link. Before we had the cherry-picker holding the rear of the frame in place at ride height, but every time we touched the frame all of our measurements would get messed up. A little circular saw action with a 2x4 and we were able to remove the cherry-picker and now have a much more sturdy mount for the rear.

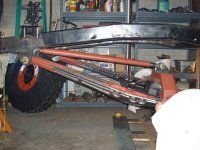
We got one side (driver side) of the 4 Link tacked into place. We went ahead and got the upper link bar cut to length and tacked the upper link mounts to the truss. There's some fine-tune grinding to do on the LCA axle mounts to allow more movement in the uniball without the arm interfering with the mount, but so far things have gone smoothly on the install.

Here are some pics of today's progress.
 

Attachments

  • DSC00361.JPG
    DSC00361.JPG
    114.5 KB · Views: 520
  • DSC00359.JPG
    DSC00359.JPG
    138.9 KB · Views: 420
  • DSC00358.JPG
    DSC00358.JPG
    136.3 KB · Views: 534
  • DSC00357.JPG
    DSC00357.JPG
    119.5 KB · Views: 360
  • DSC00354.JPG
    DSC00354.JPG
    108.3 KB · Views: 301
  • DSC00353.JPG
    DSC00353.JPG
    98.7 KB · Views: 317
OP
OP
SC74

SC74

Contributor
Bronco Guru
Joined
May 24, 2004
Messages
3,413
More on the 4 Link

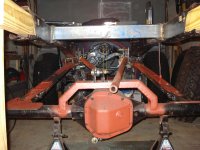
We got the Passenger side of the 4 Link tacked up, upper bar cut to length, insert welded in, and took it all back apart again to weld it up for good. We did some clearance work on the LCA axle mounts and some grinding on the LCA's to prevent any rubbing. Here are some pics of it all tacked together before we took it apart.
 

Attachments

  • DSC00362.JPG
    DSC00362.JPG
    120.2 KB · Views: 307
  • DSC00363.JPG
    DSC00363.JPG
    124.9 KB · Views: 410
  • DSC00365.JPG
    DSC00365.JPG
    125.4 KB · Views: 452
Top