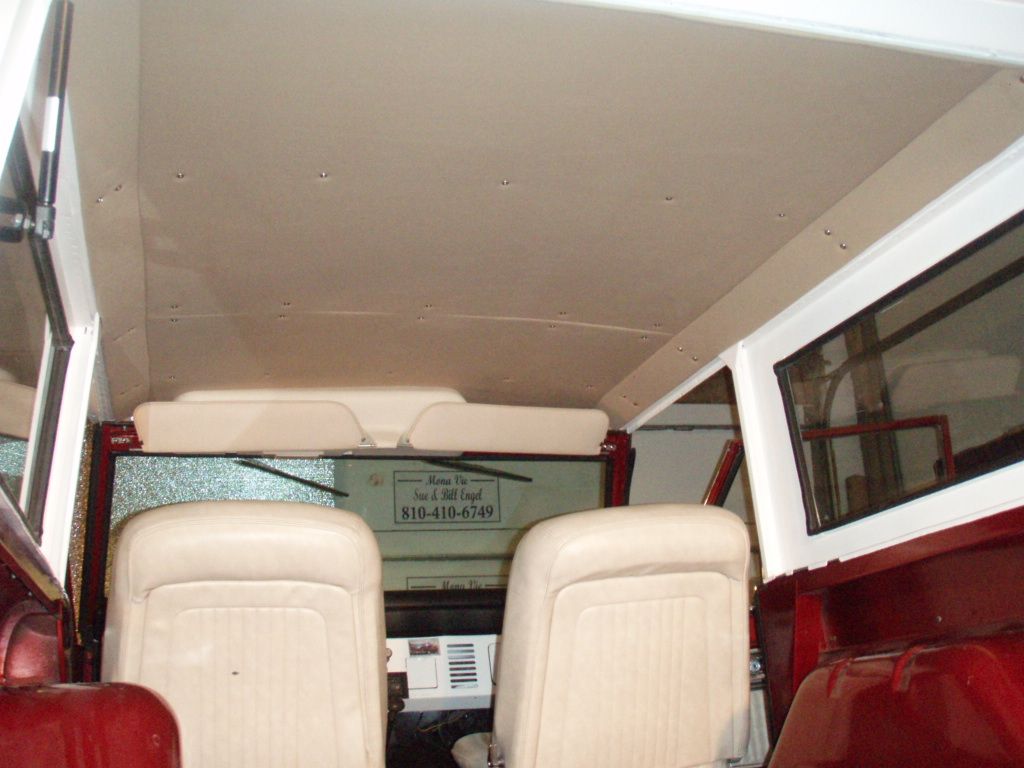
The lightweight panel board is as the name implies, panneling bought at my local home depot. I couldn't easily find any other material that was water/moisture/mildew/rot resistent, and I didn't want to use the old fashion "cardboard" again, and didn't have the tools or ability to make some complex headliners w/ multiple bends/break's. So my headliner is now mutli-piece, but it fits nicely and is very well insulated
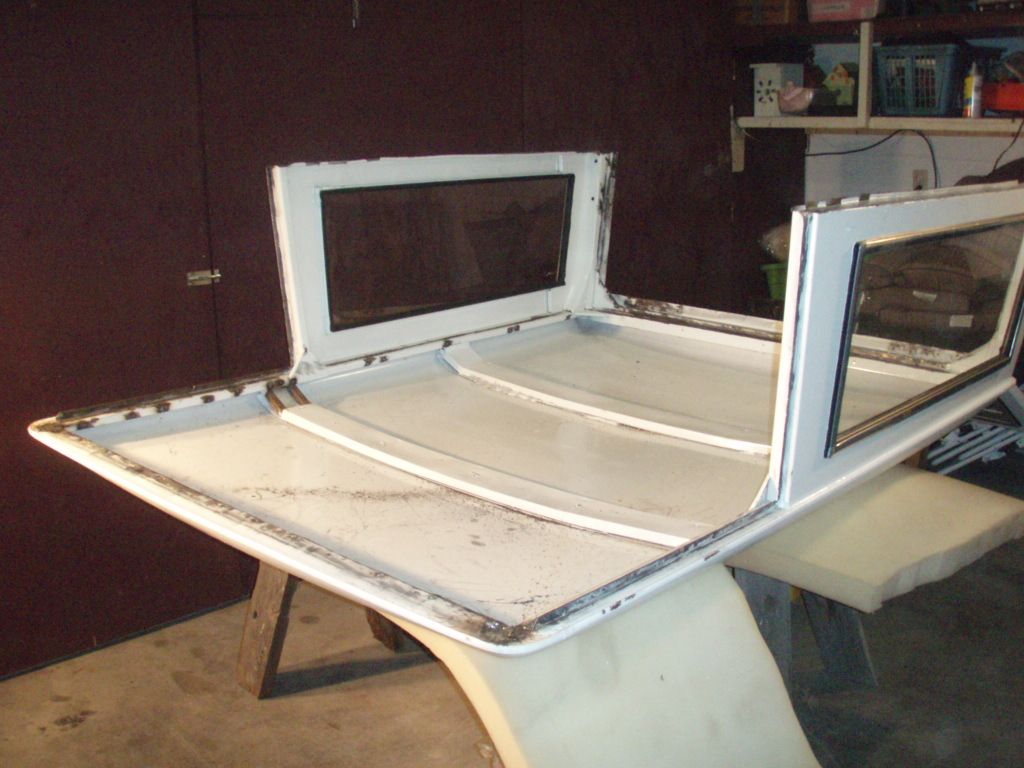
This all started as a weekend afternoon project to fix a modest leak in the outside top channel. After digging into that issue more I discovered my top was in very poor condition. I filled the outside channel complety full of seam sealer and actually brought it to a crown so water can never sit & pool in there again. Next of course was fixing the damage on the inside.
To start with I welded all of the old holes shut, then fixed (welded) cracks and structural weak area's around the corners of the top by welding in small gussets and/or plating over.
Sorry my pictures are not in order...it was my first time adding pic's to the site.
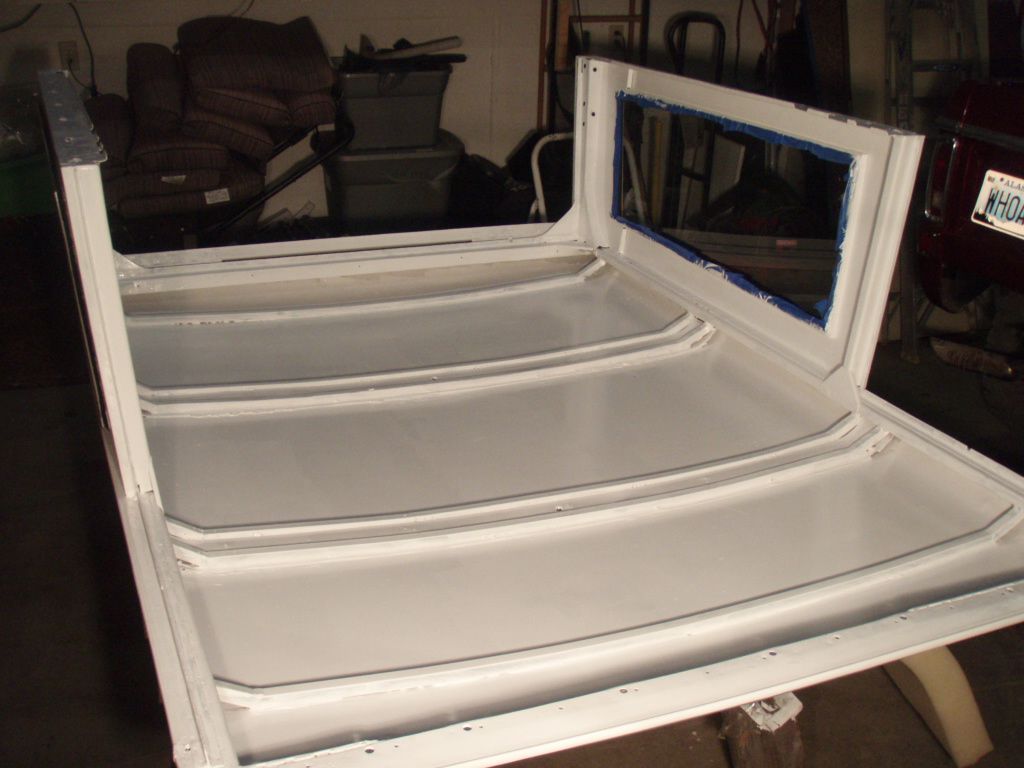
I added 2 additional ribs, plus 2 sets of extra support ribs next to the exsisting ribs. Ultimatley I used these as backing plates for the screws for the new headliner. In one of the pic's, after its' cleaned and painted, you'll notice 1 new in a forward location, and 1 rib in a rear location, plus a new ribs on either side of the exsiting ribs/bows.
I made the new ribs from 3/4" x 3/4" x .068 square tubing. And it was actually very simple. I cut a piece the lenght of the top width (a little over 50"), then put a slight bend in it to make it fit the convex profile of the top.
For my "bender" I just made marks at the center and one-quarter lenght, shoved the end into the open frame-end of the bronco w/ the bumber off and gave a little pull, rinse and repeat a few times until I had a perfect fitting bow to the exact contour of the top. The ol' trial-n-error method. Then I cut some short piece for the sides, after everything was fitting nice I welded it it together.
For installing the new ribs, I marked the top in the location of the new rib, then applied some construction adhesive (liquid nails), smushed the new rib in place, then welded just the edge where it met the top rim.
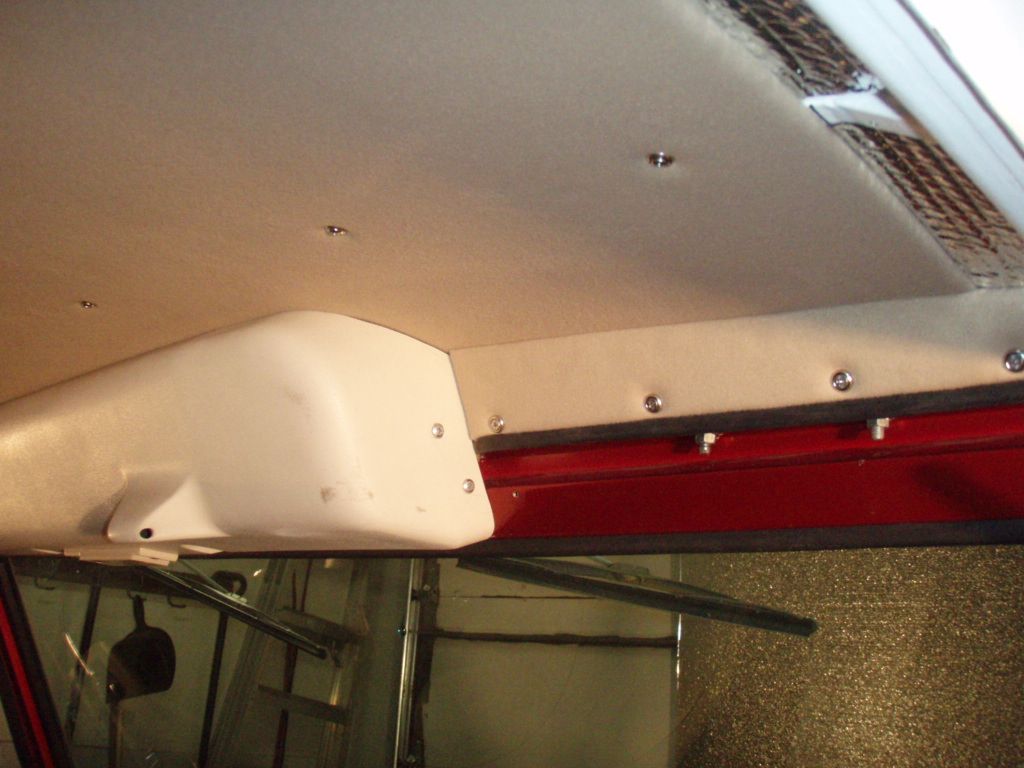
I did have to add two small formers to each side of the front on either side of where the wiper cover would be re-installed later. For this I just welded on some 1" x 1/8" flat bar...just something to screw to later.
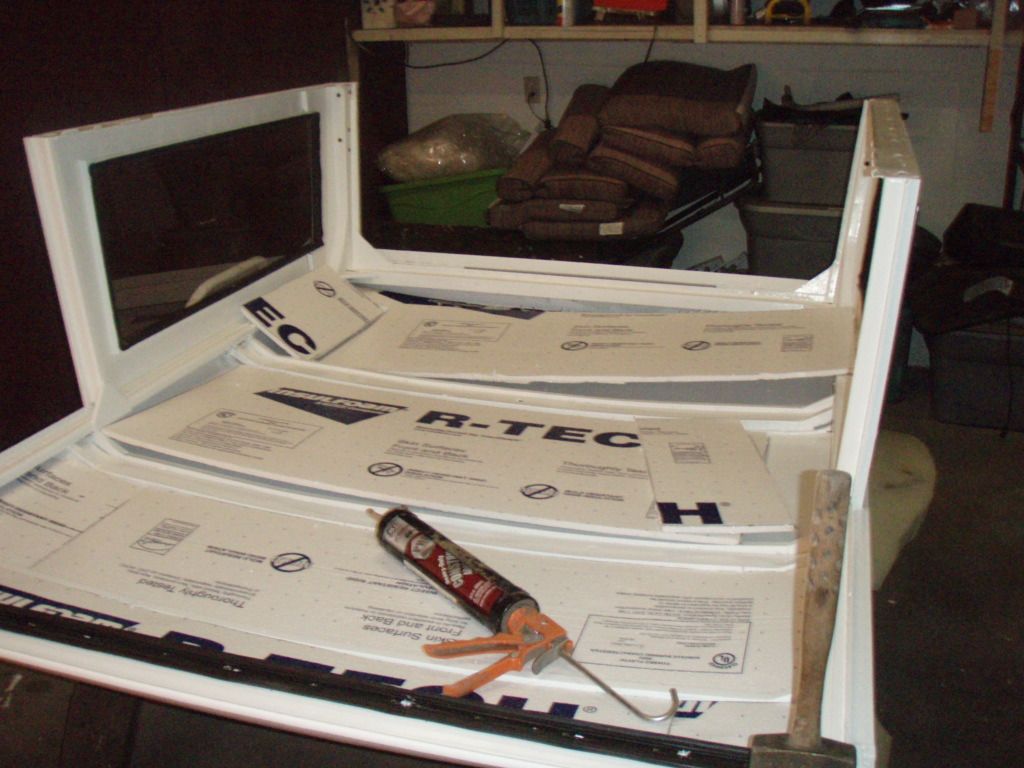
While I had my caulking gun handy I squrited liquid nails adhesive into any and all little gaps between the exsiting ribs. I want this top to be quite! No oil canning, no poping, or sqeaking, no rattles, ect....Everything is secured proper, insulated and tight.
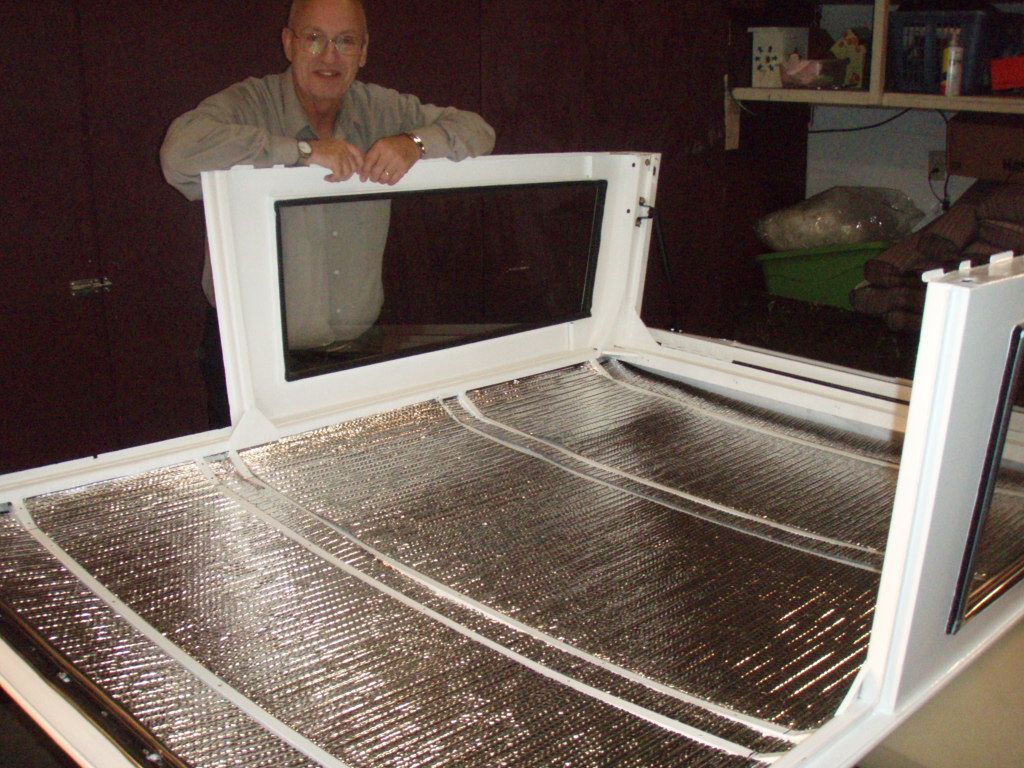
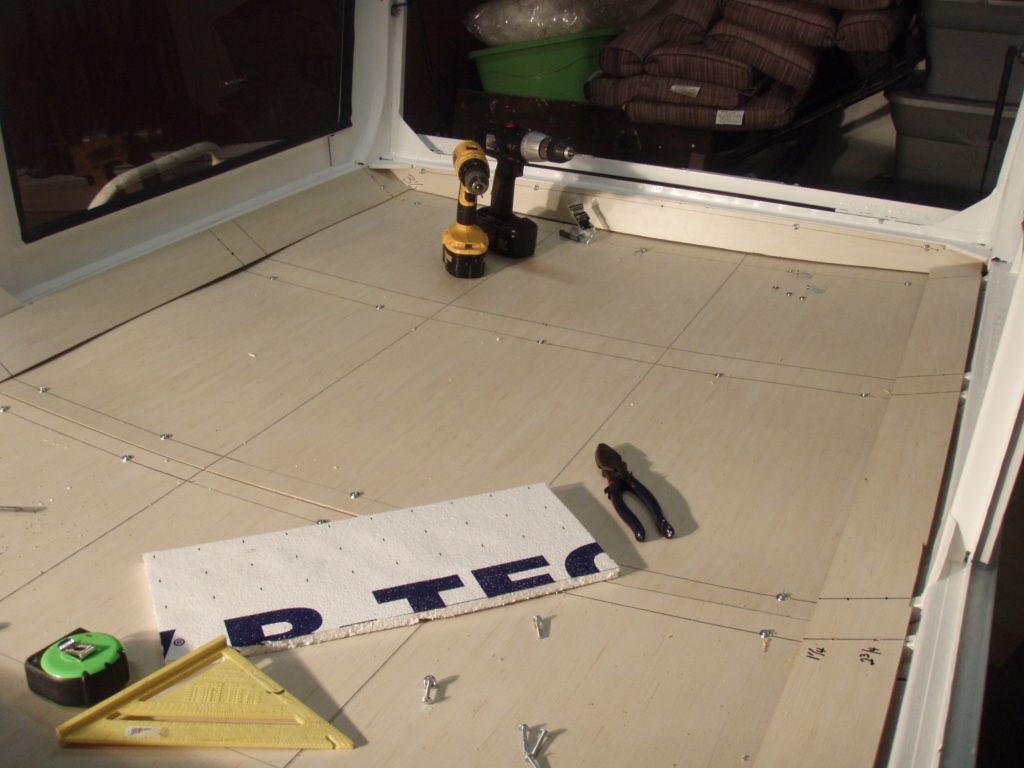
Between the ribs I used 1/2" semi-rigid foam insulation board, glued this to the top w/ liquid nails. Then I put 1/4" bubble wrap looking insulation on top of that layer giving me a net of 3/4" of total insulation. More than anything I wanted a smooth transition between the ribs so the new headliner would fit nice. Of course as a by product of using 2 layers of insulation I got it to fit perfect and fit to the contour of the top w/o using much glue or forcing it into place and taking a chance of tweaking the top -which could be seen form the outside.
Next, I fitting all of the pannels in place. Once they were generally fitted in place I pre dilled all of the pannels, and then drilled through to the new ribs. Instead of using sheet metal screw I took the time to actually drill a nice hole of the proper size and then ran a tap through the holes. So now I have threaded ribs to put a real bolt/screw into -working as a nut plate, versus a sheetmetal screw that will fail at some point in the future. I used #8 x 32 threaded machine screws to attach everything. My thought here was 1) I didn't want this falling apart latter 2) At some point in the future I want to have the ability to remove this headliner and then re-install it w/o a big production..such as having a sheet metal screw strip out in one of the holes, and/or waller-out over time from vibration.
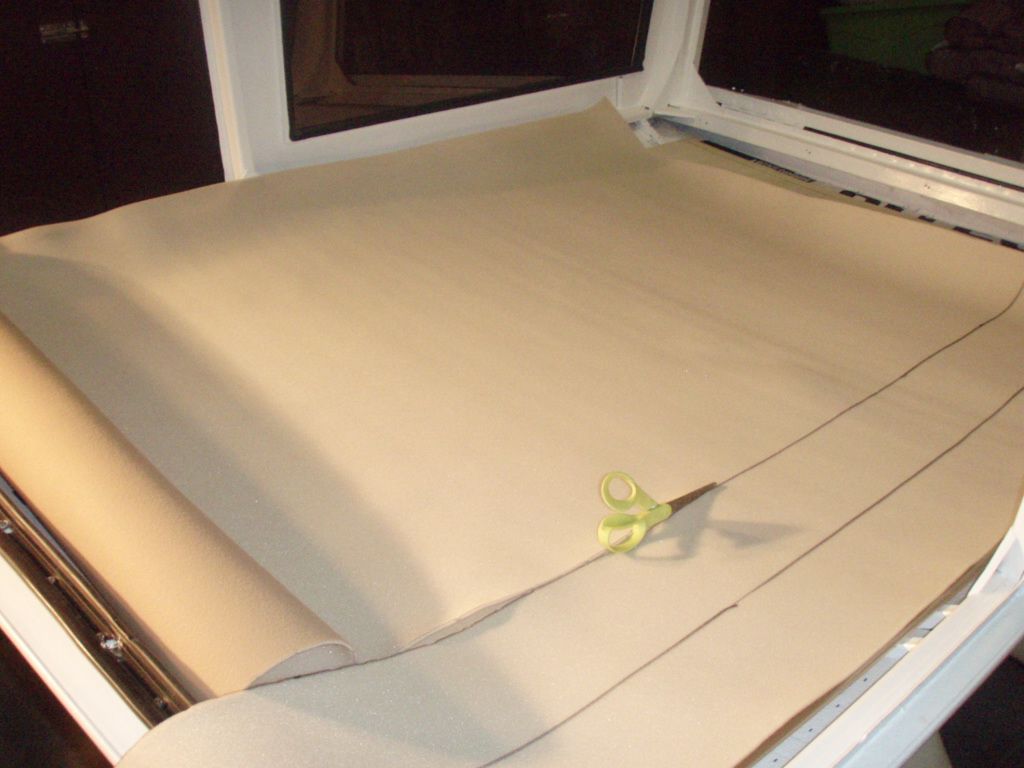
Next I bought some actual headliner materail from the local fabric store. And boys let me tell you...this was the BEST part of this whole top rebuild! I spent some time in a store where mainly women shop for making blankets, dress's and stuff...my wife wasn't w/ me and all of these girls looked prettier than ever
")
I might get some beer's and go shop there again!
I used some spray adhesive to the field of the pannels and fabric and attach the headliner fabric. As a word of caution, real headliner material is about 1/8" thick and mainly made from lightweight foam w/ a very thin layer of colored fabric. If you write on it w/ a sharpie marker it will show through to the other side and you have ruined your piece. After getting the field section glued to the pannels w/ the spray adhesive, I wrapped all of the edges around w/ about 1-2" overlap and attached this part w/ hot glue.
I was able to assemble the back 2/3 of the headliner while it was still upside-down on the saw horses. Then I re-instaleld the top on the bronco. Now I just had to finish fitting the forward headliner piece around the wiper cover, and cut out a little insulation to clear the wiper motor. I ended up scripe fitting and cutting the "top" of the wiper motor cover to now allow for the "lower" headerliner. Once I had cut about 1/2" around the top of the wiper cover it fit perfect and I used all of the same factory screw holes to re-install.
A great project. It did take some time and tought, but very rewarding. I had the attitude that "I'm doing this myself" without buying store-bought pre-made parts. I'm not a fast fabricator, so I prolly spent 40-60 hours on this whole project, but doubt I spent $200 bucks total.