ThatGuy@Duff's
Sponsor/Vendor
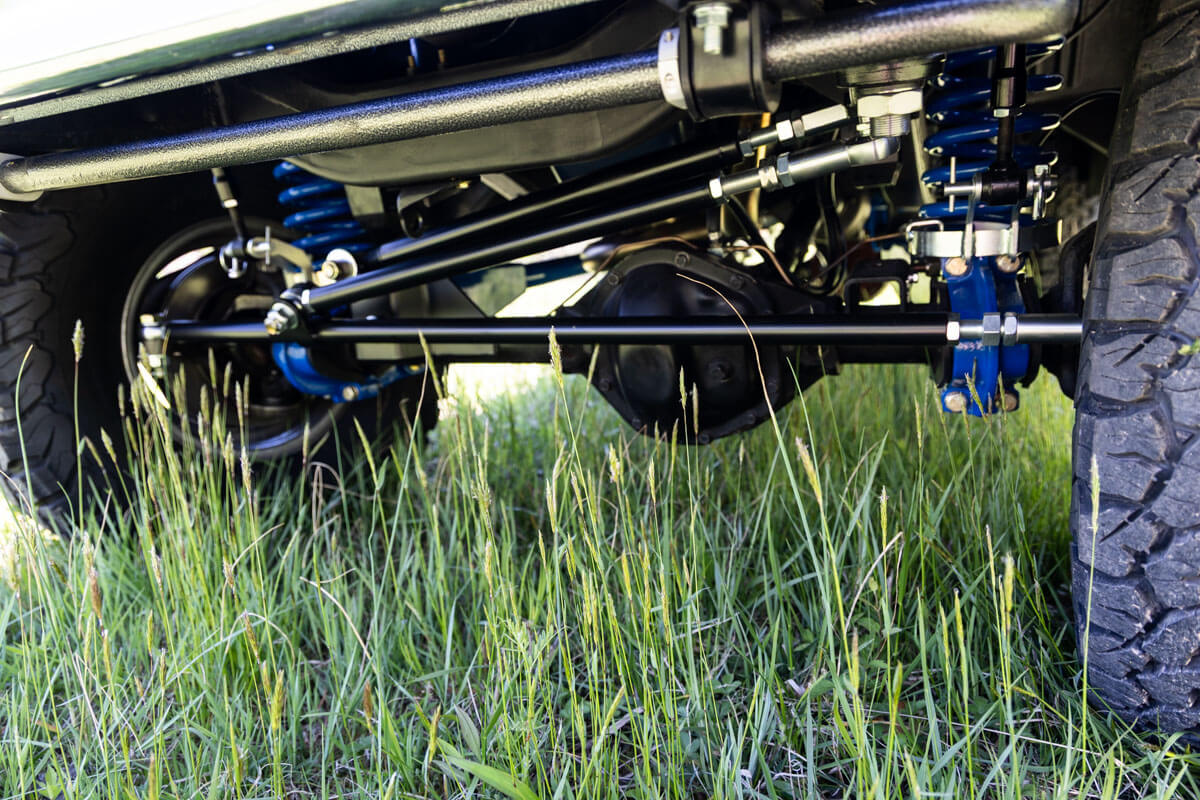
We're getting ready for the big show next month and we're taking the opportunity to update our LUBR, Nebula, to our Dual Sport 2.5" Four Link Performance Package.
Last year we installed our LUBR 1.5" system which had a great look and drove great, but @jduffent Suzy said: "Nebula needs a TUFF update", and our sales staff needs reference to know what our four-link system is like on a Bronco. So here we are...")

Before we break off into talking about the four-link system and answering those questions. I want to take a few moments to talk about our 1.5" systems and why we brought them to the market a couple of years ago.
The 1.5" performance package is great for LUBR owners who are planning a coyote with a stock frame and want the truck to be as low as possible. Since the coyote powertrain requires a 2" body lift. This will allow you to have 3.5" of total lift. I don't know about you all but my knees surely appreciate not having to jump down out of a Bronco that's 10 feet up in the air. Plus the 1.5" lift also keeps you from having to make drastic changes with your steering geometry. Over the past few years as I've managed our sales team, the 1.5" and 2.5" systems have been our top seller because they keep the geometry in check, and our recipe of parts allows for you to have the confidence to throw your keys to the wife and expect it to have the road manners of a modern vehicle.
Now with Nebula, there are no plans to go with a coyote, we're keeping her true to the Bronco roots with a normal pushrod windsor. In this first phase, we'll be installing the Performance Package, power steering, and the power brake system that we've sold for years. We'll also be installing a fresh set of 10.50" wide BFG ko2 or ko3's on the factory wheels.


In phase 2 we'll likely be installing an automatic transmission c4 or 4r70w along with air conditioning so we can make this a nice year-around cruiser.
Nebula's current powertrain is a Roller 302 with a 3-speed & Dana 20. Dana 44 front axle and banjo housing 9" rear axle. It has a stock-sized tire on the factory wheels. We coined the term "Nebula" from the Marvel character that complements her shade of Duff Blue that Suzy picked out herself. For those who aren't a comic book nerd, Nebula was somewhat of a cyborg made of bits and pieces to do her job in the multiverse. After our Nebula was restored we made modifications to the frame to allow us to modulate her with several different types of suspension bits whether it's hoops, towers, or a factory shock mount, and allow us to revert to her being a leaf-sprung Bronco in the future if we deem necessary. She was restored to be a cornerstone Bronco in the stable and to be used as a test bed for new and upcoming parts, some of which you all will be the first to learn about in this thread.
I invite all of you to not only follow along here but on our Facebook and Instagram pages. @Monster Mike is standing by too with any questions you might have as he and our team film the installation of the system for Bronco Garage.
I look forward to showing more as things evolve over the next 45 days. This is going to be super exciting. See you all at the show.
-Zac at James Duff
Last year we installed our LUBR 1.5" system which had a great look and drove great, but @jduffent Suzy said: "Nebula needs a TUFF update", and our sales staff needs reference to know what our four-link system is like on a Bronco. So here we are...
Before we break off into talking about the four-link system and answering those questions. I want to take a few moments to talk about our 1.5" systems and why we brought them to the market a couple of years ago.
The 1.5" performance package is great for LUBR owners who are planning a coyote with a stock frame and want the truck to be as low as possible. Since the coyote powertrain requires a 2" body lift. This will allow you to have 3.5" of total lift. I don't know about you all but my knees surely appreciate not having to jump down out of a Bronco that's 10 feet up in the air. Plus the 1.5" lift also keeps you from having to make drastic changes with your steering geometry. Over the past few years as I've managed our sales team, the 1.5" and 2.5" systems have been our top seller because they keep the geometry in check, and our recipe of parts allows for you to have the confidence to throw your keys to the wife and expect it to have the road manners of a modern vehicle.
Now with Nebula, there are no plans to go with a coyote, we're keeping her true to the Bronco roots with a normal pushrod windsor. In this first phase, we'll be installing the Performance Package, power steering, and the power brake system that we've sold for years. We'll also be installing a fresh set of 10.50" wide BFG ko2 or ko3's on the factory wheels.
In phase 2 we'll likely be installing an automatic transmission c4 or 4r70w along with air conditioning so we can make this a nice year-around cruiser.
Nebula's current powertrain is a Roller 302 with a 3-speed & Dana 20. Dana 44 front axle and banjo housing 9" rear axle. It has a stock-sized tire on the factory wheels. We coined the term "Nebula" from the Marvel character that complements her shade of Duff Blue that Suzy picked out herself. For those who aren't a comic book nerd, Nebula was somewhat of a cyborg made of bits and pieces to do her job in the multiverse. After our Nebula was restored we made modifications to the frame to allow us to modulate her with several different types of suspension bits whether it's hoops, towers, or a factory shock mount, and allow us to revert to her being a leaf-sprung Bronco in the future if we deem necessary. She was restored to be a cornerstone Bronco in the stable and to be used as a test bed for new and upcoming parts, some of which you all will be the first to learn about in this thread.
I invite all of you to not only follow along here but on our Facebook and Instagram pages. @Monster Mike is standing by too with any questions you might have as he and our team film the installation of the system for Bronco Garage.
I look forward to showing more as things evolve over the next 45 days. This is going to be super exciting. See you all at the show.
-Zac at James Duff