• Just a reminder that you won't be able to start new posts or reply to existings posts in the Archive forum.

    This is where all the old posts go so they can still be used for reference and searched.
  • Welcome to ClassicBroncos! - You are currently viewing the forums as a GUEST. To take advantage of all the site features, please take a moment to register. It's fast, simple and absolutely free. So please join our community today!
    If you have problems registering or can't log into your account, please contact Admin.

302 finaly back start assembley DONE!!!!!update

savage

Bronco Nut
Joined
Apr 18, 2007
Messages
2,483
Loc.
Renton
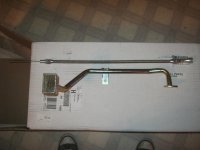
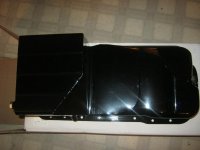
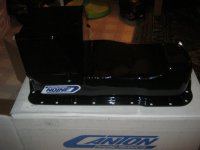
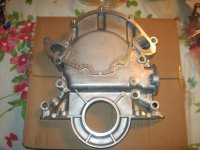
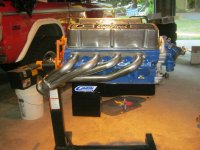
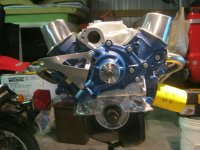
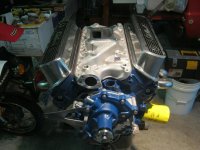
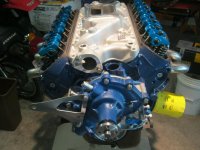
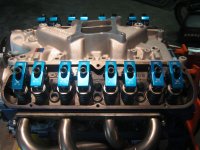
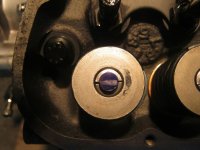
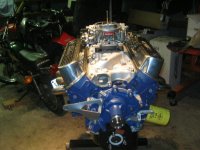
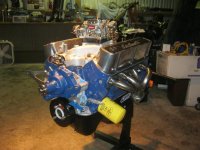
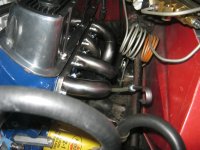
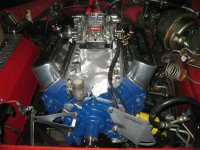
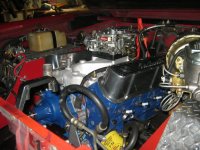
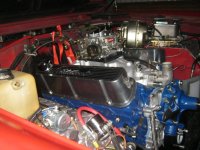
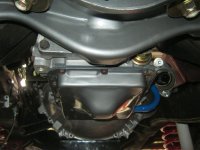
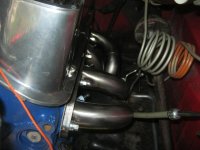
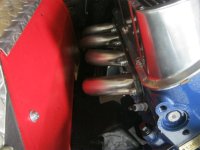
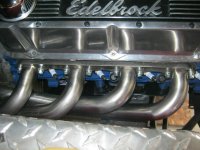
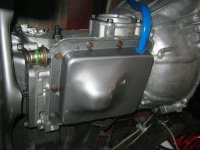
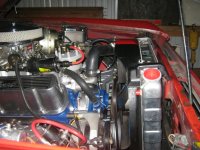
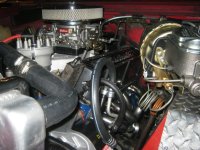
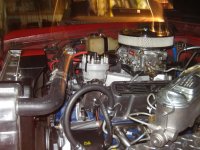
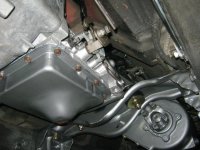
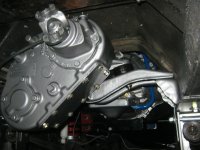
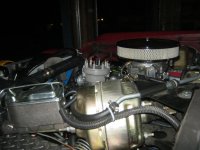
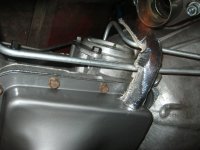
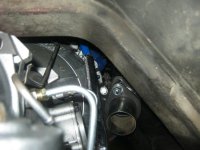
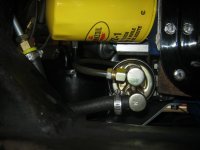
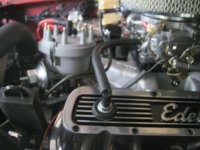
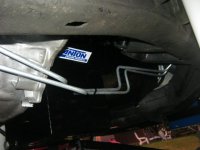
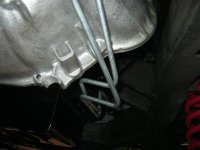
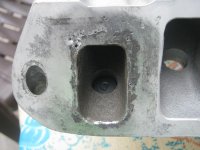
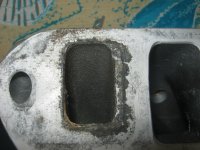
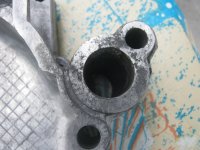
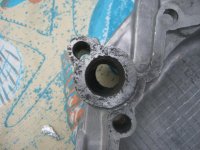
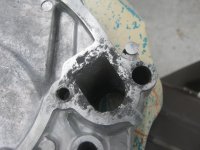
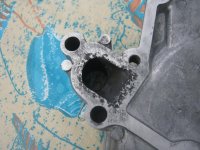
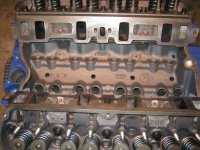
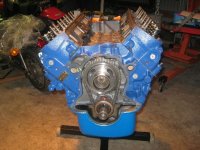
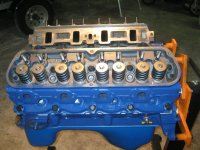
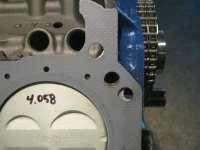
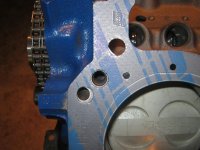
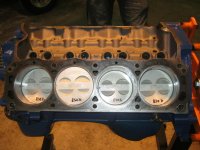
I got my short block and heads back and starting to assemble.I also pick up timing cover and intake,notice the waster in and out lets are really corroded,should I replace them or are they useable?
 

Attachments

  • 302 assambley 014.jpg
    302 assambley 014.jpg
    93 KB · Views: 91
  • 302 assambley 015.jpg
    302 assambley 015.jpg
    118.3 KB · Views: 87
  • 302 assambley 016.jpg
    302 assambley 016.jpg
    90.6 KB · Views: 106
  • 302 assambley 017.jpg
    302 assambley 017.jpg
    93.6 KB · Views: 78
  • 302 assambley 018.jpg
    302 assambley 018.jpg
    94.6 KB · Views: 89
  • 302 assambley 019.jpg
    302 assambley 019.jpg
    111.5 KB · Views: 90
Last edited:

broncnaz

Bronco Guru
Joined
May 22, 2003
Messages
24,341
Pretty common issue while its nice to have ones in better shape RTV around those areas should seal it with no issues. Thats what I usually do in hose areas when there like that
 
OP
OP
savage

savage

Bronco Nut
Joined
Apr 18, 2007
Messages
2,483
Loc.
Renton
Here are the pics of short block coming together.
 

Attachments

  • 302 assambley 010.jpg
    302 assambley 010.jpg
    133.5 KB · Views: 138
  • 302 assambley 008.jpg
    302 assambley 008.jpg
    118.9 KB · Views: 152
  • 302 assambley 007.jpg
    302 assambley 007.jpg
    116 KB · Views: 136
  • 302 assambley 005.jpg
    302 assambley 005.jpg
    88 KB · Views: 121
  • 302 assambley 003.jpg
    302 assambley 003.jpg
    97.6 KB · Views: 136
  • 302 assambley 001.jpg
    302 assambley 001.jpg
    103.8 KB · Views: 150

blubuckaroo

Grease Monkey
Joined
Jun 11, 2007
Messages
11,795
Loc.
Ridgefield WA
Engine assembly...
The next best thing to a new engine start-up.;)
It's pretty common to find the aluminum parts pitted a little. Your's aren't bad at all. As already stated, a smear of RTV on those gasket surfaces and the patient will be fine.
 
OP
OP
savage

savage

Bronco Nut
Joined
Apr 18, 2007
Messages
2,483
Loc.
Renton
My son put the heads on for me, are the holes for the bolts blind holes,we bought arp headbolts 154-3601 and he followed the instrutions that came with the bolts.I was just woundering.I no some bolts some time need sealent instead of lub when going into a water jaket.This is the cam they put in they said it should give me the torque down low in the rpm.
 

Attachments

  • cam chart 001.jpg
    cam chart 001.jpg
    51.3 KB · Views: 94
OP
OP
savage

savage

Bronco Nut
Joined
Apr 18, 2007
Messages
2,483
Loc.
Renton
Just received my Canton oil pan ,pickup,and dip stick.Pick up new timing cover.
 

Attachments

  • new pan 010.jpg
    new pan 010.jpg
    65.5 KB · Views: 69
  • new pan 006.jpg
    new pan 006.jpg
    79.6 KB · Views: 64
  • new pan 005.jpg
    new pan 005.jpg
    62.3 KB · Views: 62
  • new pan 002.jpg
    new pan 002.jpg
    54.9 KB · Views: 71
  • new pan 001.jpg
    new pan 001.jpg
    88.7 KB · Views: 68
OP
OP
savage

savage

Bronco Nut
Joined
Apr 18, 2007
Messages
2,483
Loc.
Renton
pan and front together

Here is more new parts goig on.
 

Attachments

  • engine assabley 2 001.jpg
    engine assabley 2 001.jpg
    88.7 KB · Views: 122
  • engine assabley 2 002.jpg
    engine assabley 2 002.jpg
    98.2 KB · Views: 111
  • engine assabley 2 004.jpg
    engine assabley 2 004.jpg
    91.4 KB · Views: 115
  • engine assabley 2 005.jpg
    engine assabley 2 005.jpg
    97 KB · Views: 102
OP
OP
savage

savage

Bronco Nut
Joined
Apr 18, 2007
Messages
2,483
Loc.
Renton
New roller rocker PRW 1.6 3/8 STUD

Got my roller rockers in today.Did my valve adjustment with my pushrods from old motor, adjustment was right in the middle of valve YA!!!!!Then engine guy told me I had to run harden pushrods.Took one out to find out if they were harden,and they were harden and titanum YA!!!!SO valve train done.Dont you just love thees old broncos!!!!!
 

Attachments

  • new parts 006.jpg
    new parts 006.jpg
    98.5 KB · Views: 104
  • new parts 005.jpg
    new parts 005.jpg
    107.2 KB · Views: 95
  • new parts 004.jpg
    new parts 004.jpg
    79.3 KB · Views: 90
  • new parts 003.jpg
    new parts 003.jpg
    67.1 KB · Views: 87
  • new parts 001.jpg
    new parts 001.jpg
    103.5 KB · Views: 82
OP
OP
savage

savage

Bronco Nut
Joined
Apr 18, 2007
Messages
2,483
Loc.
Renton
Intake and harmonic balancer on. I have never installed a intake ,using rtv for end gaskets,Edlebrock instrutions said to use rtv not the cork or rubber end gaskets will see.
 

Attachments

  • lifterss and intack 014.jpg
    lifterss and intack 014.jpg
    96.7 KB · Views: 91
  • lifterss and intack 016.jpg
    lifterss and intack 016.jpg
    96.9 KB · Views: 94
  • lifterss and intack 015.jpg
    lifterss and intack 015.jpg
    100.7 KB · Views: 111

broncoman1972

Bronco Guru
Joined
Mar 4, 2004
Messages
1,297
Looking good. Mine is slowly coming together. Hope it looks as good when its finished, before it gets thrashed on the trail and gets stained with dirt. Maybe I need dirt colored paint...
 
OP
OP
savage

savage

Bronco Nut
Joined
Apr 18, 2007
Messages
2,483
Loc.
Renton
Got motor in was not fun but its in,start next with trans and tranfercase.besides the motor mounts being off,the new dipstick was a pain the new pan puts it on the driver side close to the back and with the new shorty headers,I had no room to go between the header,so I ended up out side the header an up.Who would think a dipstick would be a mayger pain!!!!
 

Attachments

  • installing engine 007.jpg
    installing engine 007.jpg
    89.7 KB · Views: 113
  • installing engine 009.jpg
    installing engine 009.jpg
    94.3 KB · Views: 111
  • installing engine 008.jpg
    installing engine 008.jpg
    71.7 KB · Views: 120
  • installing engine 003.jpg
    installing engine 003.jpg
    111.2 KB · Views: 129
  • installing engine 004.jpg
    installing engine 004.jpg
    119.1 KB · Views: 113
  • installing engine 005.jpg
    installing engine 005.jpg
    107.7 KB · Views: 136

Crawdad

Bronco Guru
Joined
Feb 16, 2011
Messages
3,635
I had a fit with dipstick interfering with BC shorties on my old 351w. I eventually got the Milodon SS stick but would only work underneath the power brake booster. I wish they made these dipsticks a lil longer so it would be easier to chk. I also needed 45-90 degree spark plugs wires, straight ones touched the tubes and burned up even with boots on.
 

airbur

Bronco Guru
Joined
Jun 3, 2008
Messages
2,763
Loc.
Castle Pines, CO
302 finaly back start assembley

I had a fit with dipstick interfering with BC shorties on my old 351w. I eventually got the Milodon SS stick but would only work underneath the power brake booster. I wish they made these dipsticks a lil longer so it would be easier to chk. I also needed 45-90 degree spark plugs wires, straight ones touched the tubes and burned up even with boots on.

You can order Lokar sticks any length you want.

2usaneqy.jpg
 
OP
OP
savage

savage

Bronco Nut
Joined
Apr 18, 2007
Messages
2,483
Loc.
Renton
I have Lokar stick,but my problem is where the mounting hole is its right under the header collector and,and when you try to screw it in you have to make hard s.[airbur],what headers are you running?
 
OP
OP
savage

savage

Bronco Nut
Joined
Apr 18, 2007
Messages
2,483
Loc.
Renton
tran installed plus headers,getting their.Need to figurevwhat to do for pipes.
 

Attachments

  • transmisson install 008.jpg
    transmisson install 008.jpg
    80.4 KB · Views: 68
  • transmisson install 007.jpg
    transmisson install 007.jpg
    81.4 KB · Views: 54
  • transmisson install 006.jpg
    transmisson install 006.jpg
    68.4 KB · Views: 59
  • transmisson install 005.jpg
    transmisson install 005.jpg
    96.3 KB · Views: 72
  • transmisson install 004.jpg
    transmisson install 004.jpg
    86.5 KB · Views: 83
  • transmisson install 003.jpg
    transmisson install 003.jpg
    88.3 KB · Views: 78
  • transmisson install 002.jpg
    transmisson install 002.jpg
    90.7 KB · Views: 62
  • transmisson install 001.jpg
    transmisson install 001.jpg
    70.6 KB · Views: 57
OP
OP
savage

savage

Bronco Nut
Joined
Apr 18, 2007
Messages
2,483
Loc.
Renton
transfer case and odds and ends installed getting there wont be together for labor day,shooting for the week after.more pics!!
 

Attachments

  • getting close 004.jpg
    getting close 004.jpg
    116.2 KB · Views: 72
  • getting close 003.jpg
    getting close 003.jpg
    117.1 KB · Views: 59
  • getting close 001.jpg
    getting close 001.jpg
    119.1 KB · Views: 78
  • getting close 012.jpg
    getting close 012.jpg
    107.4 KB · Views: 78
  • getting close 011.jpg
    getting close 011.jpg
    85.5 KB · Views: 76
  • getting close 009.jpg
    getting close 009.jpg
    96.6 KB · Views: 78
  • getting close 008.jpg
    getting close 008.jpg
    87.7 KB · Views: 73
OP
OP
savage

savage

Bronco Nut
Joined
Apr 18, 2007
Messages
2,483
Loc.
Renton
new fuel line built rerouted,new trans cooler lines.
 

Attachments

  • FUEL PUMP 030.jpg
    FUEL PUMP 030.jpg
    97.2 KB · Views: 57
  • FUEL PUMP 031.jpg
    FUEL PUMP 031.jpg
    76.8 KB · Views: 54
  • new fuel line & filter 005.jpg
    new fuel line & filter 005.jpg
    66.3 KB · Views: 64
  • new fuel line & filter 001.jpg
    new fuel line & filter 001.jpg
    100.5 KB · Views: 51
  • new fuel line & filter 002.jpg
    new fuel line & filter 002.jpg
    76.5 KB · Views: 54
  • trans bolt and lines 003.jpg
    trans bolt and lines 003.jpg
    71.8 KB · Views: 54
  • trans bolt and lines 004.jpg
    trans bolt and lines 004.jpg
    72.3 KB · Views: 43
  • trans bolt and lines 005.jpg
    trans bolt and lines 005.jpg
    94.5 KB · Views: 51
Last edited:
Top