• Welcome to ClassicBroncos! - You are currently viewing the forums as a GUEST. To take advantage of all the site features, please take a moment to register. It's fast, simple and absolutely free. So please join our community today!
    If you have problems registering or can't log into your account, please contact Admin.

Any pics of upper floor repair where it meets the rear ribbed floor.

sellitall

Bronco Guru
Joined
Jul 30, 2002
Messages
1,444
Loc.
Malvern, Pennsylva
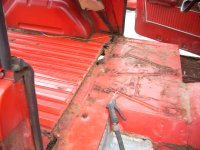
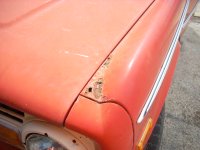
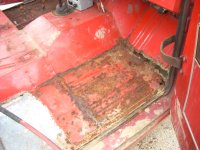
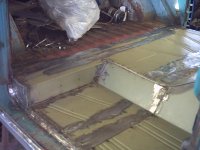
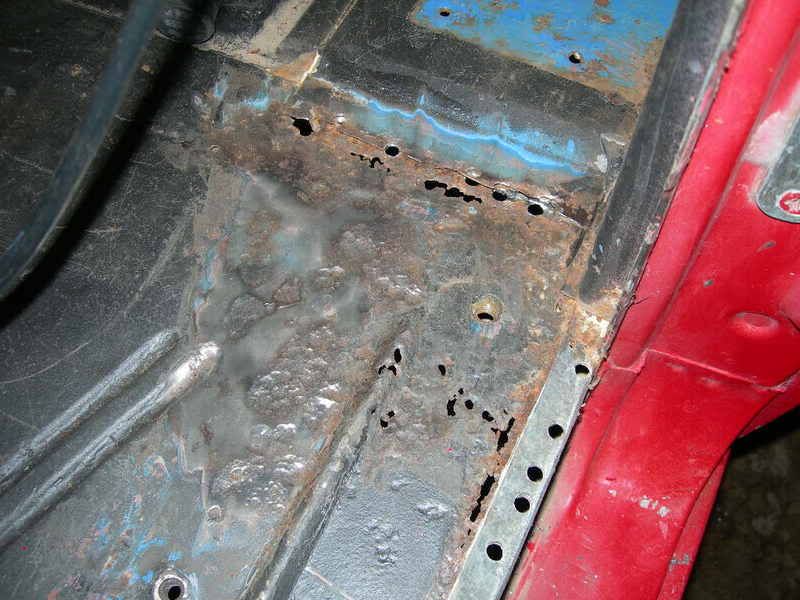
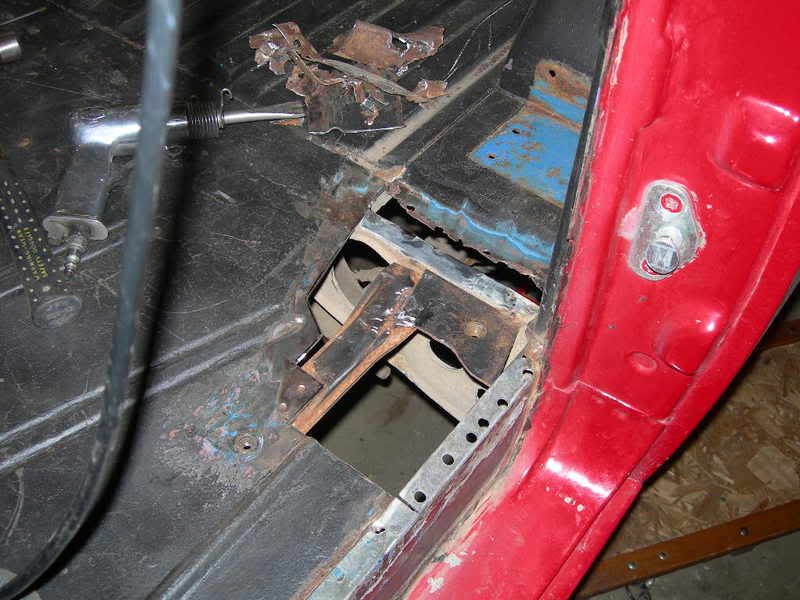
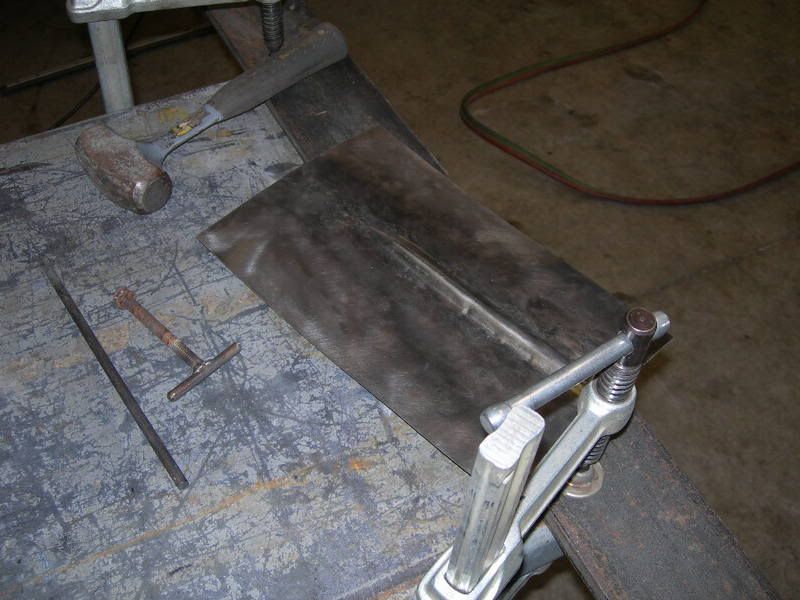
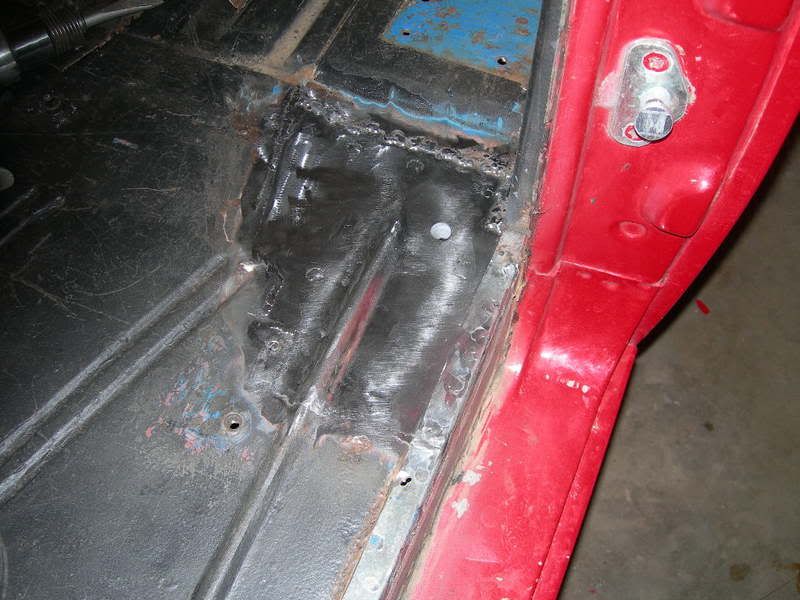
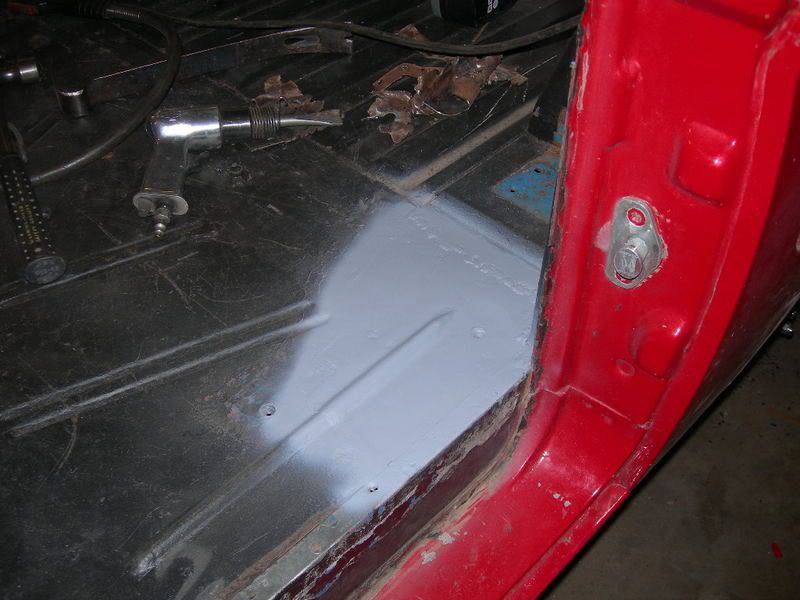
Has anyone patched the upper floor panel where it meets the rear floor (ribbed section)? Mine is pretty rough, but the rest of the upper floor is ok. I'd rather cut out the rotted section patch it using a piece of 16 gauge, fully weld it in and grind it flush with the existing metal. It would save me time and money. I can get pics if anyone needs them for reference.
 

ugly74

Bronco abuser
Joined
Apr 17, 2006
Messages
2,847
post pics, we love that stuff.

small spots can be patched pretty easily. I made 6 of 'em for my floors a few years ago. as long as you remove all the rot, and then get your patch all sealed up, it'll be fine. (I'm gonna take my own advice, take pics tonight, and post 'em tomorrow)
 

SC74

Contributor
Bronco Guru
Joined
May 24, 2004
Messages
3,413
Here is what I did on mine. It was not completely rusted out so I cleaned the original, primed it, and patched over it. After doing this the body was much more rigid than before.
 
OP
OP
sellitall

sellitall

Bronco Guru
Joined
Jul 30, 2002
Messages
1,444
Loc.
Malvern, Pennsylva
Thanks for the pics. Here's a shot of my newly acquired beauty. Oh how I love rust!!! One good thing is that besides the radio and wheels the truck is 100% stock/original.
 

Attachments

  • heatherseb 015.jpg
    heatherseb 015.jpg
    233.4 KB · Views: 60
  • heatherseb 008.jpg
    heatherseb 008.jpg
    235 KB · Views: 33
  • heatherseb 006.jpg
    heatherseb 006.jpg
    231.9 KB · Views: 21
  • heatherseb 005.jpg
    heatherseb 005.jpg
    233.8 KB · Views: 29
  • heatherseb 004.jpg
    heatherseb 004.jpg
    233.9 KB · Views: 30
  • heatherseb 003.jpg
    heatherseb 003.jpg
    227.9 KB · Views: 26
  • heatherseb 002.jpg
    heatherseb 002.jpg
    231 KB · Views: 23
  • heatherseb 001.jpg
    heatherseb 001.jpg
    232.7 KB · Views: 20
  • heatherseb 013.jpg
    heatherseb 013.jpg
    233.3 KB · Views: 62
  • heatherseb 012.jpg
    heatherseb 012.jpg
    230.1 KB · Views: 26
  • heatherseb 011.jpg
    heatherseb 011.jpg
    234.5 KB · Views: 47
  • heatherseb 009.jpg
    heatherseb 009.jpg
    230.6 KB · Views: 28

ugly74

Bronco abuser
Joined
Apr 17, 2006
Messages
2,847
whoops I forgot that i said I was gonna take some and post 'em.
I do have 1 pic in my gallery where I patched the front floors. but, mine were not as bad as what you've got.
with those, I think a full panel replacement would be the best way to go.
 
OP
OP
sellitall

sellitall

Bronco Guru
Joined
Jul 30, 2002
Messages
1,444
Loc.
Malvern, Pennsylva
I am dfinitely going to do the front floors. That pretty much goes without saying, but I was talking about the upper floor where it meets the rear floor. That's the only spot that's bad on the upper floor.
 

ugly74

Bronco abuser
Joined
Apr 17, 2006
Messages
2,847
well it depends on how "original" you want it to come out.
aesthetics aren't really my cup of tea...so I'd cut out all of the rust, measure the opening, and cut a piece of steel to weld over it. seal it with seam sealer on both sides, topcoat it, and call it done.
 

66ALRIDE

Just BIP It!
Joined
May 9, 2005
Messages
1,785
Loc.
Dothan, AL
I just drilled out the welds and placed my front floor underneath the rear floor and welded it back.
 

Attachments

  • 03-19-06 (37)post.JPG
    03-19-06 (37)post.JPG
    69.1 KB · Views: 93
OP
OP
sellitall

sellitall

Bronco Guru
Joined
Jul 30, 2002
Messages
1,444
Loc.
Malvern, Pennsylva
well it depends on how "original" you want it to come out.
aesthetics aren't really my cup of tea...so I'd cut out all of the rust, measure the opening, and cut a piece of steel to weld over it. seal it with seam sealer on both sides, topcoat it, and call it done.

I'm not trying to toot my own horn here, but I've been down this road before too many times to count. I'm just looking for some pics of someone who's done that repair. Here's my build thread. http://classicbroncos.com/forums/showthread.php?t=84003
 

Wyflyer

Bronco Guru
Joined
Apr 1, 2008
Messages
2,920
I"m a little confused about this.
Do you want pictures of one that is already done, or do you want pictures of one being rebuilt, or do you have pictures of one you did?
Are you doing this or have you already done it?
I really don't get it.
 

Fishbone

Full Member
Joined
Nov 5, 2007
Messages
534
Loc.
Northern, Illinois
I think he's lookin' for pics of a finished (or in progress) repair of the area circled in the picture below.
 

Attachments

  • heatherseb%20015.jpg
    heatherseb%20015.jpg
    173.6 KB · Views: 44
OP
OP
sellitall

sellitall

Bronco Guru
Joined
Jul 30, 2002
Messages
1,444
Loc.
Malvern, Pennsylva
I"m a little confused about this.
Do you want pictures of one that is already done, or do you want pictures of one being rebuilt, or do you have pictures of one you did?
Are you doing this or have you already done it?
I really don't get it.

Looks pretty straight forward to me. I bought a truck that needs that particular section replaced. I was wondering if anyone had any pics of the during and after. My 77 I 'm redoing had a decent upper floor, so replacement wasn't necessary. I'm looking for how many spotwelds and what's underneath I need to worry about. Sorry for the confusion.
 

Wyflyer

Bronco Guru
Joined
Apr 1, 2008
Messages
2,920
What confused me was when you said "but I've been down this road before too many times to count", and then posted a link. It made me think you were asking for photos but had also already done this many times before, so I was asking myself why go to the trouble to go get a pic if you've already done this too many times to count?
Hehehe,, i'm less confused but I can get a pic for you. There is an angled brace underneath the corner metal for the seat belt bolt to go to.
I did not repair mine, but rather installed new floor pan to new rear floor pan. the only old part used was the cross member system.
I'll get some pics later and edit them into this
 

Attachments

  • floor supports 2.jpg
    floor supports 2.jpg
    126.9 KB · Views: 37
  • IMG_0498.jpg
    IMG_0498.jpg
    121.7 KB · Views: 39
Last edited:

hopp150

Jr. Member
Joined
Apr 26, 2008
Messages
68
What are you guy's using to cut your floors? I know some swear up and down by the plasma cutters and others swear that angle grinders are the way to go.
 

Fishbone

Full Member
Joined
Nov 5, 2007
Messages
534
Loc.
Northern, Illinois
What are you guy's using to cut your floors? I know some swear up and down by the plasma cutters and others swear that angle grinders are the way to go.


We have a plasma cutter that I use quite a bit for cutting patches etc., but for cutting out damaged areas, I prefer a grinder with a cutting disc or a regular cut off wheel.

If I have good access I sometimes use an air nibbler. The little wedges it discharges can be messy, but it makes a nice clean, quick cut.:)
 

Explorer

Bronco Guru
Joined
Mar 2, 2008
Messages
4,390
Loc.
Raphine, Virginia
Panel cutter bit on air chisel works great. I just cut around the supports then chisel between the spot welds and grind down whats left. Those new Dremel cutting wheels do great on small stuff and love my little air sabersaw.
 

broncbuster

Sr. Member
Joined
Jun 29, 2008
Messages
414
Wow that orange tub is worse than one of mine and I had pretty much decided to scrap the tub and just find a tub to put on. Maybe I'll just fix mine.
 
Top