Tech article by BroncoWanted
WARNING: I claim no responsibility for kick panels made using this tech article that do not fit properly. As with any 30+ year old vehicle the craftsmanship and original construction varies from vehicle to vehicle. Please be aware of this and make the necessary measurements for your particular Bronco.
That being said the following article outlines how I made replacement kick panels that worked for my Bronco. Enjoy.
Tools Needed:
Take accurate measurements of your existing kick panels if available. Make sure that you measure from points that will not change (i.e. the firewall or door posts). Once you have taken your measurements carefully make note of all the measurements and store in a safe place. (Not on the cardboard you use as a weld spatter shield)
Make sure to measure from the top edge of the existing kick panel to the center of all bolt holes in the kick panel. Also measure from the firewall to the center of all bolt holes. Make note of the measurements and hole sizes.
Install braces from the dash support to the door post and to the floorboard. I recommend tack welding in place because sheet metal screws tend to give a certain amount, especially when you are beating and banging to remove the old kick panel. At this point if your kick panel is in decent shape you are very lucky and this project just got a lot easier.
Using a 4 x 4 or 4 x 8 sheet of 16gauge steel make the following measurements and mark with a paint pen, marker, etc. (See Drawing Below)
With the steel on a flat surface start at the top where it is 23 inches wide and make the following measurements and transfer with a marker. (See Drawing Below)
With the panel in front of you like it would go on the Bronco, make the following measurements and mark. (See Drawing Below)
Attach the kick panel to the Bronco using sheet metal screws and test the fit. (Don’t fret if it is too long when it fits behind the pillar post. We will correct this shortly.) While you have the panel in place, mark any areas where you have excess sheet metal and make the following measurements.


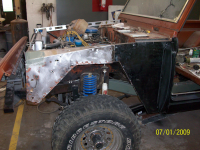
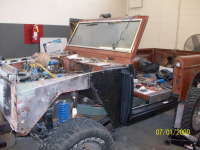
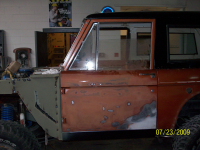
I hope you find this article informative and useful. This worked wonderfully for me as you can see by the photos. I will stress however, that our beloved Broncos were made many, many moons ago and they are by design and build different from one to another so please be careful with your measurements and make logical choices if you decide to follow this article.
WARNING: I claim no responsibility for kick panels made using this tech article that do not fit properly. As with any 30+ year old vehicle the craftsmanship and original construction varies from vehicle to vehicle. Please be aware of this and make the necessary measurements for your particular Bronco.
That being said the following article outlines how I made replacement kick panels that worked for my Bronco. Enjoy.
Tools Needed:
- Metal Cutting Device (Plasma Burner, Nibbler, Shear, Cutoff Tool or Grinder)
- Square
- Markers
- Tape Measure
- Spot Weld Cutter
- Drill Bits
- Welder
- Drill
- Clamps
- Grinder
- 4x4 or 4x8 16 Gauge Sheet Metal
- Self Tapping Sheet Metal Screws
- Cutoff Wheels
- Grind Rocks
STEP 1:
Take accurate measurements of your existing kick panels if available. Make sure that you measure from points that will not change (i.e. the firewall or door posts). Once you have taken your measurements carefully make note of all the measurements and store in a safe place. (Not on the cardboard you use as a weld spatter shield)
Make sure to measure from the top edge of the existing kick panel to the center of all bolt holes in the kick panel. Also measure from the firewall to the center of all bolt holes. Make note of the measurements and hole sizes.
STEP 2:
Install braces from the dash support to the door post and to the floorboard. I recommend tack welding in place because sheet metal screws tend to give a certain amount, especially when you are beating and banging to remove the old kick panel. At this point if your kick panel is in decent shape you are very lucky and this project just got a lot easier.
STEP 3:
Using a 4 x 4 or 4 x 8 sheet of 16gauge steel make the following measurements and mark with a paint pen, marker, etc. (See Drawing Below)
- Total Width = 23 inches ( allows for some extra space on the inner fender for welding)
- Total Height = 29 ¼ inches (includes 1 ½ inches for lip that connects to the cowl.
STEP 4:
With the steel on a flat surface start at the top where it is 23 inches wide and make the following measurements and transfer with a marker. (See Drawing Below)
- Measure down from the top 1 ½ inches at each corner and mark.
- Use a straight edge and connect the two marks.
- From left to right measure 9 inches from the front edge of the panel and make a mark from the top to the previous line.
- From the right edge measure 3 ½ inches from the back edge of the panel and make a mark from the top to the first line you made.
- Cut off the 1 ½ inch piece at the top left and top right corners.
- The remaining tab at the top now needs to be bent up at a 90 degree angle (towards you, if you are facing the piece) on the 1 ½ inch mark.
STEP 5:
With the panel in front of you like it would go on the Bronco, make the following measurements and mark. (See Drawing Below)
- From the top left edge measure down six inches and mark.
- Using a square make a line from the previous mark toward the center of the panel 2 inches long.
- From the bottom right edge measure 4 inches toward the center of the panel.
- Using a straight edge make a mark connecting the end of the 2 inch line to the end of the 4 inch line.
- Cut along the 2 inch line, the 4 inch line and the line connecting them.
Step 6:
Attach the kick panel to the Bronco using sheet metal screws and test the fit. (Don’t fret if it is too long when it fits behind the pillar post. We will correct this shortly.) While you have the panel in place, mark any areas where you have excess sheet metal and make the following measurements.
- Measure and mark all bolt holes using YOUR measurements. This is important. If you don’t make these measurements using your original dash holes the dash will not fit properly. Unless you are planning to weld in your dash then don’t worry about the holes.
- IF you have not removed your pillar post mark the panel where the inside edge makes contact at the top and bottom of the post. If you have removed your post fit the post in place and secure with sheet metal screws then mark the panel where the post contacts it at the top and bottom.
- Stand back and look how far you have come!!!!
STEP 7:
- Remove the panel from the Bronco.
- Drill appropriately sized holes on the marks you made.
- Use a straight edge and connect the two marks you made where the panel contacts your pillar post.
- Remove the excess metal by cutting along the line.
- Remove any excess metal from other marks you made. (This step can be postponed until the panel is in place to allow for more accurate fitting.)
- Weld appropriately sized nuts to the outside of the panel lined up with the holes you drilled earlier.
- You can cut the excess metal off on the mark you made and when the time comes weld directly to the pillar post
- You can cut the excess metal off on the mark you made and then use a piece of ½ or ¾ inch angle iron welded to the door post and then the kick panel to make the connection.
- You can make two bends in the metal using a brake or similar setup to allow for the variation from the kick panel to the pillar post and connect the two using spot welds.
STEP 8:
- Refit the panel using your original sheet metal screw holes.
- Check all measurements from your Bronco and adjust the cowl, dash and pillar post appropriately.
- Use a spot weld cutter to make holes in the panel along all edges for welding if you prefer a clean factory look. Otherwise weld the panel in place along all joints. (Make sure you make short welds in different areas of the panel and allow cooling time to reduce the chance the panel will warp.
- Use a grinder to smooth all welds and edges so that they are clean and line up with the fender well and inner rocker panel.
- Use etching primer to prime the metal.


I hope you find this article informative and useful. This worked wonderfully for me as you can see by the photos. I will stress however, that our beloved Broncos were made many, many moons ago and they are by design and build different from one to another so please be careful with your measurements and make logical choices if you decide to follow this article.


