Tech article by Merle Howard (Howiebilt)
The first thing you have to do is get some help. You already know that you will have to cut your front axle housing in half and the darned thing weighs more than most mortals can lift by themselves. I have chosen to use a band saw, to do the deed, since it will do a much better job than I could do with a sawzall. I will TIG or MIG weld whatever needs it. If a special tool is called for or a different technique is used other than the ones described in the instructions that came with the WAH kit, I will make a note saying so.
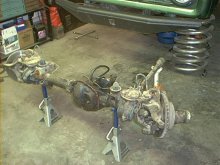
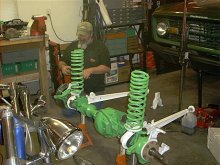
The first thing I did was remove the tie rod and drag link. Then I took the track bar off. Removing the nuts from the radius arms is important at this point because I jacked the bronco up and placed jack stands under the frame directly behind the radius arms to support the weight of the bronco while the transformation takes place. There is no room for a wrench at this point so that is why I did it ahead of time. This places most of the weight of the bronco directly on or slightly in front of the jack stands. Make sure that the vehicle is stable. As a precaution, I put some tension on the front bumper with my high lift jack; to be sure that the jack stands weren’t alone in their task. Next I removed the shocks and the coil springs as well as the front drive shaft and the rubber brake hose that is attached to the frame. Be sure to cap off the steel line coming down to the frame as well as the rubber line. Once these things were completed, the whole front assembly was rolled out from under the bronco and I placed it on jack stands.
At this time, the spring perches and radius arms were removed. The calipers and brake lines were taken off as one assembly and then the lock outs and hubs.
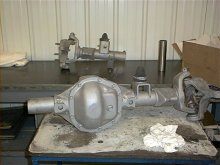
The spindles and caliper brackets were removed as well. I then took the axles out and removed the bolts from the front cover and drained the lube from the differential. Since I plan to take the housing to the car wash and clean it up really well on the inside and out, I decided to remove the carrier and pinion. This is not called for in the instructions, but rather something that I wanted to do. At this point, everything that needs to be removed is done and will be cleaned in a parts washer or washed at the local car wash, awaiting the WAH installation.
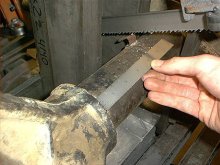
Cutting the housing is very easy and the instructions say to mark the tube 4 ½” from the passenger side differential housing and, using a pipe cutter, make a mark all the way around the axle tube.
I chose to use a band saw that is fairly precise and didn’t need to use the pipe cutter. If I had been doing this at home, my options would have been a sawzall or one of those little band saws they sell at Northern tools or Harbor freight.
With the two halves cleaned and prepped, as per the instructions, I set forth to deburr the inside and outside of the cuts and chamfer them, as well as drill the two ½" holes at 90 degrees apart and the .213" hole for the grease zerk and then I tapped it.
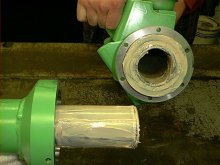
With a cylinder hone and a bunch of time to kill, I proceeded to hone the differential side of the housing so that the sleeve would slide inside without binding.
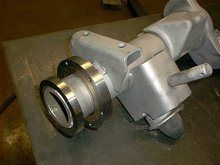
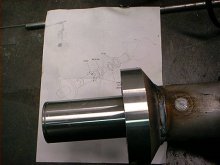
Since the axle tube is pressed into the actual housing, this presented a problem. The inside of my axle tube was slightly smaller than the rest of it, nearer the housing. I can only attribute this to the fact that the tubes are pressed into the housing and it required the use of a die grinder with a large stone, to enlarge the tube enough so that it could be honed. Since the sleeve is to be inserted into the tube 4 ½". The first 3" went really well but the last 1 ½" required a lot of test fitting and 7 hours later, it was done. The outer section was very simple and only required about 5 minutes of honing before it was ready. It is very important to remove any sharp edges from the holes drilled in the tubes as there will be "O" rings placed on the sleeve and if the holes are not deburred after honing, they will cut the "O" rings upon insertion. This is when you install one of the "O" rings on the sleeve and slide it into the housing side of the axle tube (using a soft hammer) and weld the 4 bung welds in the ½" holes that were drilled.
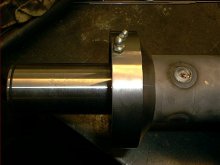
At this point, the tube needs to cool off a little. Installing the various parts on to the tubes was very straight forward and only slightly sanding the outside of the tubes to remove any nicks or burrs (from years of rock bashing) with some 320 grit emory cloth was required. I slid the hub onto the housing side of the axle tube and positioned it so that the inside of the hub was flush with the end of the tube and marked it's location with a scribe.
Then I placed the cap (with "O" ring installed), bronze washer and rotor on to the outer axle tube and placed the second bronze washer into the hub.
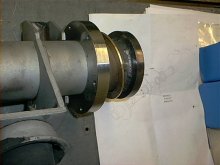
Now comes the time for the test fitment. I slid the two halves together and made sure that the grease zerks were in the upright position and the hub was on its mark. At this time, I bolted the unit together and tack welded the hub to the axle tube. The bolts were removed and the cap and bronze washer were slid back to reveal the rotor. The rotor is then tacked using very small tack welds (this is important unless you enjoy grinding in places that are hard to get at) and the whole assembly is slid apart.
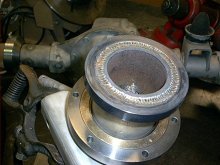
I MIG welded the hub around the outside and then TIG welded the rotor on both sides.
After allowing ample cooling time, and checking to see that the bronze washers were not contacting any of the welds, the last "O" ring was installed on to the sleeve and everything was lubed generously with grease.
Don't forget to lube the inside of the outer axle tube. I then slid both halves together and applied a small bead of Permatex around the mating surfaces and bolted it all together using the hardware provided.
It's done, put everything back on the new "WRISTED AXLE HOUSING" in reverse order and start wowing your friends!
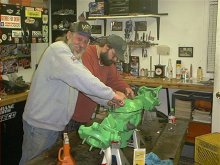
I want to thank Chuck and BC Broncos for their trust and confidence in me. I am very thankful to Jon, for the best web site on the planet, and everyone at ClassicBroncos.com who posted questions about the WAH. I also want to thank Travis, for the garage space and his tools. That heater works great! I also wish to thank a couple of members of the Buffalo Joe Band (J.D. and Jamie) for helping me out with the tough stuff and diggin' in on the wrenchin'.


