


Community
Message Forum
Photo Gallery
Event Calendar
Book Reviews
Bronco Wallpaper
Bronco FAQ
Link Back to CB!
Photo Gallery
Event Calendar
Book Reviews
Bronco Wallpaper
Bronco FAQ
Link Back to CB!
Buy / Sell


Bronco Tech
3 Arm Wiper Setup
Fix Motor Mount
Roll Cage Braces
Throttle Body 65mm
Wheel Alignment
Heat Riser Replacement
Vent Window Repair
Center Console Mount
Straighten Bumper
Ford 6R80 6 spd
More Tech...
Fix Motor Mount
Roll Cage Braces
Throttle Body 65mm
Wheel Alignment
Heat Riser Replacement
Vent Window Repair
Center Console Mount
Straighten Bumper
Ford 6R80 6 spd
More Tech...

Install the app
-
Welcome to ClassicBroncos! - You are currently viewing the forums as a GUEST. To take advantage of all the site features, please take a moment to register. It's fast, simple and absolutely free. So please join our community today!If you have problems registering or can't log into your account, please contact Admin.
You are using an out of date browser. It may not display this or other websites correctly.
You should upgrade or use an alternative browser.
You should upgrade or use an alternative browser.
Barn Find Restomod Build
- Thread starter AZ73
- Start date
KeithKinPhx
Sr. Member
- Joined
- Jan 8, 2017
- Messages
- 444
Looks great. Keep going....
- Joined
- Mar 8, 2007
- Messages
- 81,756
Love it.......
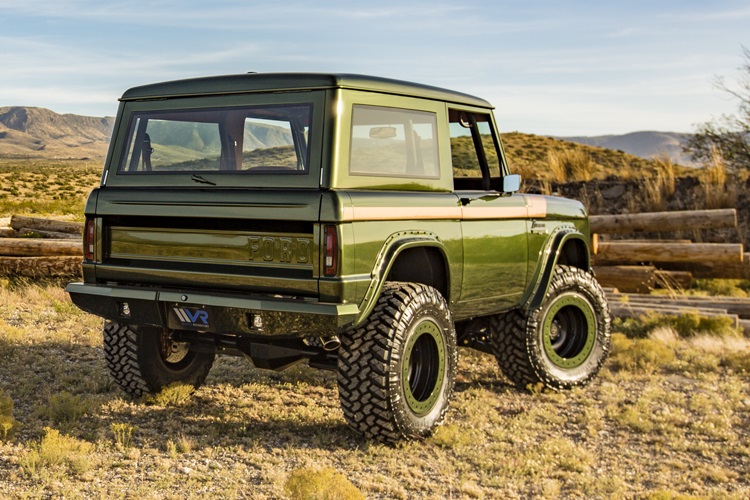
Decided on Ford Performance White for the top. Since the Body color was updated with a nod to the original Ginger, I decided Wimbledon white looked too creamy. So it's updated with a nod to the original scheme. I know black is a popular top color for this type of "burnt orange", but this is Arizona and it gets hot. Don't need to add to the heat, and I think it looks fantastic.
OP
OP
- Joined
- Mar 28, 2012
- Messages
- 3,542
Thank you all so much for your support! I'm TOTALLY getting excited that the end is near. Well maybe 3-6 months near. ;D Actually had someone driving by stop and say "nice Bronco!" I said "you didn't think it was a Jeep?" He said "Hell no!"
Attachments


Last edited:
KeithKinPhx
Sr. Member
- Joined
- Jan 8, 2017
- Messages
- 444
3-6 months. Crap. I am not quite to where you are and the thought I won't be driving until this fall is depressing.
When I look at the pictures that white top really does look good. Dash is going to be sweet as well. The UPS driver brought my dash from BC this afternoon.
When I look at the pictures that white top really does look good. Dash is going to be sweet as well. The UPS driver brought my dash from BC this afternoon.
KeithKinPhx
Sr. Member
- Joined
- Jan 8, 2017
- Messages
- 444
If you flush mount the glass I would be interested in doing that as well. So maybe a group buy? I live off Carefee Hwy so not too far away.
Putting the engine back in tonight (hopefully).
Putting the engine back in tonight (hopefully).
OP
OP
- Joined
- Mar 28, 2012
- Messages
- 3,542
Glad its back in your possession! Now the real fun begins. Flush mounting the glass?
Still debating. It's a Ranger so I have all the shiny stuff for the windows, but I do like the Flush mount. Anyone done it to the Hard Top? Have lots of other work first so I have time to decide. What I was searching for the other day is some kind of windshield that has insulation too. My BMW has that option on the car but I can't find any information on how they do it. All I can find is just some green tint for sun readily available. Anyone ever hear of that kind of safety glass that's insulating? Maybe embedded titanium?
Busy for 2 weeks so only a few minutes at night to play with it. Just added the crush nuts for the tailgate handle, the warflares, door handles, and the LED headlights. The dreaded wiring still has to be done but I need a few free days in a row to get that going.
HINT for people doing theirs - New screws and bolts needed to assemble all the stuff is a pain to figure out. Headlight trim requires "J" clips for a #8 screw. The headlight mounting ring needs SHORT #8s. Side marker lights need the little plastic press-in clip that the #8 screw screws into. When you take it apart, keep everything together in baggies since a lot of replacement parts don't come with the hardware. You'll either have to purchase sets from the vendors, or note what you need and head to an ACE hardware or someplace if you're replacing your old rusty bolts/screws with new and/or stainless. It slows you down if you're missing something.
Attachments


Last edited:
Skiddy
Bronco Guru
- Joined
- Oct 8, 2003
- Messages
- 11,557
Still debating. It's a Ranger so I have all the shiny stuff for the windows, but I do like the Flush mount. Anyone done it to the Hard Top? Have lots of other work first so I have time to decide. What I was searching for the other day is some kind of windshield that has insulation too. My BMW has that option on the car but I can't find any information on how they do it. All I can find is just some green tint for sun readily available. Anyone ever hear of that kind of safety glass that's insulating? Maybe embedded titanium?
Busy for 2 weeks so only a few minutes at night to play with it. Just added the crush nuts for the tailgate handle, the warflares, door handles, and the LED headlights. The dreaded wiring still has to be done but I need a few free days in a row to get that going.
HINT for people doing theirs - New screws and bolts needed to assemble all the stuff is a pain to figure out. Headlight trim requires "J" clips for a #8 screw. The headlight mounting ring needs SHORT #8s. Side marker lights need the little plastic press-in clip that the #8 screw screws into. When you take it apart, keep everything together in baggies since a lot of replacement parts don''t come with the hardware. You'll either have to purchase sets from the vendors, or note what you need and head to an ACE hardware or someplace if you're replacing your old rusty bolts/screws with new and/or stainless. It slows you down if you're missing something.
just what I needed thanks, I have my front end still apart. got most of that on order, my clips, headlight adjusters and most of the rest fell apart from rust when I removed it. I will be putting it back together in a few weeks
What are the J clips,? don't remember them
OP
OP
- Joined
- Mar 28, 2012
- Messages
- 3,542
just what I needed thanks, I have my front end still apart. got most of that on order, my clips, headlight adjusters and most of the rest fell apart from rust when I removed it. I will be putting it back together in a few weeks
What are the J clips,? don't remember them
"J" clip is on the left. "U" clip is on the right. I guess it could use a "U" clip (like on the fenders) but I couldn't find any "U" clips that were small enough for a #8 screw.
Another HINT: Tape around whatever you're working on, or tape up thick towels. You don't want to slip with a screwdriver, file, or wrench and scratch your new paint. I had to square file the side marker light screw holes slightly to accept the plugs I had. Slipped 3 times and was saved by the tape. Dropped a wrench on the tailgate installing the crush nuts and thanked God for the thick towel I had taped up below the tailgate latch. Probably saved a scratch AND a dent. Also, I used car wax on all the stainless steel screws (to slow down and help prevent galling), and also waxed the holes for the warflare bolts, and the paint behind the welting to add a protective layer.
Attachments


Last edited:
Skiddy
Bronco Guru
- Joined
- Oct 8, 2003
- Messages
- 11,557
"J" clip is on the left. "U" clip is on the right. I guess it could use a "U" clip (like on the fenders) but I couldn't find any "U" clips that were small enough for a #8 screw. The "J" worked fine. You need them for the front turn signal lights too for 68-77. Not sure for a 66-67.
gotcha thank you, one more question. are they nuts or barrel type fasteners for the front grill turn signals? didn't really find any info on any of the websites
OP
OP
- Joined
- Mar 28, 2012
- Messages
- 3,542
If you flush mount the glass I would be interested in doing that as well. So maybe a group buy? I live off Carefee Hwy so not too far away.
Putting the engine back in tonight (hopefully).
I'm following your excellent build Keith. If you need specialized tools or help, let me know. I have a wide selection from building mine. As for the glass, I think we'd have to have a local shop cut it for us. I'll keep you posted on what I find.
Last edited:
OP
OP
- Joined
- Mar 28, 2012
- Messages
- 3,542
gotcha thank you, one more question. are they nuts or barrel type fasteners for the front grill turn signals? didn't really find any info on any of the websites
The lenses to the buckets are #8 screws. The Buckets and fat gasket look like they might take a barrel nut based on this picture. It seems the buckets have bolts welded into them? Good question. I'll have to edit my last comment. Won't know for sure until I actually find mine. %)
https://d1ovggn179d8ws.cloudfront.net/images/products/423/1517.JPG
OP
OP
- Joined
- Mar 28, 2012
- Messages
- 3,542
Some info on glass
https://www.press.bmwgroup.com/glob...ecting-laminated-glass-technology?language=en
https://glassmagazine.com/article/auto/california-mandates-use-ir-reflective-auto-glass
So maybe there's hope it's available!
https://www.press.bmwgroup.com/glob...ecting-laminated-glass-technology?language=en
https://glassmagazine.com/article/auto/california-mandates-use-ir-reflective-auto-glass
So maybe there's hope it's available!
KeithKinPhx
Sr. Member
- Joined
- Jan 8, 2017
- Messages
- 444
One of my commercial tenants runs a glass company and stupidly I did not think to ask him. I'll call tomorrow and see what he has access to. He mainly does shower doors, not autos.
Im flush mounting my windshield. Need to get it primered and then Ill take it in for measurementsIf you flush mount the glass I would be interested in doing that as well. So maybe a group buy? I live off Carefee Hwy so not too far away.
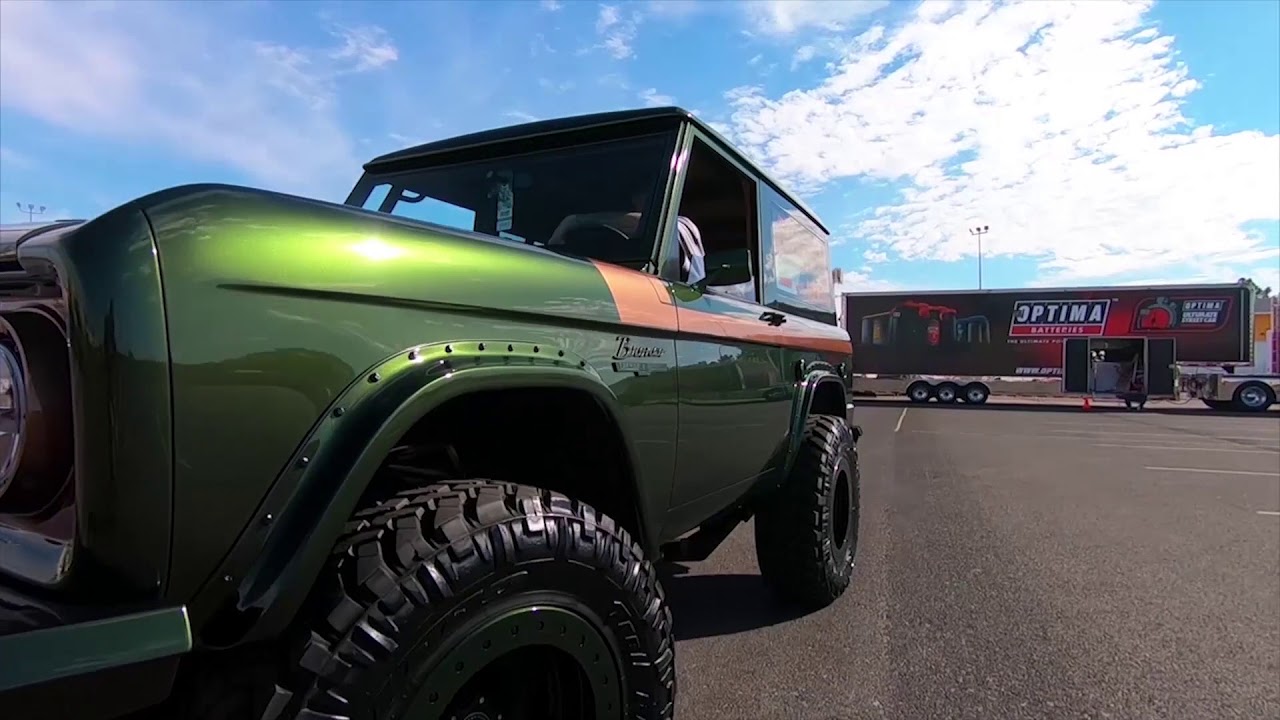
Velocity did with their green SEMA build:Still debating. It's a Ranger so I have all the shiny stuff for the windows, but I do like the Flush mount. Anyone done it to the Hard Top?


I have 25-30 labeled bags full of hardware and am still not done taking it apartWhen you take it apart, keep everything together in baggies since a lot of replacement parts don't come with the hardware.
OP
OP
- Joined
- Mar 28, 2012
- Messages
- 3,542
Velocity did with their green SEMA build:
I'm a moron. I took many pictures of it at Barret Jackson and never even noticed. I was too enthralled by the frame and suspension. Thanks! I'll check my pix too.
KeithKinPhx
Sr. Member
- Joined
- Jan 8, 2017
- Messages
- 444
Spoke with my glass guy today. He does mainly structural glass, not automotive. He can order any kind of glass but needs to know what kind. He can definitely trim or round to our need but he needs a type.
I looked up a couple of other posts on doing this modification but no one specifies the type of glass they bought, other than tinted green.
I looked up a couple of other posts on doing this modification but no one specifies the type of glass they bought, other than tinted green.
mjschneidy
Full Member
- Joined
- Nov 21, 2016
- Messages
- 224

OP
OP
- Joined
- Mar 28, 2012
- Messages
- 3,542
Looking good! I'm very interested in hearing how it runs and drives.
Maybe its buried in these 15 pages somewhere but any tips for drilling the grill trim holes?
I asked the Body shop to do it since they were painting the center and needed the trim to line up the paint line anyway. They installed the little plastic tabs onto the back of the trim evenly apart, and then put the 4 trim pieces together, taping the ends to keep them from coming apart. Then they taped the whole thing to the grill and marked the inside edge with a pencil, and cross marked where each tab was. The long way isn't as important as the thickness since the tabs can slide back and forth. Then they pulled it off, added 1/2 the thickness of the trim to their inside marking line, and drilled where the cross marks were. Then they taped along the center of the drill holes following the inside marking line, cleaned off the penciled outline, and painted the middle. I put arrows where some of the holes are. This picture was taken after they were done. I just put the pieces together again and laid it on top to see it. Unfortunately the 2 long pieces were damaged and need to be replaced which is why they didn't install it when they were done.
Attachments

Last edited:
Similar threads
- Replies
- 2
- Views
- 586
- Replies
- 17
- Views
- 2K
- Replies
- 0
- Views
- 1K