OP
OP
- Joined
- Jun 29, 2015
- Messages
- 865


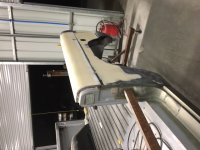
ok we got some more accomplished tonight. Finnaly got the panels fit and clamped/kleco'd in. We are moving again!!!
The first tail light housing that the PO supplied to me was not even close. I ordered this replacement one But had to "massage" it and the fender to make them fit correctly, but I'm not a body guy so for me to make them fit they must have not been too bad.How are the rear Q's and taillight housings working out, are they lining up fairly well, or are you having to do some serious mods to get them to work?
 . My painter will do final sanding.
looking good chuck! Can't wait to see it/she/he ion the road!
I Needed to get my frame out from under the bronco so I decided to build a body jig. I will use it again and it made life much easier I made the body mounts high so I coud get to the underneath areas easier. (Someone on here had done that with extensions on an old frame so I used their knowledge).