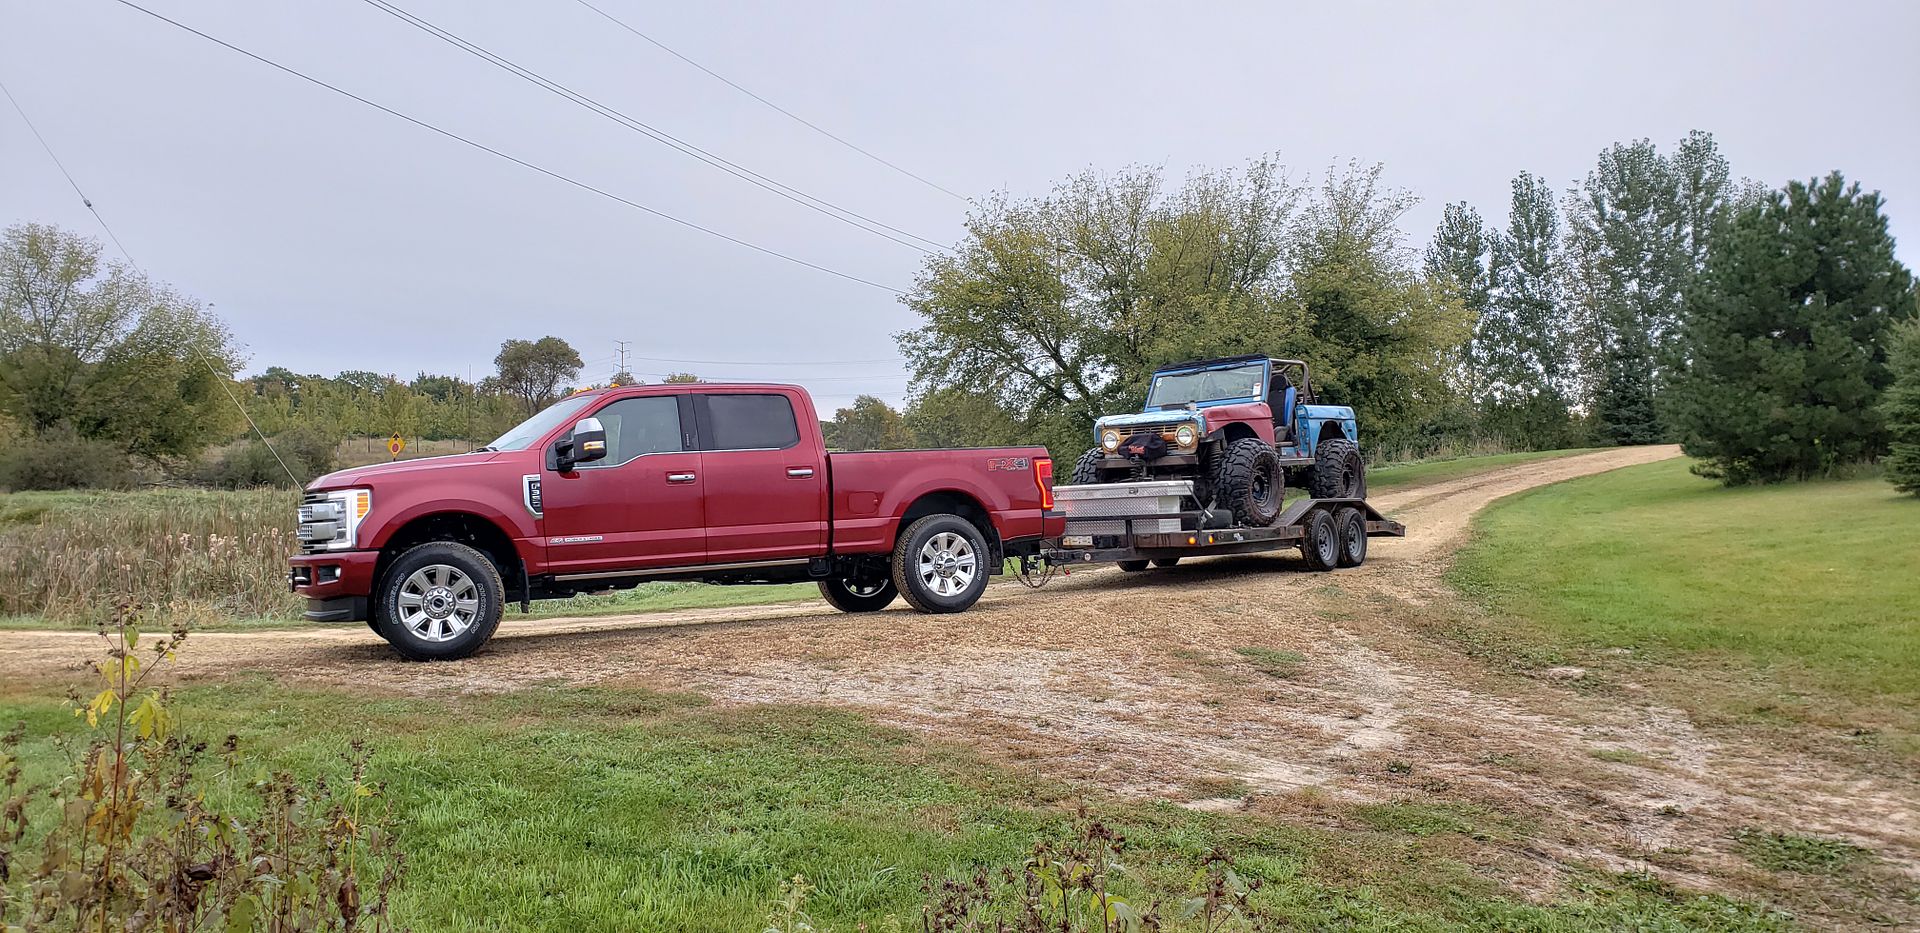
• Welcome to ClassicBroncos! - You are currently viewing the forums as a GUEST. To take advantage of all the site features, please take a moment to register. It's fast, simple and absolutely free. So please join our community today!
    If you have problems registering or can't log into your account, please contact Admin.

Money Pit - Phase III

OP
OP
KyleQ

KyleQ

Bronco Guru
Joined
Apr 24, 2008
Messages
5,480
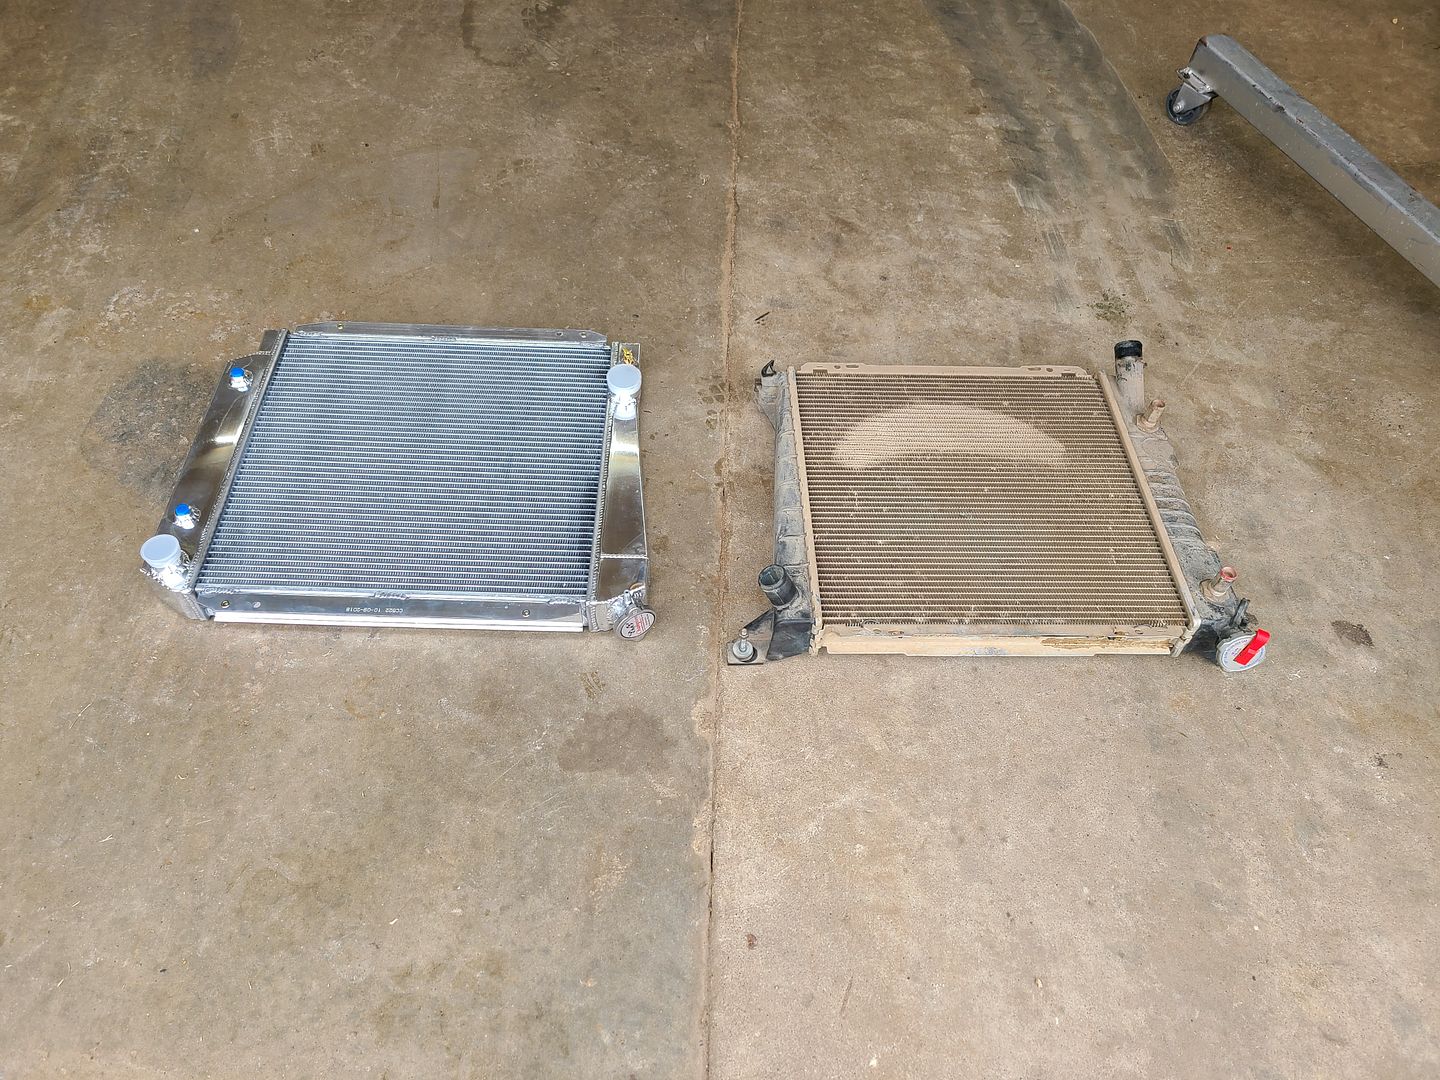
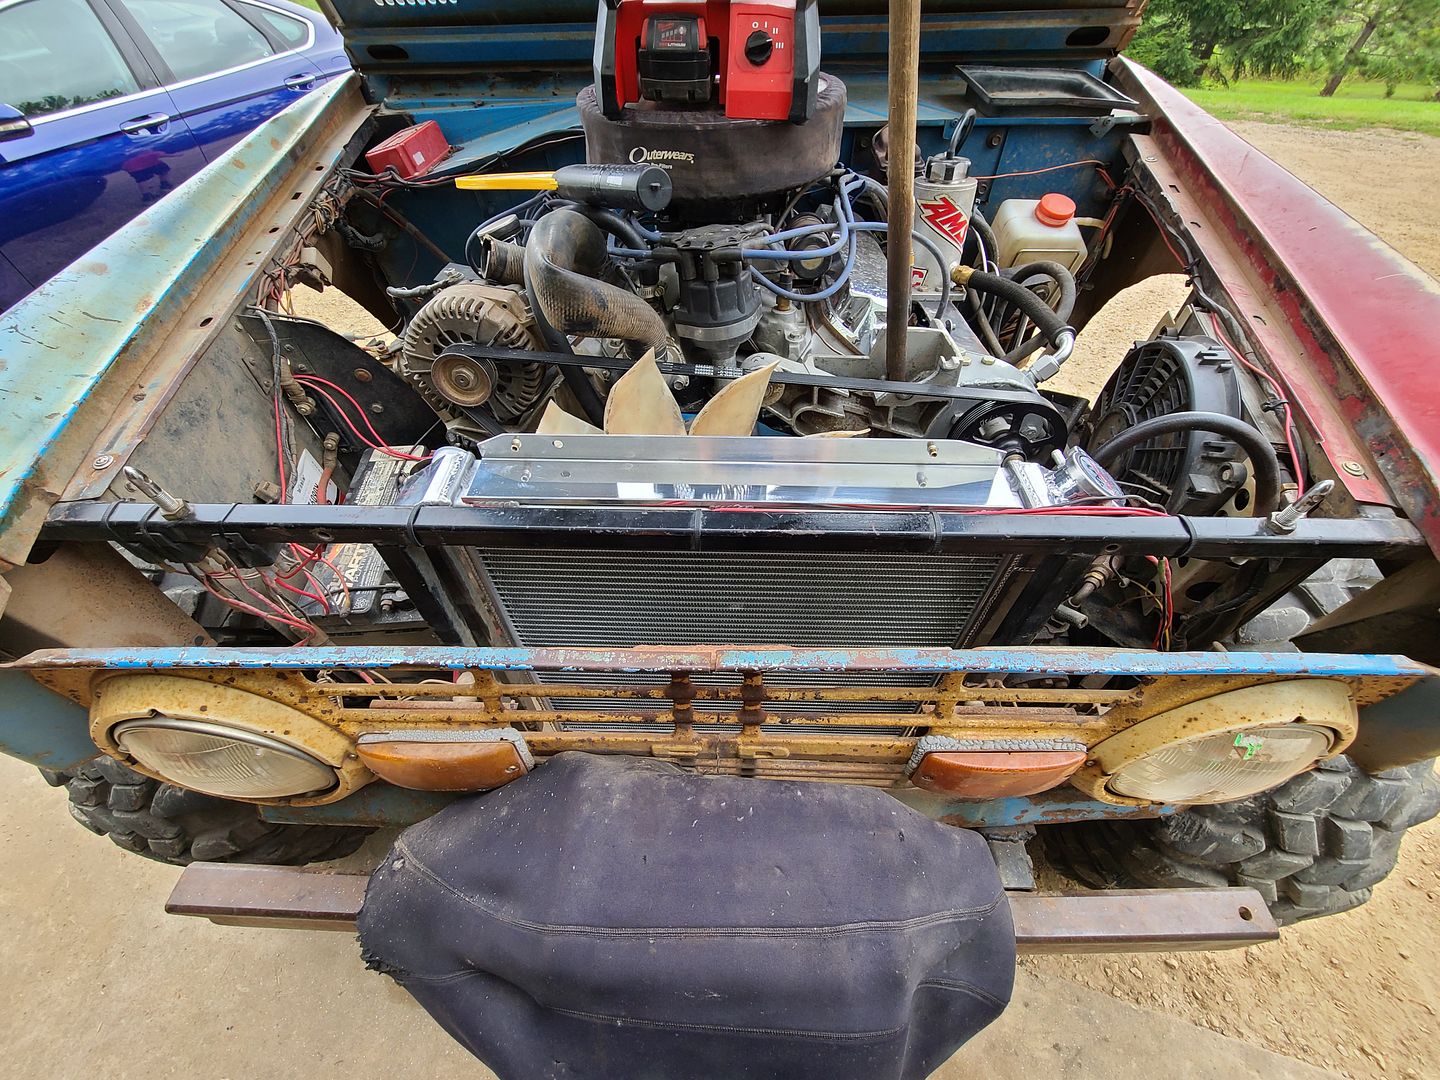
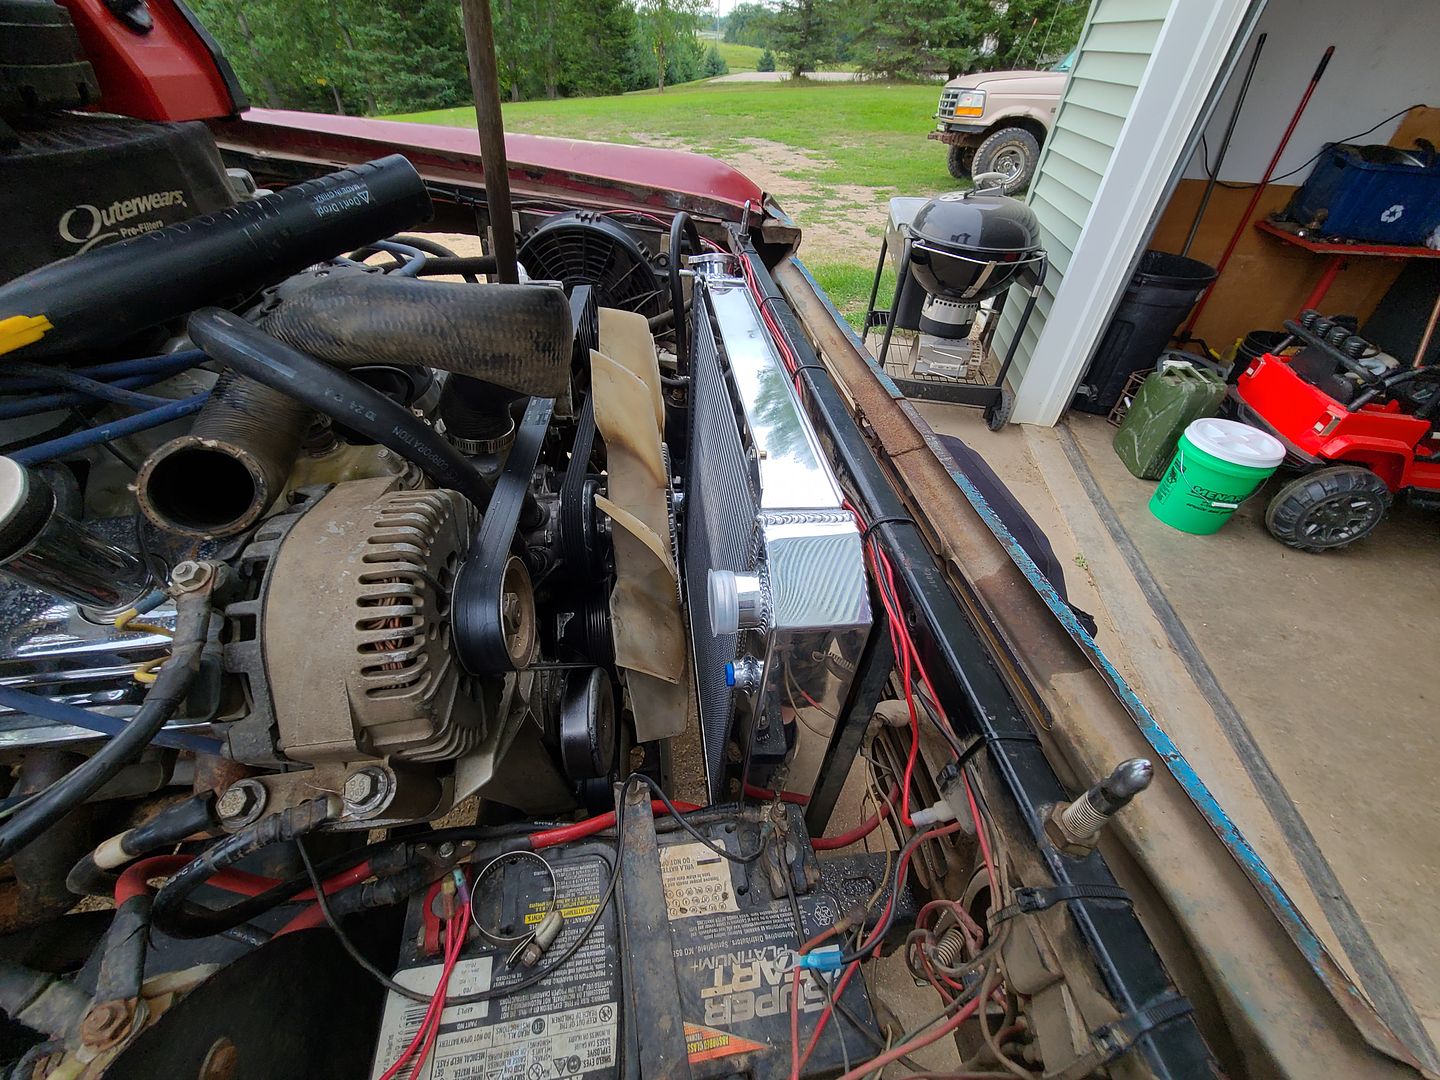
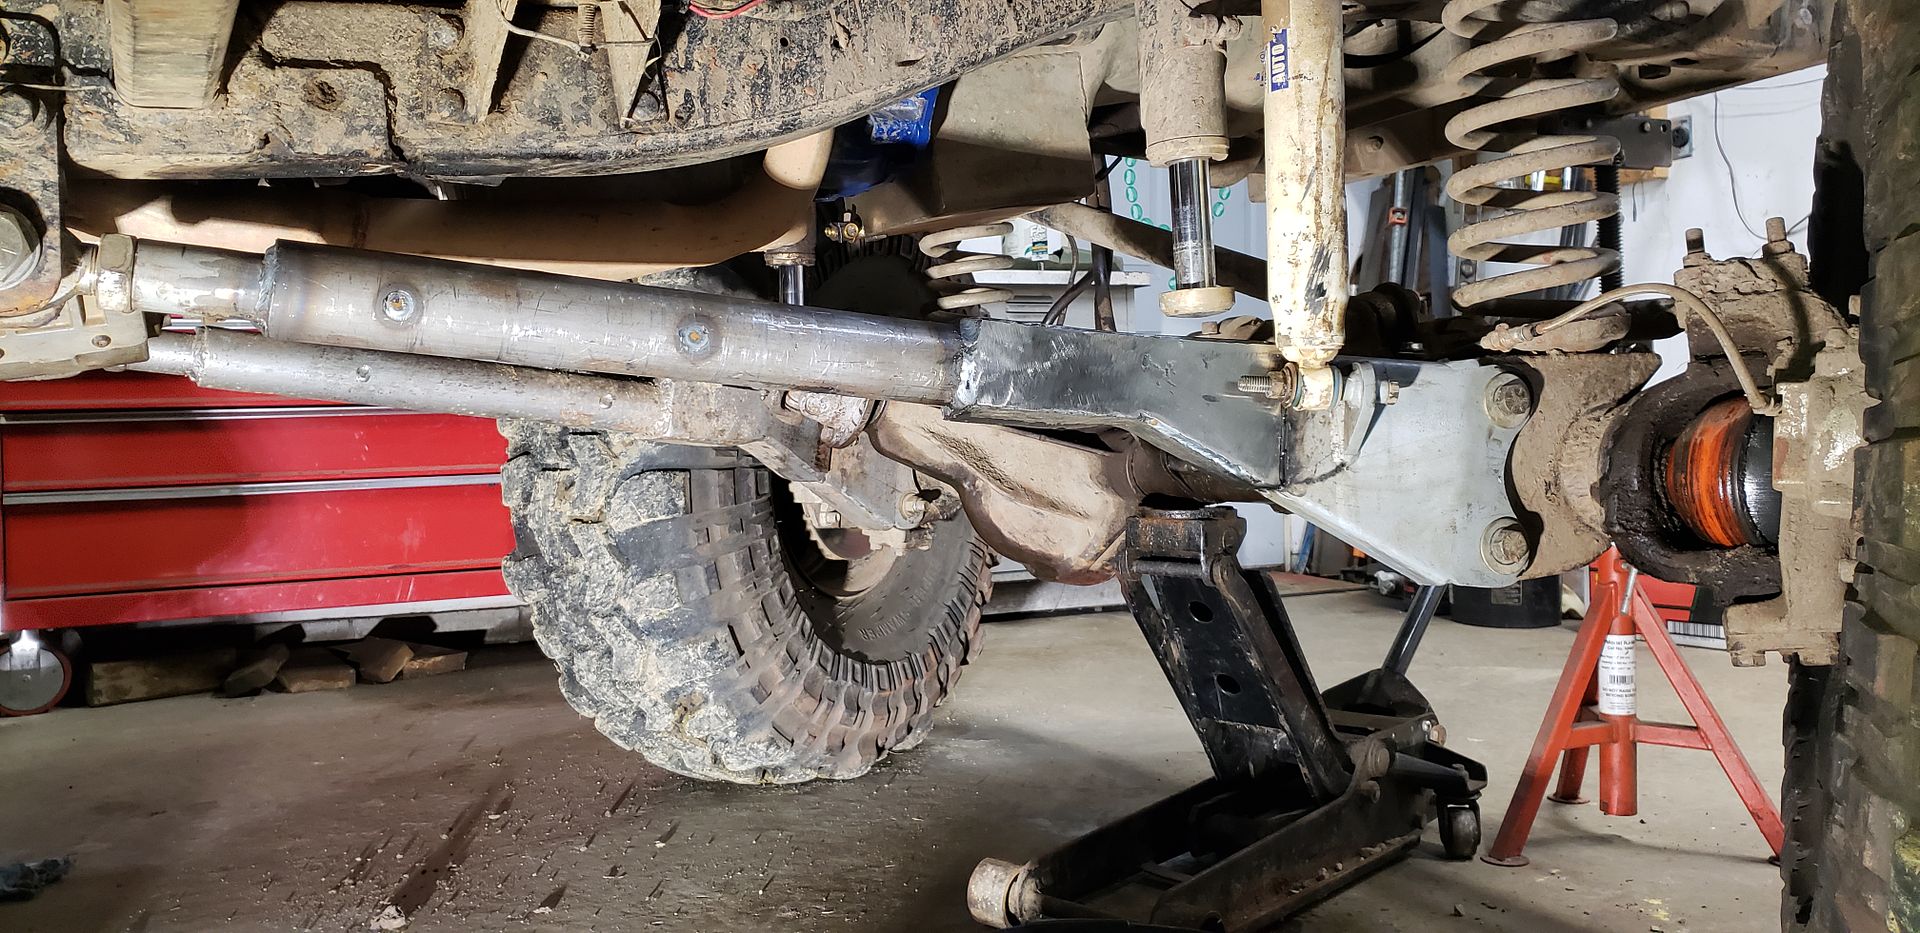
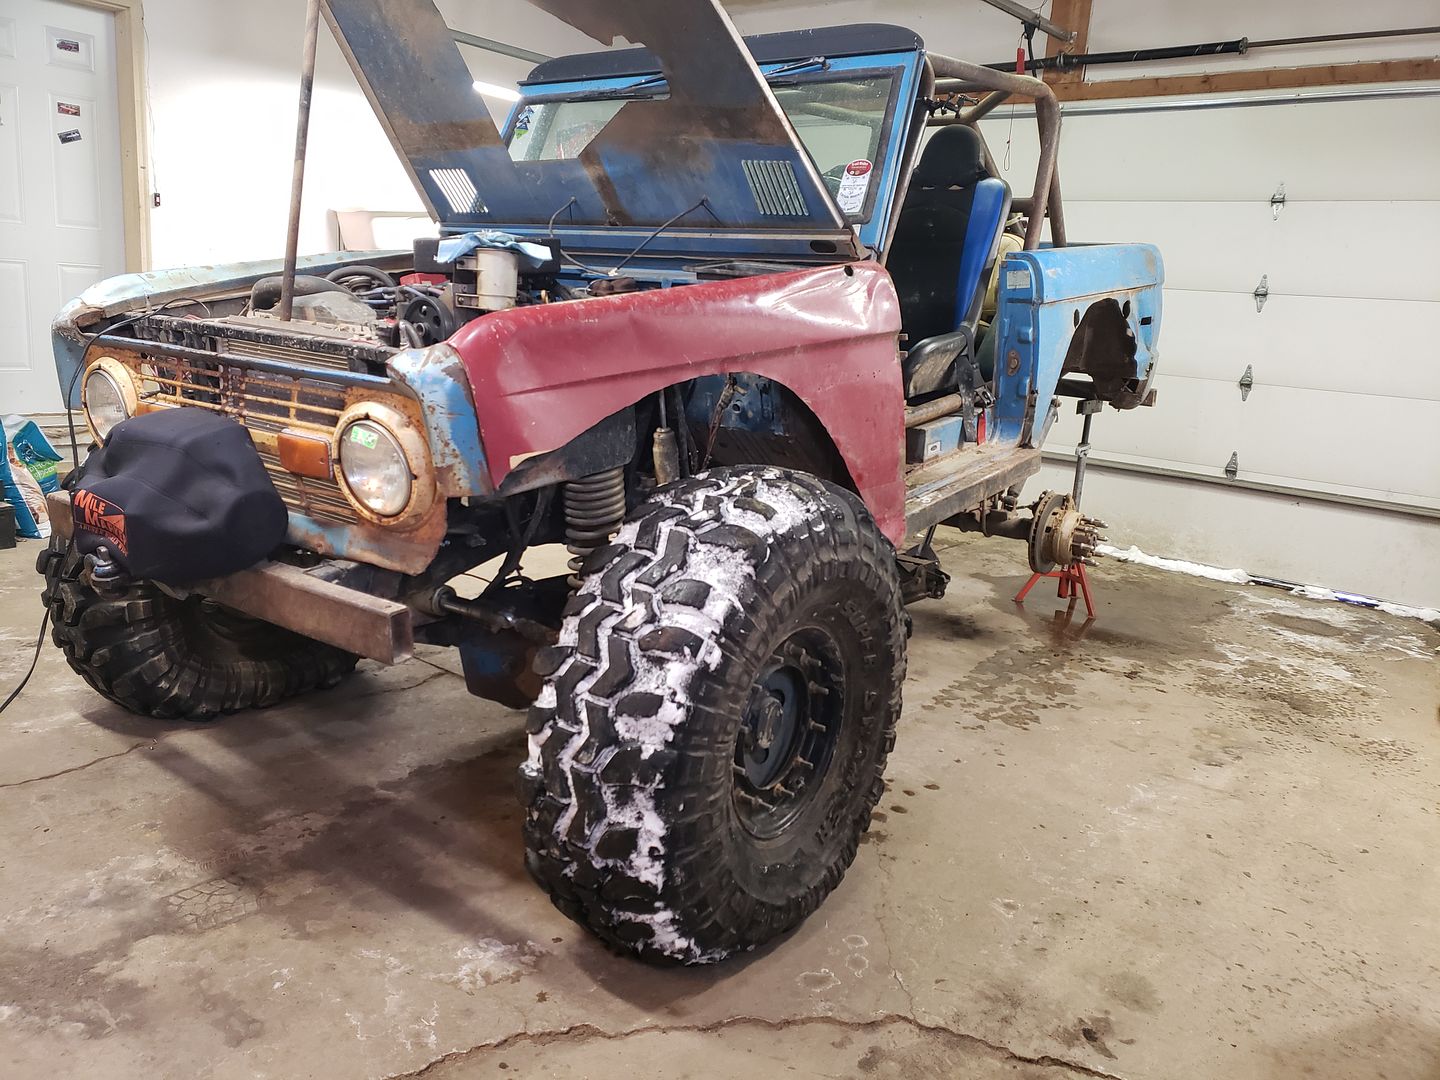
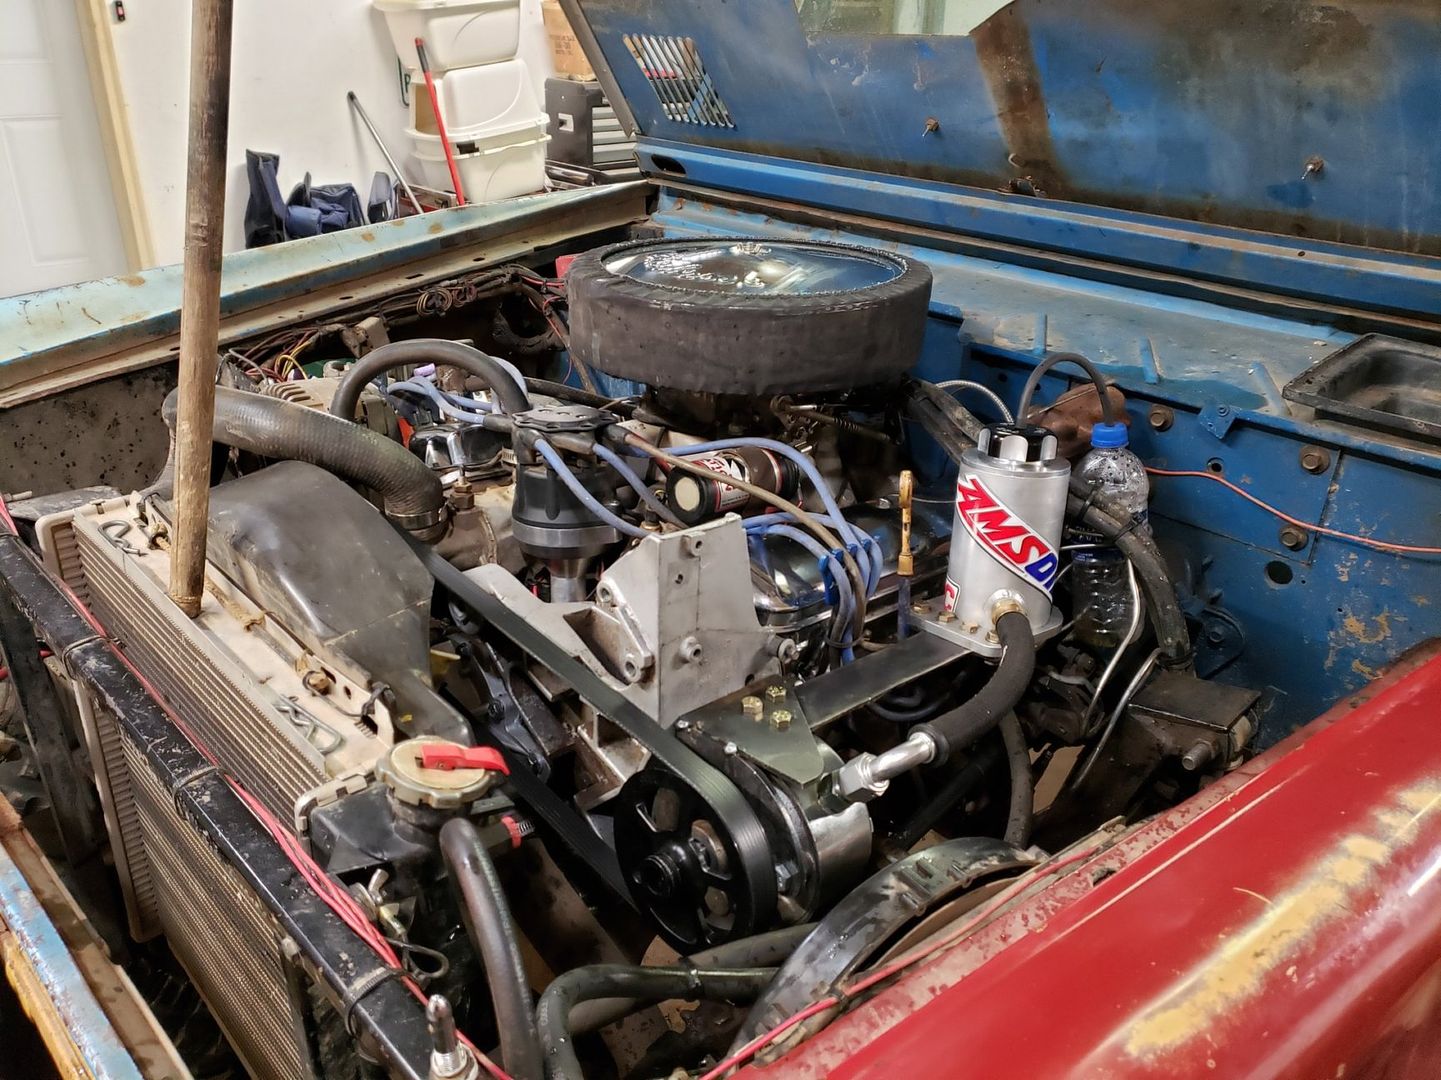
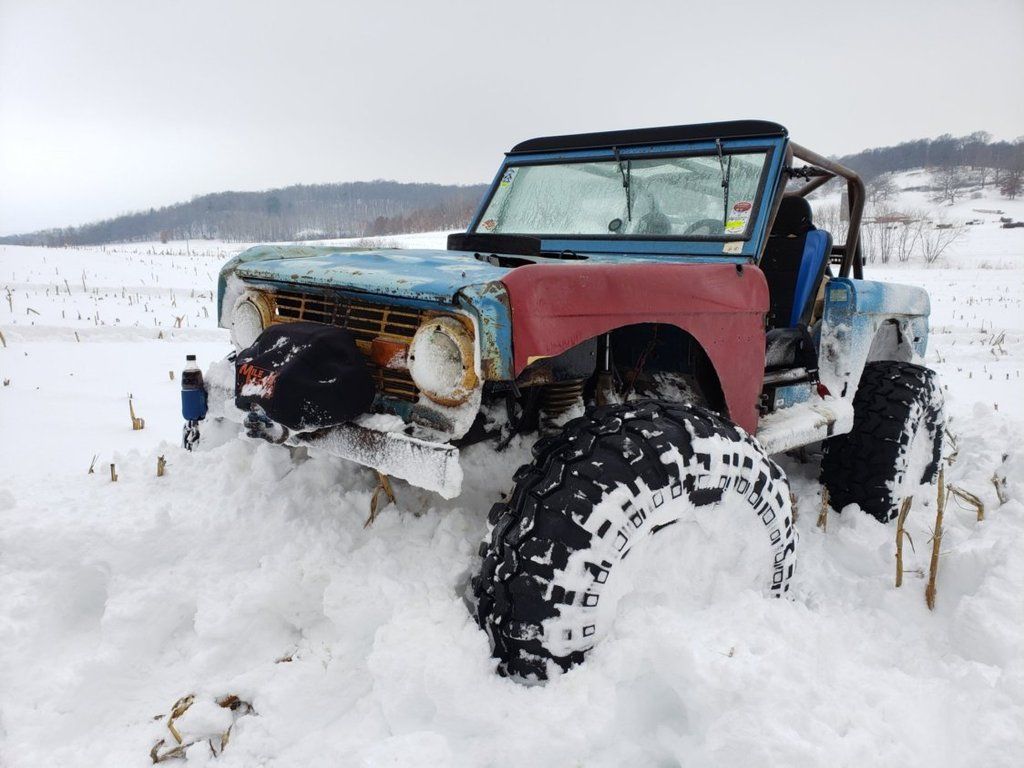
I ended up bailing on the new power steering setup as I ran out of time. The trip went well and nothing broke. My throttle cable came apart a few times and after the trip I put a helper spring on the throttle body and ended up super-gluing the cable into the end to keep it together. Not the ideal situation, but it is what I had to do.

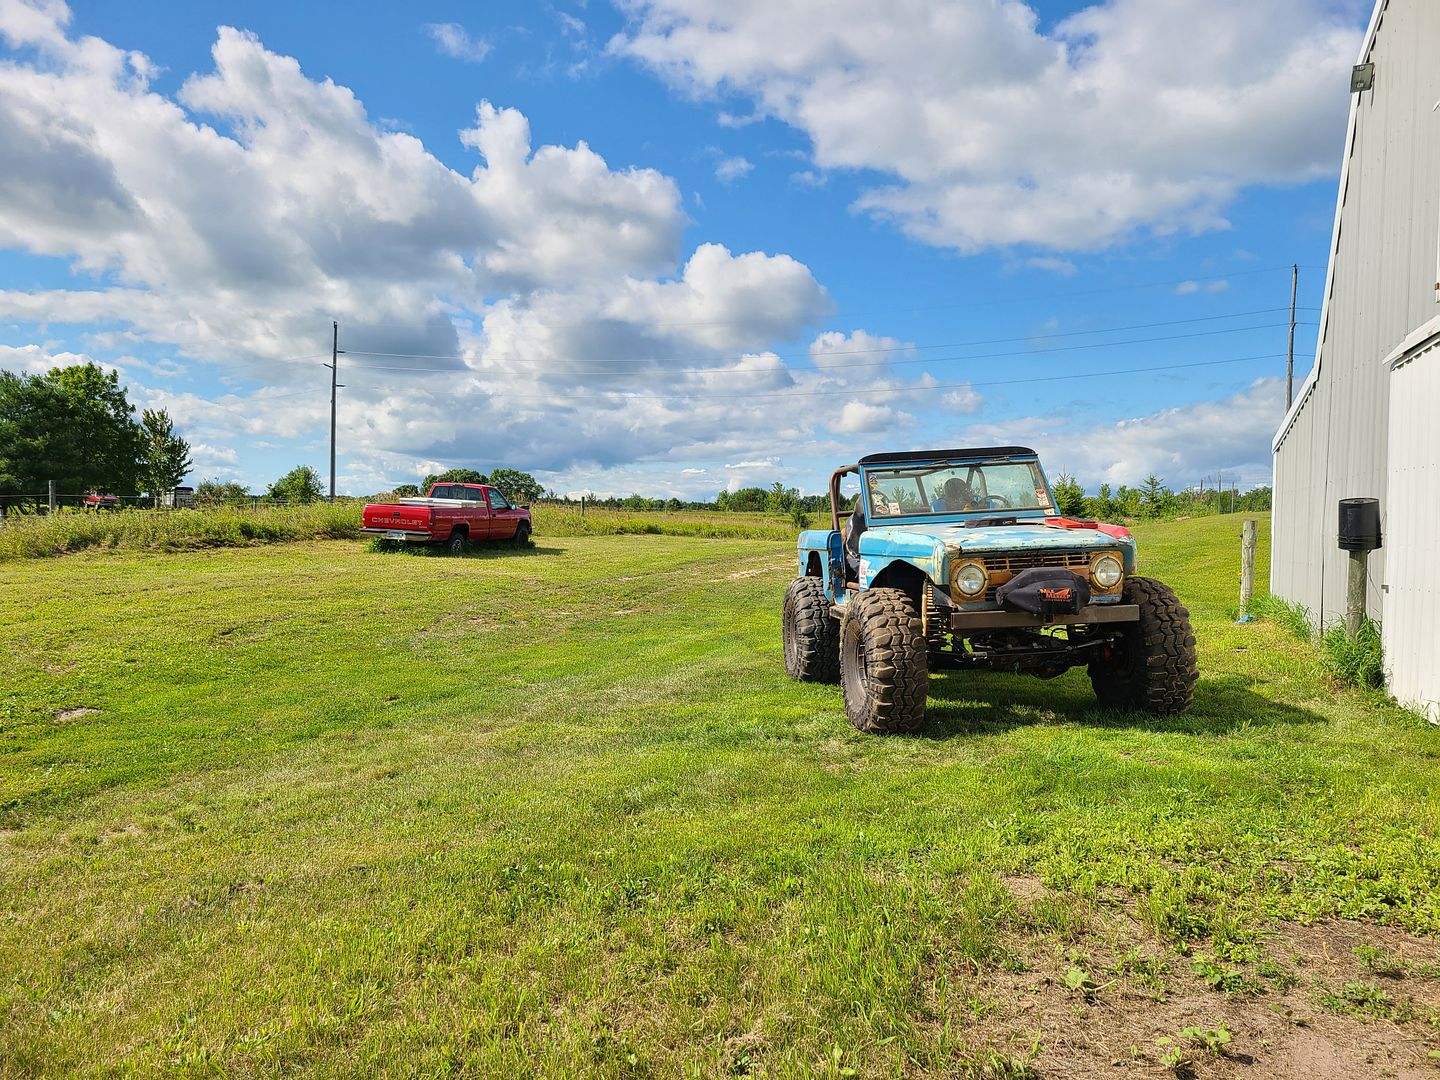
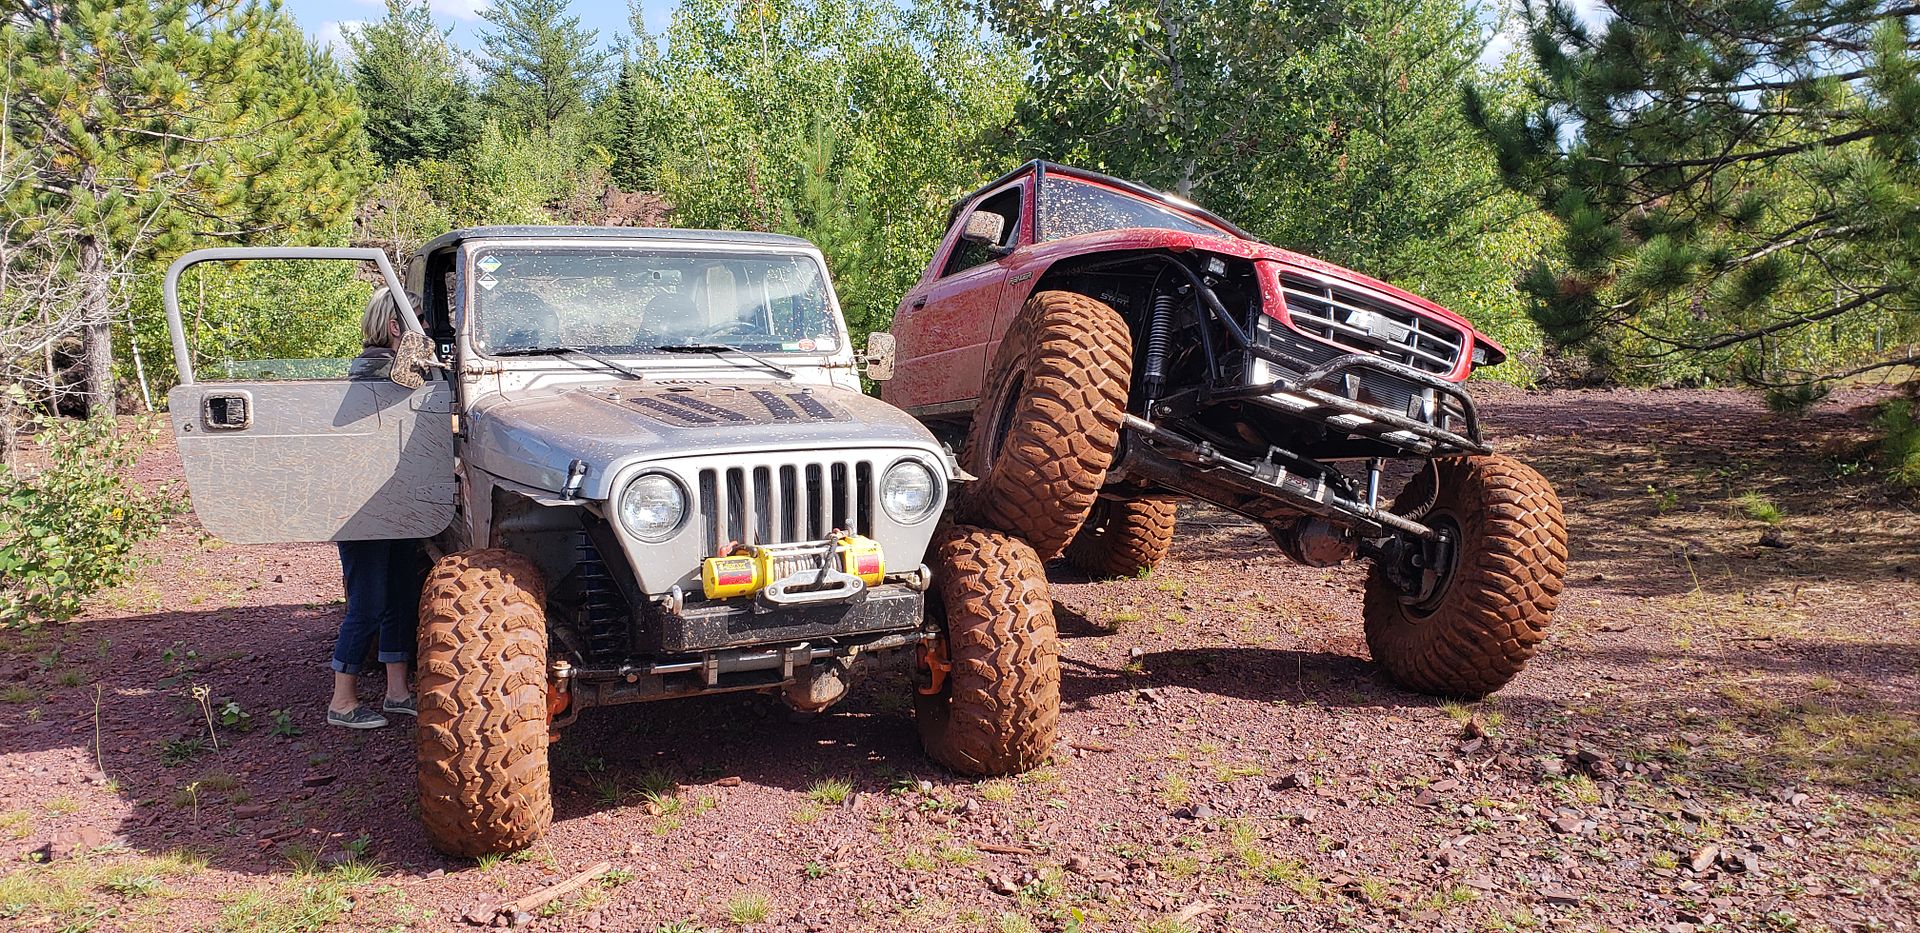
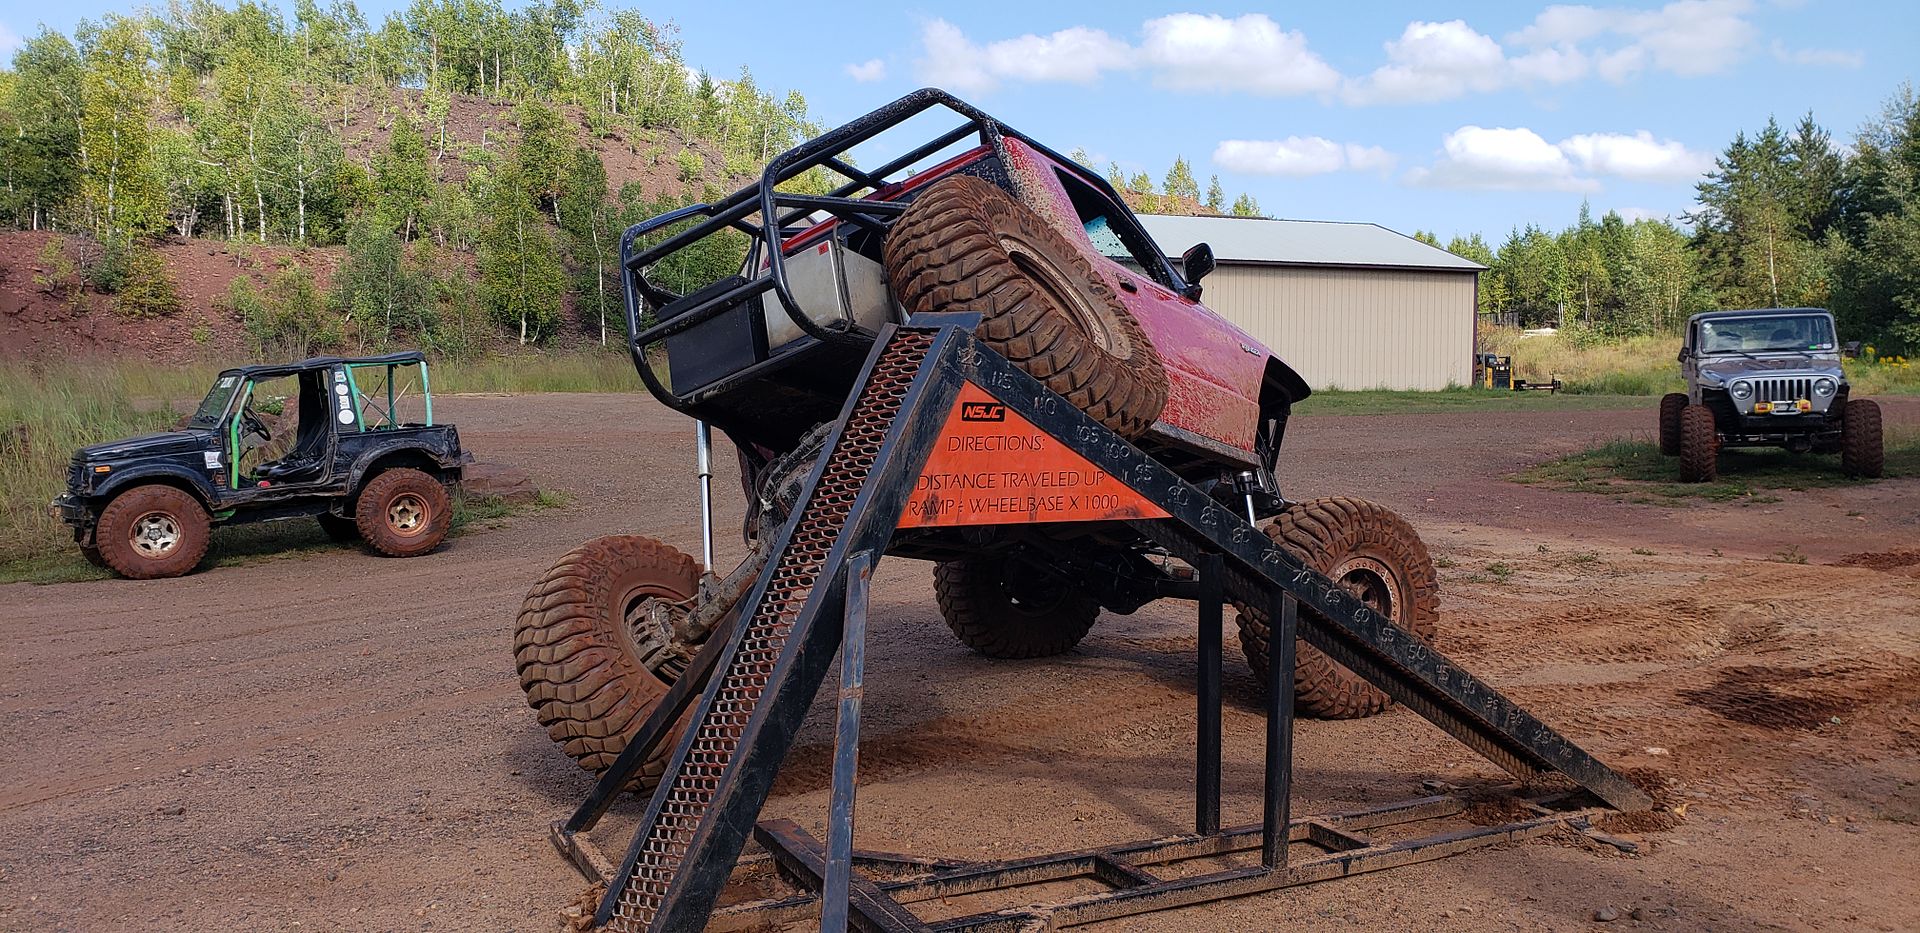
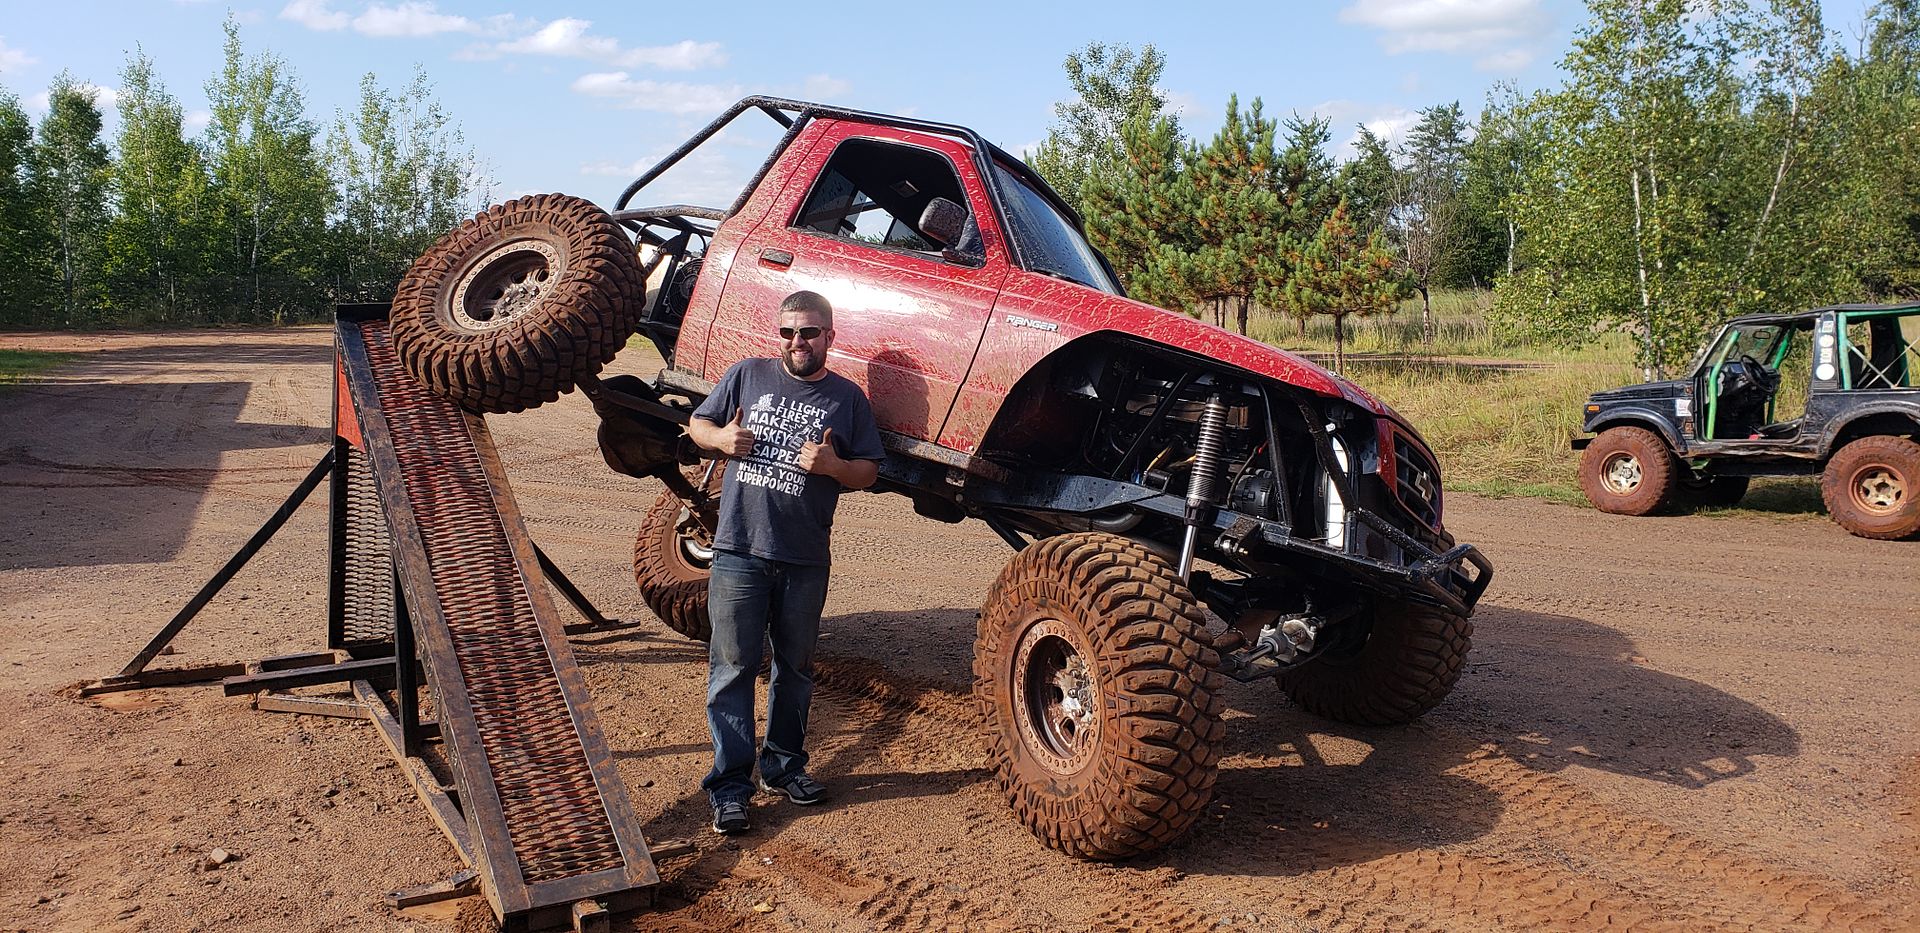
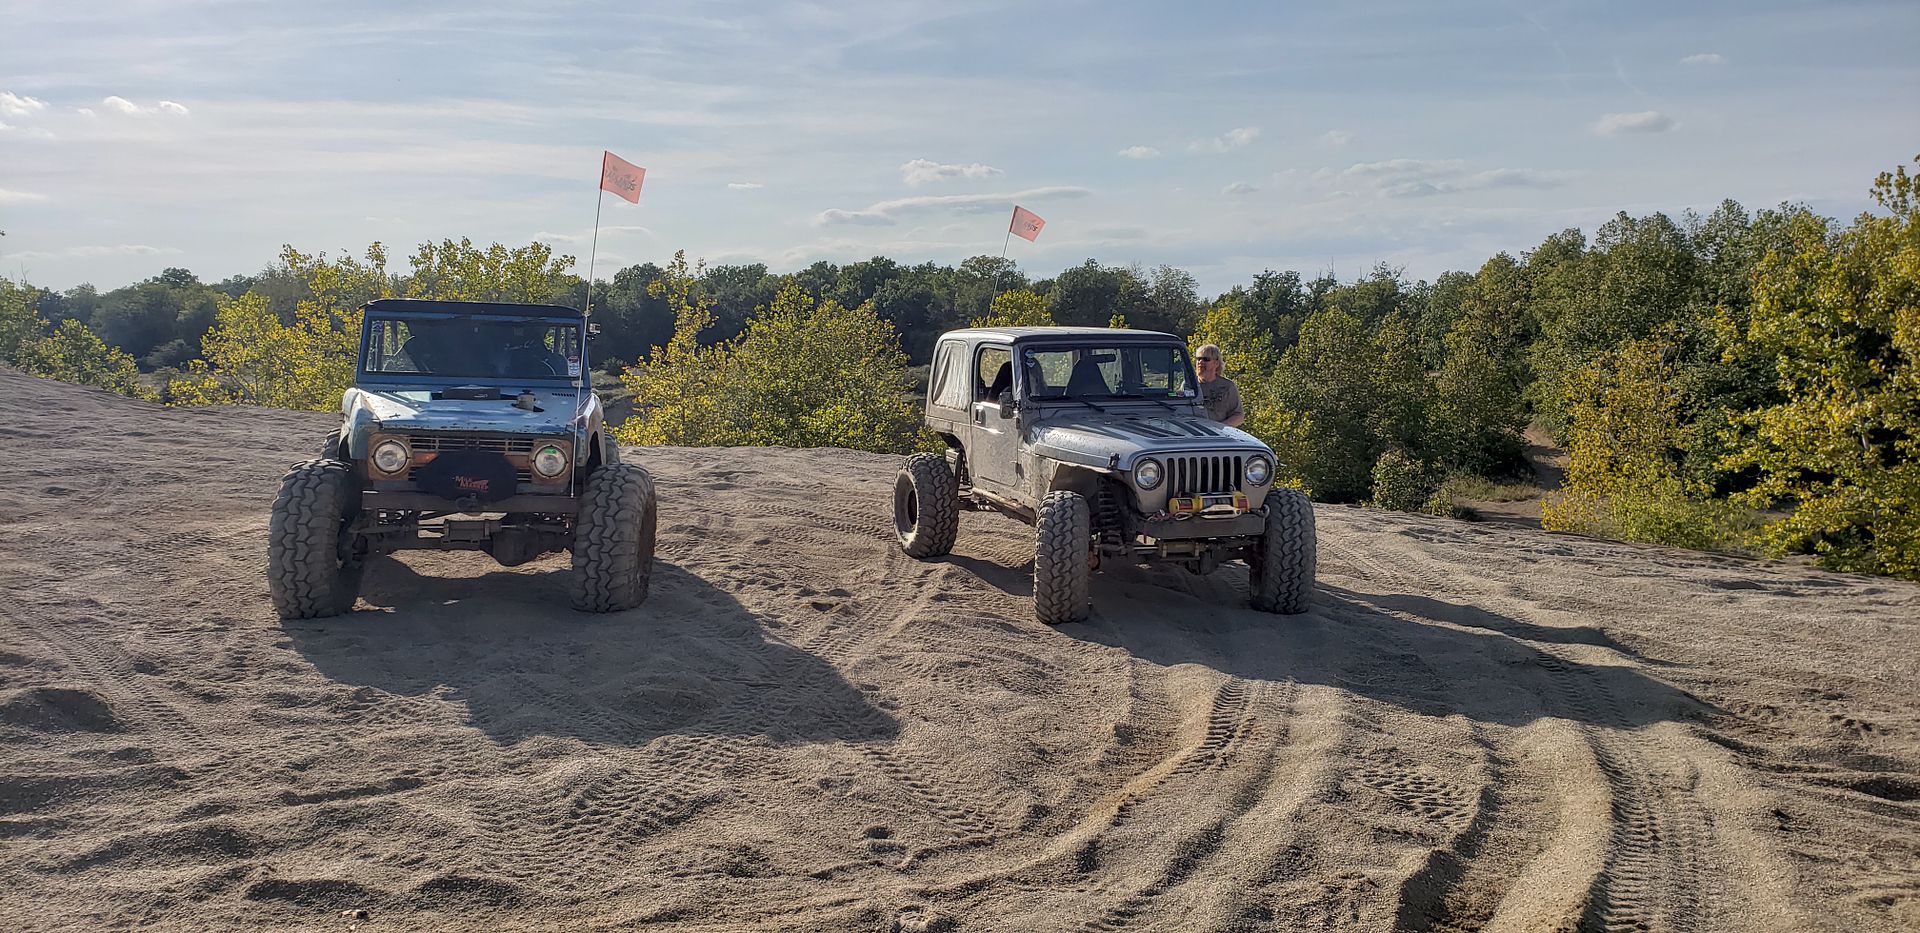
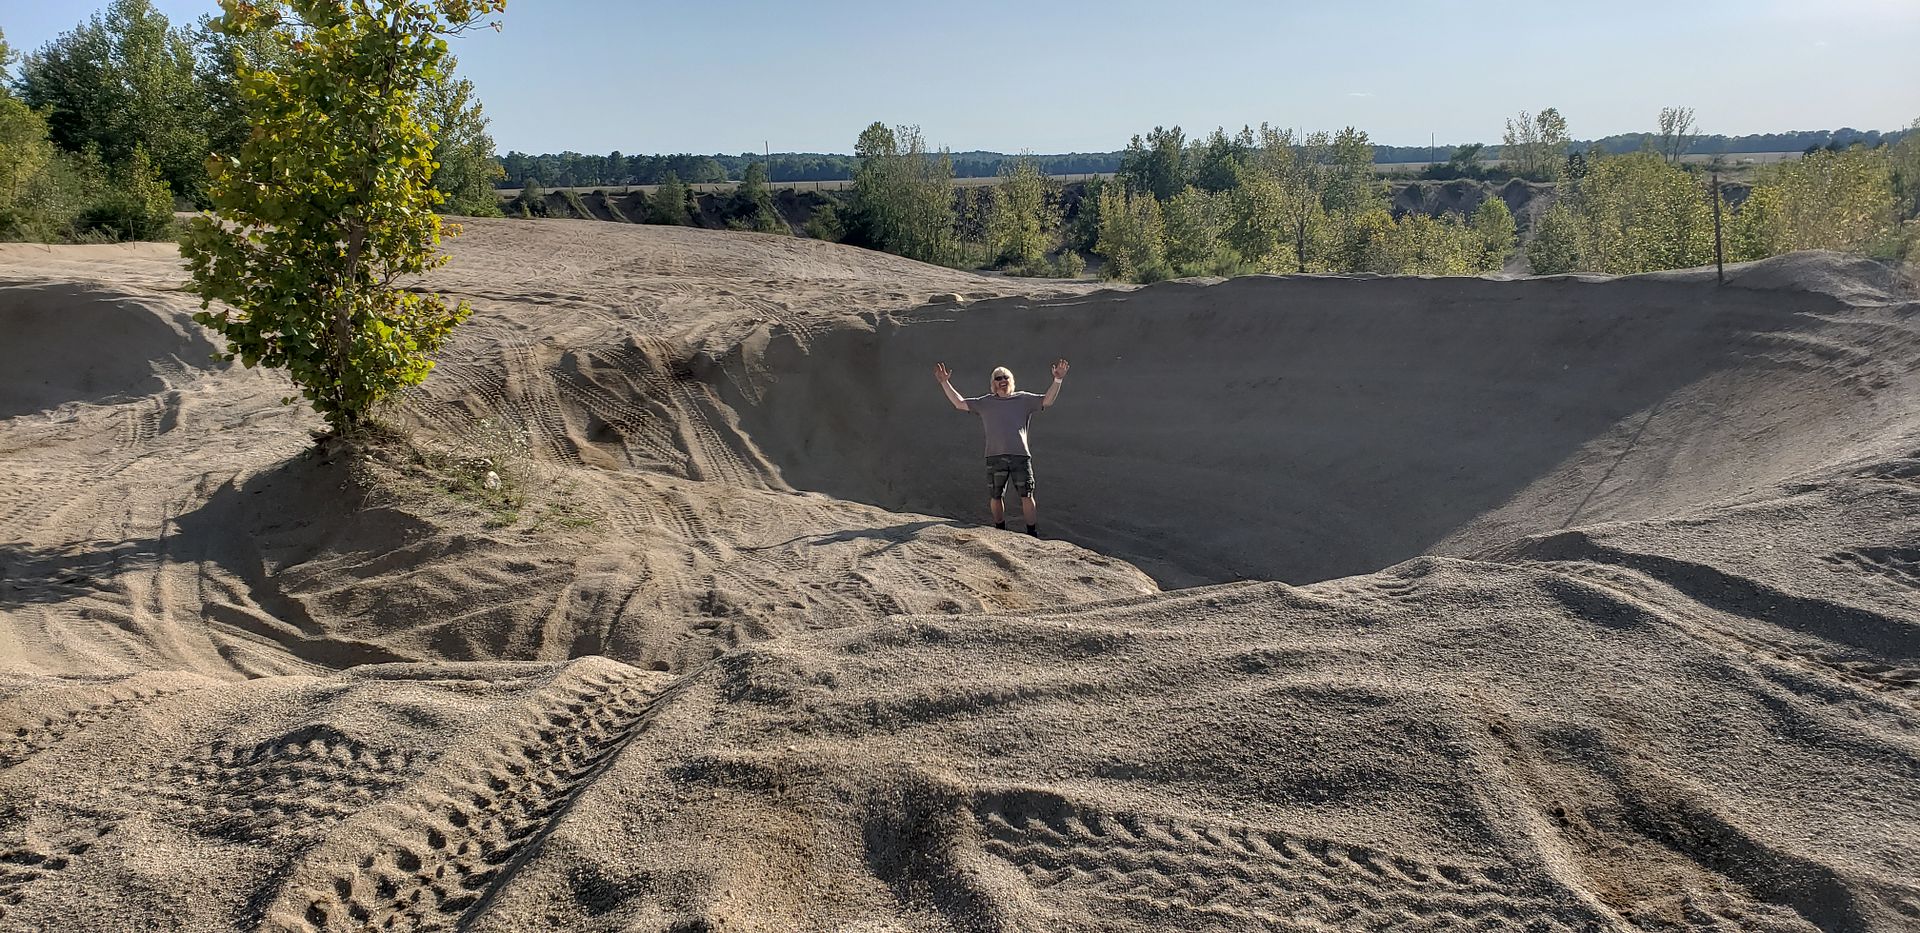
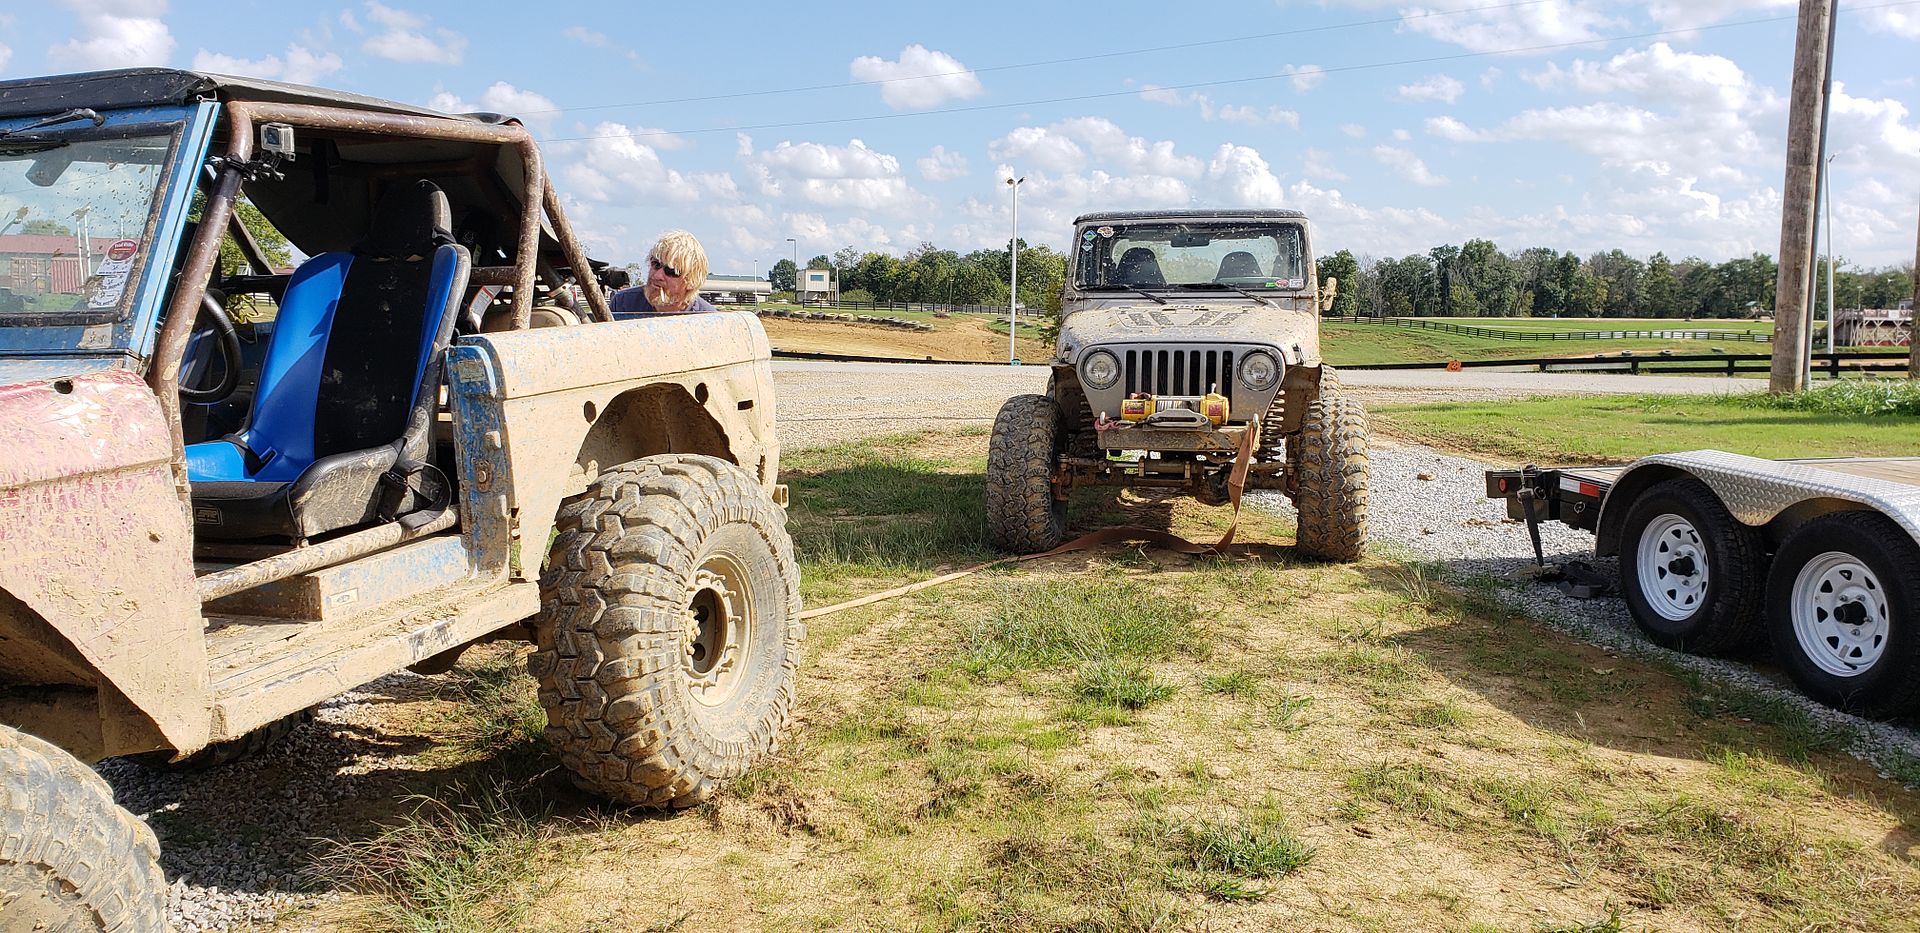
Flexed on the ramp with my buddies truggy-
7LiVI-0jhD5q5hRSxC0q6G5TenuGRVkbUqTZ7SMo0rIpX92IB_zps8bnmvc19.jpg

A0MIzEum3BhffjKWolwd0XINMoudIUcvHkuumI3cTScpX92IB_zpsbt9dvsjs.jpg

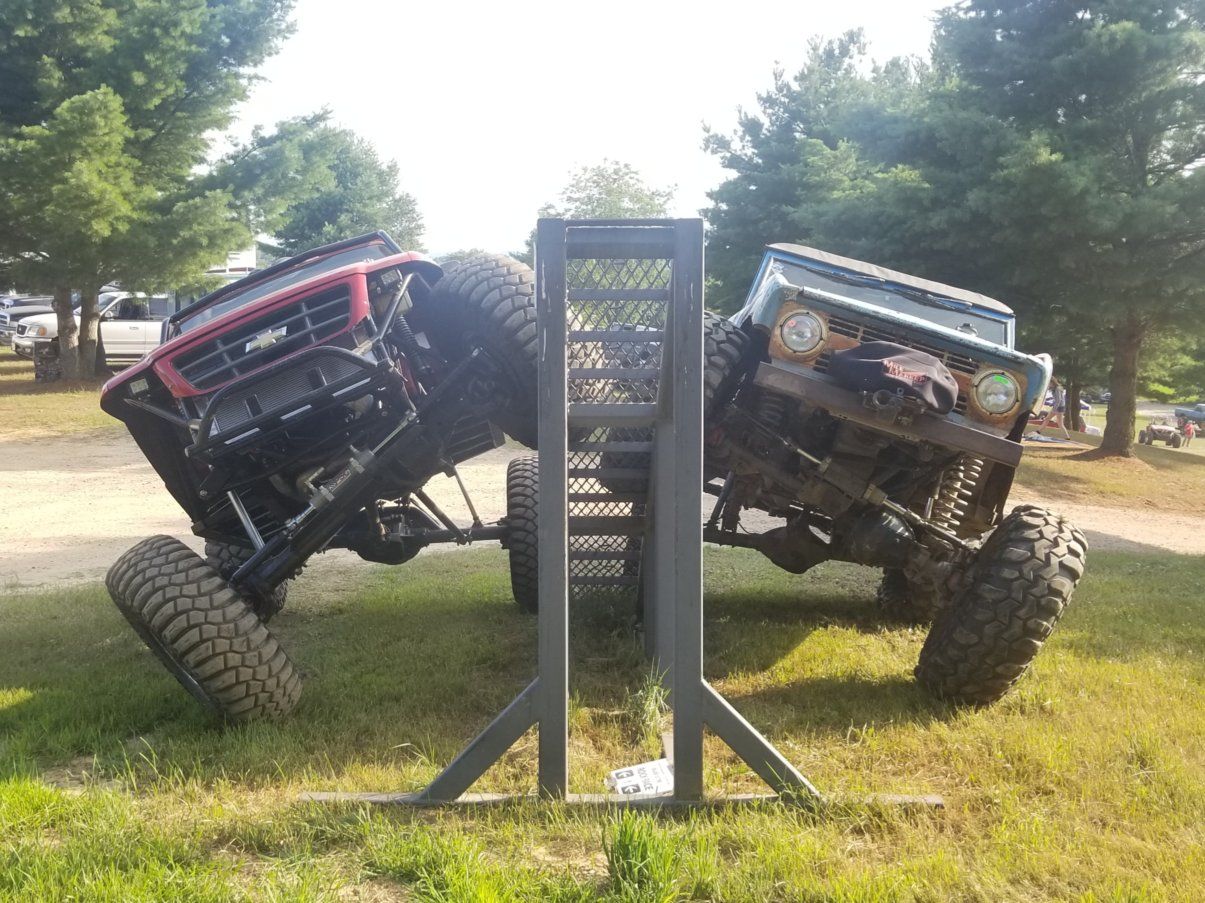
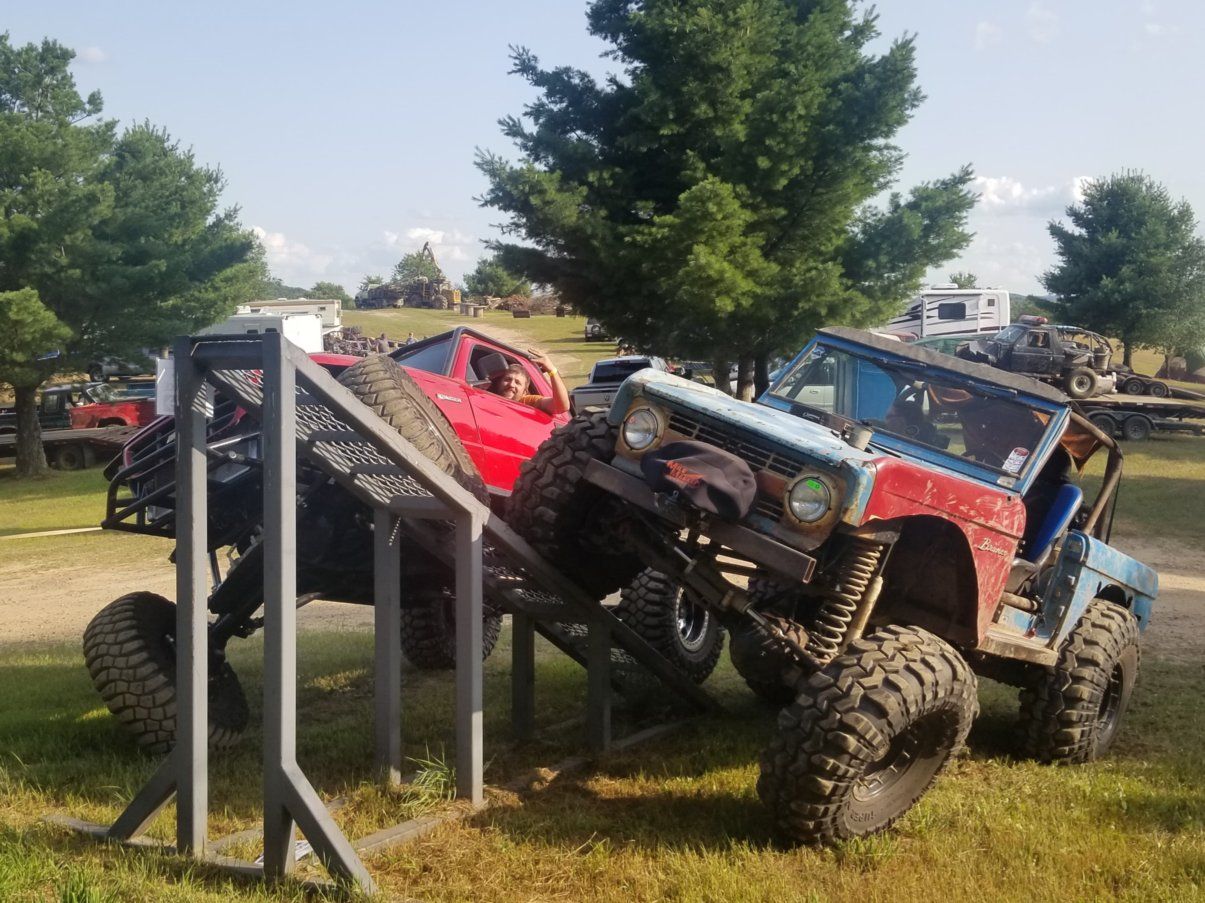
I had my son in there so I wasn't pushing it, but his wheelbase and fancy linked suspension sure works well.

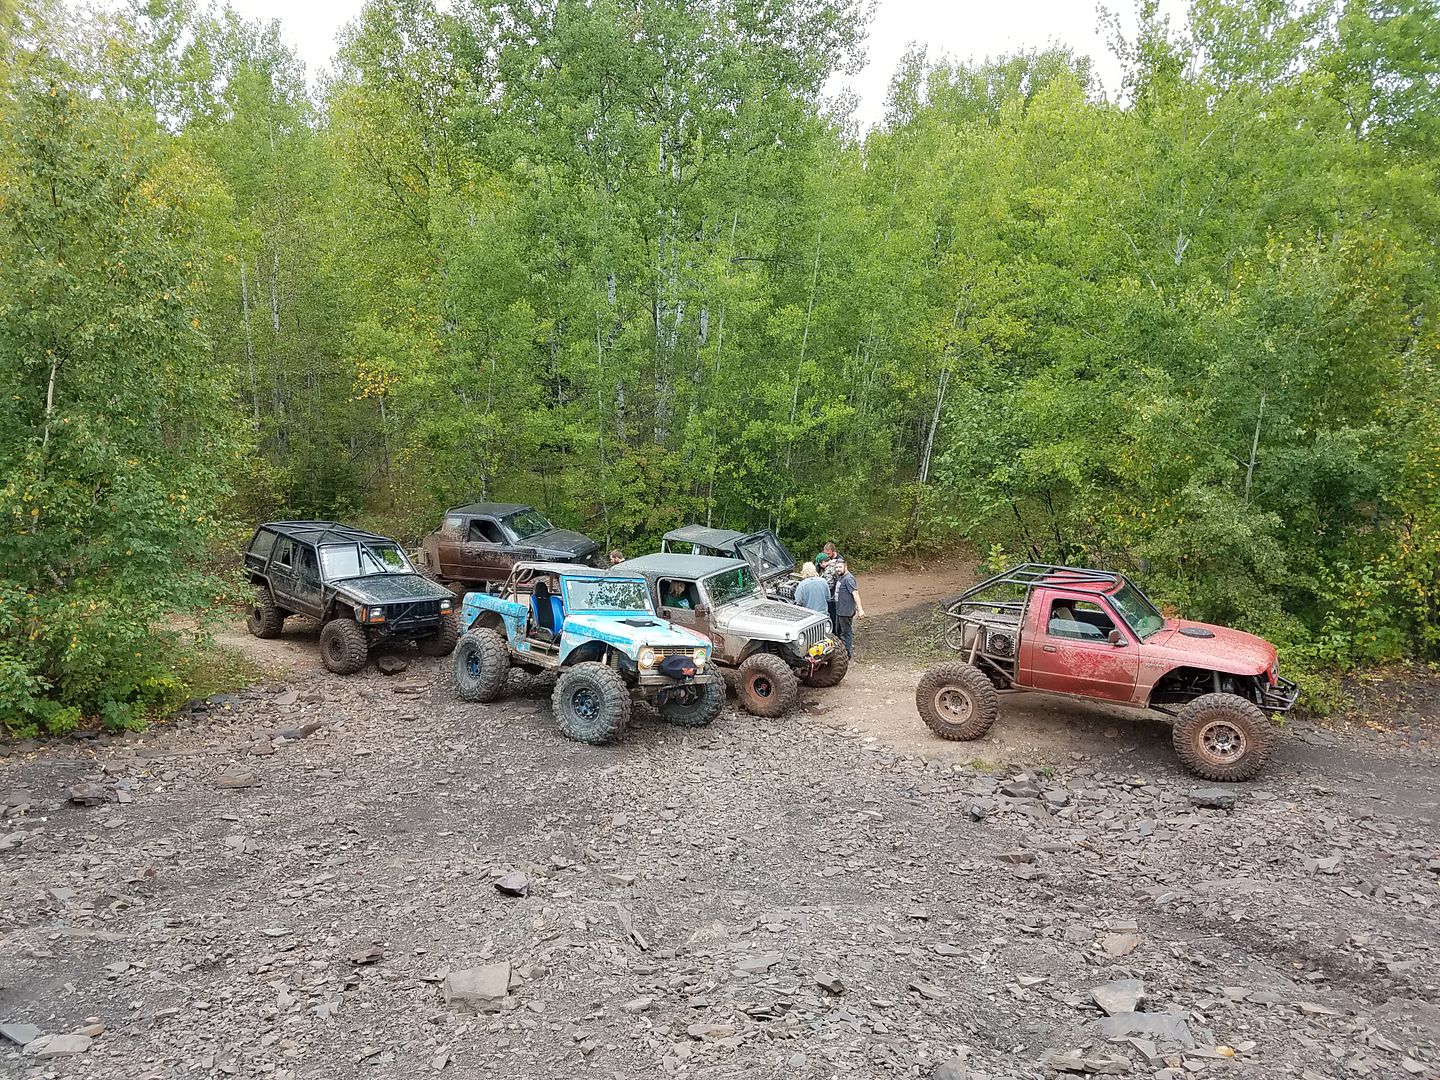
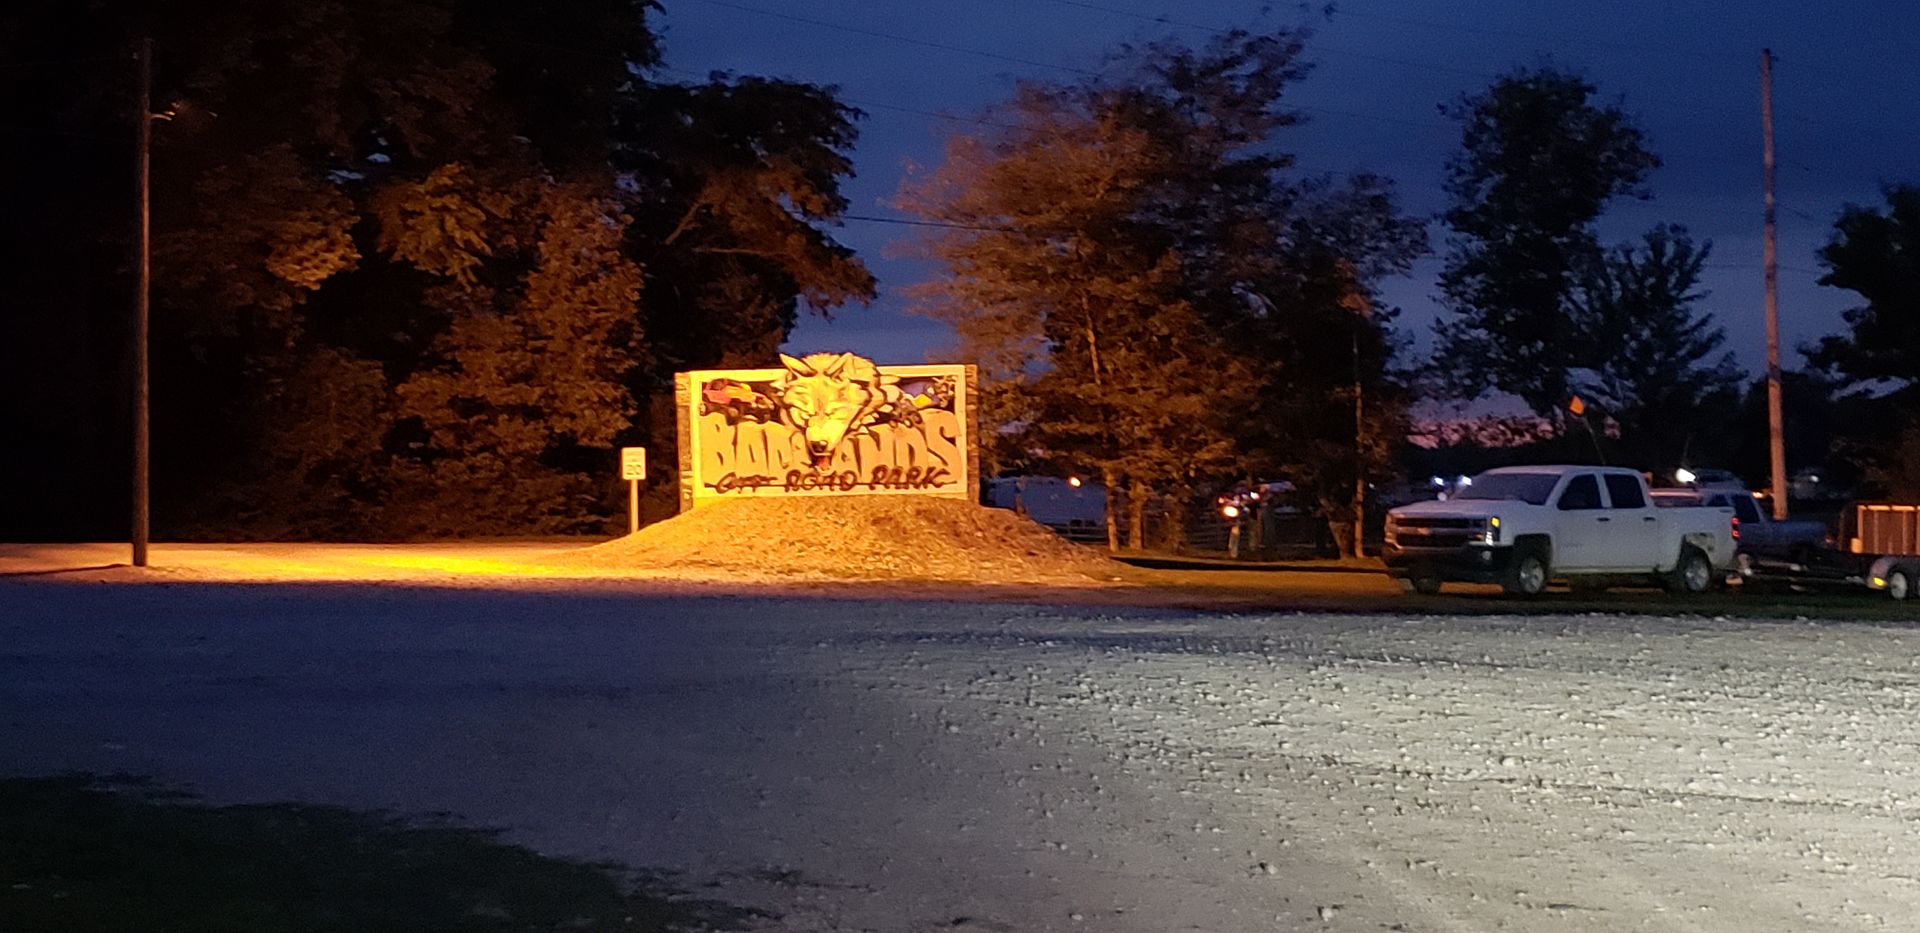
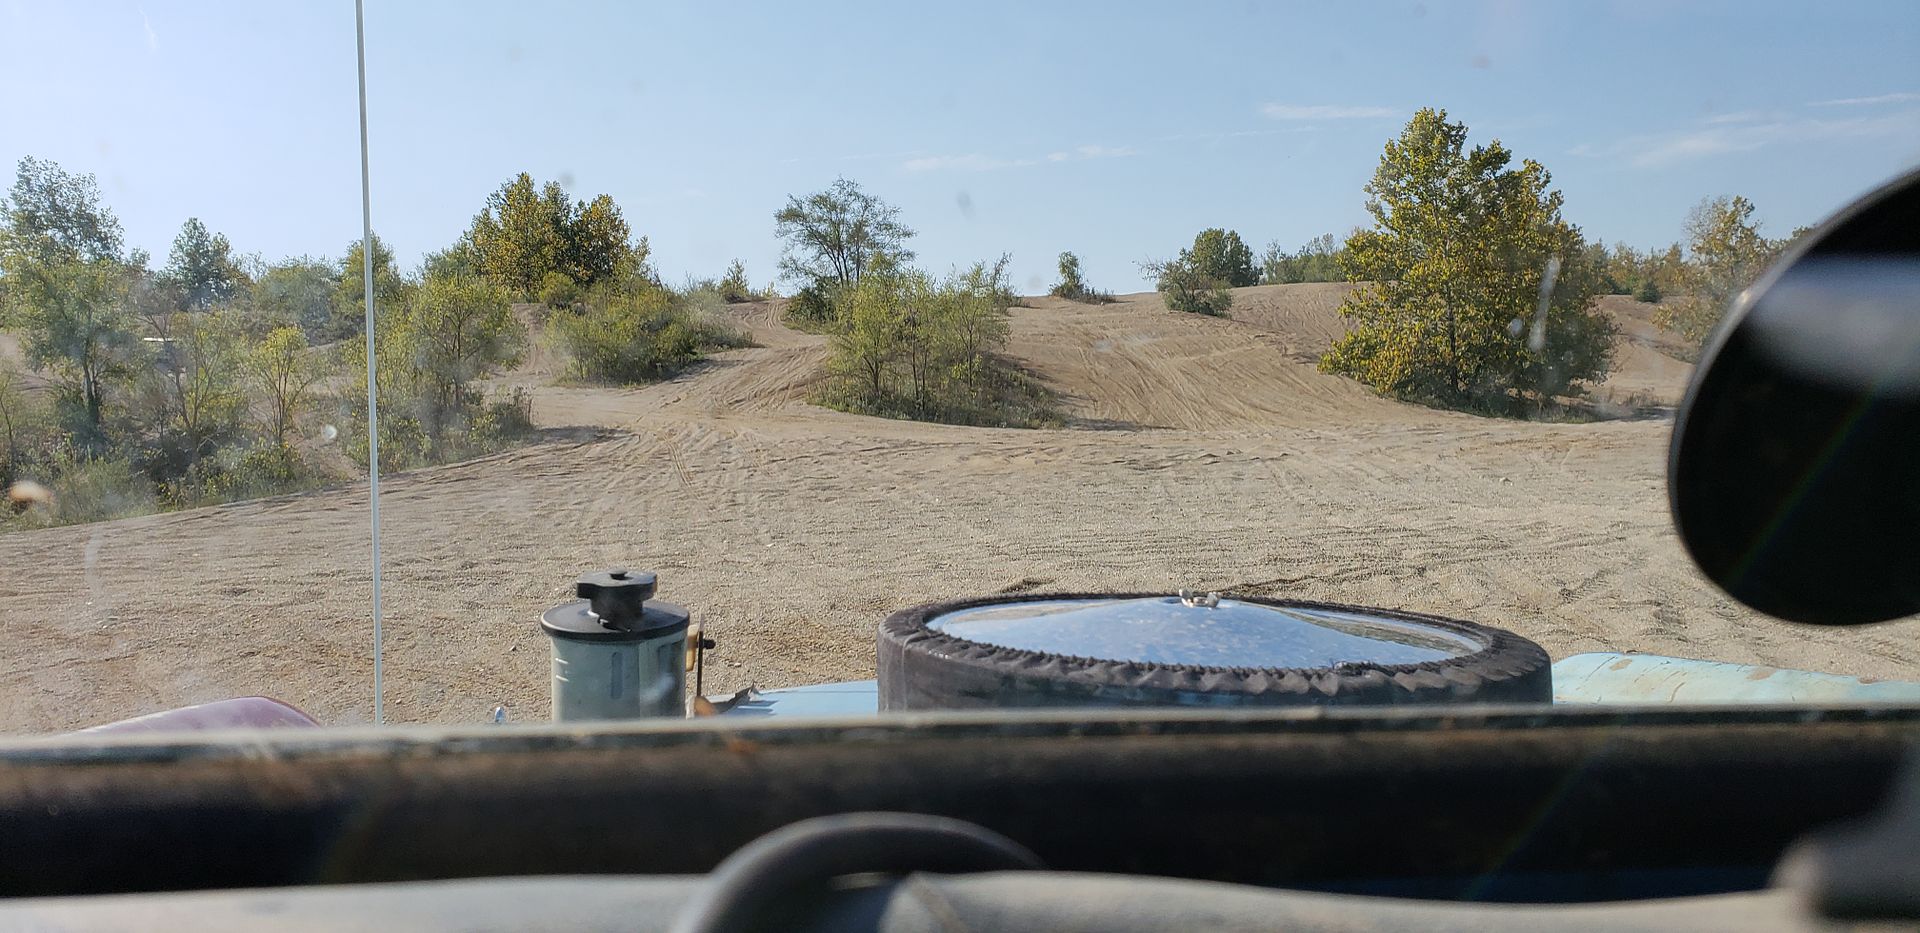
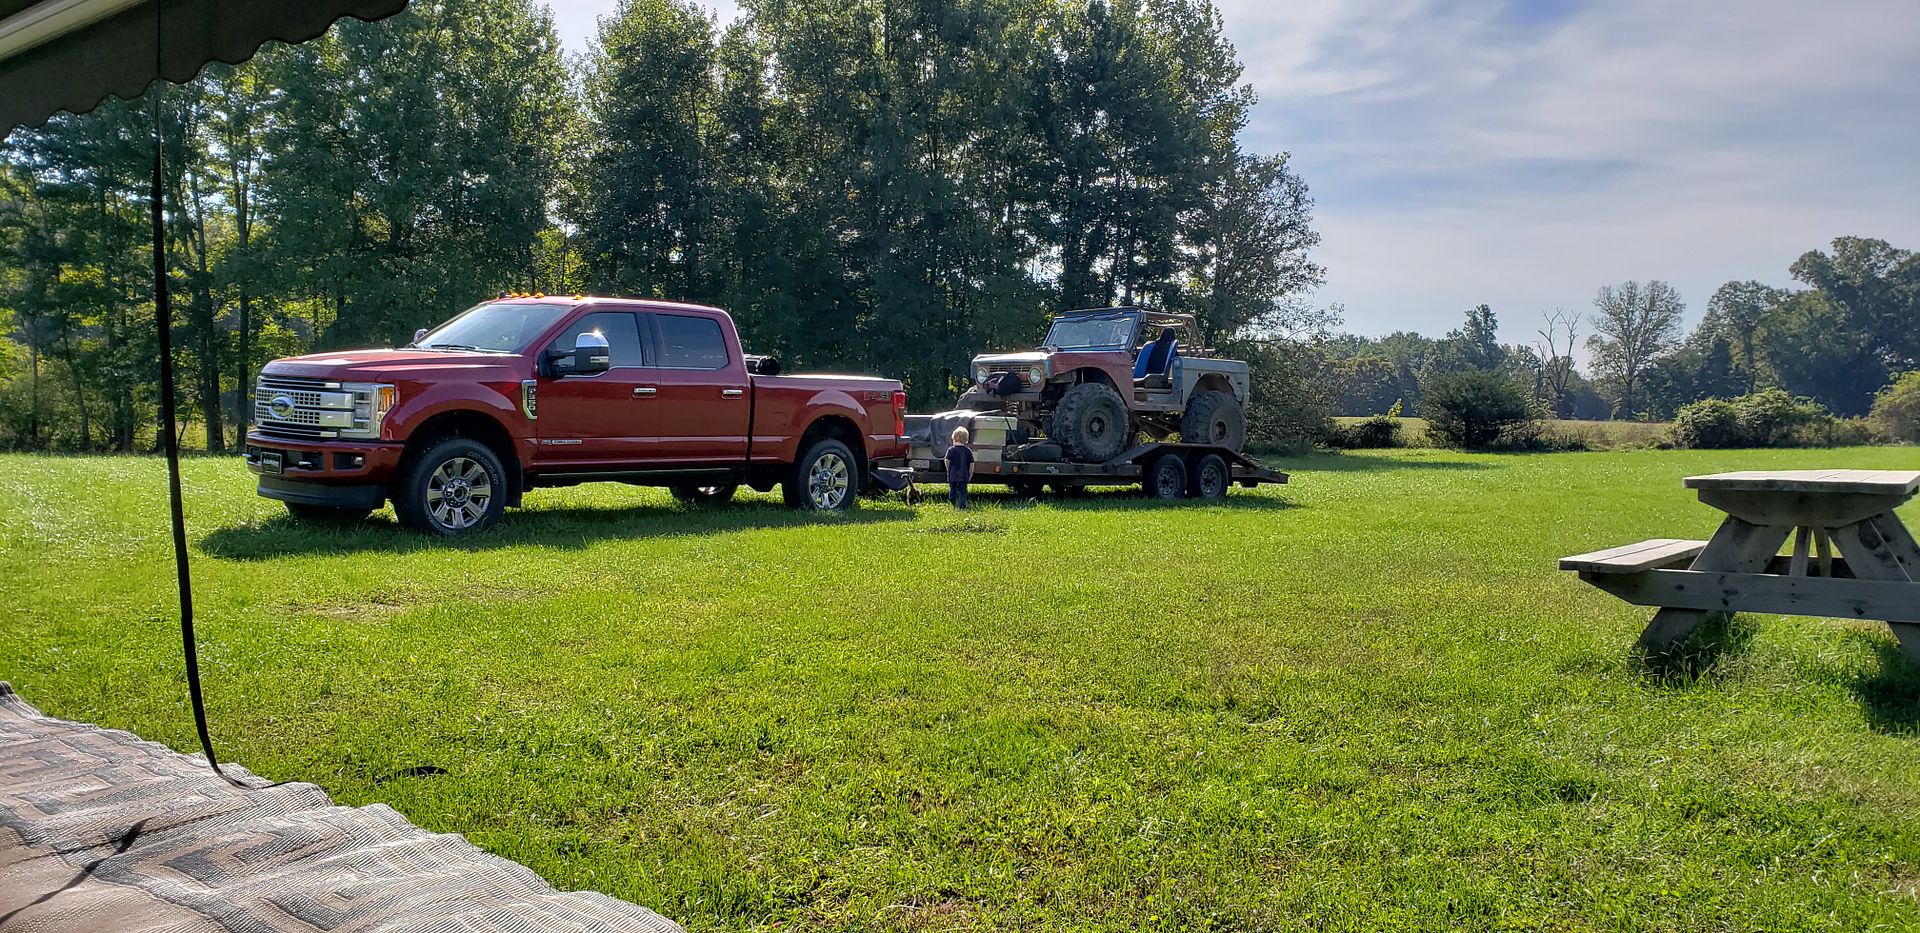
The next event was Dresser and it was basically a test and tune for the long 5 day trip into the Iron Range. We had a housewarming party for a friend the same day, so it was a short afternoon.

Matt's luck with power steering pumps was still not with him and he blew up one not ten minutes into the trail.
20180825_100033_zpsylnerdkb.jpg


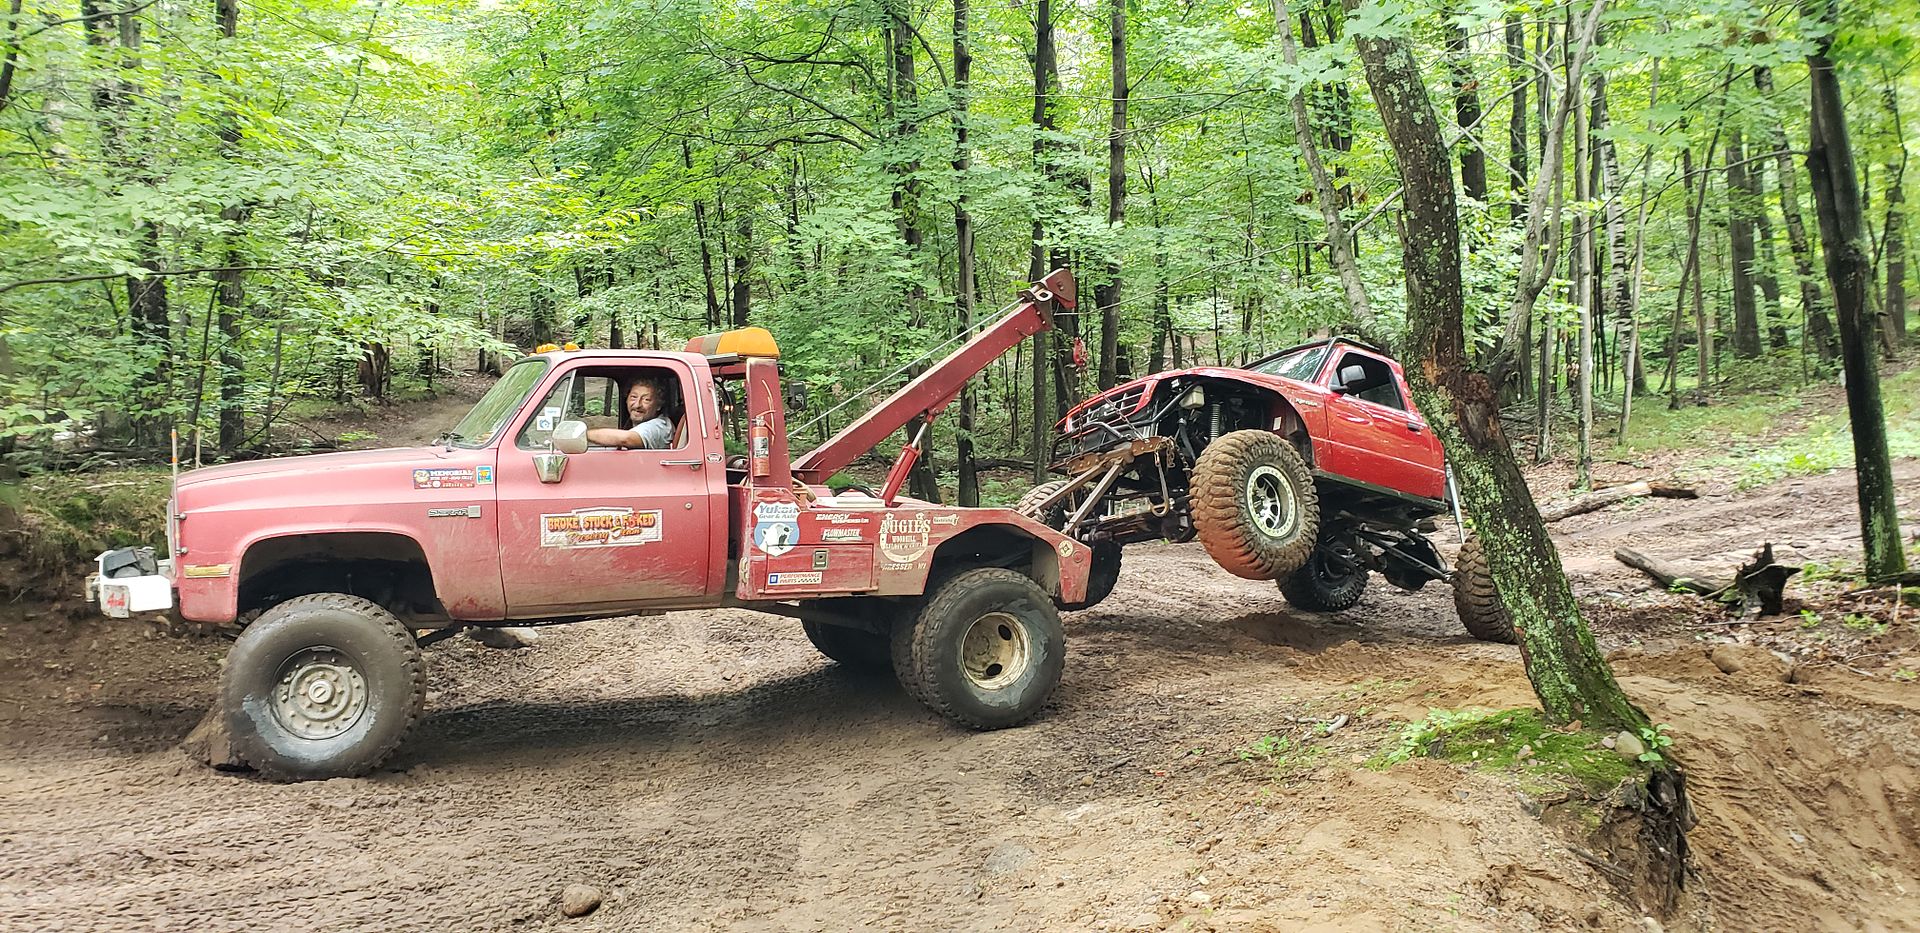
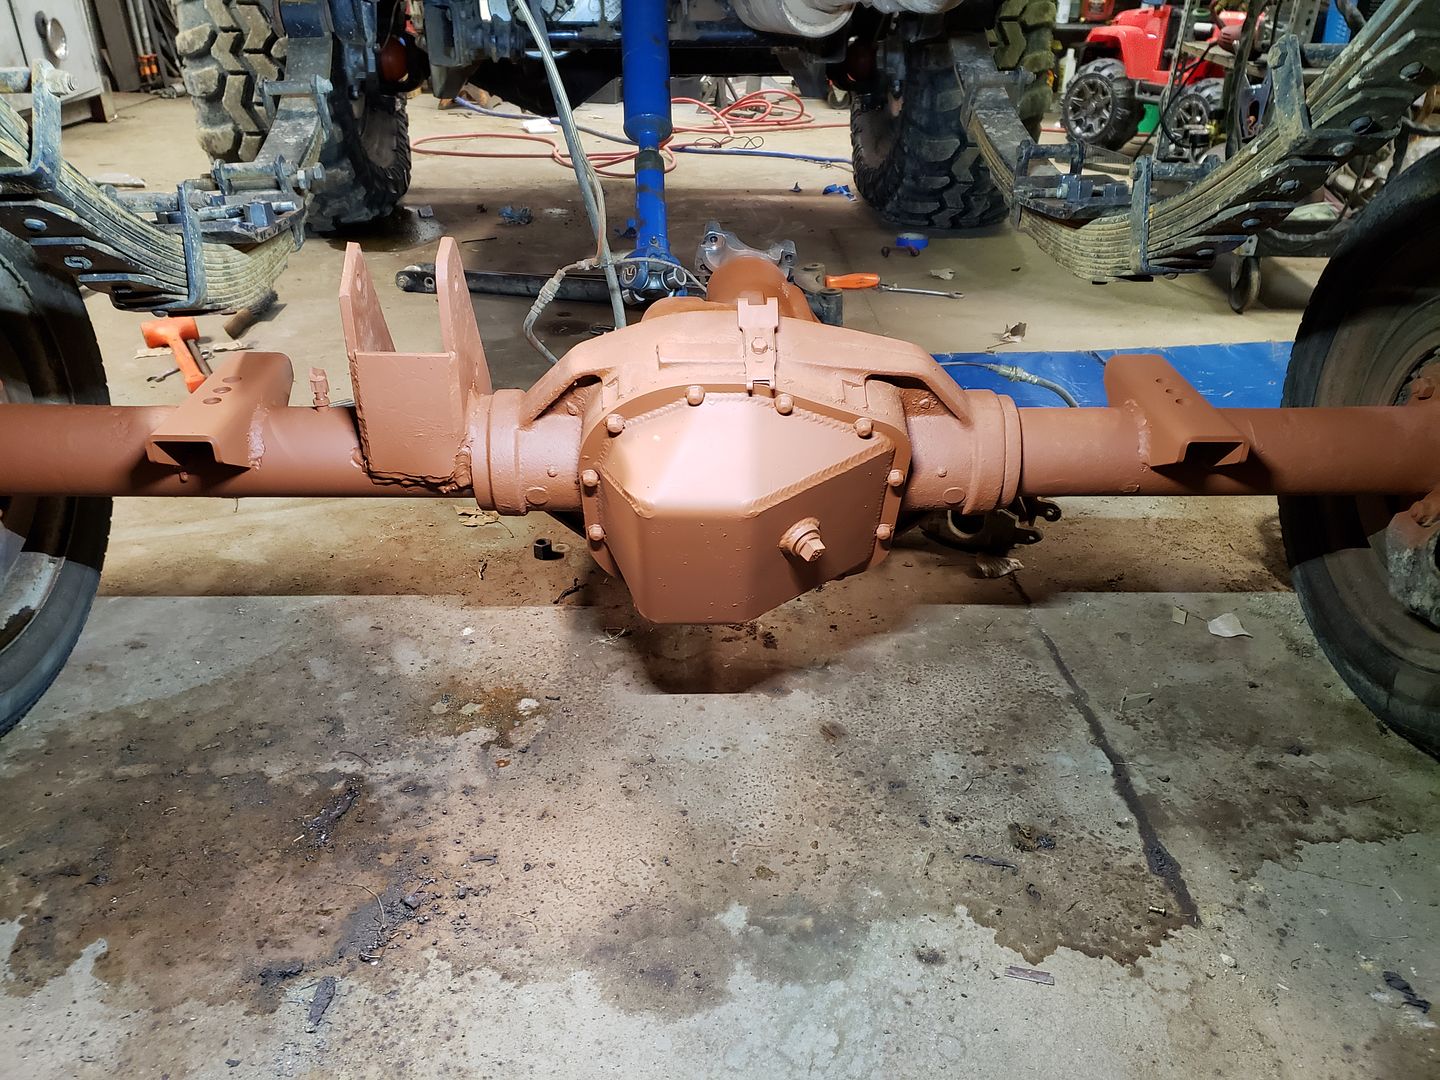
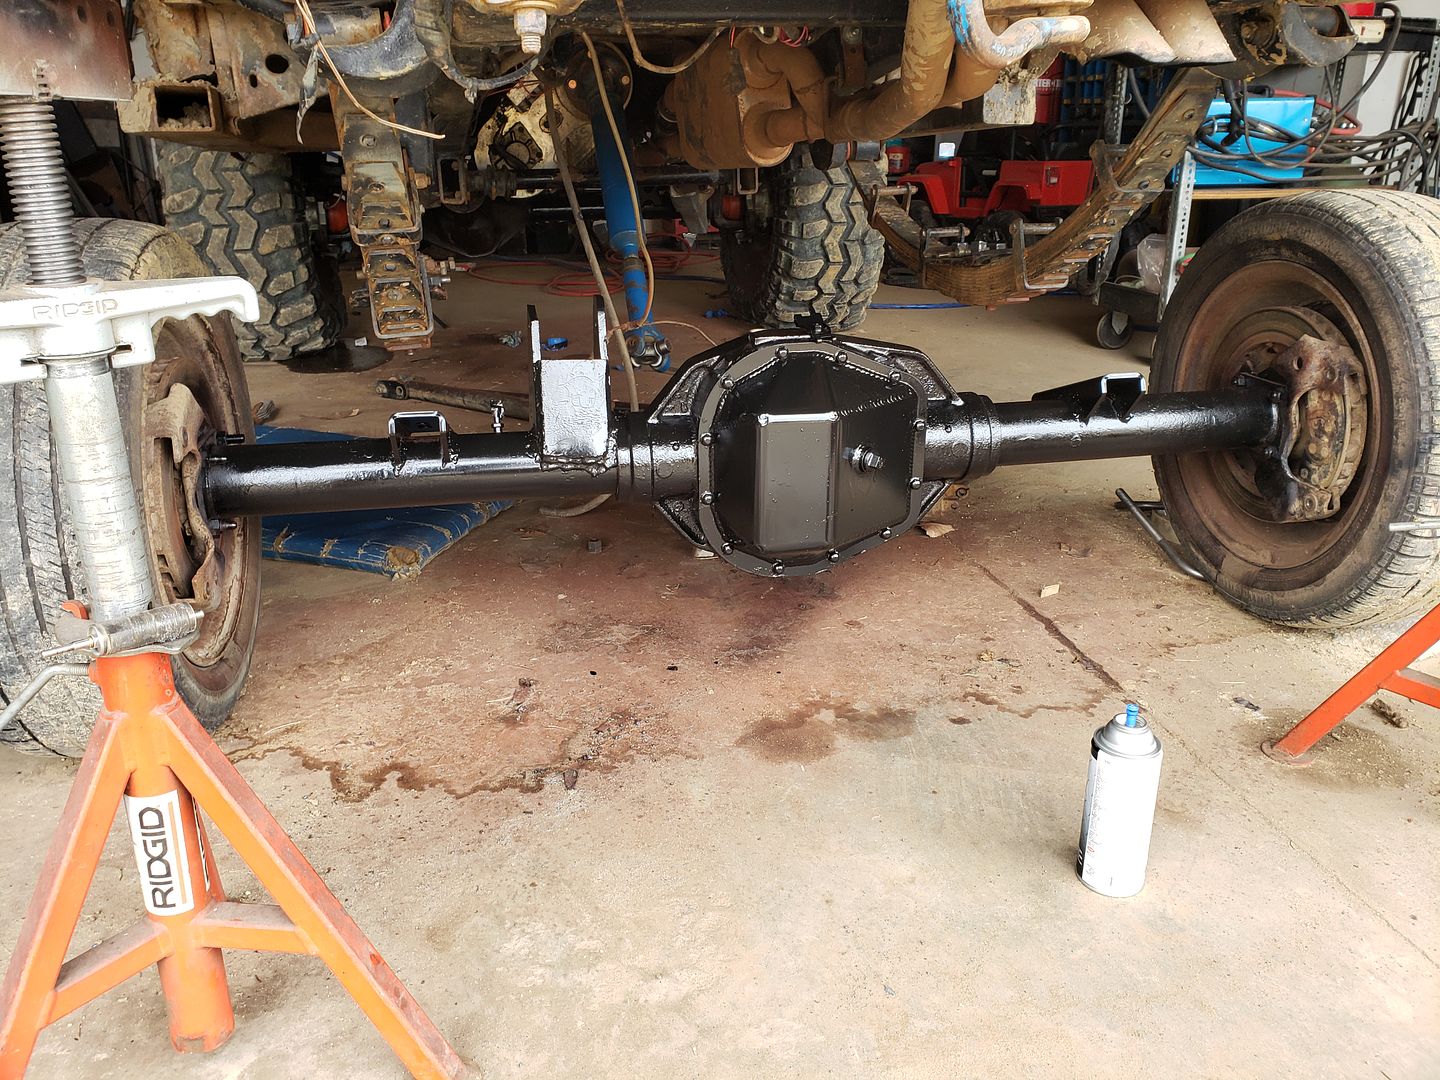
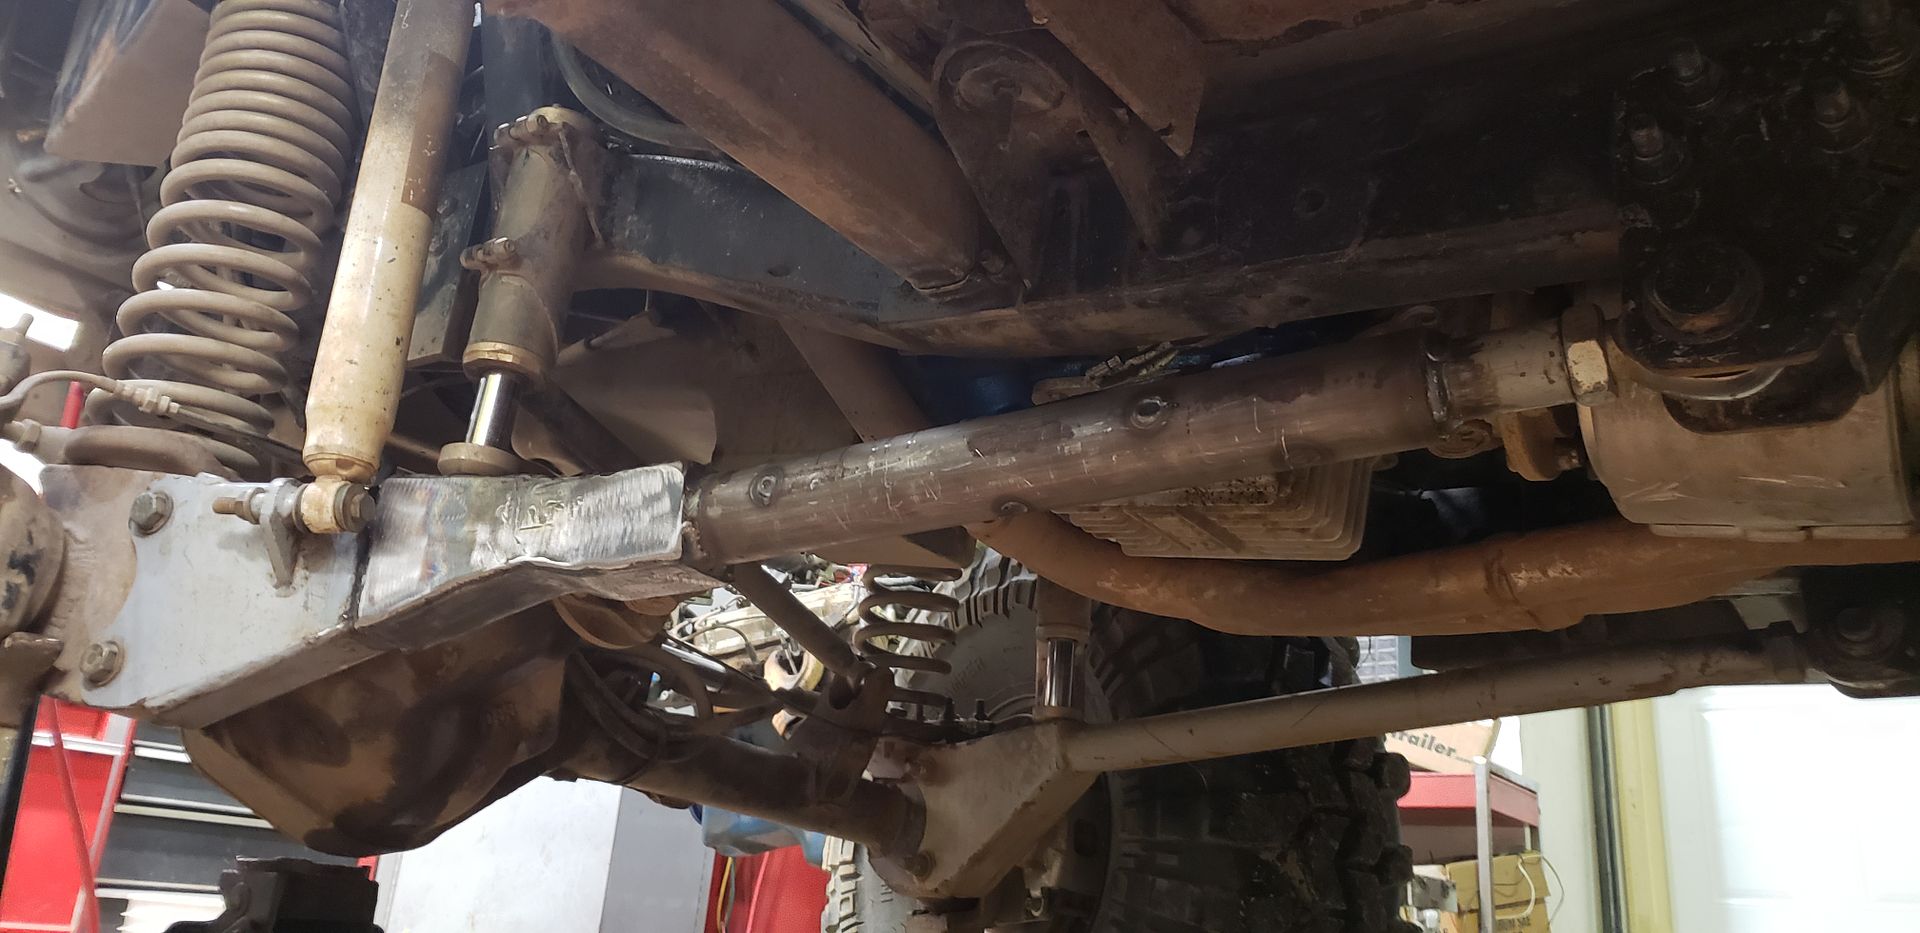
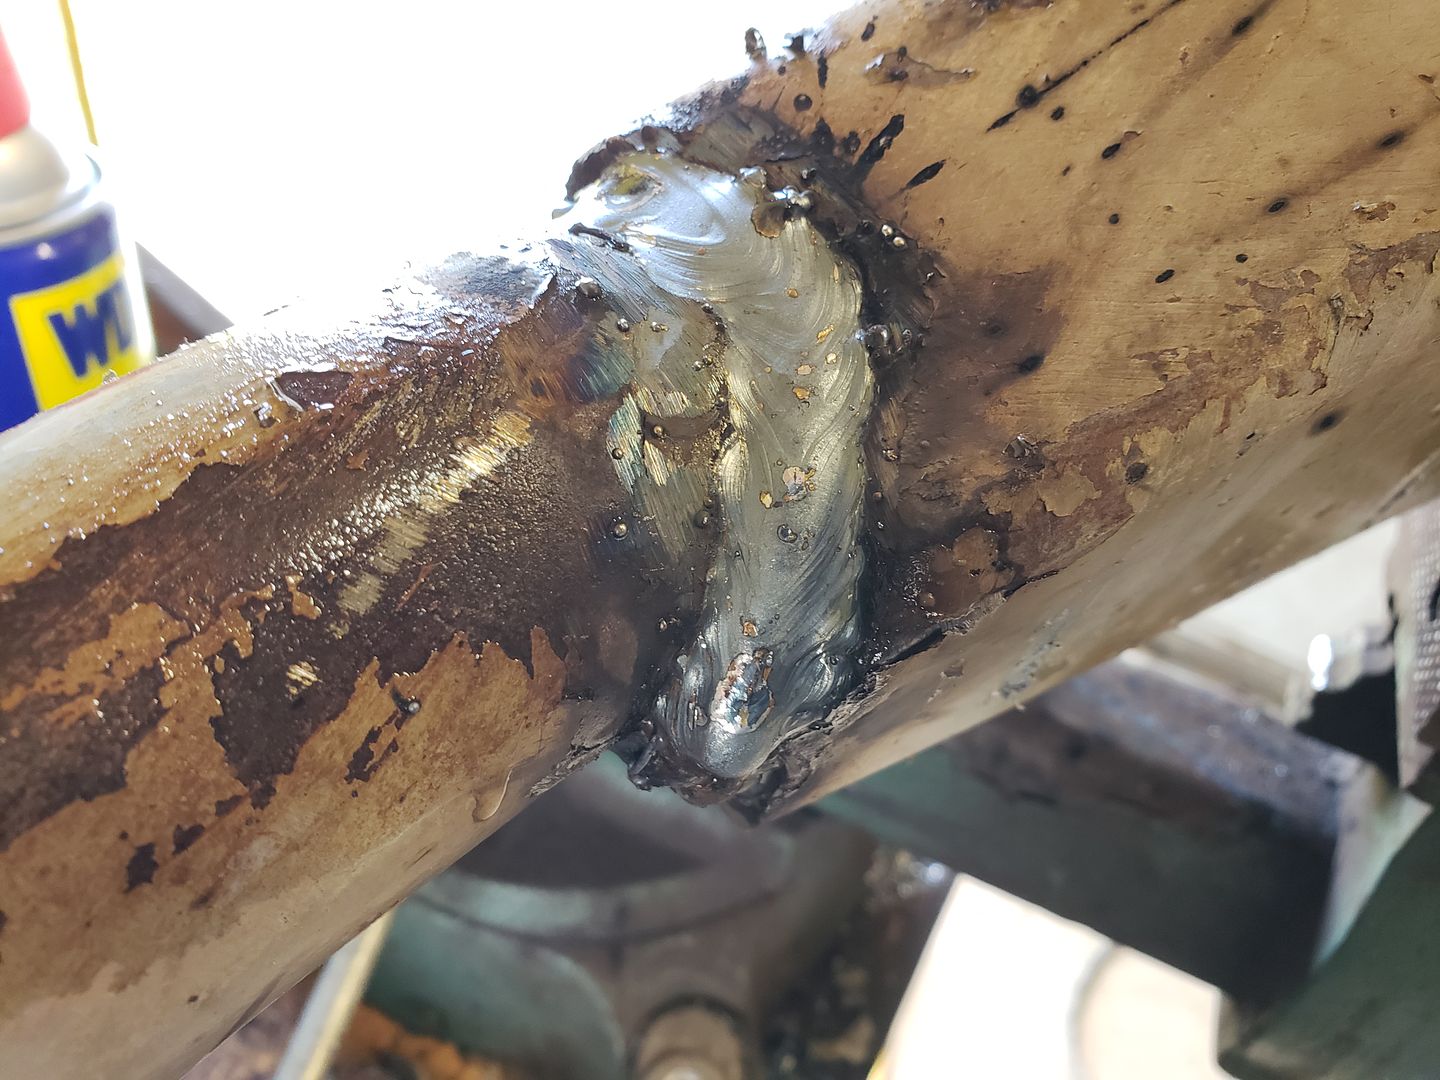
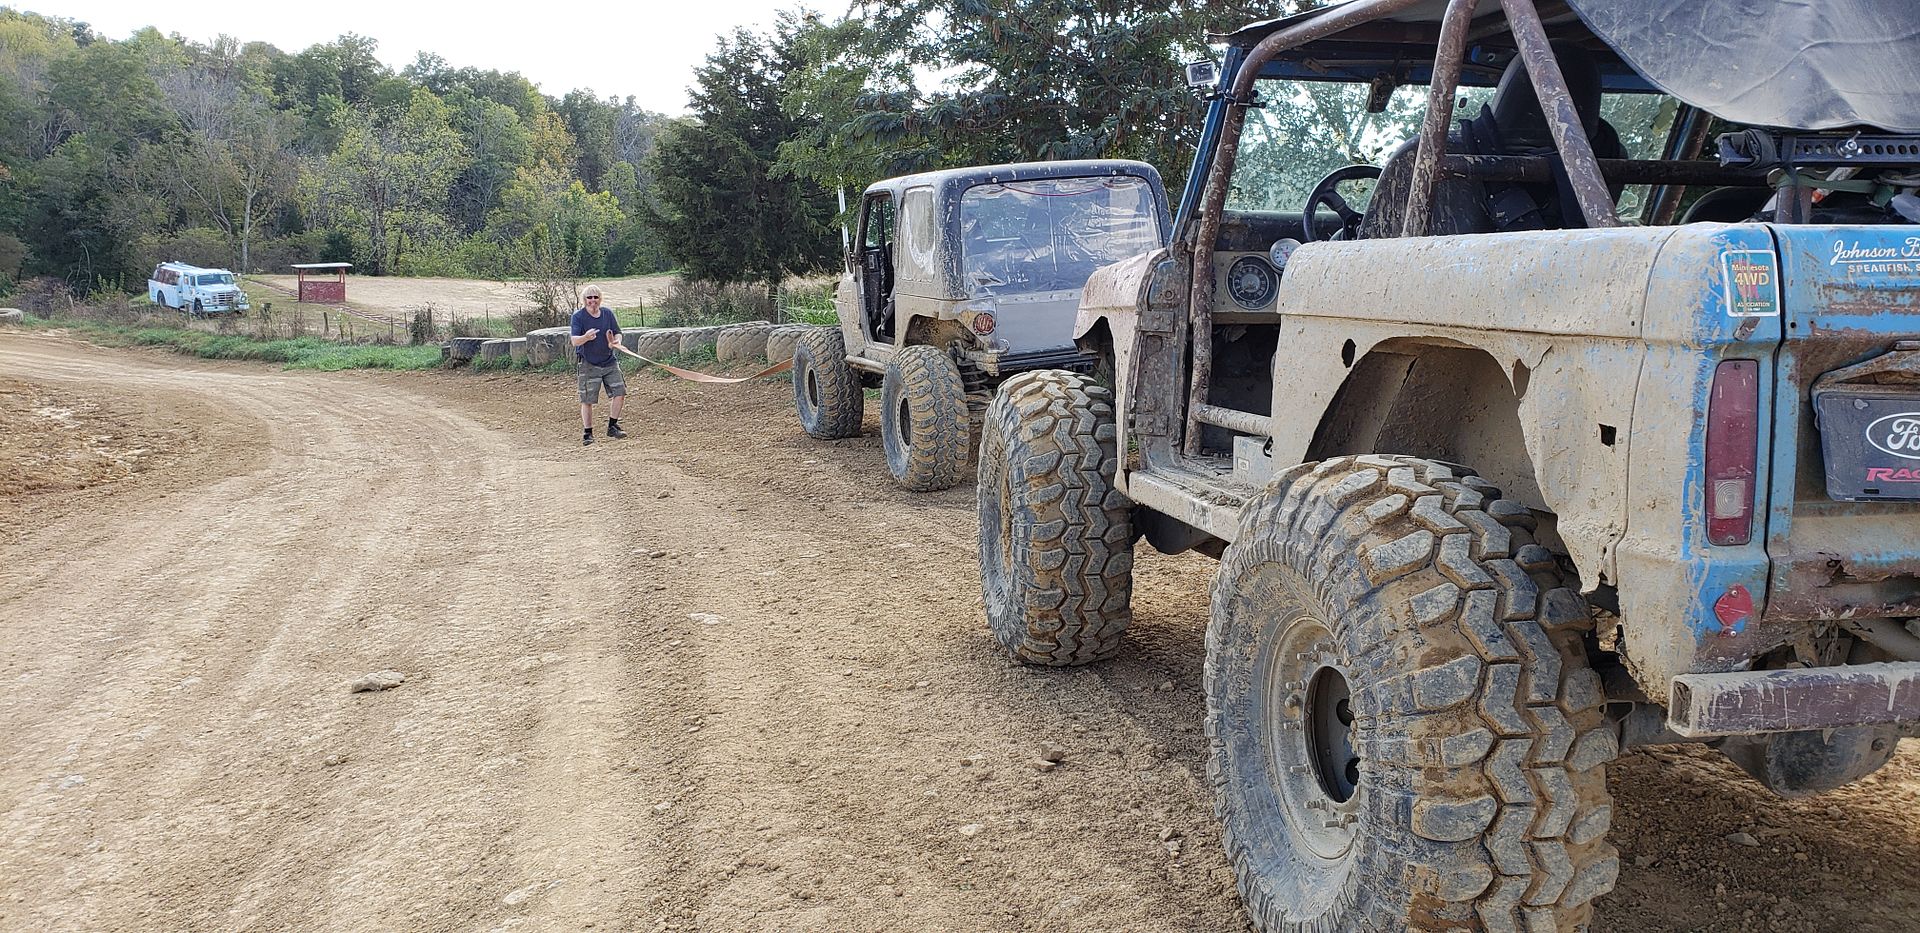
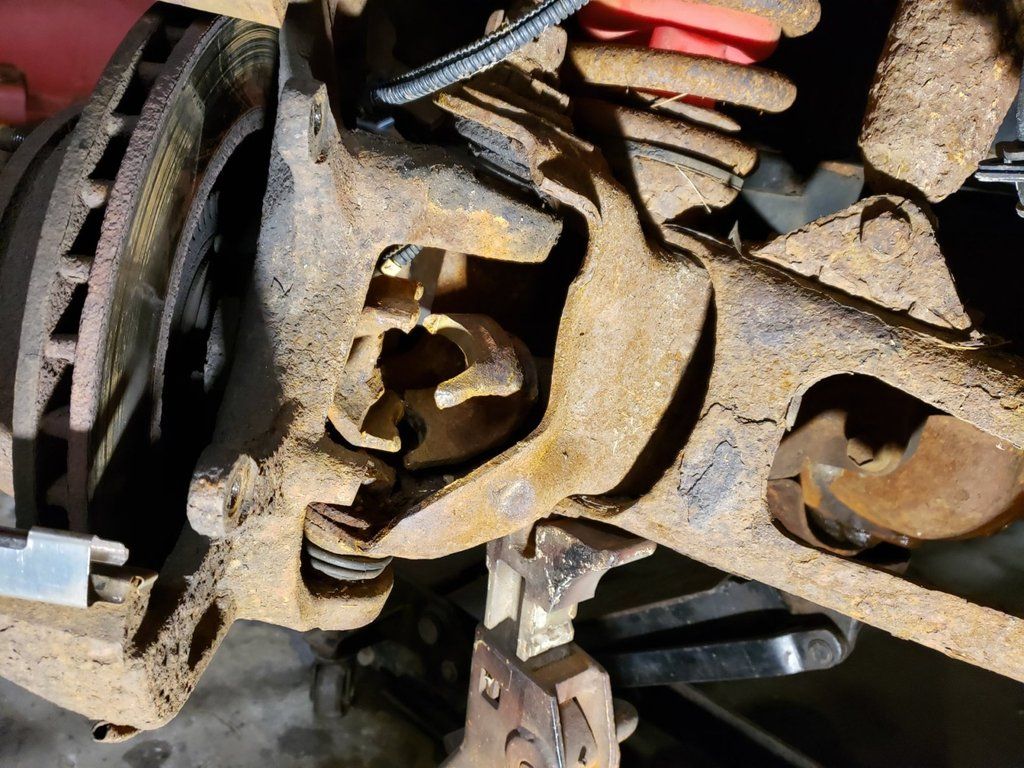
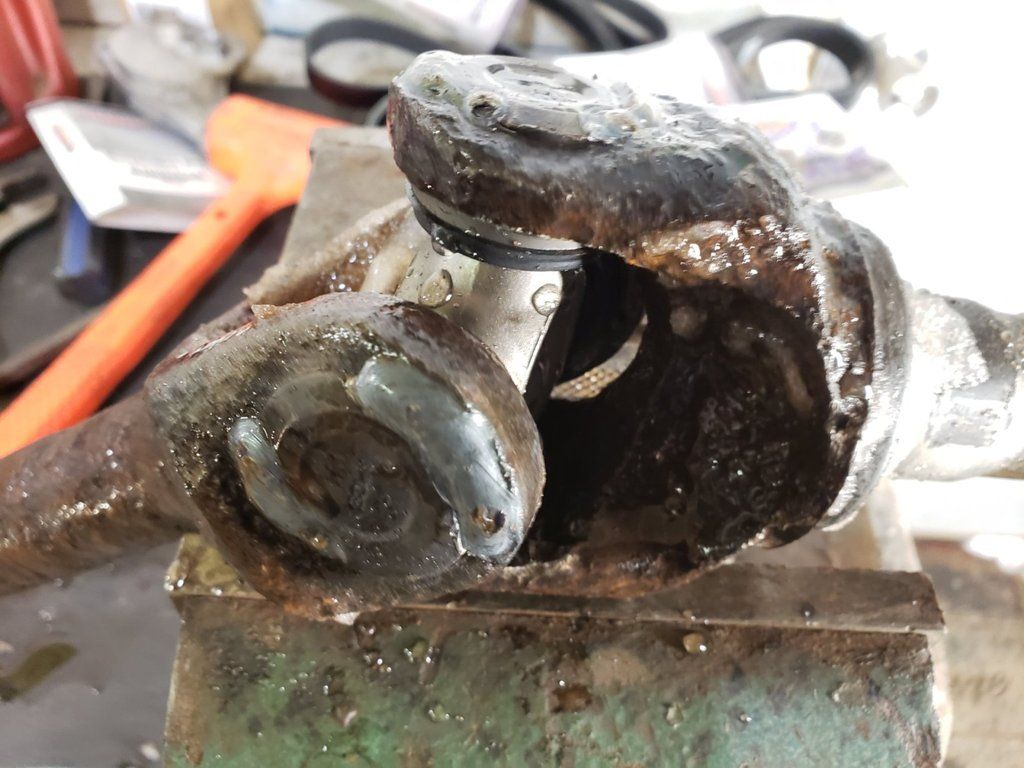
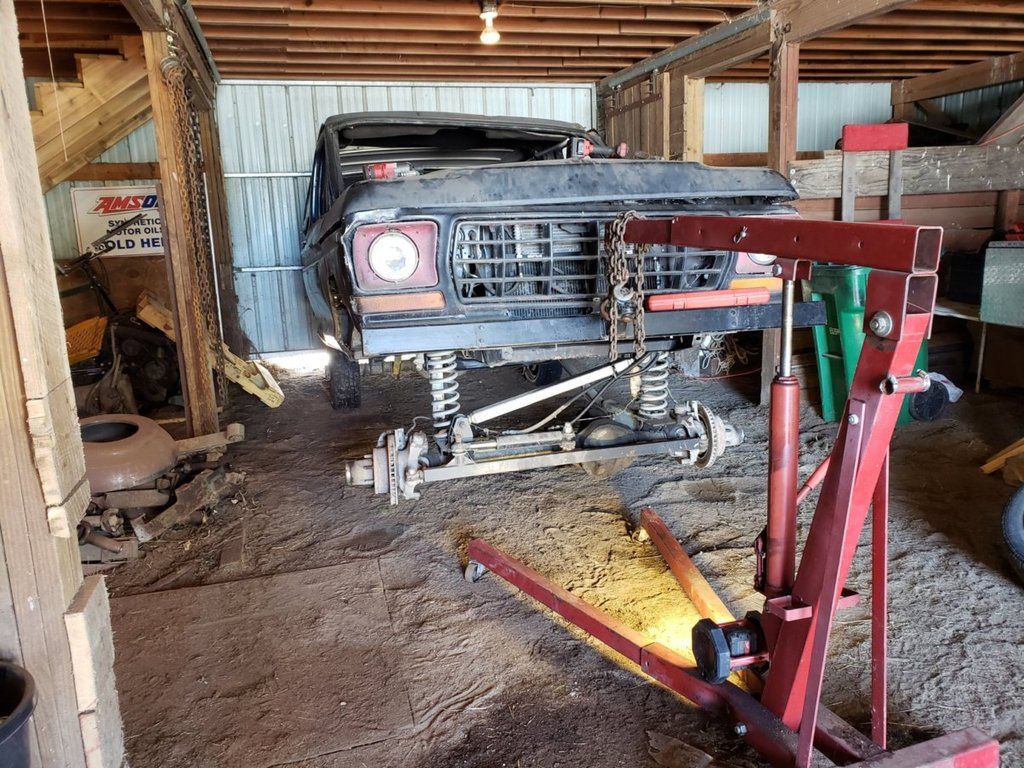
That same trail ride toasted a front R&P in the Samurai of the group and I lost an ignition coil in the middle of a water hole that I crept into.

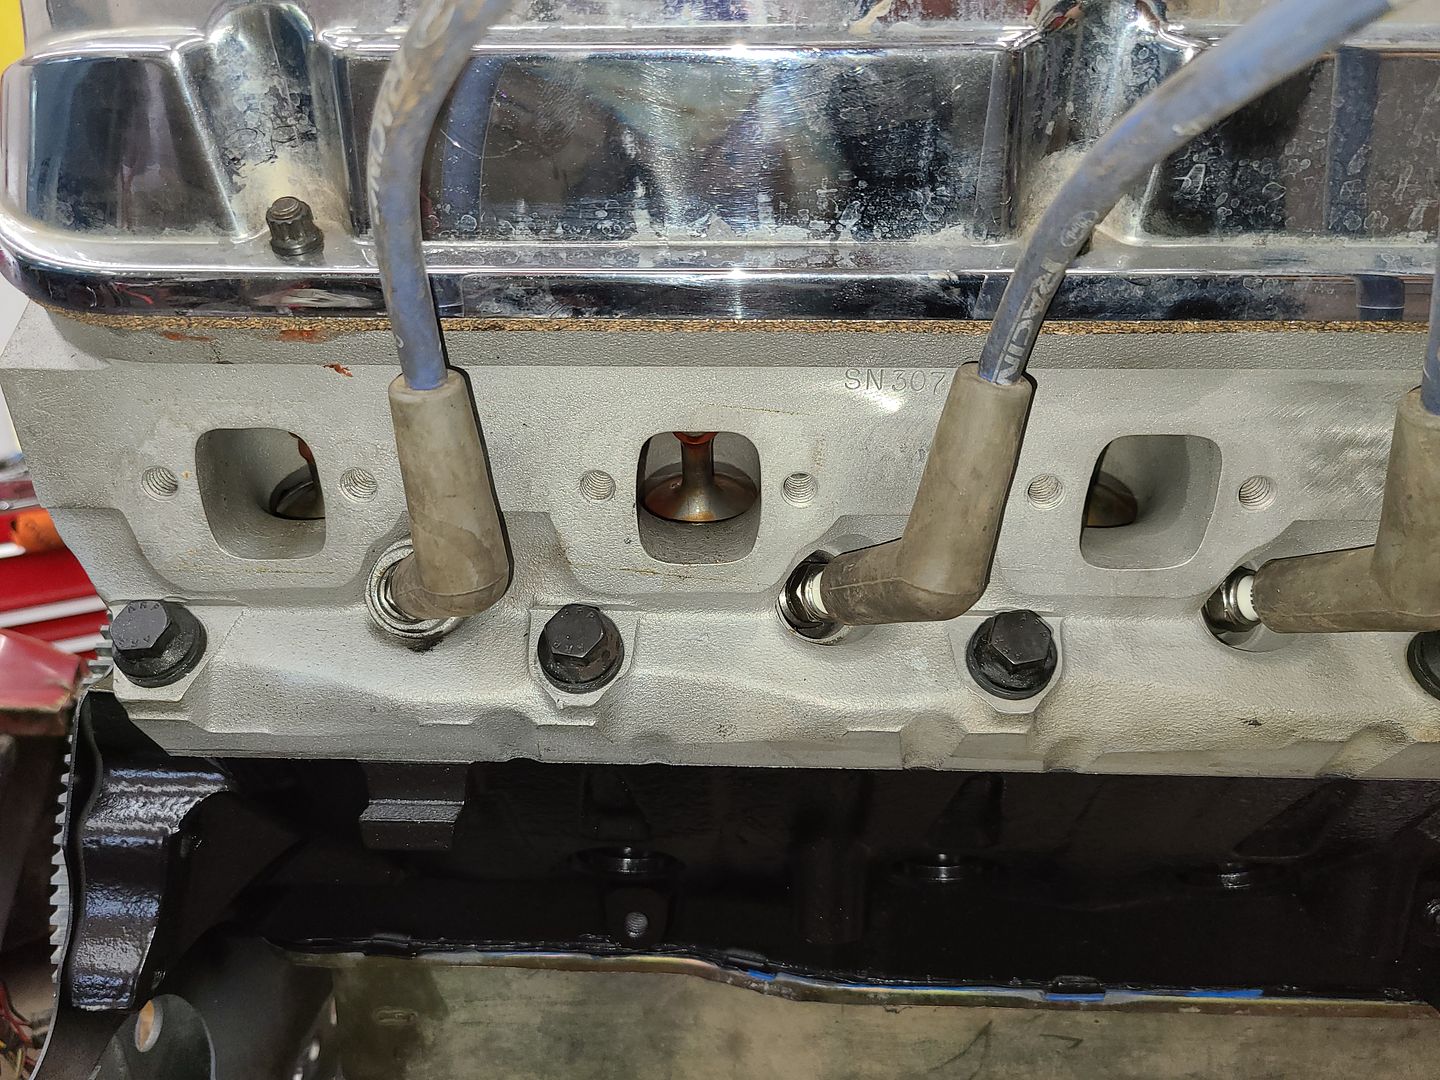
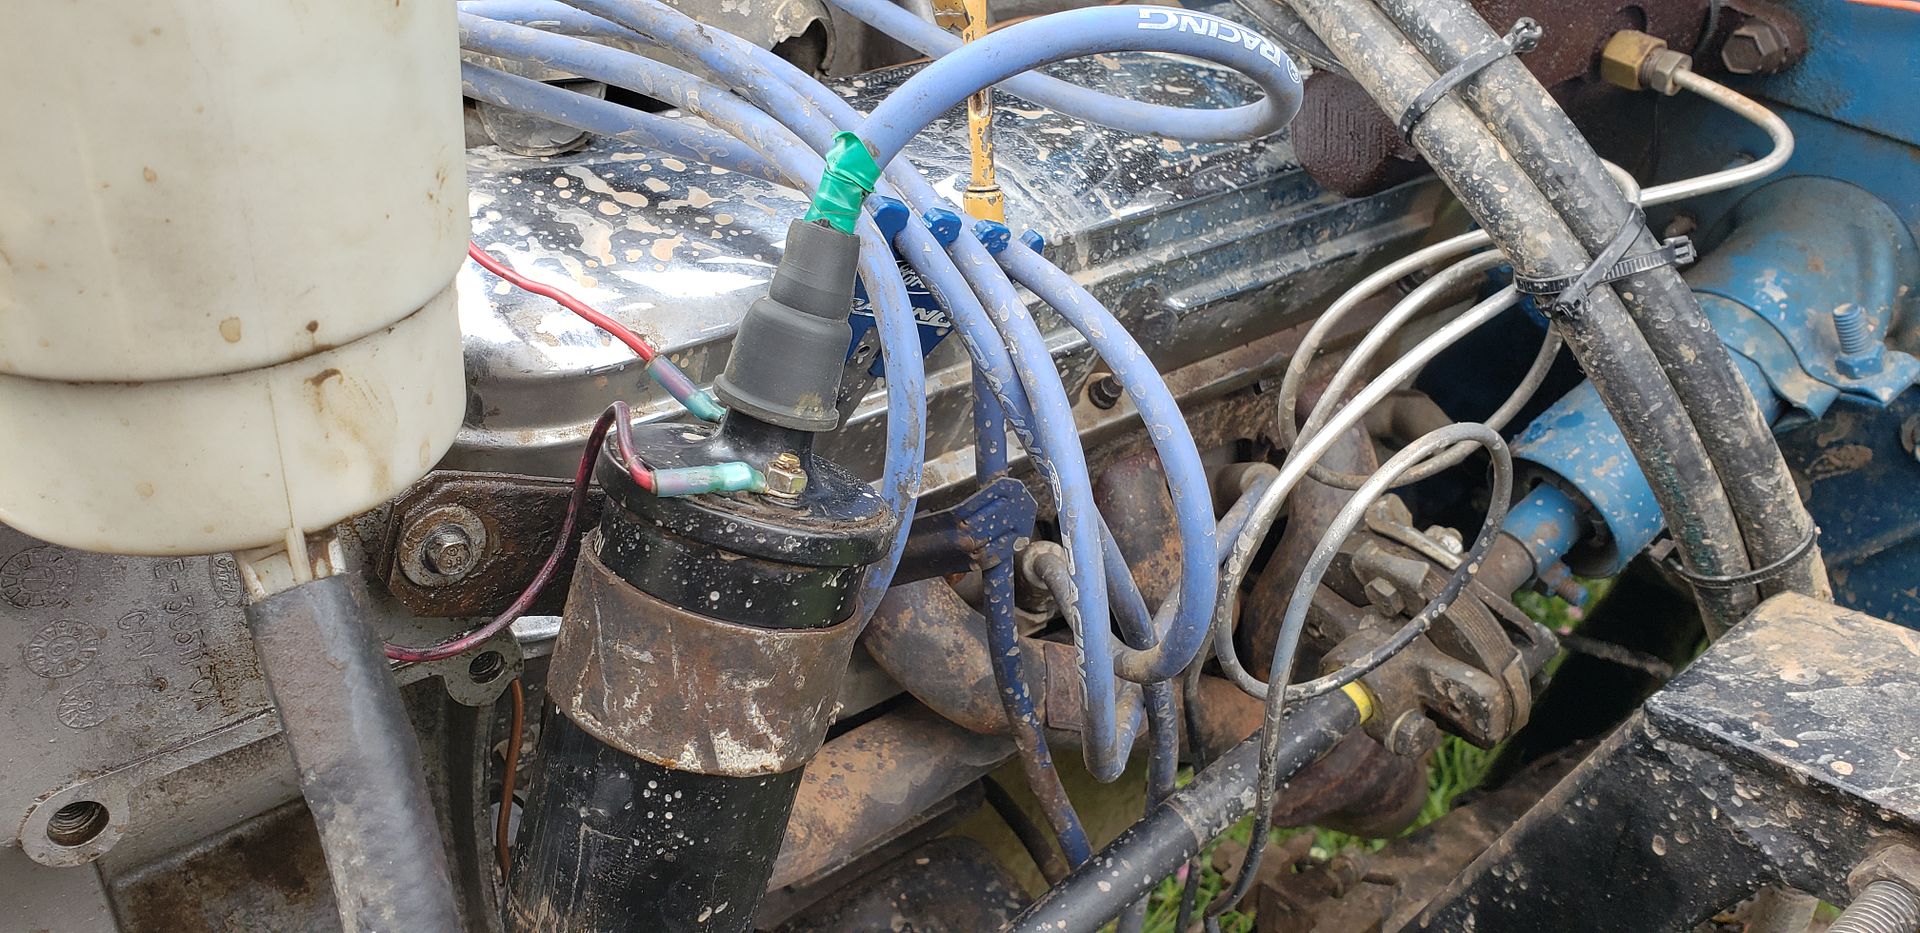
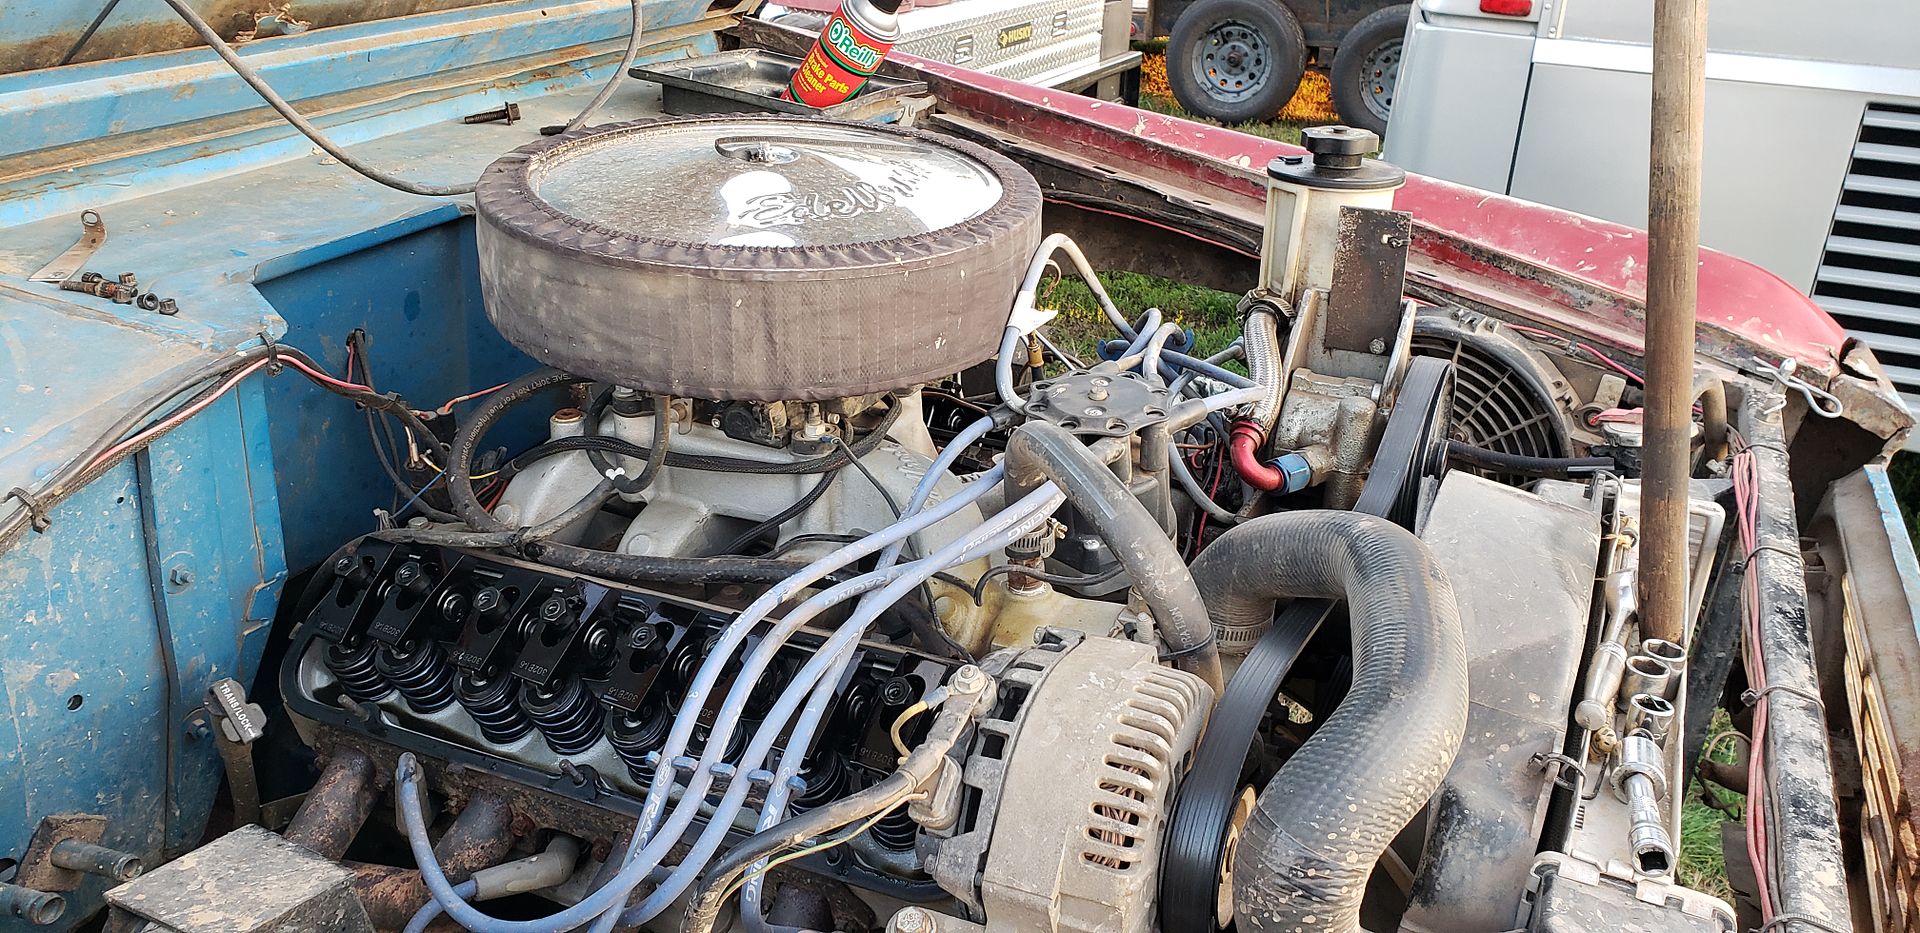
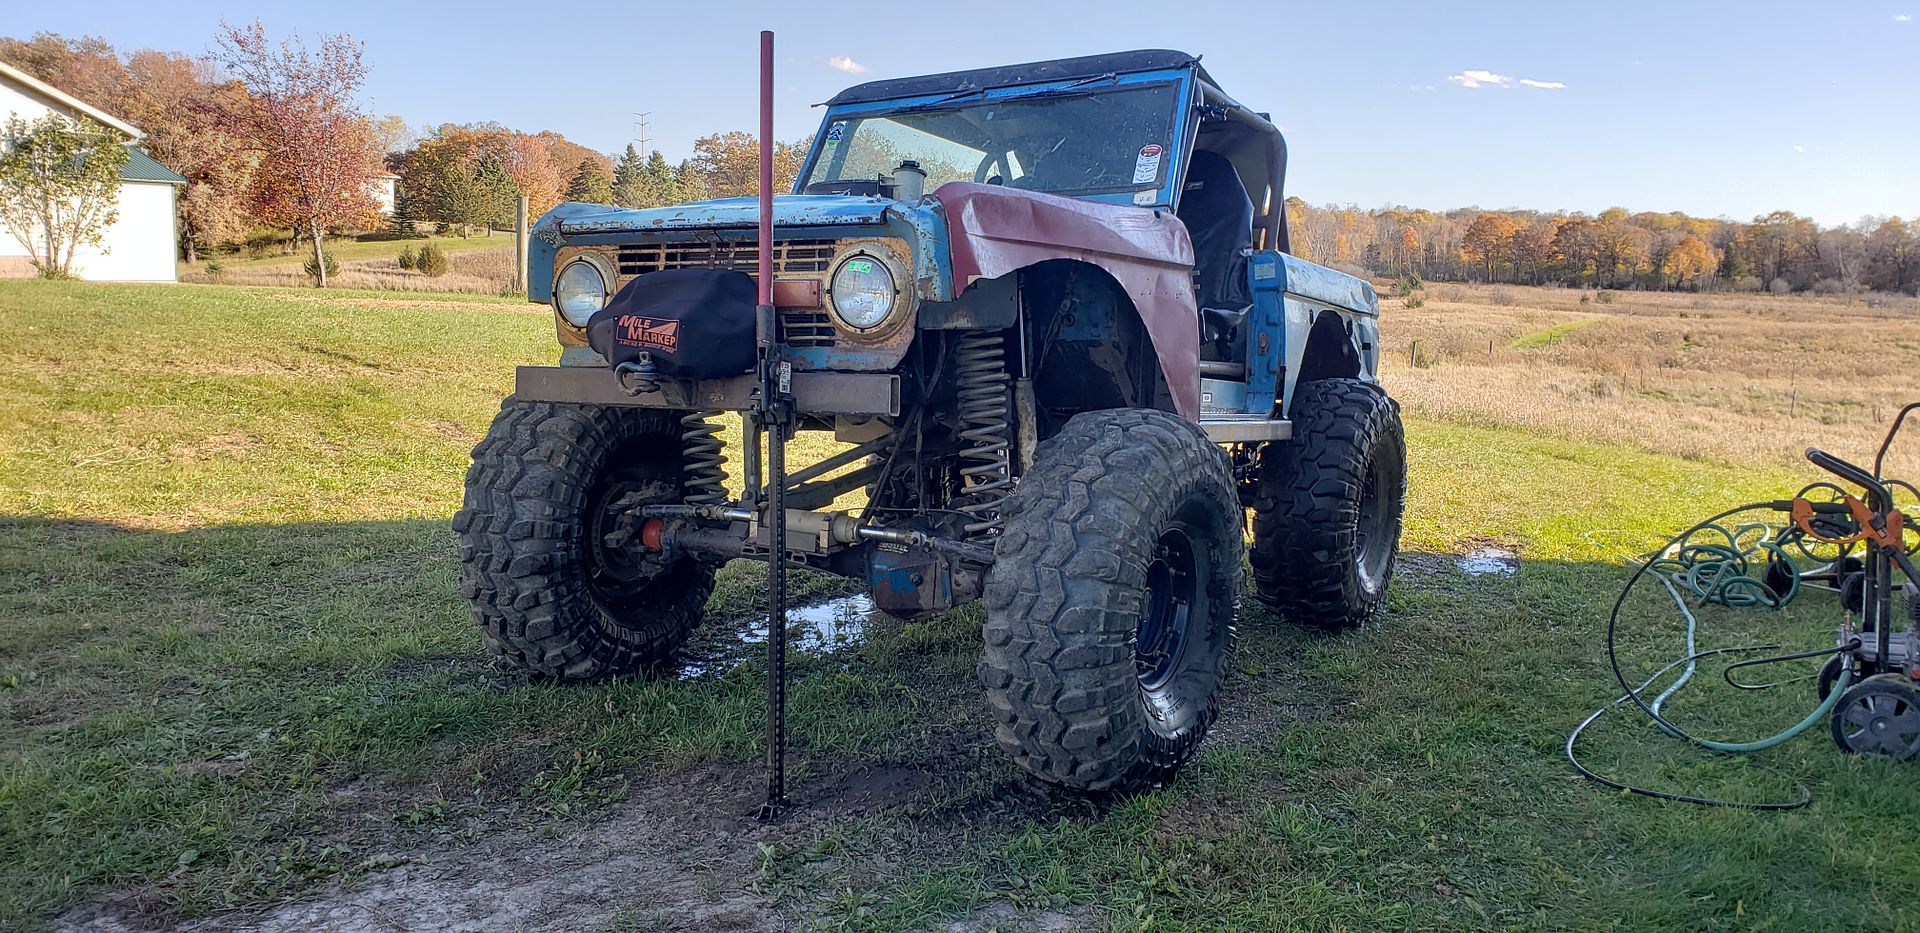
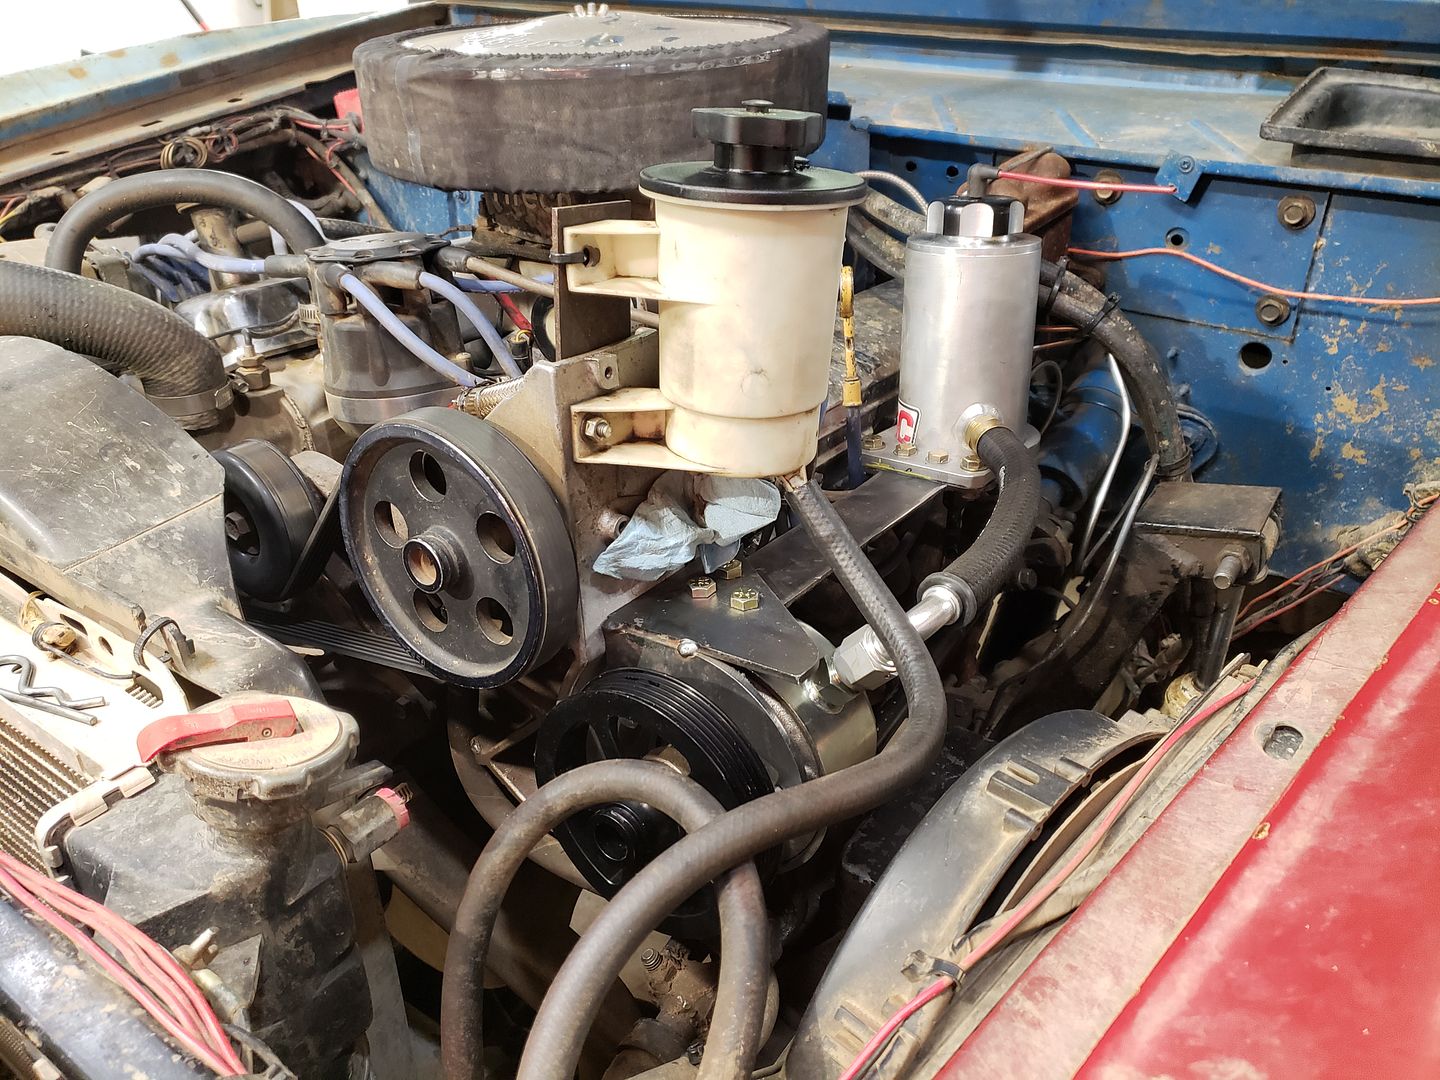
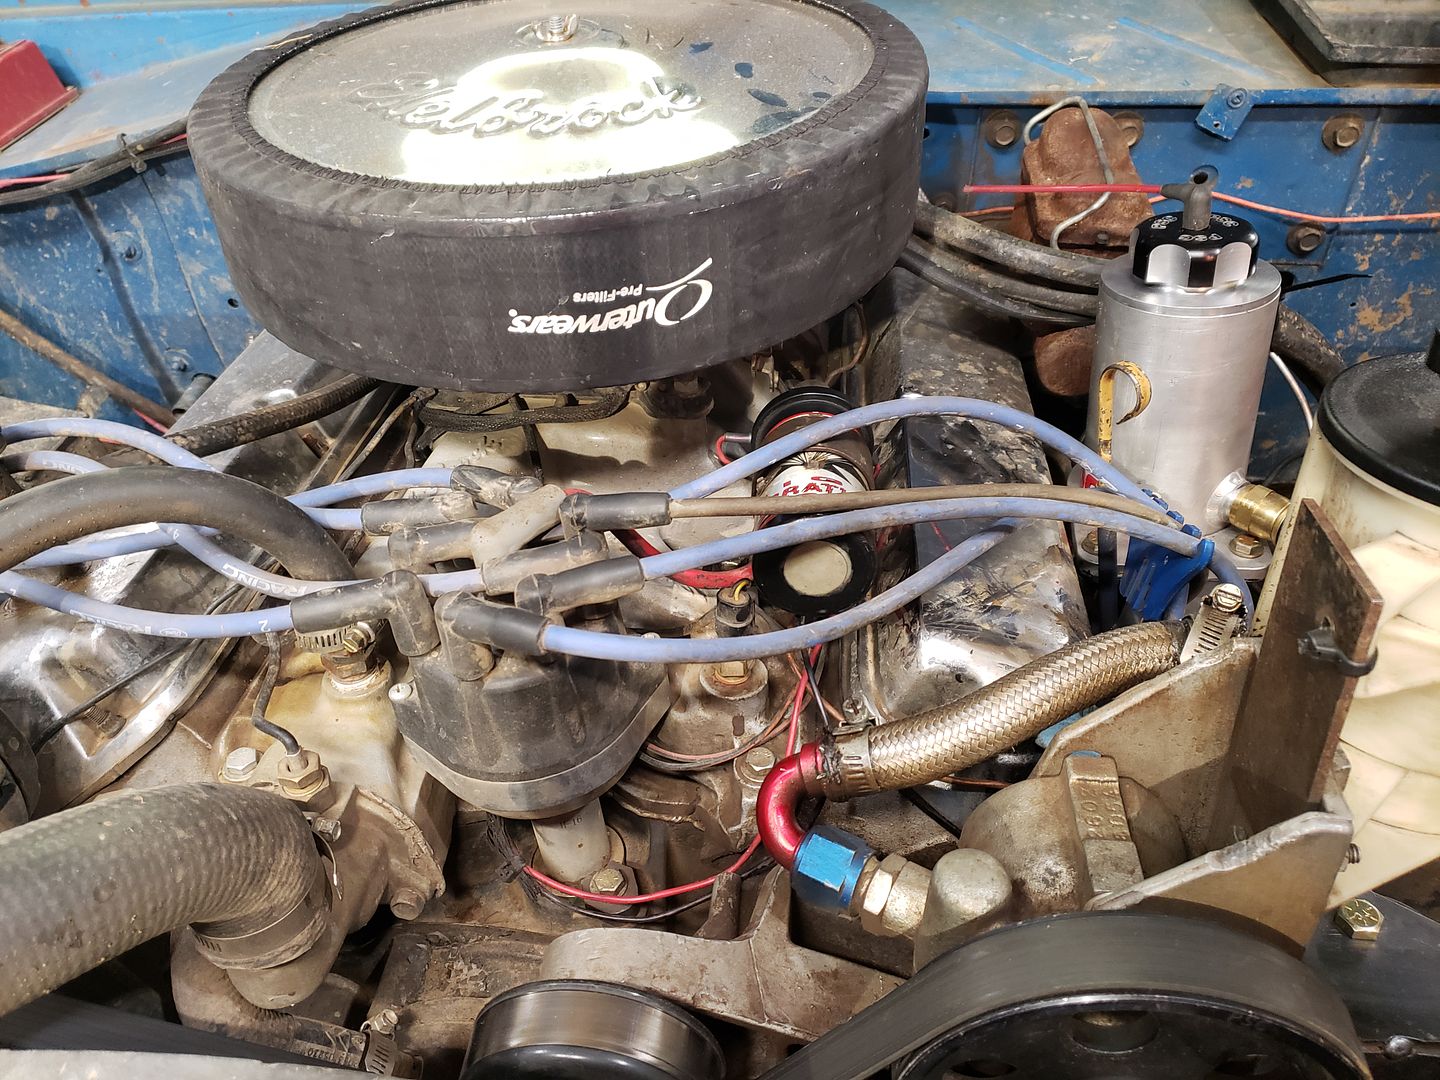
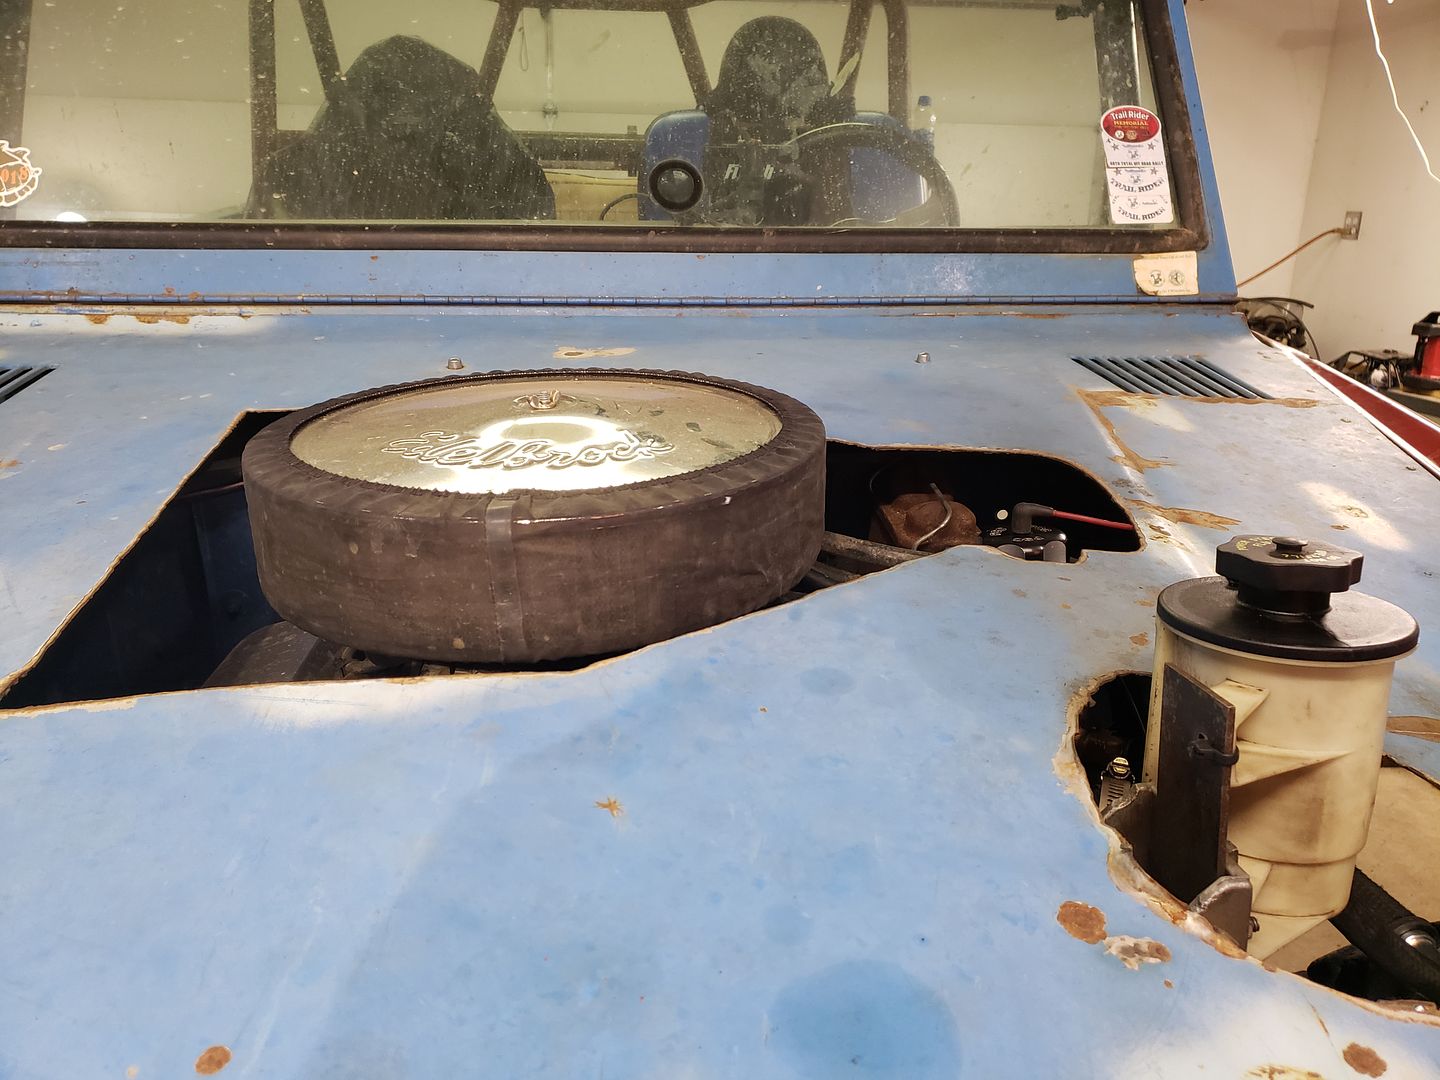
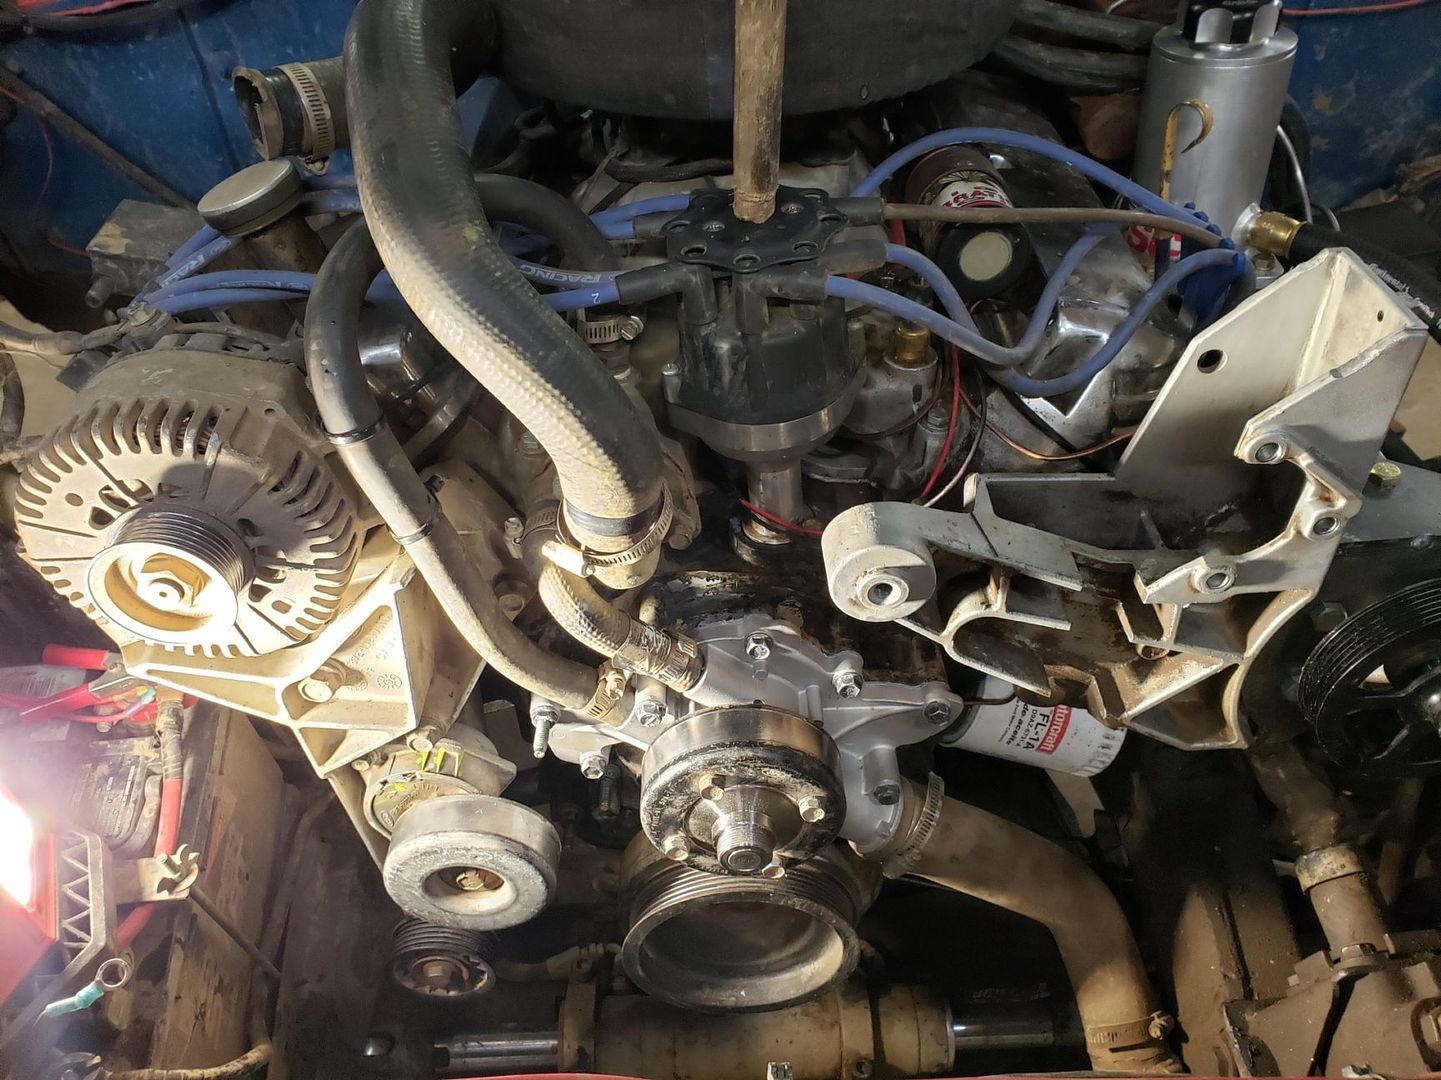
What I didn't notice at the time was that I had a ripped off spark plug wire on cylinder 4 that caused the coil to arc to ground and eventually kill it. You can see the boot on the plug but no wire running to it in this picture. This is after I swapped coils on the trail - truck sure did great for 7 cylinders. ;D
20180825_114602_zpsiiuuplza.jpg


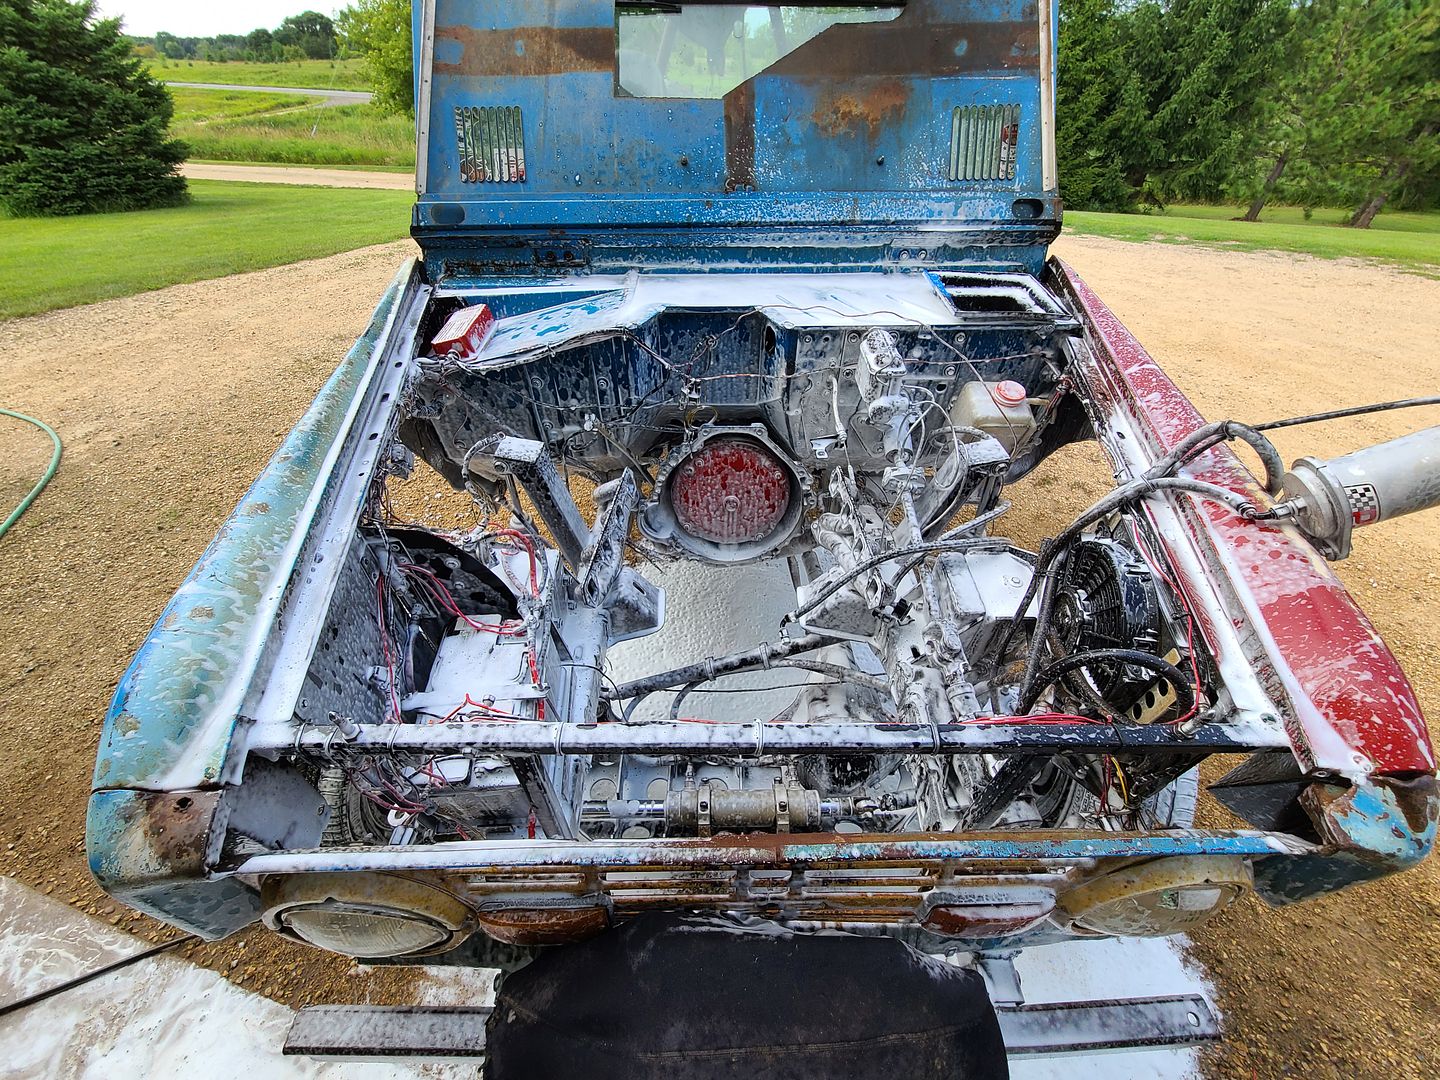
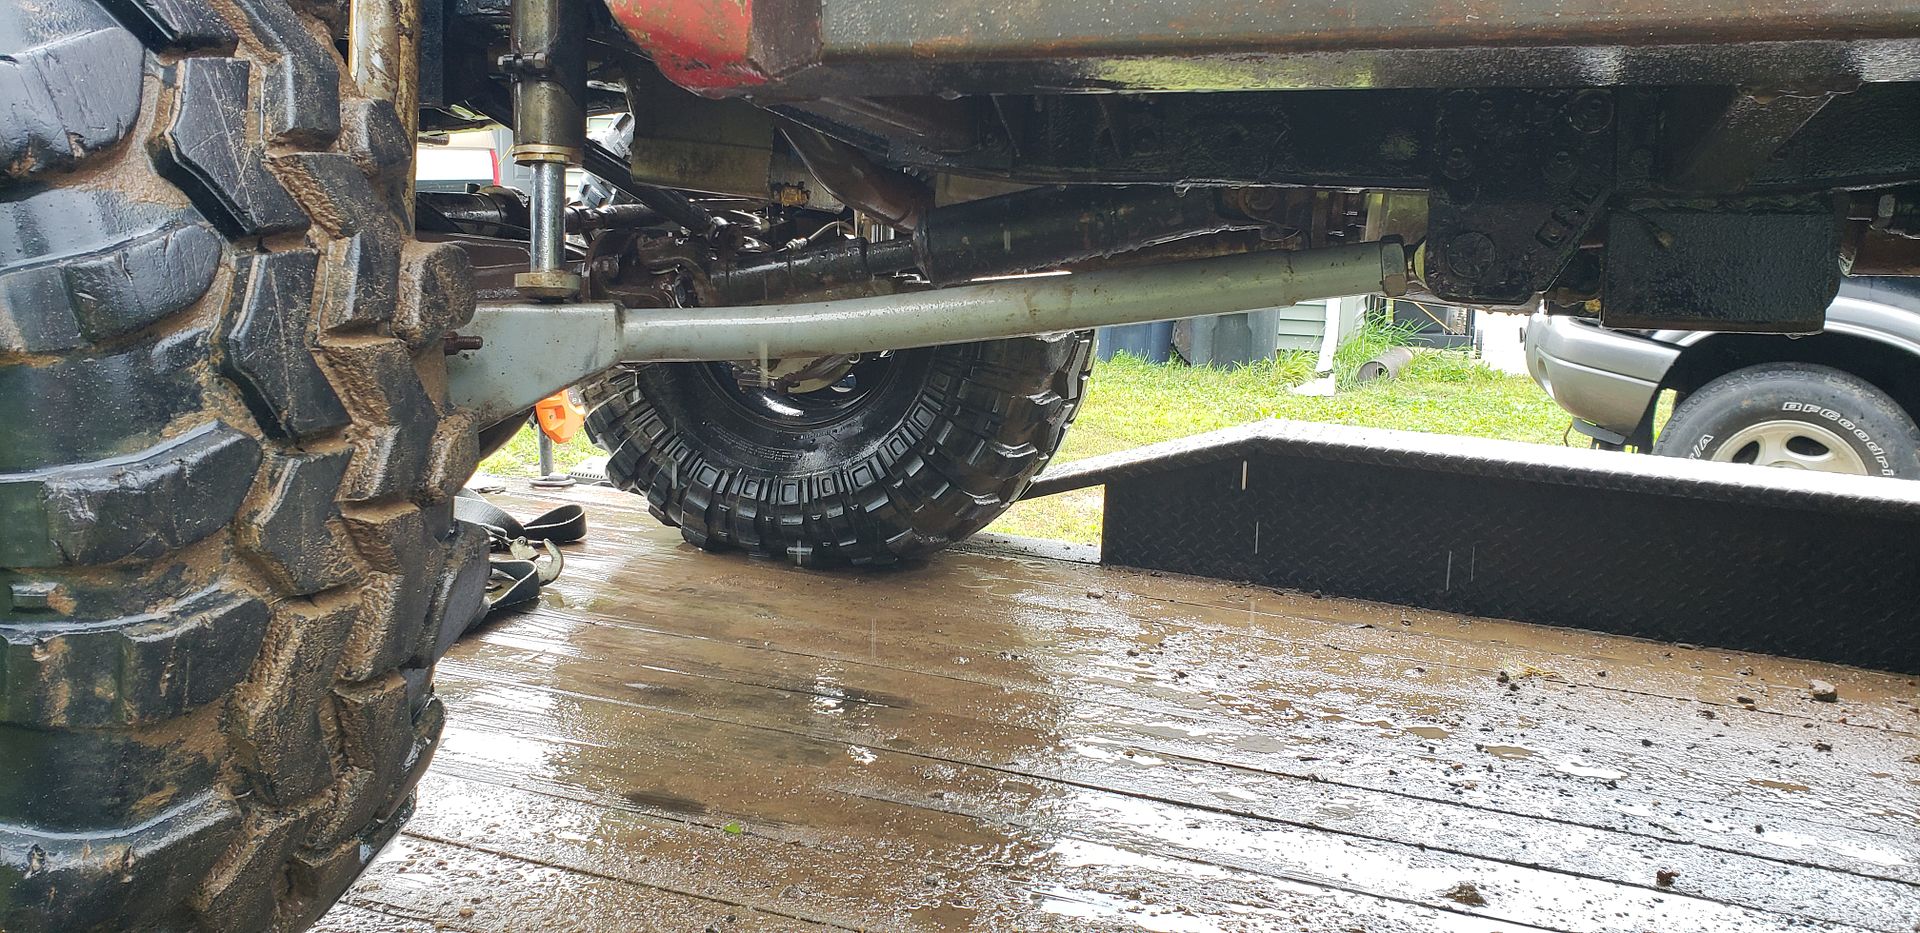
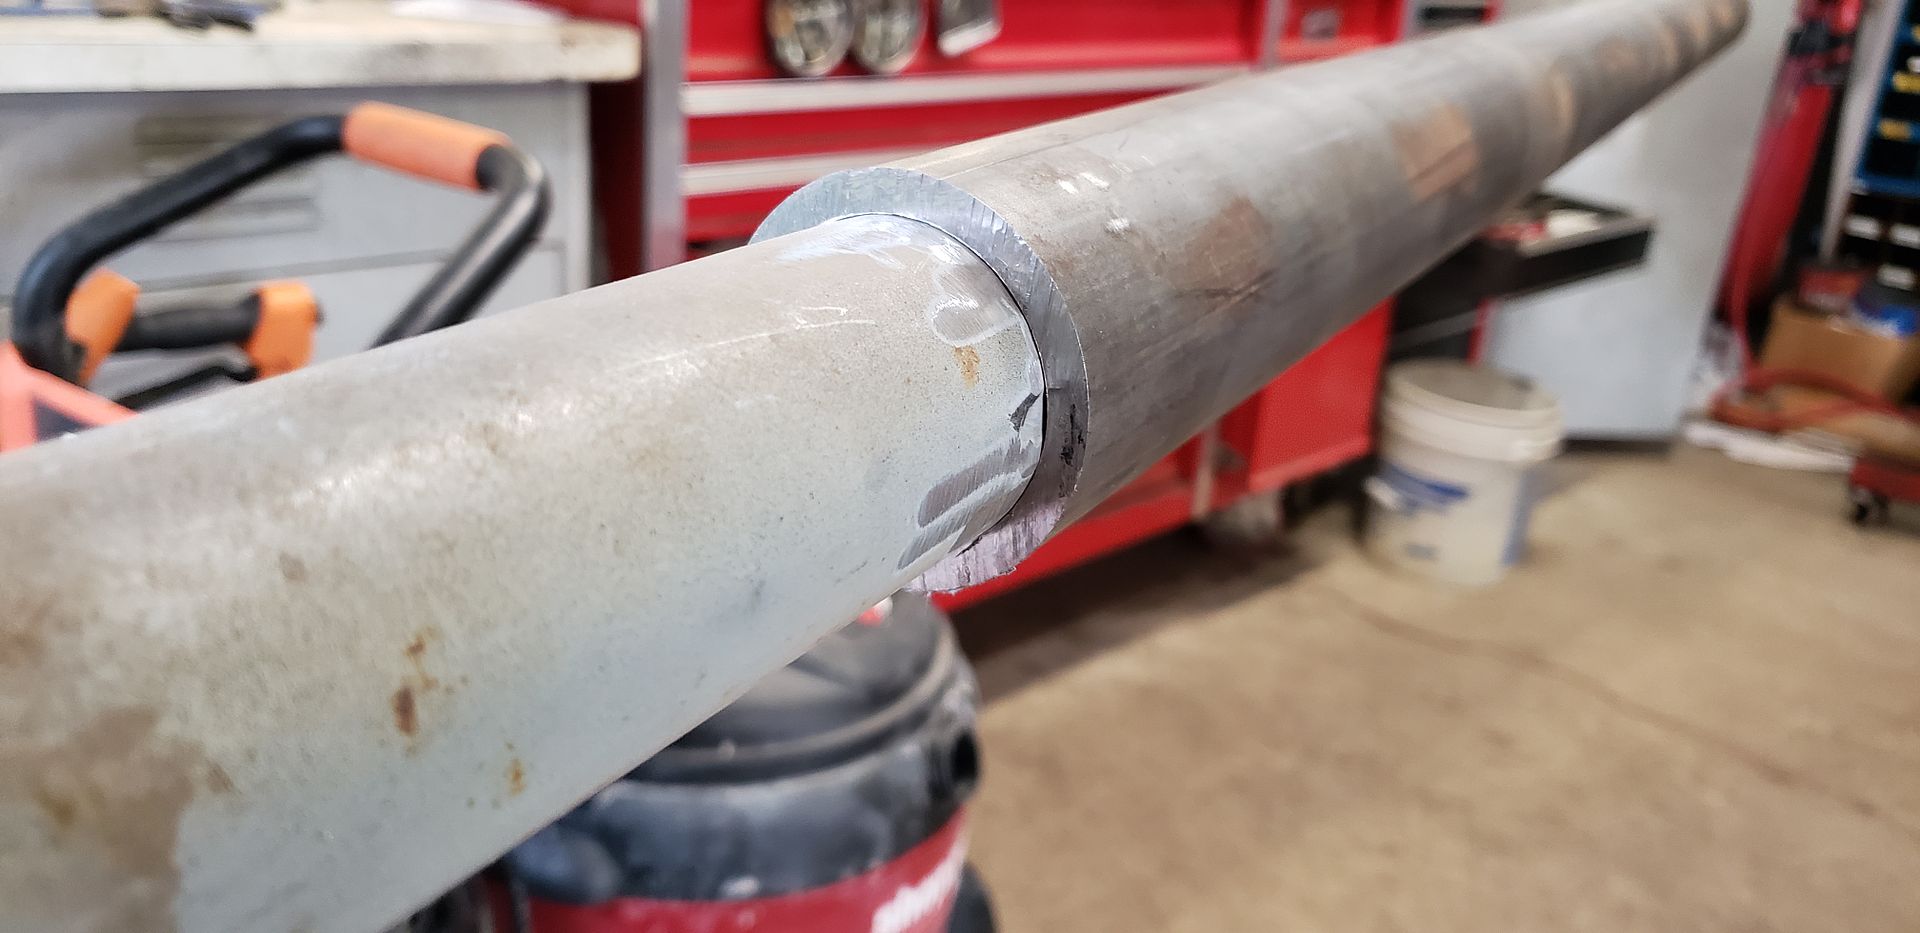
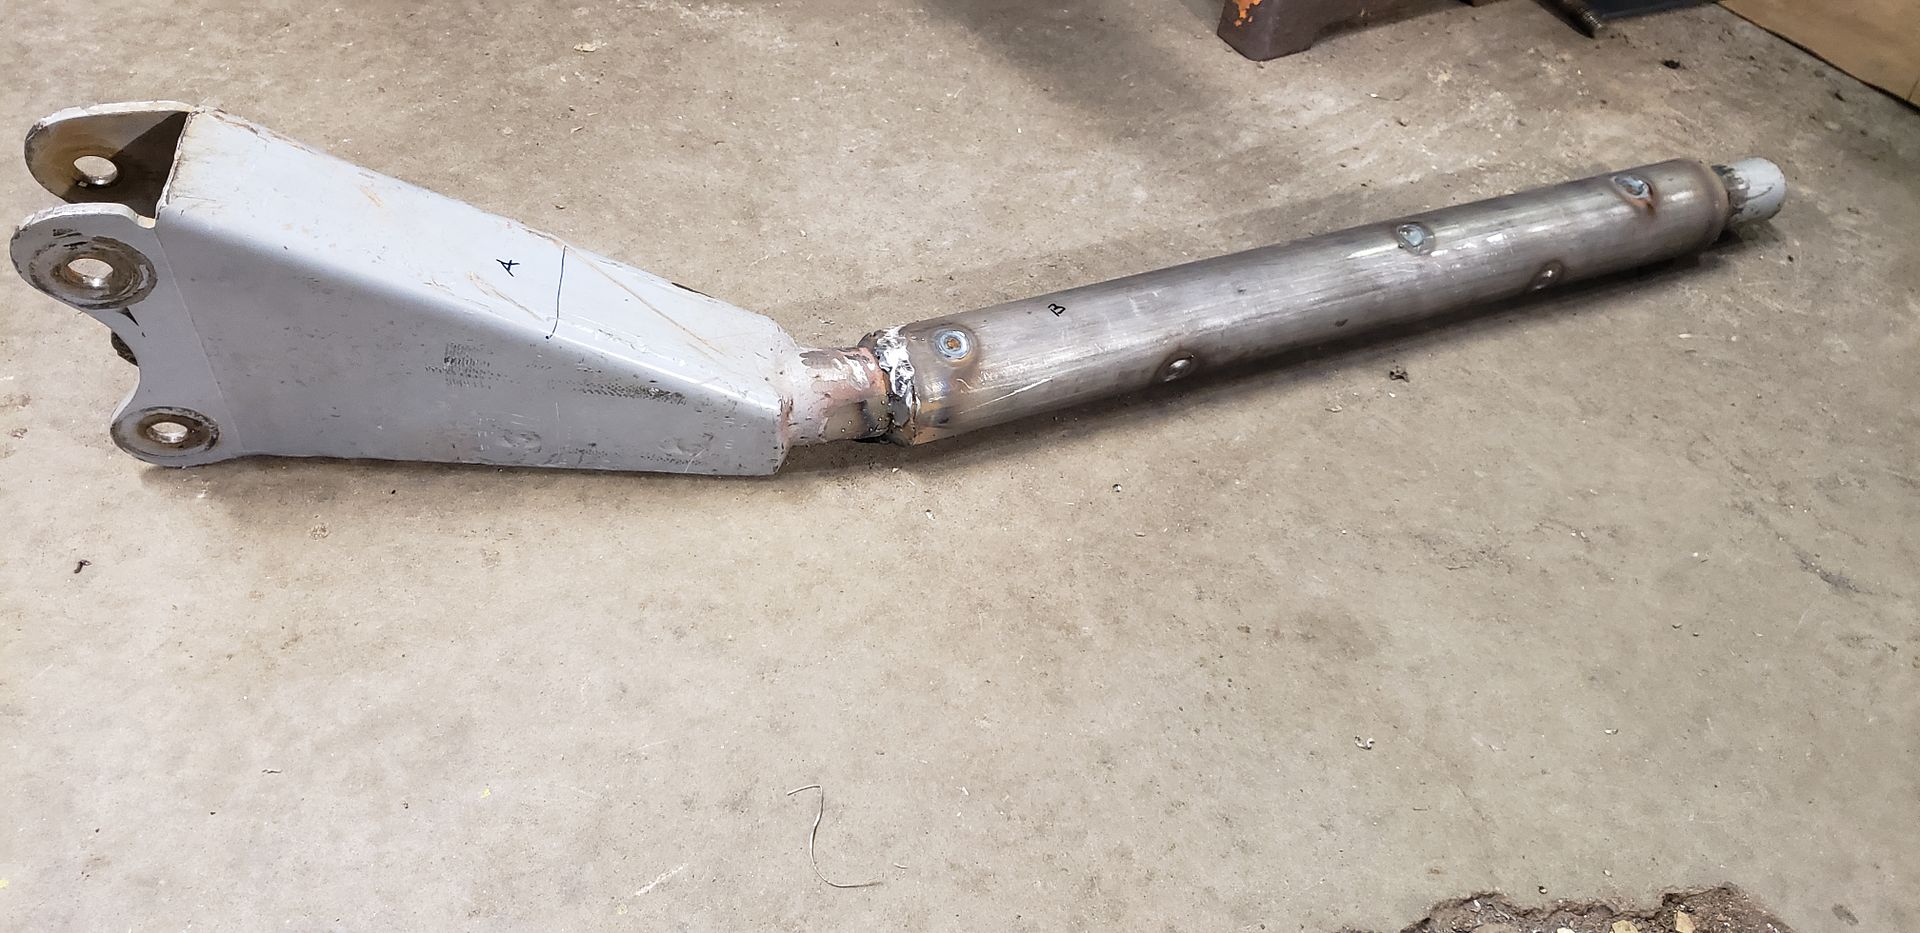
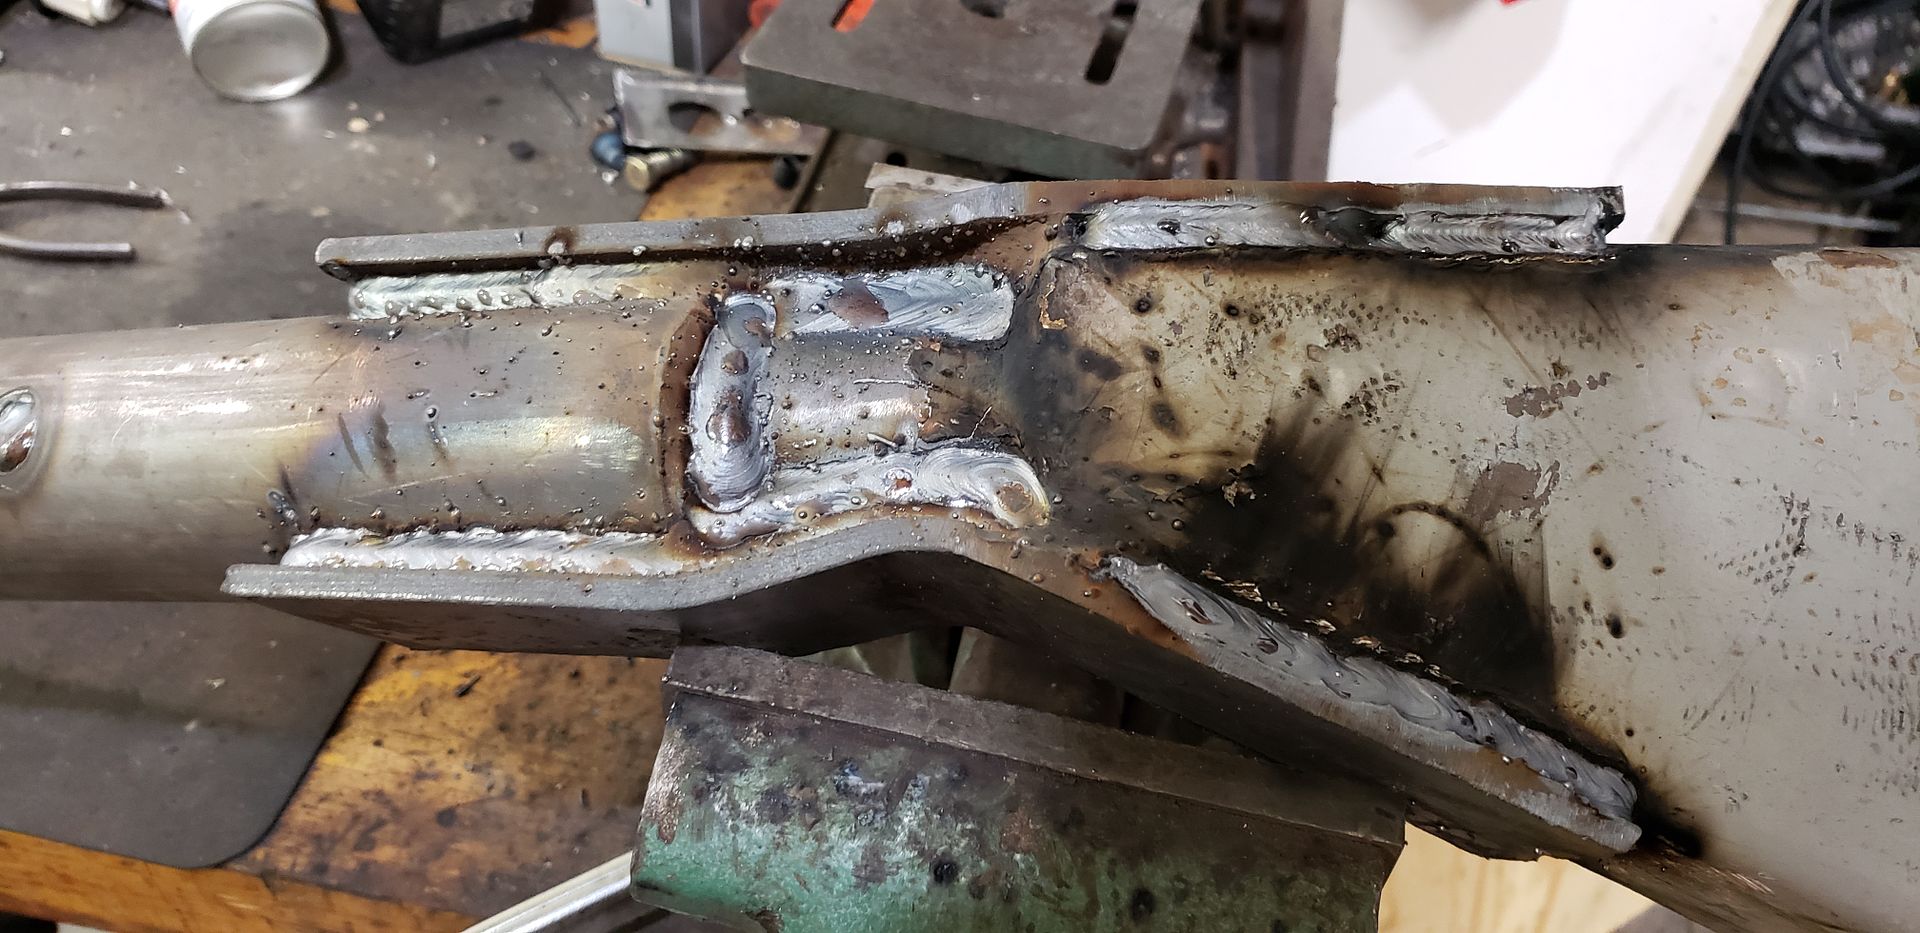
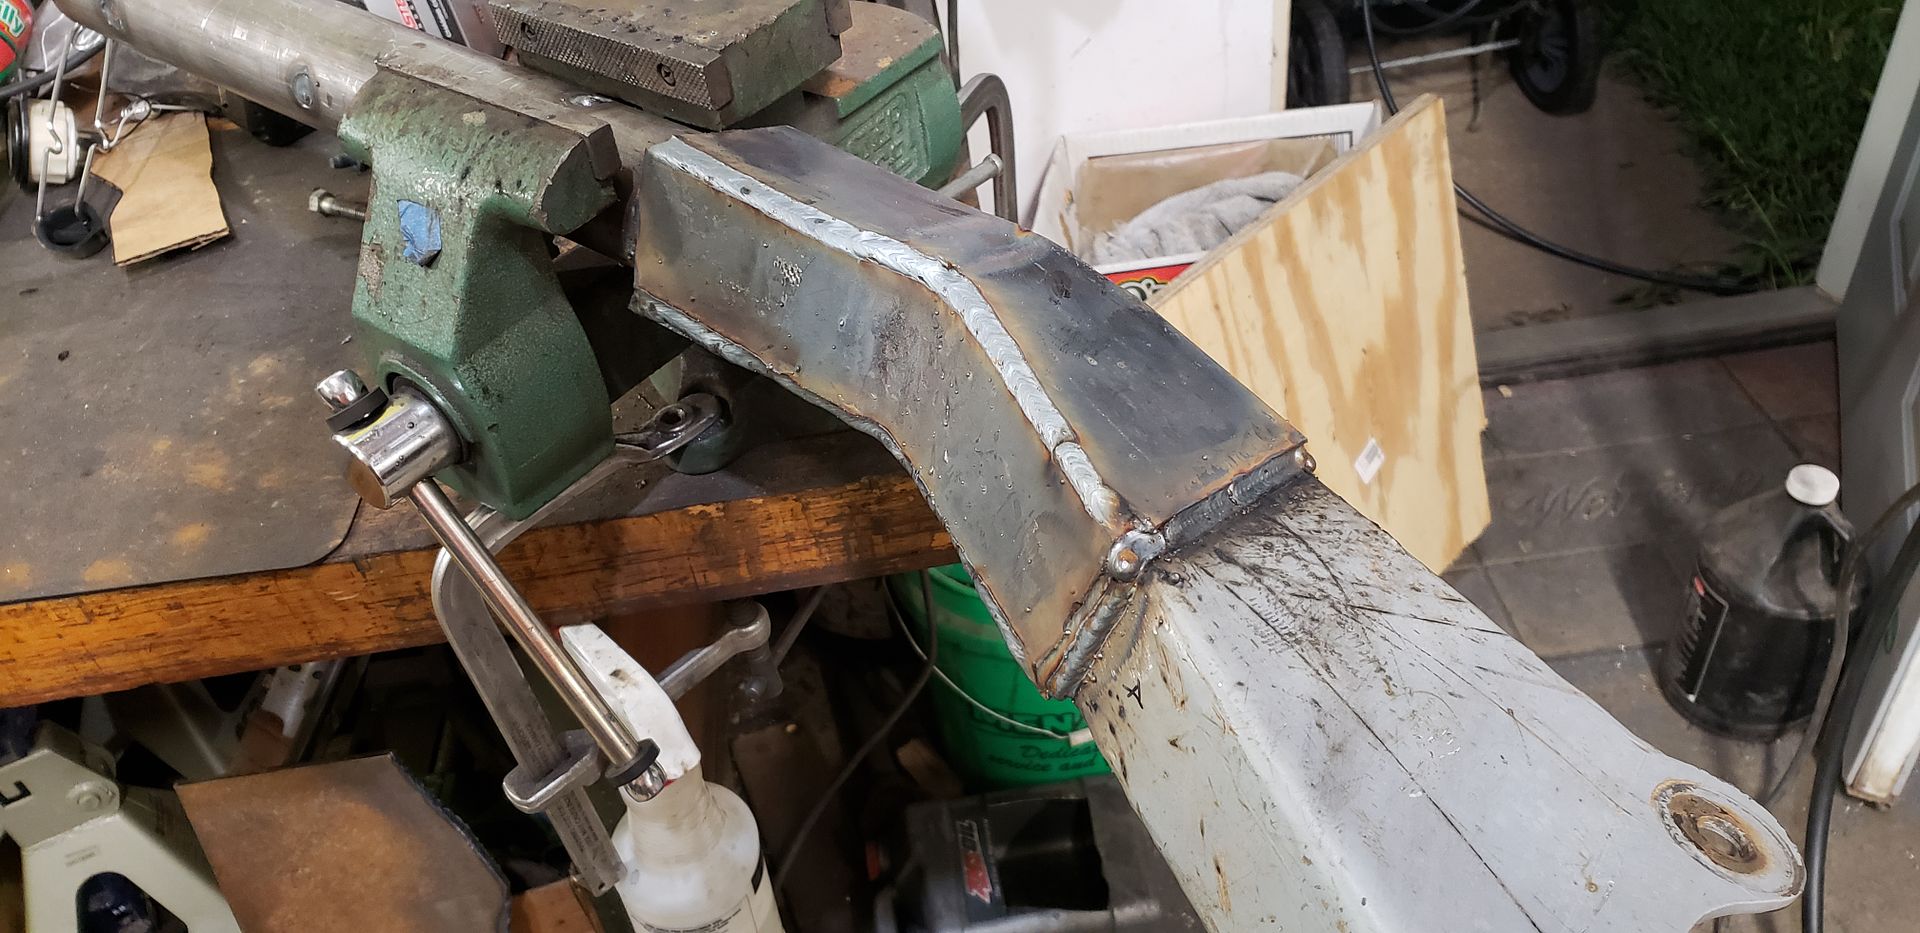
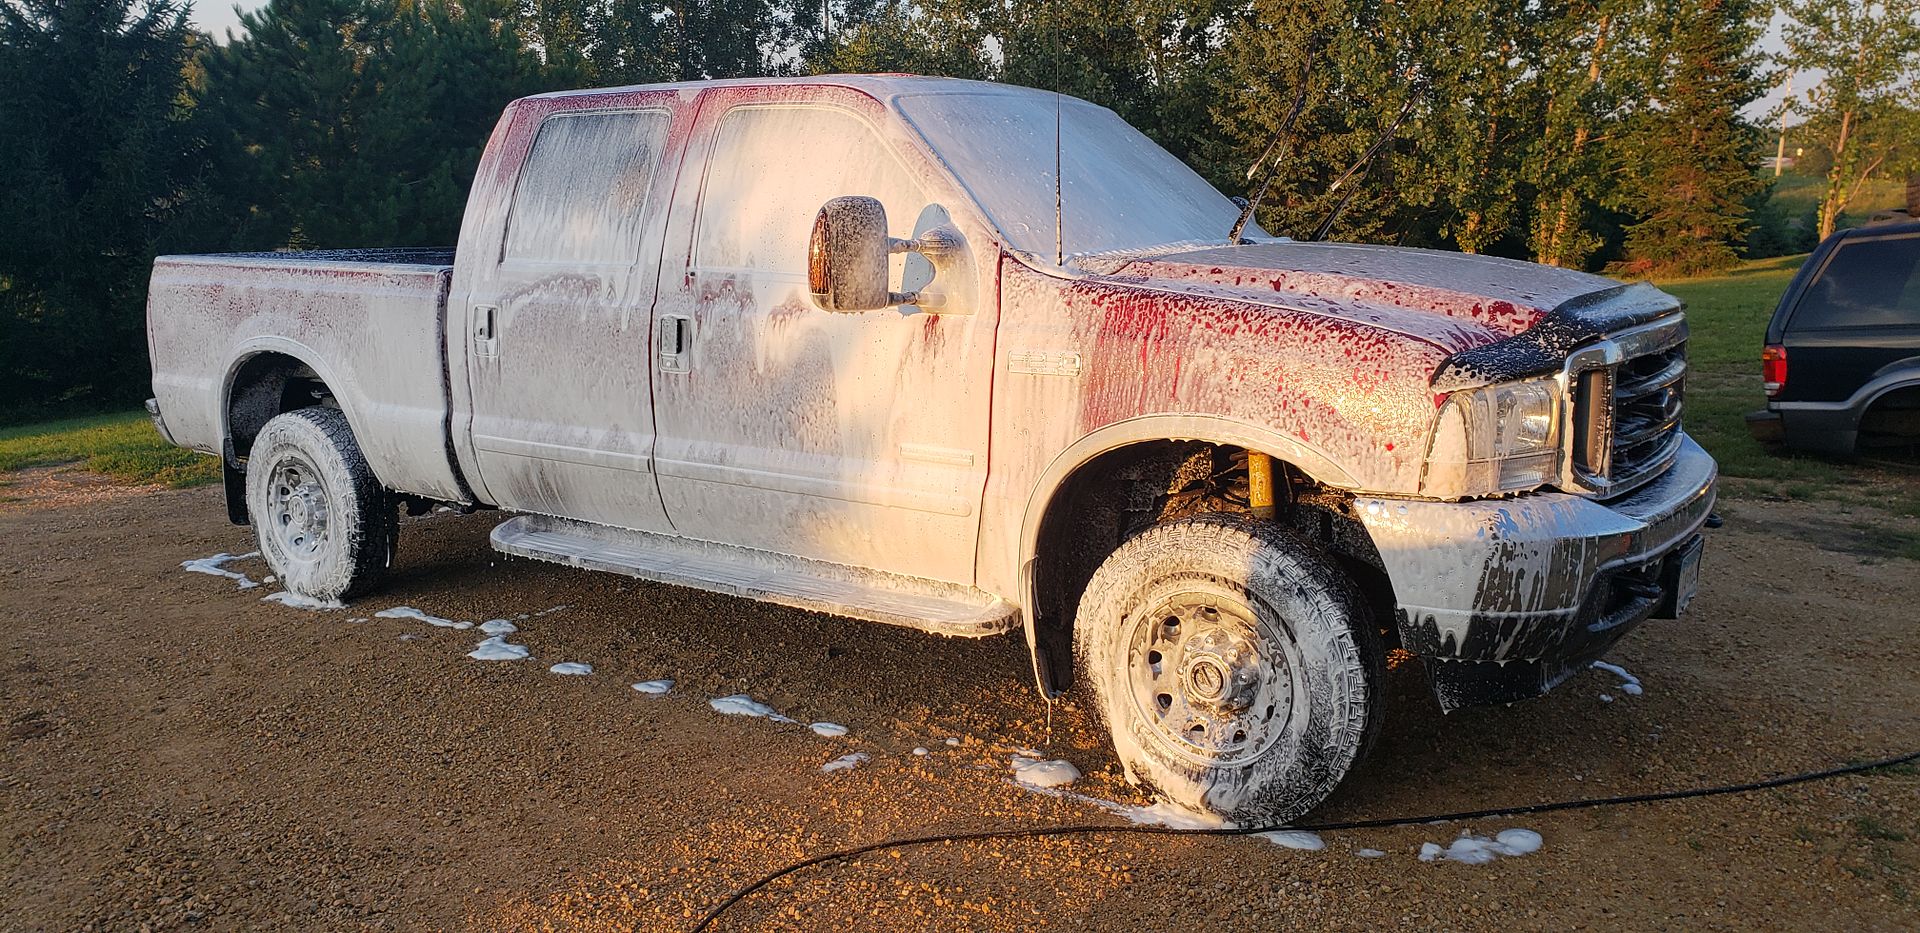
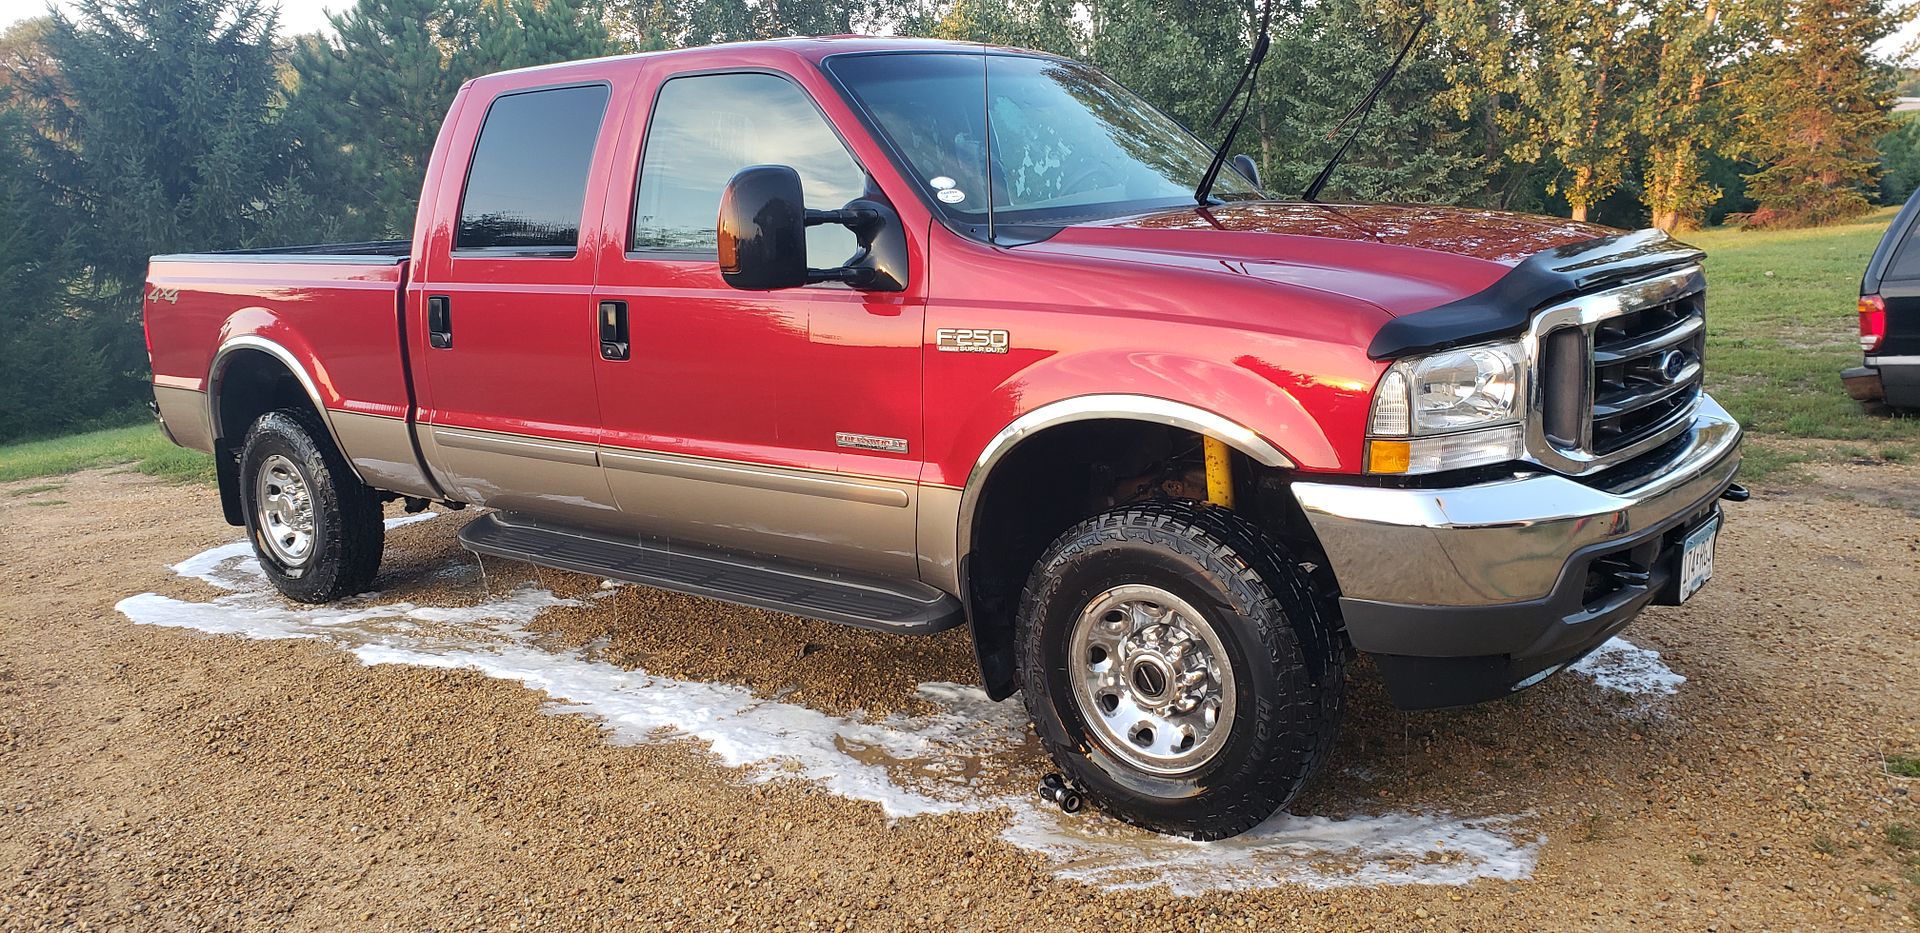
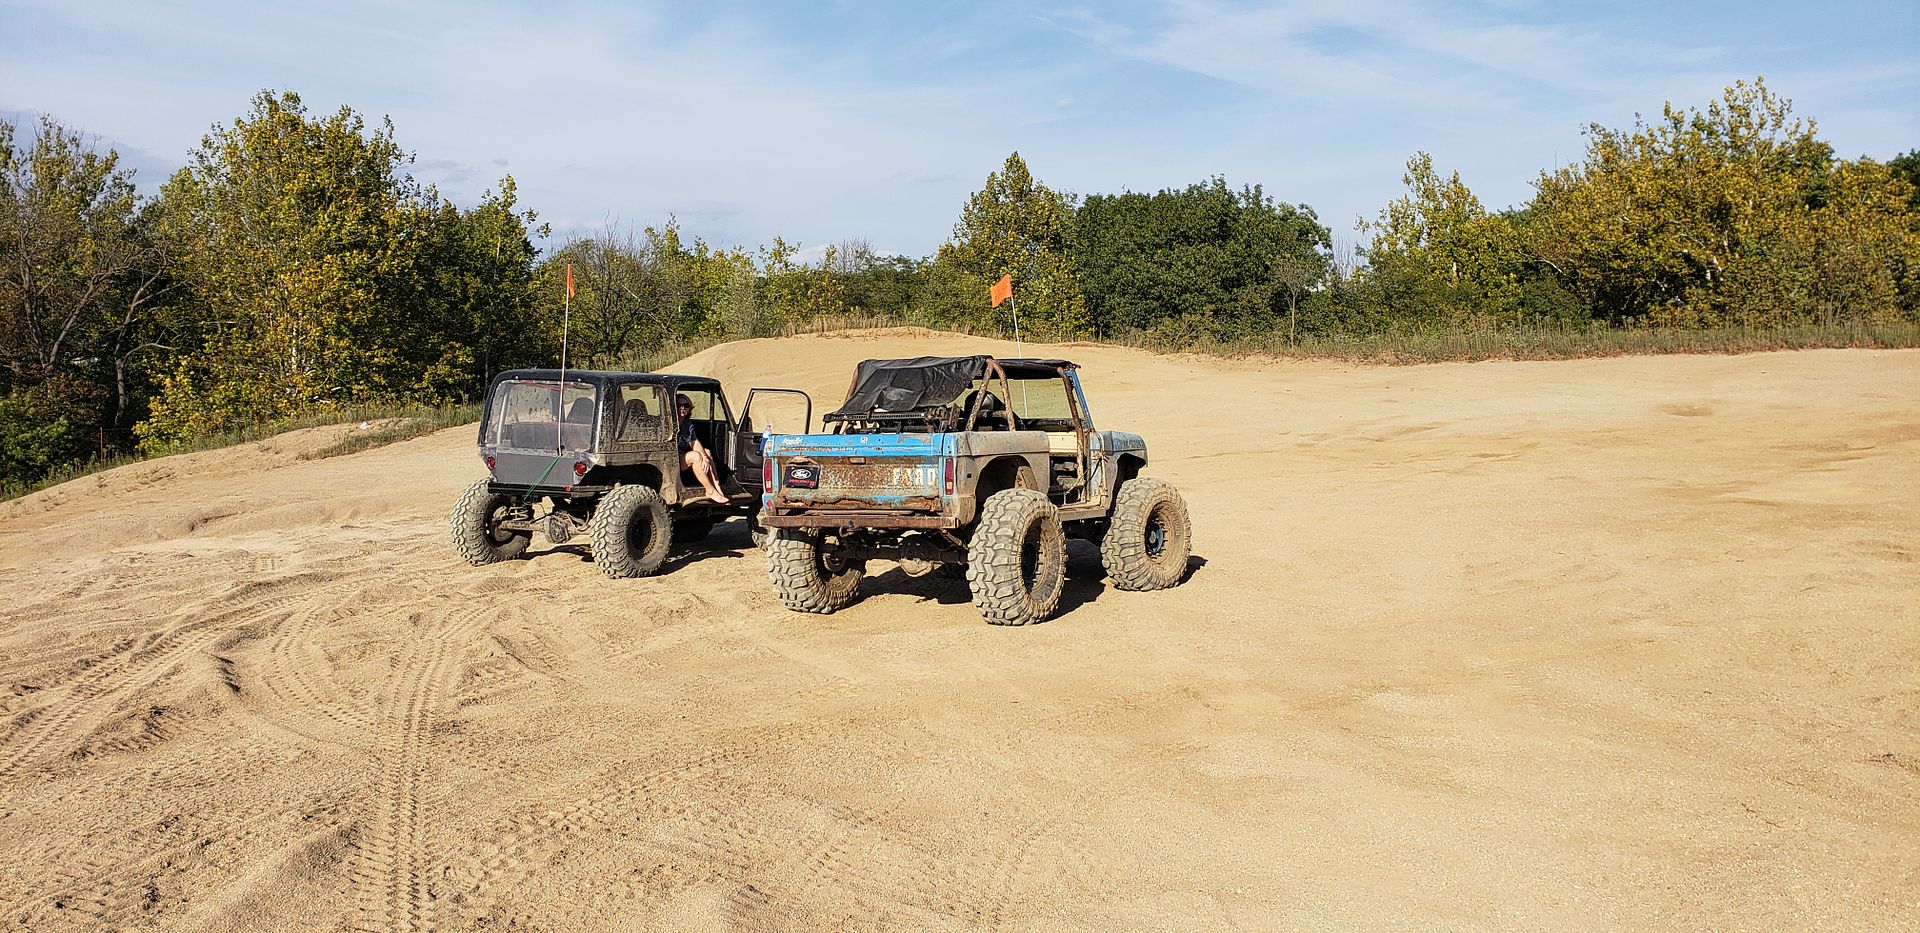
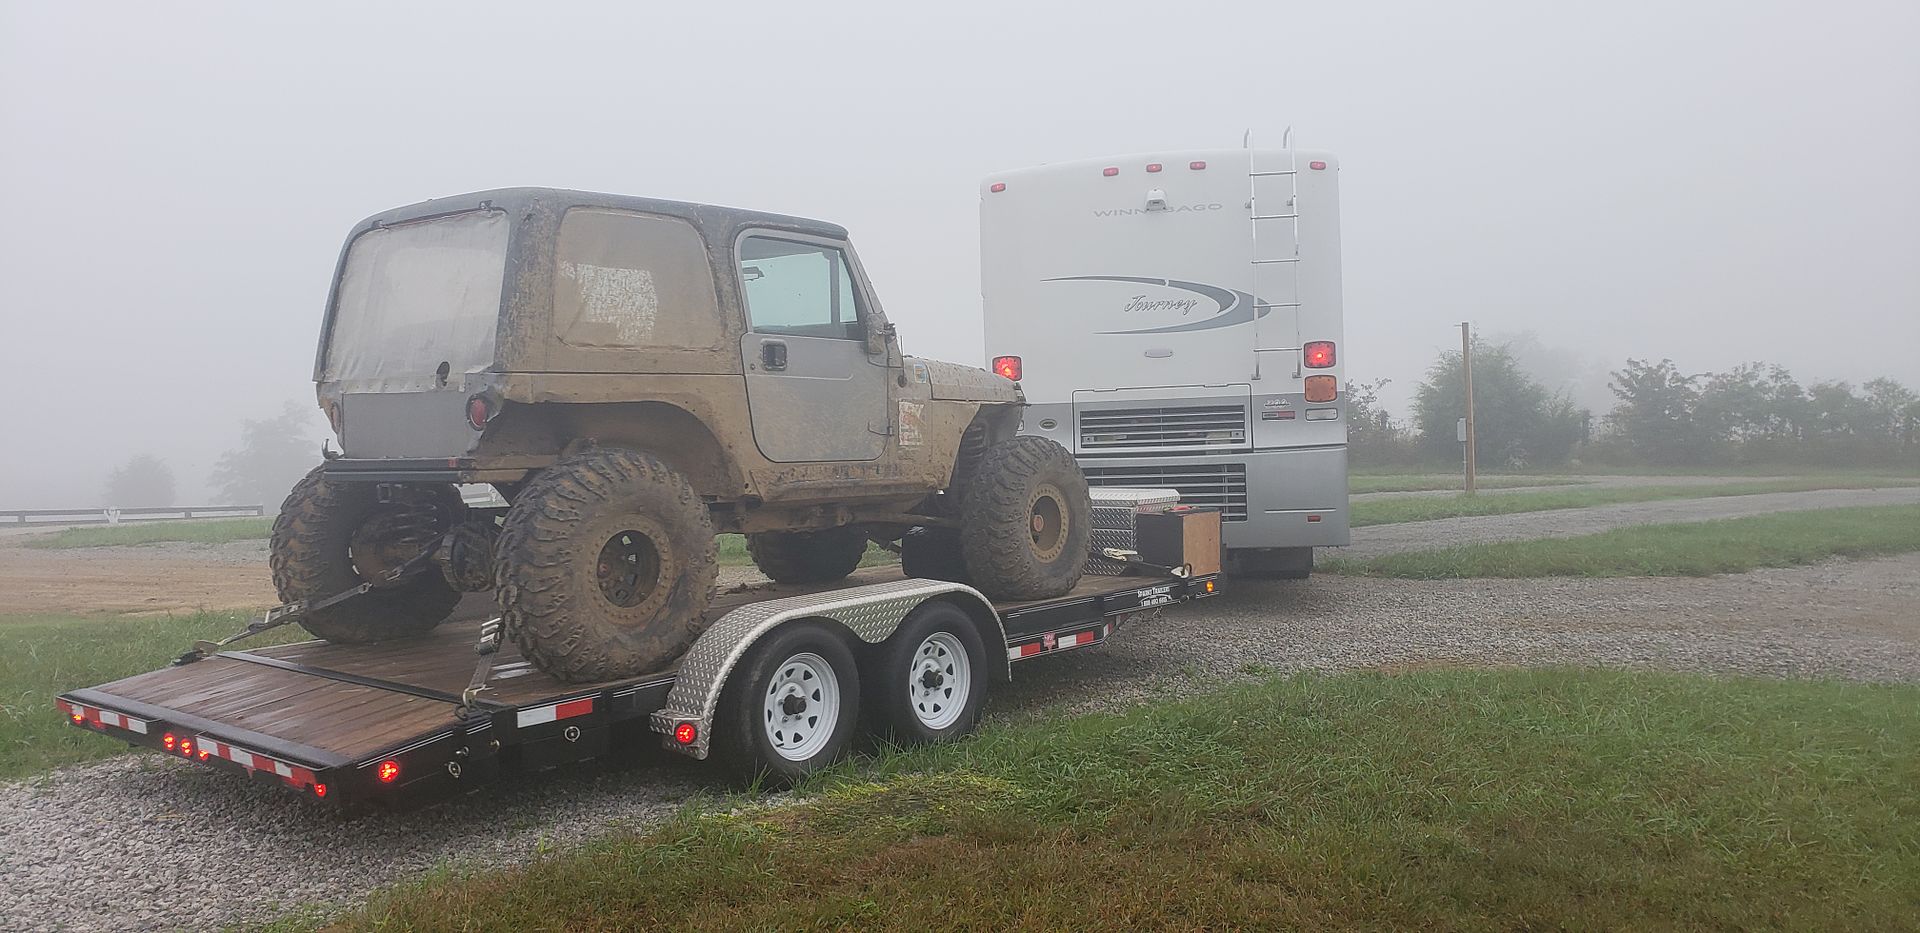
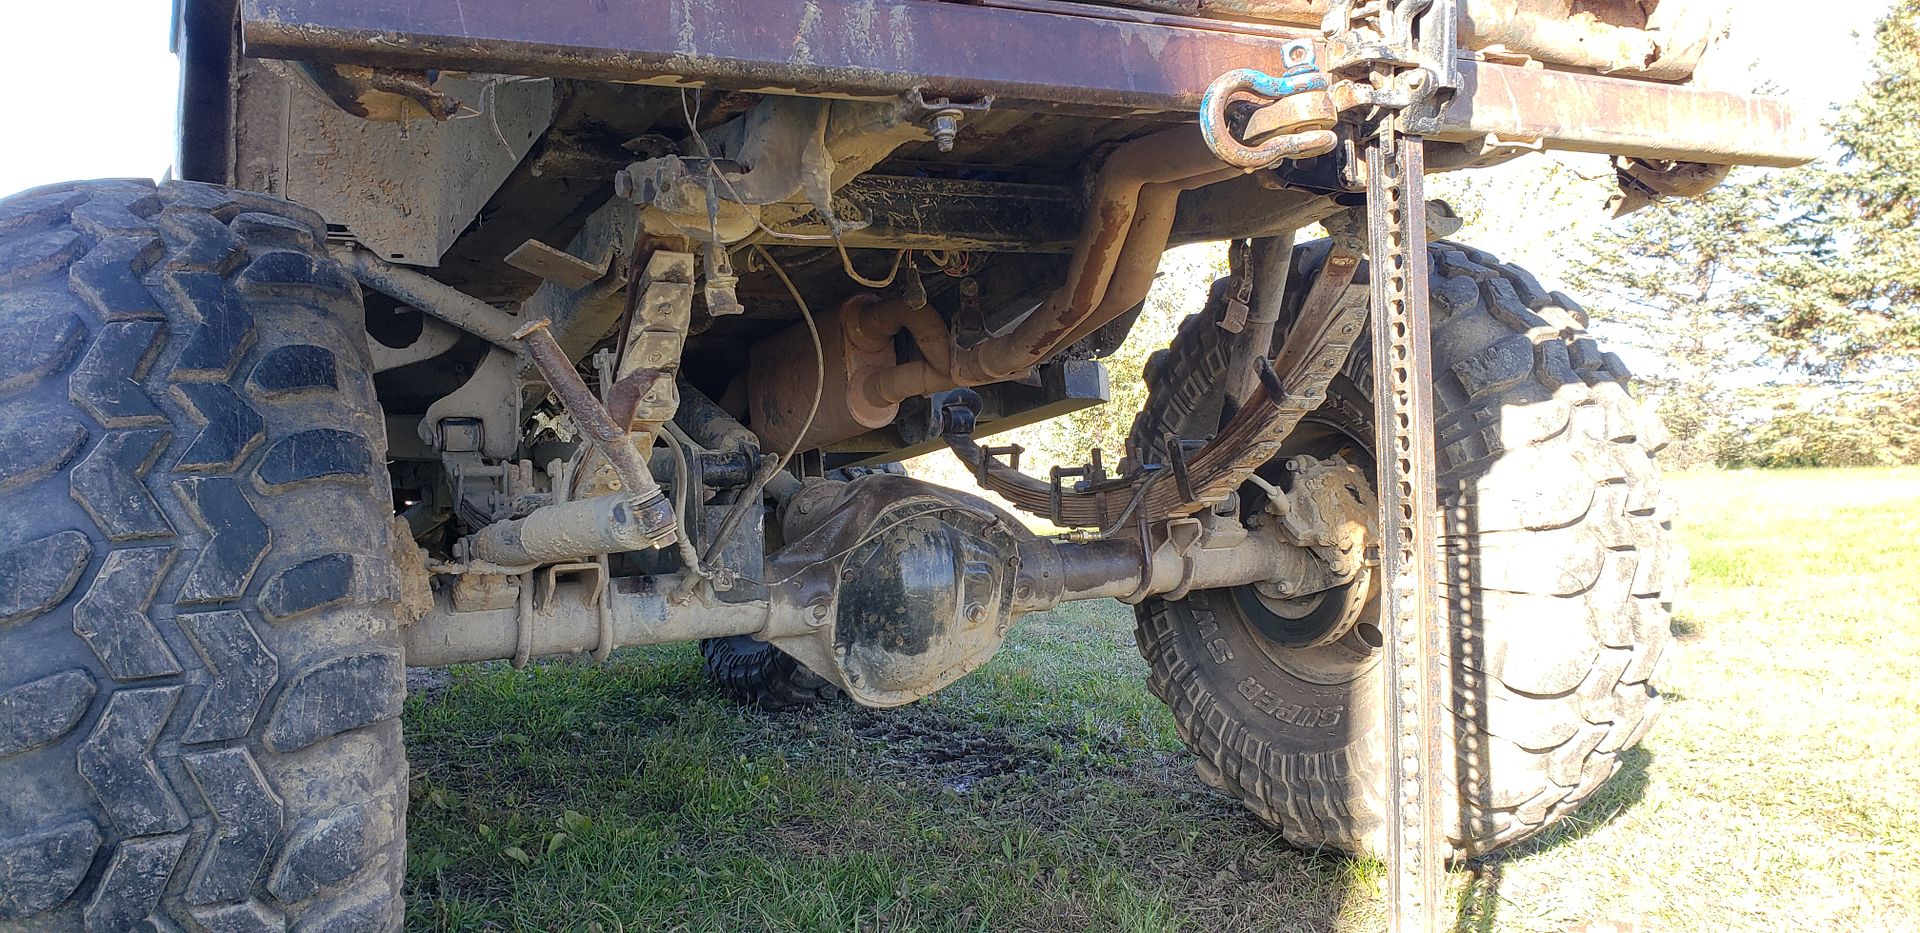
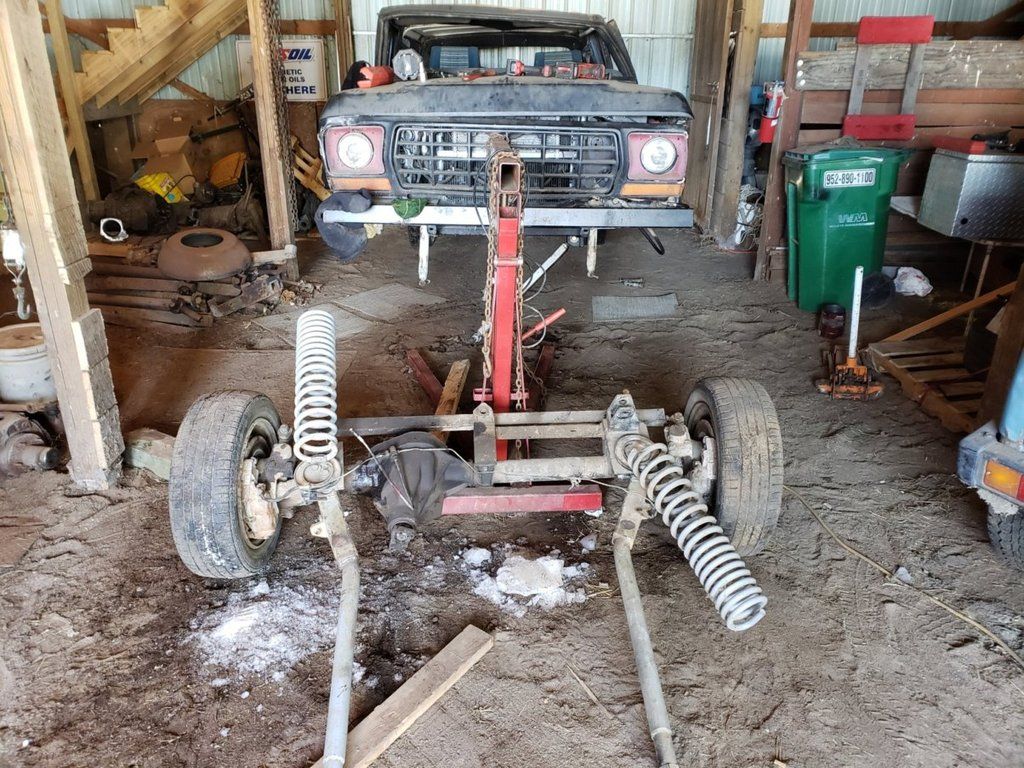
I washed the truck on the trailer and noticed something... :eek:
20180826_151124_zpsdjoa43uj.jpg
 
OP
OP
KyleQ

KyleQ

Bronco Guru
Joined
Apr 24, 2008
Messages
5,480
Well that is no good, that arm didn't even last a season... off to the steel store to fix it for good.

I got a piece of 2.5 x .25 DOM to sleeve the arm to keep it from bending. Of course the OD of the arm isn't exactly 2" so a healthy amount of grinding was required.

20180827_193731_zpsquie9hj5.jpg


I got the tubing to fit down the arm but I needed to straighten it out a bit. It was storming and my father has a press, so off to his place. The only catch, he just lost power.

20180827_213024_zpso5h190ba.jpg


We got the arm straight and the tubing slid down as far as we wanted so we called it a night.
20180827_225910_zpsgurq013i.jpg


The next day after work I drill a bunch of holes in the tubing for plug welds and then burned it all together.
20180828_200151_zpsm3ncbhny.jpg


After a test fit we then made some templates, cut out some steel and with the assistance of a torch we got them set in place and I welded everything together. Really liking this new Powermig 210 I picked up awhile back.
20180828_214157_zps5sraivp3.jpg


Cleaned up and the sides welded on and we have a completely rebuilt arm. If this breaks I'm doing something seriously wrong...
20180828_233528_zpstjrzoej2.jpg

20180828_235512_zps6xyuq7ac.jpg


All of that fun stuff left me with no time to really check anything. I discovered the broken plug wire on the trailer and tossed a cheapy plug off my old motor on there and it works like a champ. At this point it is Tuesday night and we leave on Thursday morning, talk about cutting it close.

Wed morning rolls around and someone wants to take a look at the Excursion as I've got it listed for sale. Well, he showed up with a trailer and enough cash, so off it goes, the DAY before we take off :eek:

He wanted to give it a test so he put his Chevy on the trailer and drove the Excursion home, what a boss. Going to miss that truck :cry:

20180829_123402_zpsbmqox2jc.jpg


Luckily I have awesome friends and that night I took off to go borrow Matt's truck. First thing I did was give it a wash - it sure needed it.

20180829_192605_zpsxuinv3xy.jpg

20180829_193545_zpsscd6a0oy.jpg


Off to the Iron Range we go!
 
OP
OP
KyleQ

KyleQ

Bronco Guru
Joined
Apr 24, 2008
Messages
5,480
The Gilbert, MN trip was a blast!

We got a sweet site next to the playground, not that my son spent much time there anyway...

20180830_140845_zpsdq0cn8rv.jpg


The first thing the guys did was start modding my son's Jeep. The battery up front didn't work well so they heavily modified it so it could go in the back, for traction.
20180830_142409_zps9ajgzqao.jpg


We had great weather nearly the entire time-
20180830_160604_zpsjsnnwkvu.jpg

20180830_162435_zpssy8kskrb.jpg

20180830_162453_zpsuqddf15s.jpg


Here was our crew - a little bit of everything :)
20180831_100831_zpsokc0dudf.jpg


Here is some video I shot that weekend - playlist below and a few highlights taken out as well.

https://www.youtube.com/playlist?list=PLzpb9RL9vjjRrfvWKAdZEsWxE7H0Cc54n

This hill is SUPER long, I'm off the rev limiter in 2nd gear at the bottom of it. Here is a video of Matt and I going down it in his truggy - it doesn't do it justice, but to view from the top kinda leads on to how big this hill actually is. :eek:
https://youtu.be/YIuUEwrThuY

I was actually able to catch some good air only using 2nd gear-
https://youtu.be/SybTSBBdNE8
 
OP
OP
KyleQ

KyleQ

Bronco Guru
Joined
Apr 24, 2008
Messages
5,480
Well the day finally came - I didn't sell the Excursion without having a replacement in the wings.

Here is the new daily/tow rig -

Zz8ThNwr1YnteilEkHAVMGTnOIm09tJqPmFM_zzLP9YpX92IB_zpsubzcsgrj.jpg


I've been saving for a long time and made some good stock decisions and was able to get exactly what I wanted with zero compromises. In May I ordered a 19` F350 crew cab short box Platinum Ultimate edition.

First mods already taken care of - I needed lockable storage in the bed for my upcoming Kentucky trip, so this was a necessity. I went with a Bak Revolver X4 and so far I'm loving it.
mcpt_HlXHXNeL6j4aUQaUMoii3EG3wmju1ATqA0OfuspX92IB_zps15orsyar.jpg


I also picked up a B&W Tow and Stow with the triple ball setup with 7" of adjustibility. These new trucks are GIGANTIC, it barely clears my 7' door and I had to take out my workbenches out of the front of the garage so it would even fit. I tried using the same hitch from the Excursion but it was way too tall to use more than just moving the trailer around the yard.

This weekend my father and I replicated the same work we did on the driver radius arm to the spare passenger side I had brought with to Gilbert just in case something happened. I plan on going over the truck before this week long trip and give the truck a quick tune up and picking up some spare parts along the way.

I just got the truck over the 1k mile mark so now I can safely tow with it, I spent last night greasing the trailer and giving it a once over. This Saturday we are leaving the Twin Cities area and heading for Dirty Turtle Off Road with a few parks on the way.
 

DonaldDouchebag

Bronco Guru
Joined
Apr 17, 2008
Messages
1,097
Hey Kyle, now that your arms are mega reinforced you don't need that extra set, do you? Sell them to me, a local guy!
 
OP
OP
KyleQ

KyleQ

Bronco Guru
Joined
Apr 24, 2008
Messages
5,480
Hey Kyle, now that your arms are mega reinforced you don't need that extra set, do you? Sell them to me, a local guy!

I don't have a pair anymore - I broke the driver side and haphazardly welded it together so I can move the spare parts truck around. I didn't weld it straight and only one bolt actually goes into the axle %)

20180526_140347_zpsargutmkr.jpg


It broke right at the bend into the box, so it's junk any way you look at it. I've got one well seasoned arm left though, and I need it to move my parts truck around as that is where the replacement arm came from.
 

half cab

Contributor
Guru Bronco
Joined
Dec 8, 2010
Messages
16,306
Dang that's a great lookin Super Duty you got. Congratulations :cool:
 

DonaldDouchebag

Bronco Guru
Joined
Apr 17, 2008
Messages
1,097
I don't have a pair anymore - I broke the driver side and haphazardly welded it together so I can move the spare parts truck around. I didn't weld it straight and only one bolt actually goes into the axle %)

20180526_140347_zpsargutmkr.jpg


It broke right at the bend into the box, so it's junk any way you look at it. I've got one well seasoned arm left though, and I need it to move my parts truck around as that is where the replacement arm came from.


How dare you!

;)


Enjoying the thread and your parts breakage adventures.
 
OP
OP
KyleQ

KyleQ

Bronco Guru
Joined
Apr 24, 2008
Messages
5,480
Time for a mega update, boy I've been slacking!

With the accidental destruction of the radius arm I had to build another one before my trip-

20180925_221958_zpsy6whnexj.jpg


I had to bring a spare for the Bronco and all I had was a 39.5 Bogger, wouldn't want to use it, but you never know. One sketchy trailer spare too- :p

20180928_192545_zpsoq7oa4g3.jpg


First time loaded - oh boy this combo is saweeeeeeeeeeet.
20180929_084605_zps2ptjiwmc.jpg


We traveled in tandem with my parents in their RV so I couldn't drive as fast as I wanted, but it was absolutely effortless. We traveled straight through WI all the way to Indiana in one shot.

20180929_161515_zps61treqtg.jpg


20180929_200043_zpscv32emri.jpg


We got a map of the park the next morning and went looking for adventure. We had quite a few people in camp chat us up and crawl over our rigs - we were probably some of the most built trucks that happened to be there that weekend.
20180930_111252_zpsxrl4xbur.jpg


Flags on and we headed out and found LOTS of "dunes" that were more like pea gravel than anything else and lots of dirt bikes and quads.
20180930_112840_zpsrfsz8tdn.jpg


We hit some of the local hot spots and had some fun.
20180930_115732_zps0ttuz7y3.jpg

20180930_171742_zps7g5lcsni.jpg

20180930_172027_zpsipqbt8o3.jpg

20180930_172043_zpshajeputi.jpg


Here are a few videos I uploaded, most of it is raw footage but it gives you an idea of what is there.

https://www.youtube.com/playlist?list=PLzpb9RL9vjjSSnxpUVyCJYwfvLcrkr5sn

The park was a bit underwhelming, we didn't get to explore all of it, but I don't think we missed much. Had the most fun beating around the dunes-
 
OP
OP
KyleQ

KyleQ

Bronco Guru
Joined
Apr 24, 2008
Messages
5,480
Everything went well at Badlands, no real issues and then after some serious dune bashing my 351w started making some funny noises on the way home. I immediately shut it down and checked the oil, which was oddly low. I put two quarts in it and fired it up and it still made the noise, not good.

I got back to camp and we tried to figure out where the noise was coming from, it was in the heads for sure. We started with the driver's side valve cover and didn't find anything out of the ordinary, oil was getting to every rocker and nothing looked out of place.
We were starting to get worried as we thought that was the side that the was coming from but we pushed on and yanked the passenger side cover. Low and behold it was a simple fix, one of the poly locks on the rocker arms came a bit lose and was the culprit. A quick call to a friend back at home and I had the rocker adjusted and the lock tightened down. It was tough as I didn't have internet and could only make a call standing on top of a picnic table.

20180930_190828_zpslr3ee3ae.jpg


Oh, and on reassembly I found that the drivers side valve cover had a hole in it from a previous bout of damage and that explained my oil consumption/leak that I was tracking down. Some JB Weld and I was set. I think I drank the rest of my beer that evening, I was worried my trip was going to get cut awfully short.
 
OP
OP
KyleQ

KyleQ

Bronco Guru
Joined
Apr 24, 2008
Messages
5,480
The next morning we headed south and got to Redbird State Park and stayed at this great little campground. Southern hospitality was in full swing, and we weren't even that far south yet.

20181001_111554_zps9zuhoxa1.jpg


We got to the trail head and thankfully found a map and rejoiced at the fact that they had marked trails and hills to help guide us along.

20181001_112426_zpsvsogqkpw.jpg


We didn't travel far but the terrain drastically changed and we were in for a few surprises. I didn't take many pictures but recorded a lot of video-

20181001_135426_zpsio2nzlpj.jpg


20181001_151941_zpscjvce2pf.jpg


Again, mostly raw video to see what the park is like. We had a bad scare on "It's just a hill" where I flew up this smooth hill to find the other side was a cliff face and the trees were all smashed up from people not being able to stop. This led to a very scary reversal down along rutted hill and aggro'd the wife for the rest of the trip regarding safety. The video does it no justice as usual, it was totally washed out on the left and to the right led nowhere. Pucker factor was huge.

https://www.youtube.com/playlist?list=PLzpb9RL9vjjQlIBd6h1wErdbT_OxTx8xa

This park had tons of very steep hills, tons of trees and bottomless mud pits. If you were not careful you could easily roll anything over with the way the trails rode along the spines of some very steep hills. It was a very nice change from the Badlands but still nothing spectacular IMHO.

The Bronco remained trouble free along with the Jeep - smooth sailing.
 
OP
OP
KyleQ

KyleQ

Bronco Guru
Joined
Apr 24, 2008
Messages
5,480
The next day we left Indiana and crossed the Ohio River and made our way into Kentucky. It was quite interesting coming in on 421, you cross the river, take a few abrupt turns through town and then start climbing this nasty curvy hill with little to no shoulders and a serious cliff edge view as you climb. The skinny rangy roads continued all the way to Dirty Turtle and were seriously tiring to drive with a trailer, I couldn't imagine doing it in a RV.

20181002_132534_zps5vr7agj4.jpg


20181002_191909_zpsfv9cmvad.jpg


DTOR was a beautiful park with excellent staff and the most awesome fully air conditioned bathrooms with showers.

20181003_151012_zpsowdybhc5.jpg


Our camp spot overlooked this race track and we couldn't ignore it forever.
20181003_151018_zpssbymnmgk.jpg


20181003_154958_zpselc0w64l.jpg


I didn't take many pictures while we were out and about as it was all hands on deck driving around here. This is clearly a rock bouncer park and with it being wet with the clay and shale, it was really tough to get around. I've got a ton of video that I need to organize and playlist before I'm going to share it, but the park was interestingly laid out. It was basically a series of "trails" with hills off to the sides that you could run. Most of them were very steep and very short. If you didn't go back down one of these you would be then driving for a few minutes to get back to where you just were. It took us awhile to figure this out and we spent a lot of time just driving around and looking at insane climbs.

We did run into a bouncer who was practicing for Boo Bash and after playing around on the hills they race and then watching a bouncer hit them at speed was absolutely bonkers insane what these guys do. We all agreed that we want to come back but not with our trucks but to attend a SRSS race in person.

After we got our fill of tooling around in the woods we dropped off the wives and son and we hit the race track.... hard.

Let's just say I jumped the Bronco until I ripped both rear shock mounts off and my father jumped the Jeep until the fuel pump basket shattered in the cell. Totally worth it - nothing like getting some serious hang time off the table tops.

20181003_153851_zpsqkyvcjro.jpg


20181003_153857_zpsh4xzrhlt.jpg


20181003_154717_zpstu7hmze5.jpg


Ahh, that isn't supposed to come apart like that...
20181003_155555_zpsoadhfyzt.jpg


Fishing for more parts ;D
20181003_155930_zpsmpqamalb.jpg


We were able to just plug the pump in and leave it hanging by the wires to get it to drive onto the trailer, luckily our 4x4 part of the trip was complete.
20181005_085312_zpstjleviru.jpg

What a way to end it...

We packed everyone in the Super Duty and took off to Louisville for a destination everyone was looking forward to.

20181004_103309_zps0plpxqvj.jpg

20181004_101605_zpsehjidke8.jpg


We had an amazing tour, bottled our own Knob Creek single barrel and ate some delicious BBQ.

We headed back to DTOR after dropping off my wife at her hotel (we did this entire trip because she had a business conference in Louisville) and called it a night, we were going to be heading back home in the morning.

We drove all the way through into Iowa and called in a night in a Walmart parking lot of Grinnell, Iowa - a cool 540 miles.

We got up and hit the road and eventually got to see what I had be oh so looking forward too at this point - home...
20181006_113553_zpsiusfjpga.jpg


The new truck was smooth as silk and traffic was moving - didn't even realize I was flying along at this speed with a trailer, lol.
20181006_134637_zpspoww1sjr.jpg


Made it home safe and sound without a single incident. My son was an angle the entire time and didn't even cry for mom at all on the entire trip home.

At this point it was early October - I jacked the truck up for a good power washing and foam cannoning and then stuck it in the barn and didn't touch it until the beginning of February. I had wrenched and wheeled my fill at that point and was just done with it in general.

20181019_161315_zpst8fsqsx4.jpg

20181019_155631_zpsf94yz8yc.jpg

That droop without shocks... haha. I'm not touching it until I narrow, stretch, link and air strut the rear.
 
OP
OP
KyleQ

KyleQ

Bronco Guru
Joined
Apr 24, 2008
Messages
5,480
Fast forward to now, February, and it's time to Winter wheel, but I haven't touched the truck since I parked it.

Into the garage and straight onto the screw jacks to investigate all of the damage on the rear suspension.
20190209_151338_zpsu8s9qgmi.jpg


The racetrack claimed both rear factory shock mounts completely off the frame. My other bump stops did nothing and I'm thankful the shocks kept the tires out of the body, otherwise I'm fairly certain things would have gotten ugly, fast. All I'm going to do is clean things up and weld it back together and run it how it's been, I'll wait until I completely re-do the rear to change it. It works for now- fairly well too.

Earlier in the year I had started collecting parts to get a PSC P pump mounted where the Explorer A/C compressor sat and I'm back to working on it and I was able to nearly complete that yesterday.

20190210_201138_zpsow0i2hwm.jpg

I have the pump mounted and the reservoir mounted off the pump bracket and was able to get a good fluid angle by placing the reservoir all the way back by the master cylinder.

I drilled and tapped all of the bolts you see as I've got very little clearance in the brackets and with how large the setup is I wanted to be able to take it apart if I needed to service stuff in the future. It added a ton of fab time, but I'm sure it will pay off down the road.

20190210_201147_zpsbm6webep.jpg


This allowed me to move the coil and mount it off a bolt in the intake I wasn't using. (I'm wondering if that is where it was supposed to be all along).
20190210_195351_zpspdbckofq.jpg


The money shot - it totally clears the hood!
20190210_201205_zpswyio0kmz.jpg


The plan is to get a longer belt on it tonight, move the return and pressure lines over to the new pump and give it a test. If everything works out I'll yank the old pump and reservoir and pack it just in case something goes sideways. I've got another hood I plan on swapping and putting a scoop on it for the intake now that nothing else pokes through it %)

11 days until I winter wheel, and with the amount of snow we have been getting, they are going to need me to break trail. (It's what I get having the big truck in the group - lots of rev limiter coming up)

After the old pump is gone I'm going to try and mount a chain off that spot to keep the engine from moving so much - it loosens up my exhaust and plays hell with the FiTech tuning. I also ordered some exhaust flex joints in an attempt to allow the exhaust some movement before it rips the six 3/8" bolts loose on the collectors.
 
OP
OP
KyleQ

KyleQ

Bronco Guru
Joined
Apr 24, 2008
Messages
5,480
We had quite a snow storm come through and that meant I had to plow snow for about 16+ hours over two days. Everything was going fine until I decided to be a good samaritan and pull a fairly new pickup out of the ditch. I got it done, but at a cost...

W7AYcYzSTY2rYAWfI4A8LA_zpshqcueypi.jpg


It broke just the outer ears off the stub and sent a cap flying with the entire chunk of the shaft with it. I kept on it and the truck came out - he said thanks and took off.... %)

That slowed me down and I finished the rest of the jobs in 3wd (the Bronco has an Aussie locker up front and I run stock shafts with Spicer life joints and full circle snap rings). The rest of the night I heard horrible sounds as the shafts continued to destroy each other, whatever.

I had to get home, get the trail rig finished and ino the barn so I can let the plow truck melt so I can swap shafts (if I could get parts) the next day after work.

A friend hooked me up and I got an inner, outer and a lockout to get me going. I slammed the shaft swap out, including cutting the mangled shaft apart through the knuckle in about an hour. I break at least one shaft every single year, so I took the easy way out and just welded the caps in this time.

Aw-G7uFlRlSiyALvwzOEzA_zpsjlqn0qm4.jpg


Getting that work done meant I did get the Bronco done - after plowing for 15hrs I came home and yaned the old pump, filled the new system and started bleeding it. I went to swap belts and the tensioner stripped out, thankfully I had the 18 year old original in the barn (hoarding comes in handy). The belt was coming off with just the starter so I ended up taking the top idler pulley off and running a shorter belt. I used the steering wheel and was pushing the tires lock to lock to get all of the air out. I used every last drop of fluid I had on hand and then used the plow truck to drag the Bronco outside so I could start it (it was well beyond midnight at this point). The Bronco fired right up, the pump was whisper quiet and I could steer lock to lock with my pinky finger at idle. SUCCESS!

5GbdgW7ATZKrfiE6OIGv1Q_zpssvxao4p5.jpg


Next thing to tackle was a weeping water pump.
aLf5a23oSdunDKXw44dtgg_zpsnjyjyp1z.jpg


I then yanked the exhaust to install some flex joints in hopes to keep it from constantly loosening up on trail rides.

RADHnwOYRhOdvm_4dYILSQ_zpshv4pjmxl.jpg


I got the flex joints in and and welded up - that movement sure made installing the exhaust a real pain, but as long as it works I'm all for it.
yM8PB7NBSamfsCvoVBFegA_zps2vq51ab4.jpg


A quick oil change and that ended my night. Today I'm going to weld my rear shock mounts back on and go out for an extended test to make sure everything will be good for next weekend's snow event.
 
OP
OP
KyleQ

KyleQ

Bronco Guru
Joined
Apr 24, 2008
Messages
5,480
My test showed an immediate fail and the exhaust ripped the tube past the flange and created a mess. I immediately ordered up some v-band clamps and made a quick trip to the exhaust shop between plowing sessions.

s-XQHC4xSeyzSpy7ScjcwQ_zpsjbji86bx.jpg


The trip was a ton of fun, there was a bunch of snow and my only issues were pushing the return line off my power steering setup. Luckily I had enough fluid, but annoying anyway.

le-2RV_SQ7avFeTpnTbEpQ_zpsdrmsoray.jpg


On to the next project - gearing.

This whole time I've been on 4.10 gears in the axles as my early Atlas purchase let me avoid re-gearing the one ton axles. Luckily I've got a spare set of axles that should work nicely.

This truck has 5.38 gears with Detroit up front and a spool in the rear. It had Cage arms on it as well, so besides a track bar, it is fairly bolt in.

This truck is going nowhere on the awesome roller car tires and I only want the front axle right now, so I had to get creative.
n4xgH0RVRC616JhDBLn9JQ_zpsewrmxdor.jpg


Success - and I didn't get crushed under that Bronco in the process!
wiEddJVfSIGKCofJkCZalQ_zpss5cjadix.jpg


With the help of my plow truck I was able to get it into the garage and stripped down. I'm swapping everything over from my existing axle onto this housing.
X7Zdw6ZNQ1uP-w6ZJ7Ivlw_zpscp8eiqle.jpg


I'm going to re-do my steering setup with the addition of an Artec Fab full hydro mount to hopefully gain some more clearance from the oil pan and offer my steering a bit more armor for the rocks we play in. I've got to hack off that steering setup and possibly the track bar mount as well.

I've got to swap the 1310 yoke for my 1410 flange and check to see if there is a crush sleeve or shims in there (I really hope there isn't a crush sleeve) and do the same for the 10.25. On the 10.25 I also have to cut off my anti-wrap bar brackets and get them welded onto the new housing as well. Should be interesting... Hope to go wheeling in a little over six weeks.
 
OP
OP
KyleQ

KyleQ

Bronco Guru
Joined
Apr 24, 2008
Messages
5,480
Well, last time things will look like this - it's been a faithful setup for nearly 10 years.

20190329_165025_zpsivkssedw.jpg


Bring on the horror that resides inside this absolutely destroyed differential. The bearings were well beyond shot and the pinion was pretty much a joystick at this point -

20190329_165643_zpspbmbmqv8.jpg


Here is proof you don't need to turn your spider gears into a pile of molten metal. I had welded this so I could take this apart and put a lunchbox in it but just never found the need. I don't know how this survived - :eek:
20190329_170631_zpsphovusft.jpg


Out came the axle, afterwards I cut off the air bumps as well.
20190329_231147_zpsw8bb1mqq.jpg


Next came the tedious process of cleaning everything and moving it from one housing over to the other.
20190403_221254_zpspstgg7oa.jpg


I slung the axle under the Bronco and had a surprisingly easy time getting the arms bolted up. I mocked up a coil and realized that I was going to have to move where the cups sit as the other setup had them moved further back.
20190405_201228_zpsmyskwgym.jpg


Clearanced everything and got to welding
20190407_145837_zpsrntr2c53.jpg


Coils bolted in, brakes on and steering cylinder in place. Looking good!
20190407_180940_zpss3kpje4z.jpg


My steering links are too short now but luckily a friend had extra materials from his 05+ Superduty swap. Once I get those built, I've got to drill out, shorten and weld the track bar to the axle, get the steering cylinder bolted down and power steering fluid in I'll be done with the front. I will be moving my bump stops to the front of the axle but I need to move the battery box and I'm racing against the clock to be ready for the MN4WDA Spring Convention on April 27th.

I got a new Champion Radiator to install. I'm also moving my power steering cooler out of the wheel well to in front of the radiator. I'm also considering moving my trans cooler to into the radiator and moving my other cooler from under the back seat in front of the radiator as well.
20190402_183006_zpslfimotpk.jpg


My goal is to get this stuff done before my Ruff Stuff shipment shows up so I can immediately start work on swapping the rear axle. Swapping form a D70 to a Sterling 10.25 - hoping the driveline length doesn't change too much. I've got a driveshaft spacer I can remove and I can move the axle from the spring perches, so I hope I'm good. Then it's just shock mounts, anti-wrap mounts and maybe a little brake work and fluid change.
 
OP
OP
KyleQ

KyleQ

Bronco Guru
Joined
Apr 24, 2008
Messages
5,480
Been some time since I've updated, details below.

Got the D70 out, cut the anti-wrap off of it and welded it on the 10.25

20190417_183713(1).jpg


20190420_142607.jpg


Everything worked great, new gearing was awesome but I ran into a bit of a snag... this is at temp, at a few thousand RPM...

dX1O_iArREWCjRu3NGeihw.jpg


Out came the old and the even older goes in. Oh boy, was that a tough reality going back to a junkyard build.
mTzlkZZ6Tr6kNIxEELb4Nw.jpg


This was the last time I saw this motor for ELEVEN months :eek:
FJq0mVocSI_fRh4OOyzxYQ.jpg


Got it back a few weeks ago. Ended up needing everything, I had oblonged the rods, trashed the bearings, heads were assembled wrong with wrong parts... everything was touched. Ended up with new forged JE pistons and Eagle I beam rods, rev limit is going to 6500 and I'm not even going to worry.
20200801_145220.jpg


Yanked the old old motor out and gave everything a needed bath.
20200801_165118.jpg


Happy valves ;D
20200801_175420.jpg


Back together, it's odd to even drive it's been so long.
20200802_162616.jpg


Time to install engine insurance, the Ranger radiator is tiny next to this.
20200808_155359.jpg


Fits good, oh soooo shiny!
20200808_174406.jpg

20200808_174356.jpg


Need to reach out to my fabricator friend to get some tabs welded o this radiator and to modify the shroud to catch more of the fan blades.

Once this is back together I'm starting on my next project, it's another Bronco and it's going to make people MAD.
 
Top