• Welcome to ClassicBroncos! - You are currently viewing the forums as a GUEST. To take advantage of all the site features, please take a moment to register. It's fast, simple and absolutely free. So please join our community today!
    If you have problems registering or can't log into your account, please contact Admin.

Project: 76, Orange Special Decor

gnsteam

Contributor
Bronco Guru
Joined
Jan 29, 2010
Messages
3,666
Loc.
Lincoln NE
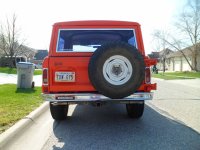
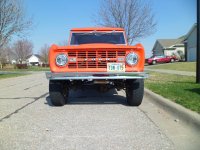
Well for my 1500th post.;D I thought I would start a build thread. Not a full frame off build, more of a, maintain and upgrade build, keeping the Bronco as drive able as possible, so I can enjoy it. The intent of this thread is to document the changes, upgrades and experiences along the way.

Here's the Bronco.:cool:
http://classicbroncos.com/forums/dto_garage.php?do=viewvehicle&vehicle_id=1150

The day I picked it up.;D
http://classicbroncos.com/forums/showthread.php?t=188576

The day it became my daily driver.;D
http://classicbroncos.com/forums/showthread.php?t=201094

The day it was retired from daily driver status.:eek:;D
http://classicbroncos.com/forums/showthread.php?t=231535

My plans for the 76.
Upgrade the Bronco to be more road worthy and comfortable for long trips, along with upgrades to improve it's off road capabilities for light to moderate trials. I want to be able to drive the Bronco anywhere from coast to coast, to attend as many Bronco related events as possible.

Here's a brief list of the future major upgrades, in order of priority.
Adjustable track bar. (Already purchased)
Wild Horses, 2.5" suspension lift kit with Bilsten shocks.
"Y" to "T" steering linkage upgrade.
New wheels and tires. Following the vendor mass buy, for 17" x 9" MHT Indy slots. http://classicbroncos.com/forums/showthread.php?t=236592
And looking at LT315/70R/17 Goodyear Dura Tracs.
One inch body lift.
Body repair and repaint to original colors with new decor stripe, and color matched Bronco design fiberglass flairs. I'm also in the process of upgrading to the Sport trim level. I only need to install the grill trim and the Sport badges, which I already have. Sport interior upgrade will come later.
Plate bumpers, front with winch and rear, featuring tire carrier, and possibly fuel can and cooler racks.
Rocker protection.
Explorer EFI 5.0 engine and 4r70w tranny upgrade.
Twin sticks.
Vintage air AC.

Well that's enough for now. I'm sure my plans will change many times. As we all know it's always a work in progress and we never really finish.;D

Fred
 
Last edited:
OP
OP
gnsteam

gnsteam

Contributor
Bronco Guru
Joined
Jan 29, 2010
Messages
3,666
Loc.
Lincoln NE
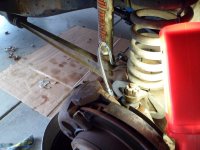
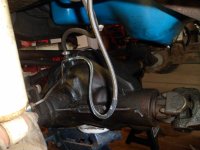
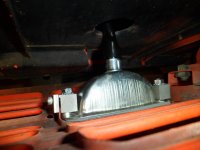
Over the weekend I started upgrading the brake system. I've been in need of a new brake booster for some time. The diaphragm was leaking, causing a vacuum leak, resulting in poor idle and ruff running. Especially during low temperature days on cool start ups. So along with a new booster. I installed a new master cylinder, new front brake pads, (rear brake shoes and wheel cylinders replace last summer) and all new braided stainless steel brake lines, front and rear. As you can see from the pictures. The brake lines where on borrowed time.:eek: I also went with the extended length axle to frame lines in anticipation for a 2.5" suspension and 1" body lift. I didn't get completely finished Sunday. I still need to install the rear axle brake line, hook up the vacuum line and brake fluid lines to the master cylinder. Then bleed the brakes.
 

Attachments

  • phphsLMe0PM.jpg
    phphsLMe0PM.jpg
    111.9 KB · Views: 264
  • phpD0npHGPM.jpg
    phpD0npHGPM.jpg
    101.7 KB · Views: 240
  • phpu3YwznPM.jpg
    phpu3YwznPM.jpg
    128.1 KB · Views: 246
  • php8JxKcWPM.jpg
    php8JxKcWPM.jpg
    114.4 KB · Views: 226
  • phpO8voB1PM.jpg
    phpO8voB1PM.jpg
    105.2 KB · Views: 239

matts460

Sr. Member
Joined
Feb 3, 2013
Messages
582
Ive been driving mine daily every other week for over a year now. Would you say you've had good luck with yours all this time? How many miles a day do you drive for work? Just cuorious. I had painted my 77 Ranger orange and I have wanted to paint the special décor stripes on mine but cant deside Black or white. LOL Sounds like you think like me... Make a list and cross off each thing till done! Other wise youll forget what you wanted to do or upgrade/change and then remember when you have no money for it! LOL I have a 36 mile round trip for mine and the mild mod 302,4bbl/c4 auto gets 12.5mpg not to bad with 31's and 4.57 gears.
 
OP
OP
gnsteam

gnsteam

Contributor
Bronco Guru
Joined
Jan 29, 2010
Messages
3,666
Loc.
Lincoln NE
Ive been driving mine daily every other week for over a year now. Would you say you've had good luck with yours all this time? How many miles a day do you drive for work? Just cuorious. I had painted my 77 Ranger orange and I have wanted to paint the special décor stripes on mine but cant deside Black or white. LOL Sounds like you think like me... Make a list and cross off each thing till done! Other wise youll forget what you wanted to do or upgrade/change and then remember when you have no money for it! LOL I have a 36 mile round trip for mine and the mild mod 302,4bbl/c4 auto gets 12.5mpg not to bad with 31's and 4.57 gears.

Hi Matts460,

I was driving my 76 every day from February 2011 till October 2013. Other than starting and poor idling issues when the temperatures got below 20 degrees. The Bronco was very reliable. I have a total of 35 miles a day between my two jobs. The Bronco has a stock 302, C4 and 4:11 gears and I'm only getting 10-12 miles per gallon. I hope to see an improvement with the idle after this brake booster change.

If you decide to add the Special Decor stripes. I think the white stripe looks best on orange paint. When I get to repainting my Bronco, I would like to have the stripes painted on if it's not to expensive. Other wise the vinyl Decor stripes are available for around $250-300 from CB member, Broncitis. Once I get this brake job and all the old rubber fuel lines changed. I'm going to start driving the Bronco more during the week.:cool:

Oh and I just remembered. I have a new set of power steering hoses to replace the leaking ones. Always something more to do.%)LOL;D

Fred
 
OP
OP
gnsteam

gnsteam

Contributor
Bronco Guru
Joined
Jan 29, 2010
Messages
3,666
Loc.
Lincoln NE
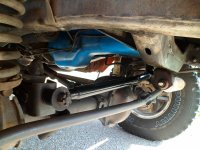
Last week I finished up the brake system and replacing the rubber fuel lines. Then my son help me with the adjustable trac bar install. My Bronco has F150 coils, which were put in by a previous owner. He did this to compensate for the added weight of a warn 8274 wench and home build bumper. I removed the wench and bumper and went back to a stock bumper because the Bronco was going into daily driving duty. So without the added weight I have a front to rear rake of nearly 2.5" and the front axle shifted to the driver side. I also had about 1-2" if lean to the passenger rear. Now that the trac bar is in and the axle is centered, it took out the lean.:cool:. I still have the high rake front to rear but at least the lean is gone. That will be fixed when I get the WH 2.5" lift with Bilstein shocks.;D Oh yea, now my steering wheel is upside down.%);D
 

Attachments

  • phpGSklg7AM.jpg
    phpGSklg7AM.jpg
    112.8 KB · Views: 303
  • php7fPpEMAM.jpg
    php7fPpEMAM.jpg
    135.7 KB · Views: 365
  • phpolQOsPAM.jpg
    phpolQOsPAM.jpg
    128.6 KB · Views: 258
  • phpKrKmBeAM.jpg
    phpKrKmBeAM.jpg
    146.1 KB · Views: 275
  • phpbzNNIsAM.jpg
    phpbzNNIsAM.jpg
    129.4 KB · Views: 301
  • phpicpLHBAM.jpg
    phpicpLHBAM.jpg
    138.7 KB · Views: 281

xfalcon

Sr. Member
Joined
Apr 13, 2013
Messages
452
When does that Mass Slot buy go through and you get those babies on your Rig?
 
OP
OP
gnsteam

gnsteam

Contributor
Bronco Guru
Joined
Jan 29, 2010
Messages
3,666
Loc.
Lincoln NE
When does that Mass Slot buy go through and you get those babies on your Rig?


Well, it all depends upon BC Bronco's ability to fill an order of 200 wheels. At last count, I heard 17 plus sets of mostly 5 each have been pre-orderd. Once they get the commitment it will take three months to produce the wheels.

For me I'm in no hurry. Getting new wheels is a bit premature in my build process. But I really like the idea of having old school slots that will fit the 76-77 better. With the added diameter and 3.5" back spacing.they should clear the tie rod ends. Going with Indy's 15"x8" or 10's" with 4"+ back spacing, would require wheel spacers to run.

Before I can mount them on my Bronco. I'll be installing the WH 2.5" lift with Bilstein shock. And I'm converting the steering over to the "T" style steering of the pre 76-77's. After all this I'll still need to find the funds for new tires.%);D

I think the wheels will look sweet.:cool::cool:
 

Attachments

  • us mag wheel 1k.jpg
    us mag wheel 1k.jpg
    80.9 KB · Views: 82
  • mag wheels 1k.jpg
    mag wheels 1k.jpg
    81.5 KB · Views: 123
OP
OP
gnsteam

gnsteam

Contributor
Bronco Guru
Joined
Jan 29, 2010
Messages
3,666
Loc.
Lincoln NE
Thanks for the compliment. It's got a long way to go to be where I want it, but don't they all.;D

I forgot to mention, I mailed the check today for the deposit on the wheels.;D
 
OP
OP
gnsteam

gnsteam

Contributor
Bronco Guru
Joined
Jan 29, 2010
Messages
3,666
Loc.
Lincoln NE
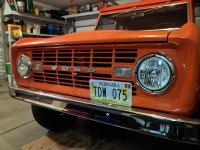
A couple weeks ago I install new H4 headlights, including the relay harness upgrade. This sure was a great improvement over the old seal beams.:cool:

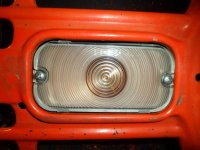
Next I did the "Alice" 66-67 turn signals with clear lenses mod. I used new 66-67 turn signal buckets and lenses from JBG's. When using the early buckets. I needed to make special brackets to mount them to the newer 76 grill. Instead of bending the sheet metal tabs (as described in the Alice mod tech article) on each side of the signal openings. I left them in place. They wouldn't have worked in the bent out position for mounting the new buckets. So I made four brackets to mount the new buckets to the tabs in their existing position. The brackets are machined out of cold roll steel in two pieces. The main piece of the bracket has a hole to accept the mounting bolts of the bucket, and a clearance hole to clear the lens mounting screw sticking through the back side of the bucket. On the side of the bracket is a raise tab, at a height to match the thickness of the sheet metal tabs. There is also a tapped 8-32 hole to accept a stainless steel, socket head cap screw to secure the clamp. The clamp works as a toe clamp, pinching the sheet metal tab on the back side of the grill. The nice thing about the new buckets, is that the mounting bolts (2) are on opposite corners of the buckets. This allowed me to make 4 identical brackets and just use them in the opposite direction.

To mount the buckets in the grill. Attach a bracket to each side of the bucket. Then slip the light bucket behind the grill from the opening at the top of the grill. Place it into position in the grill opening, placing the tabs between the bracket and it's clamp. The nice thing about these brackets is, that they allow you to position the buckets and center them in the openings. And control the depth into the grill. Once you are satisfied with the position of the buckets. tighten the clamps. The brackets hold the buckets very securely. As you can see, I still need to paint the brackets to keep them from rusting.

Now all that's left, is to stand back and admire your better looking turn signals.:cool::cool:;D

Enjoy the pictures.

P.S. Attached are two drawing for the mounts and clamps i made to install the 66-68 turn signal lamps.
 

Attachments

  • phpi3Y4WRPM.jpg
    phpi3Y4WRPM.jpg
    81.7 KB · Views: 186
  • php3eyWJ3PM.jpg
    php3eyWJ3PM.jpg
    110.9 KB · Views: 183
  • phpb5jZBmPM.jpg
    phpb5jZBmPM.jpg
    87.3 KB · Views: 195
  • phpawYWftPM.jpg
    phpawYWftPM.jpg
    75.4 KB · Views: 209
  • phpMMvl5FPM.jpg
    phpMMvl5FPM.jpg
    75.2 KB · Views: 185
  • phpNXIAwWPM.jpg
    phpNXIAwWPM.jpg
    60.3 KB · Views: 194
  • php7MjVi9PM.jpg
    php7MjVi9PM.jpg
    97.4 KB · Views: 186
  • phpwnwG3sPM.jpg
    phpwnwG3sPM.jpg
    115.8 KB · Views: 228
  • Alice Clamp.pdf
    33.9 KB · Views: 46
  • Alice Mount.pdf
    41.7 KB · Views: 29
Last edited:
half cab

Contributor
Guru Bronco
Joined
Dec 8, 2010
Messages
16,287
That looks great ...!!


A couple weeks ago I install new H4 headlights, including the relay harness upgrade. This sure was a great improvement over the old seal beams.:cool:

Next I did the "Alice" 66-67 turn signals with clear lenses mod. I used new 66-67 turn signal buckets and lenses from JBG's. When using the early buckets. I needed to make special brackets to mount them to the newer 76 grill. Instead of bending the sheet metal tabs (as described in the Alice mod tech article) on each side of the signal openings. I left them in place. They wouldn't have worked in the bent out position for mounting the new buckets. So I made four brackets to mount the new buckets to the tabs in their existing position. The brackets are machined out of cold roll steel in two pieces. The main piece of the bracket has a hole to accept the mounting bolts of the bucket, and a clearance hole to clear the lens mounting screw sticking through the back side of the bucket. On the side of the bracket is a raise tab, at a height to match the thickness of the sheet metal tabs. There is also a tapped 8-32 hole to accept a stainless steel, socket head cap screw to secure the clamp. The clamp works as a toe clamp, pinching the sheet metal tab on the back side of the grill. The nice thing about the new buckets, is that the mounting bolts (2) are on opposite corners of the buckets. This allowed me to make 4 identical brackets and just use them in the opposite direction.

To mount the buckets in the grill. Attach a bracket to each side of the bucket. Then slip the light bucket behind the grill from the opening at the top of the grill. Place it into position in the grill opening, placing the tabs between the bracket and it's clamp. The nice thing about these brackets is, that they allow you to position the buckets and center them in the openings. And control the depth into the grill. Once you are satisfied with the position of the buckets. tighten the clamps. The brackets hold the buckets very securely. As you can see, I still need to paint the brackets to keep them from rusting.

Now all that's left, is to stand back and admire your better looking turn signals.:cool::cool:;D

Enjoy the pictures.
 
OP
OP
gnsteam

gnsteam

Contributor
Bronco Guru
Joined
Jan 29, 2010
Messages
3,666
Loc.
Lincoln NE
Finally had time to post the latest upgrade to the 76. Saturday 05/03, my son and I drilled the mounting holes for the new grill trim addition. We also decide to paint the grill back to the original black color. We scuffed the old paint with red scotch bright pads. Then we laid down a coat of Rustoleum automotive sand able primer. After it dried we lightly sanded with some 600 wet dry, then use two coats of a Rustoleum satin black. It came out really well for a rattle can job. Now if only the rest of the paint on the Bronco looked this good.

Still need to paint the Ford letters red to add some contrast.:cool:
 

Attachments

  • phpbmiv9oPM.jpg
    phpbmiv9oPM.jpg
    110.1 KB · Views: 249
  • phpgGBq0tPM.jpg
    phpgGBq0tPM.jpg
    115 KB · Views: 203
  • phpHvXYSbPM.jpg
    phpHvXYSbPM.jpg
    105.9 KB · Views: 202
  • phpaRVAlRPM.jpg
    phpaRVAlRPM.jpg
    115.8 KB · Views: 210
  • phpCvNGcSPM.jpg
    phpCvNGcSPM.jpg
    118.8 KB · Views: 258
Top