• Welcome to ClassicBroncos! - You are currently viewing the forums as a GUEST. To take advantage of all the site features, please take a moment to register. It's fast, simple and absolutely free. So please join our community today!
    If you have problems registering or can't log into your account, please contact Admin.

Bahama Blues: Extensive camper work has begun

Hank_

Bronco Guru
Joined
May 9, 2010
Messages
1,915
Well the time has come to start this thread. This is mostly for me to track my own progress with hopes that it will become driveable at some point. This road all started when I became tired of my Jeep YJ. It was ok off road but lacked power and was not fun to take to the local summer cruise nights. So I sold the YJ and was looking at buying a 68 lemans convertible. The wife said "NO" to the lemans knowing that I would want another 4x4 to play with. So after much research the early bronco seemed the logical choice. Great classic looks, V8 power and you can customize it to fit your personality. So the search was on and this site was found. I found a bronco that looked like a good start in New York. I contacted the seller and after many e-mails an pics sent I picked what I thought would be a good starter project. I initially wanted a stockish bronco that I could throw a lift and some 35's on and have fun. Well as many of you know as you start to fix things more and more things pop up and pop up they did.

IMG_0839-1.jpg

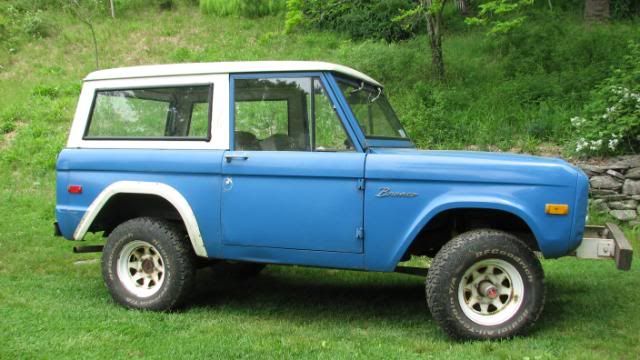
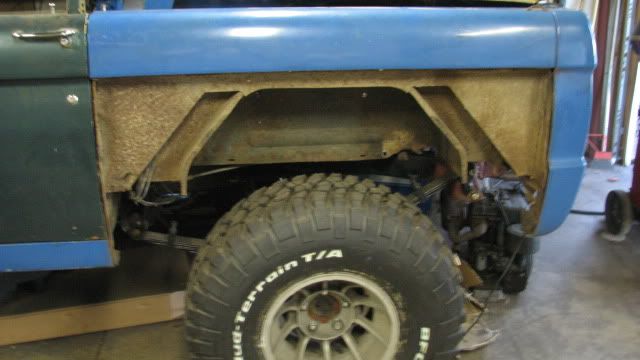
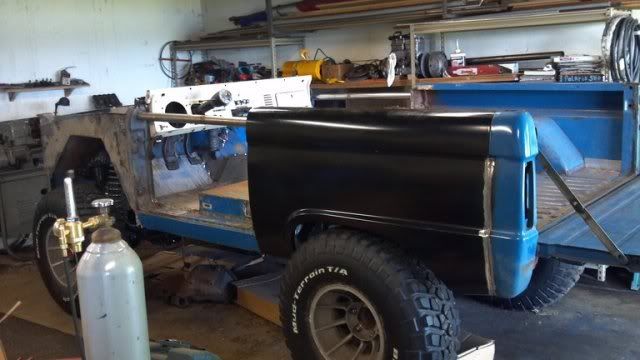
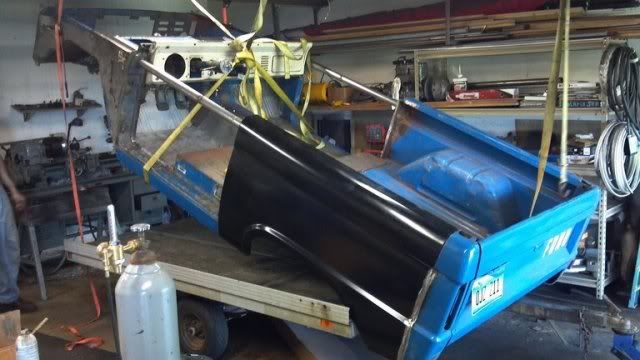
The day I purchased it.

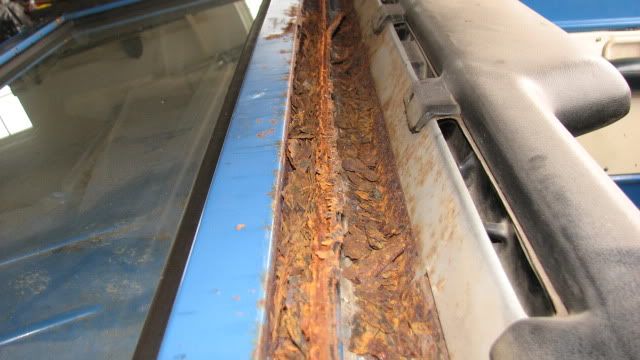
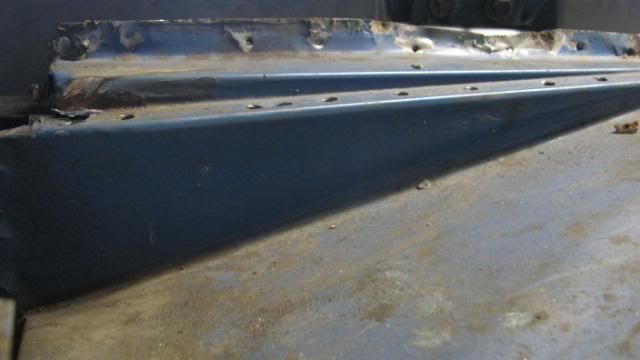
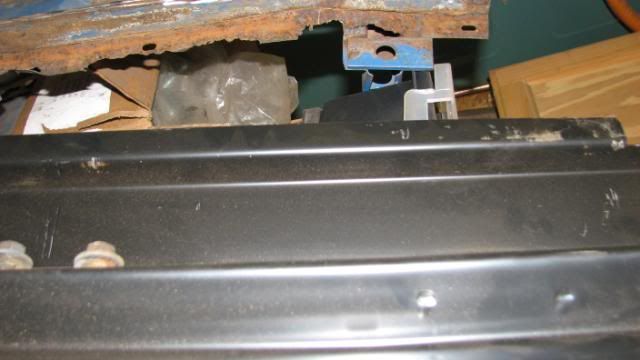
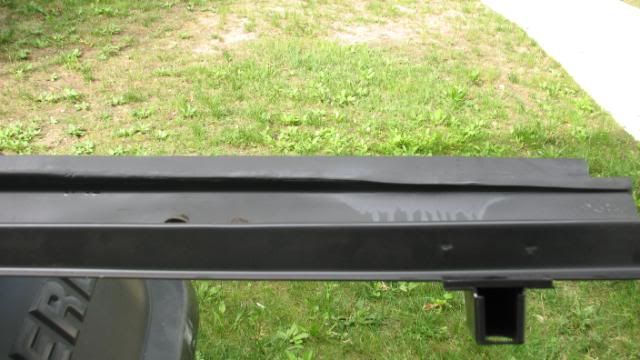
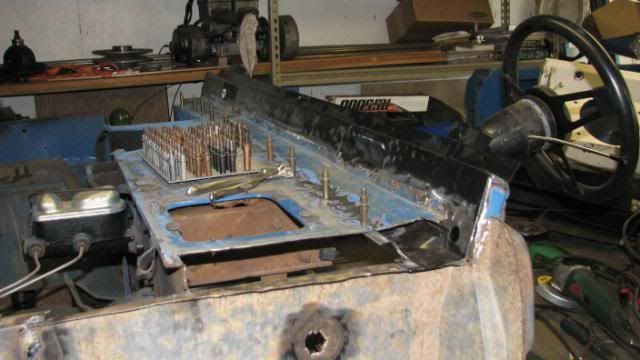
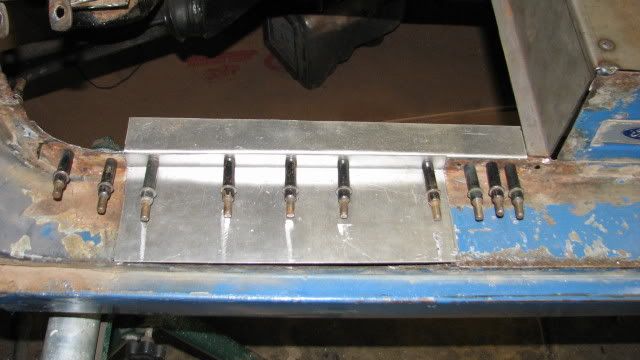
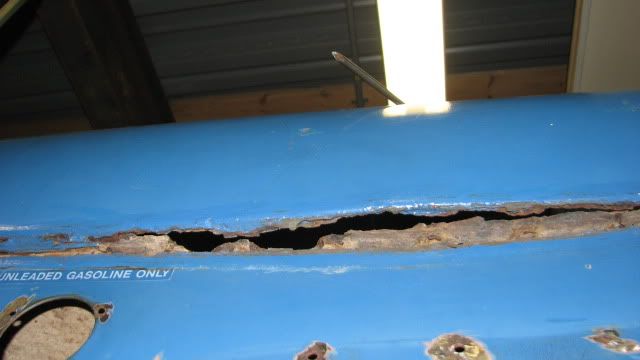
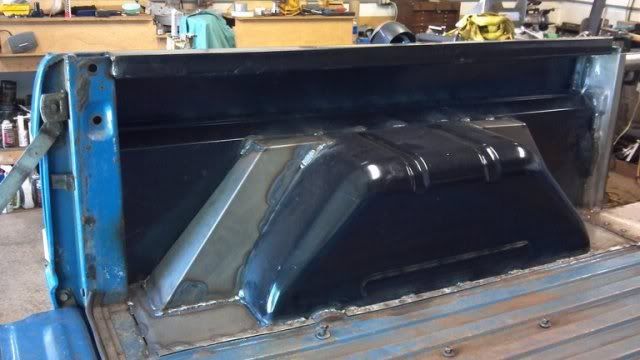
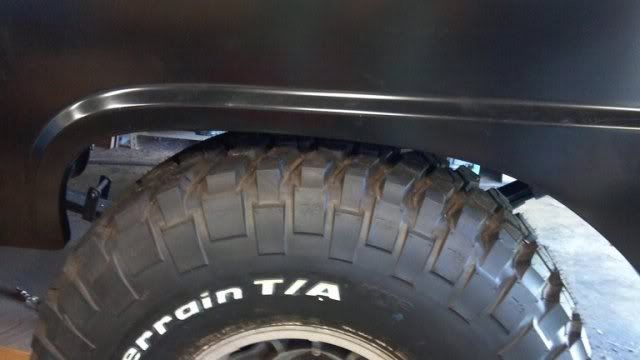
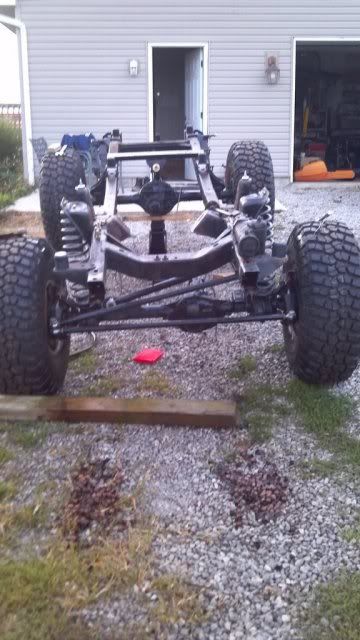
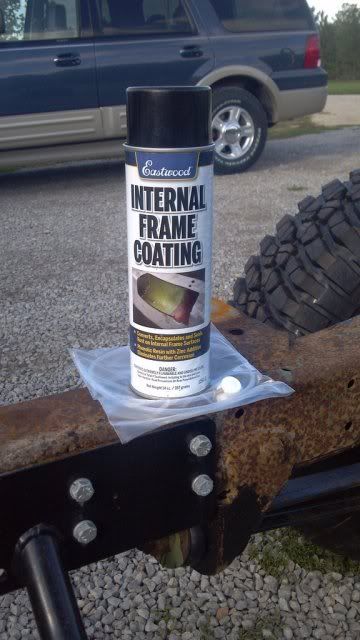
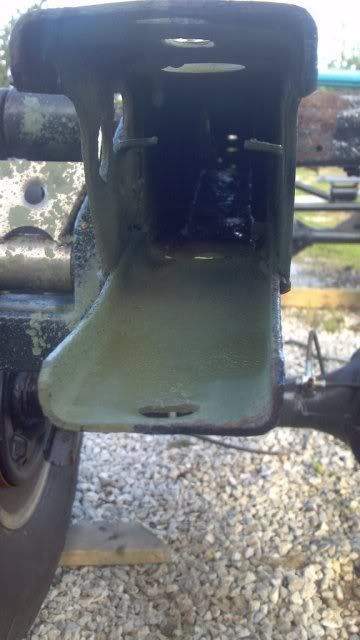
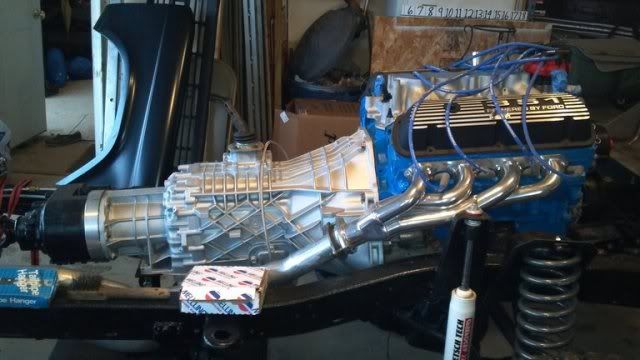
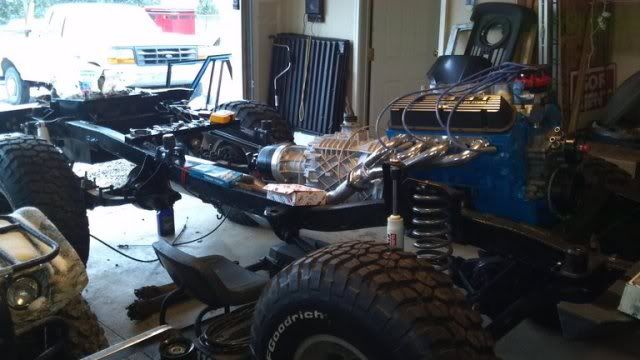
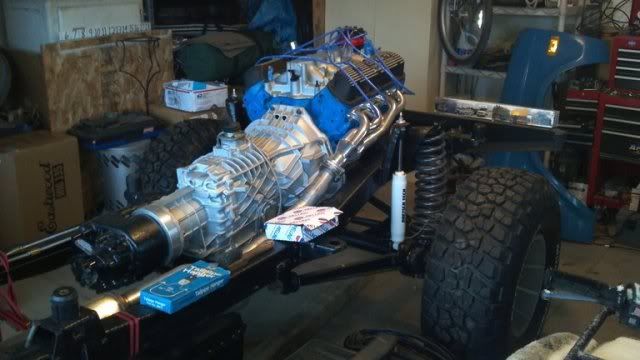
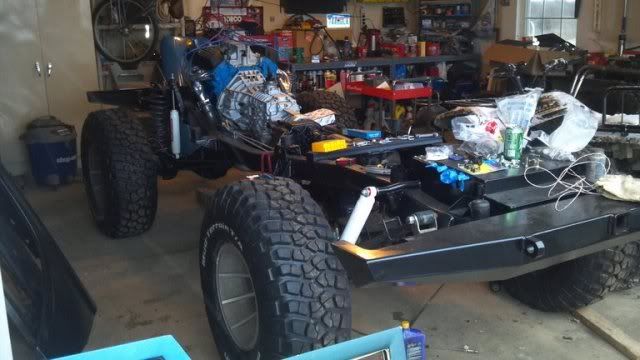
Well it wasn't long and I was starting to purchase parts to start my build. I admit 100% that I should have done far more research on the bronco before starting this project but I did not so I jumped in with both feet. I quickly found rust holes in the frame that I will address in the next month. The amount of rust and where I found it in the body sheetmetal is amazing. The windshield frame, cowl, drivers quarter panel, floor pans and windshield cowl. So the real work has begun. The build will be as follows: 3 1/2" lift from JBG, 35" bfg Km2's, 1" body lift for wild horses, 351 roller and ZF from a 1995 250, recovered stock seats, 6 point roll cage, warn 8274 winch and others things to come.
 
Last edited:
OP
OP
Hank_

Hank_

Bronco Guru
Joined
May 9, 2010
Messages
1,915
So I needed to replace my rusted out windshield cowl.
IMG_3624.jpg


A new cowl was provided by JBG and it looked like a great piece. The old cowl was removed but when we went to install the new cowl we noticed a problem. The original cowl goes straight across from drivers to pass side but 19" fromthe end it starts to slope down for some reason. Well the new piece was not set up for the slope. Modification to the new panel was in order.

IMG_0144.jpg

showing slope.

IMG_0147.jpg

new piece.

IMG_0166.jpg

modified replacement piece.

IMG_0167.jpg

new panel installed awaiting welding.

IMG_0171.jpg

2nd view.

In the next month should have all floor panels installed, cowl finished, new rear quarter installed, frame repaired and stainless windshield installed. I will post more pics soon.

Henry;D
 

Louie

Bronco Guru
Joined
Mar 29, 2004
Messages
1,805
Holy moly...guess you're not taking it to Silver lake this year! Glad to see you're making progress though!
 
OP
OP
Hank_

Hank_

Bronco Guru
Joined
May 9, 2010
Messages
1,915
Holy moly...guess you're not taking it to Silver lake this year! Glad to see you're making progress though!

Yeah not this summer thats for sure. Once I got started I new I did not did not want to redo anything I half-assed the first time so apart it came. The good thing is I have a ton of new parts ready to install, the other good thing is my business is picking up and that means more money for the bronco. The bad part is all the work leaves very little time to work on the bronco. I am hoping to have it ready to wheel this winter. I will let you know and maybe I can talk you into coming along.

Henry
 
OP
OP
Hank_

Hank_

Bronco Guru
Joined
May 9, 2010
Messages
1,915
More rust repair today. Repaired the drivers inner rocker panel, the drivers sill plate, the cowl and left front fender. Should be able to finish up the floors this week and move on to the drivers rear quarter panel. Rust sucks.


IMG_0193.jpg

Working at my friend Don's house. He made up this nice little bender. Works great for small sheet metal repairs.

IMG_0201.jpg

Cowl finally getting finished up.

IMG_0199.jpg

Inner rocker repair. I will be cutting the rockers and installing skis soon thats why the metal does not go all the way to the bottom.

IMG_0200.jpg

New sill piece attaching to new inner rocker.

IMG_0202.jpg

Front fender repair.

Henry
 
OP
OP
Hank_

Hank_

Bronco Guru
Joined
May 9, 2010
Messages
1,915
Floors and cowl are done. Started working on the drivers quarter panel. I cut the lower panel out but now that I can see the rust in other areas I am going to replace the door post and the inner panel. Cant believe how a little rust here and there turns into a lot of rust everywhere.

IMG_0219.jpg

Panel seam showing rust.

IMG_0220.jpg

Lower panel cut out.

Hopefully I can have the bronco home by the end of August. I would like to get it in primer before cold weather hits.

Henry
 
OP
OP
Hank_

Hank_

Bronco Guru
Joined
May 9, 2010
Messages
1,915
Hopefully I will be able to finish the drivers quarter panel this weekend. Today I ordered a set of front and rear bumpers from Logans Metal Products http://logansmetalproducts.com/ . Great looking bumpers at a reasonable price. Still hoping to have the bronco home the end of the month.

Henry
 

Stutsmo

Contributor
Bronco Guru
Joined
Jan 24, 2009
Messages
2,549
Nice Job replacing the cowl, isnt an easy job. The rest of your Bronco should be a cake walk after that. Keep at it and post up plenty of pics!
 
OP
OP
Hank_

Hank_

Bronco Guru
Joined
May 9, 2010
Messages
1,915
Replaced the drivers side inner and outer 1/4 panel, the wheel well, and door post. This part SSSSucked big time.

photobucket-5926-1315101979851.jpg


photobucket-3249-1315101736666.jpg


photobucket-3503-1315101940224.jpg

Not much clearance for the 35's. I will be cutting that soon to install the flares.

We pulled the body off the frame.
photobucket-3064-1315101542993.jpg


Sticking out of one of the holes in the frame was this skeleton. Creepy.
photobucket-3194-1315101438889.jpg


Now a few frame repairs and mods and then start reassembly. 351 roller will start going back togethe this week. Cant wait to see some real progress.

Henry
 

sellitall

Bronco Guru
Joined
Jul 30, 2002
Messages
1,444
Loc.
Malvern, Pennsylva
;DNice build!!;D

What the hell was that creature you found in the rail??? Looks like it had legs and was some sort of reptile..........in MI?????

I had to replace the hinge and lower assembly on my 77. I actually bought a decent cowl off of a local guy for $20. He was parting out the rig and the rear sheetmetal was shot. It was the best $20 I spent on the truck. Everything lined up good since it was OEM.
 
OP
OP
Hank_

Hank_

Bronco Guru
Joined
May 9, 2010
Messages
1,915
;DNice build!!;D

What the hell was that creature you found in the rail??? Looks like it had legs and was some sort of reptile..........in MI?????

I looks like some sort of lizard. Dont know for sure. I picked up this bronco in New York and pulled it home to Michigan last May. I dont know where is was before then.


Henry
 
OP
OP
Hank_

Hank_

Bronco Guru
Joined
May 9, 2010
Messages
1,915
Well the frame and the body are back at my house. I am currently rebuilding the engine getting it ready to set on the repaired frame. It was nice out tonight so I figured I would do some work on the frame to finish getting it ready for the engine. I had a few broken bolts that needed drilled and tapped so I started working on it. I noticed what looked like an acorn in the frame. I got the hose and after an hour of flushing out the frame this is what I had.

photobucket-7209-1316651654911.jpg


photobucket-7242-1316651764525.jpg


Seems like its always something keeping me from moving ahead. Oh well there is always tomorrow.

Henry
 

sellitall

Bronco Guru
Joined
Jul 30, 2002
Messages
1,444
Loc.
Malvern, Pennsylva
After using my best internet friend google I found this pic which bares a striking resemblance to the remains you discovered.
 

Attachments

  • 1394_70_57-complete-squirrel-skeleton-hip.jpg
    1394_70_57-complete-squirrel-skeleton-hip.jpg
    9.1 KB · Views: 87
OP
OP
Hank_

Hank_

Bronco Guru
Joined
May 9, 2010
Messages
1,915
After using my best internet friend google I found this pic which bares a striking resemblance to the remains you discovered.

Could def be a baby squirrel. Amazing how much stuff they packed into that frame.


Henry
 
OP
OP
Hank_

Hank_

Bronco Guru
Joined
May 9, 2010
Messages
1,915
Could also be this little guy

2885093930_57831fc1ac_z.jpg


Chipmunk looks like about the right size.


Henry
 
OP
OP
Hank_

Hank_

Bronco Guru
Joined
May 9, 2010
Messages
1,915
Banama blues "eastwood internal frame coating"

With the frame back home trying to get it painted so I can began to reassemble it. I power washed the interior of the frame and let it dry I then used Eastwoods "internal frme coating w/nozzle". The kit is easy to use. It is suppose to cover and stop rust on the inside of the frame. We will see how it works but it does do a nice job of covering the internals of the frame. I used 2 cans, one for each frame rail and it seemed like plenty to coat. It dried quickly and looks good.

photobucket-5449-1317509307900.jpg


photobucket-6980-1317509261027.jpg

The frame after coating.

Tomorrow will be to por 15 and chassis black the frame. Hope to have the engine and trans on the frame by next weekend.
 
OP
OP
Hank_

Hank_

Bronco Guru
Joined
May 9, 2010
Messages
1,915
Bahama blues build thread.

What a crazy fall. I was working 7 days a week and had no time to work on the bronco. Finally I am back on a basic schedule and work is back on. I have spent the last week trying to straighten up the garage so I could walk around it (I know it still looks like a mess, imagine how it looked before). I have the engine and trans on the frame. I am working on finishing up the serp system on the front of the motor. I picked up an eastwood mig 135 as I will be back at metal work by next weekend. In mid January I am signed up for the paint and restoration class at the local Vo-Tech. It is a great class. It runs from mid January until Late April. The class is 2 nights a week for three hours per night. I will be able to take the bronco in and sand, prime, block prime, fill, prime, block and finally paint the bronco. I have taken the class before my last project (a 1968 meyers manx) turned out great. Here are a few pics of the frame as is sits now.

photobucket-2374-1324164054424.jpg


photobucket-2687-1324164017790.jpg


photobucket-2352-1324163943237.jpg


photobucket-1215-1324163908772.jpg
 
Top