• Welcome to ClassicBroncos! - You are currently viewing the forums as a GUEST. To take advantage of all the site features, please take a moment to register. It's fast, simple and absolutely free. So please join our community today!
    If you have problems registering or can't log into your account, please contact Admin.

Tin and Tar - First Time 68 Bronco Resto

OP
OP
rydog1130

rydog1130

Sponsor/Vendor
Bronco Guru
Joined
Jun 19, 2014
Messages
4,026
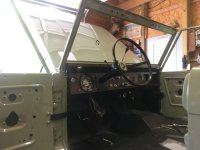
Last week was super productive, I was able to scratch a bunch of stuff off the list. I got my power steering hooked up (go into that later), radiator hoses, radiator in, distributor wires ran/wire loom, heater box rebuilt and installed, brake and gas pedal assembly installed, windshield mounted, and doors hung, rebuilt my column, and coated my mirrors and emblems in a black chrome finish.

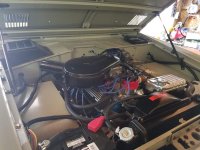
Ok, but back to the power steering set up, I wanted to keep my stock surge tank but the cooler for the PS setup was too bulky, so we ended up cutting the bracket down and mounted it horizontal underneath the surge tank by adding a few small tack welds. Once it was together I got it powder coated and together it went! It looks really well and I'm super happy!

IMG_8244.jpg IMG_8277.jpg

IMG_8408.jpg IMG_8416.jpg

IMG_8437.jpg IMG_8566.jpg

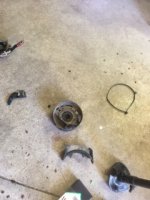
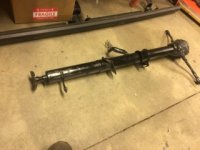
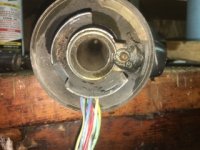
Steering column tear down, had to replace the switch and shift indicator. I forgot to get a photo after it was done, but its all painted and looks nice!
IMG_8031.jpg IMG_8513.jpg IMG_8519.jpg

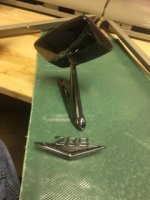
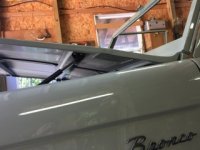
Also coated my emblems and mirrors, here's a pic comparing the old ones to the new ones
IMG_8487.jpg IMG_8471.jpg

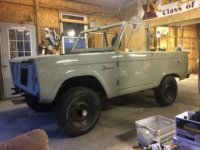
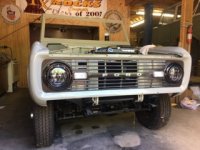
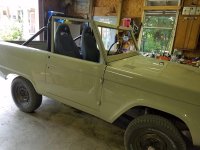
and Lastly how she's looking now!
IMG_8582.jpg

Next week planning on getting the grill and hood back on, getting the dash together and running the wiring.... I want to drive it bad!
 
OP
OP
rydog1130

rydog1130

Sponsor/Vendor
Bronco Guru
Joined
Jun 19, 2014
Messages
4,026
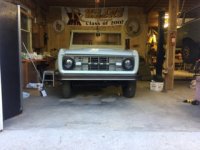
Last week was pretty productive. You think all these simply things will go back together easy but they end up taking way longer than planned. Everything is good to go in the engine bay. I tracked down a push in style dip stick for my 289. I got that cleaned up, then cut the mounting tab and welded it in place, powder coated and mounted to a header bolt. I cleaned up all the dash bezels, I was amazed I still had them all after taking them out 3 years ago. I find things tend to walk off or find new homes when my dad ventures out into the garage. Anyway, got the dash back together along with the lights and bezels in my grill. I didn't realize it but my frame horn ends were tweaked a bit, so a couple of big crescent wrenches did the job of getting the bumper flush. I also had to face the square areas of the carriage bolts to get them to sit in the bumper. I think it was a 3hr process of getting the bumper back on!

IMG_8874.jpg IMG_8987.jpg

IMG_8818.jpg IMG_8853.jpg

IMG_9013.jpg

I also got the hood back on and was a little disappointed as I should have test fitted it one last time after fixing the cracks along the driver side section. I created a slight curve and now it doesn't want to sit flush. I'll have to make a few cuts to relieve the tension in order to get it to sit flush. I'm lucky in one aspect that even though its been painted the shop that painted everything told me things would need to get touched up afterwards so I'll d o my best not to screw anything else up while trying to fix this hood. Overall I'm pretty satisfied as the grill and fenders line up good and I just need to tweak my doors a bit before lining up my fenders.
IMG_8933.jpg IMG_8956.jpg

IMG_8963.jpg IMG_8970.jpg

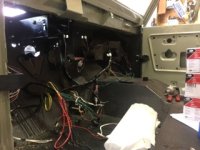
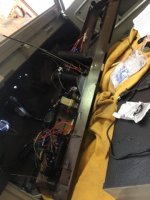
Lastly we opened up the centech wiring kit. I was pretty nervous about starting this section of the build but I'm thinking it's not going to be as bad as I thought. First off it comes with all the major switches already connected. It also had the existing delphi connectors that plug right into my Lucky 13's I got from HID PROJECTORS. I did have to purchase a separate connector to use my factory ignition though, BUT it was supper easy to change. The next big plus is that 80% of the harness is loomed and has protective sleeves over it. I did have to enlarge my previous firewall hole to 1 3/8" and drill an addition hole on the passenger side as the harness is designed to exit both holes and run along the sides of the inner fender aprons. I like it because it gives the engine bay a pretty clean look! So far the harness is laid out where it needs to go to its respective homes but over all doesn't look near as challenging or intimidating now!

IMG_9010.jpg IMG_9036.jpg IMG_9163.jpg
 

chuckyb

Contributor
Sr. Member
Joined
Oct 25, 2016
Messages
941
Awesome build! I am in tear down phase on a 68 with a similar amount of replacement panels needed. Might have missed it but didn't see confirmation on the paint color used...looks greenish in some pics but maybe it's just the light...is it Pebble Beige? Also what are your plans for wipers?
 
OP
OP
rydog1130

rydog1130

Sponsor/Vendor
Bronco Guru
Joined
Jun 19, 2014
Messages
4,026
Awesome build! I am in tear down phase on a 68 with a similar amount of replacement panels needed. Might have missed it but didn't see confirmation on the paint color used...looks greenish in some pics but maybe it's just the light...is it Pebble Beige? Also what are your plans for wipers?

Color is Desert Khaki its cool because depending what light its in different hues pop out at you. It's not a chameleon color just a single stage plain color. Right now I plan on keeping the vaccum wippers. I think down the road I will upgrade to the wiper kit tom's sells as they will fit where the existing wipers are now.
 
OP
OP
rydog1130

rydog1130

Sponsor/Vendor
Bronco Guru
Joined
Jun 19, 2014
Messages
4,026
looking back on photos I realized my hood always had a kink in it, its tough when your in a chair and relying on others eyes to scope out what you can't see. I feel like I should have caught this and a final test fit would have done this... oh well, Im going to take that fender off, cut some relief points and get it straightened out then weld it back together.

IMG_4354.jpg

IMG_2189.jpg

hoodline.jpg
 
OP
OP
rydog1130

rydog1130

Sponsor/Vendor
Bronco Guru
Joined
Jun 19, 2014
Messages
4,026
Huge mile stone this week, got the dash together, wiring harness is 85% complete, (just need to hook up the rear portion of it), steering column is in and hooked up to the gear box. The fluids are in and no major leaks (a few small ones where I forgot to tighten a few hoses,etc)

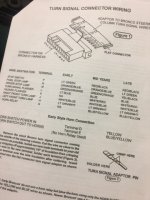
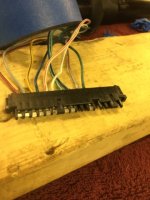
I put my dad to good work on wiring up the column pigtail. The majority of the wires corresponded to the pig tail I picked up from jeffs but I still had a few extra wires left. So far my head lights, turn signals, and neutral safety switch work, so I don't think anything is wrong at the moment. We'll find out later I guess.

IMG_9536.jpg IMG_9543.jpg IMG_9588.jpg

Dash went in easy, sanded off some painted areas and it seems to have done a good job for the grounds as everything tested so far works!

IMG_9604.jpg IMG_9613.jpg IMG_9626.jpg

Power steering got hooked up as well, really didn't feel like taking the shifter housing cone back off so we slid the column through the dash and through the fire wall. Topped off the fluids, found out my drain plug was missing from my radiator real quick, then later on noticed my drain plug on my oil pan wasn't tight. I then mad sure everything else got a once over before we tried dumping a little gas in the carb. I also got the passenger side body and door lines looking a little better too! Also, I modified my corbeau seat bracket as the single hole didn't have enough real estate to get into the floor pan. I welded a good solid piece of steel on there and added 2 holes instead of one. I saw a pic earlier on here of a bronco that was in an accident and the seat looked like is was ripped right of the of the floor pan!
IMG_9633.jpg IMG_9594.jpg
IMG_9671.jpg IMG_9687.jpg
 
OP
OP
rydog1130

rydog1130

Sponsor/Vendor
Bronco Guru
Joined
Jun 19, 2014
Messages
4,026
Its Alive

Finally got to fire it up! Sounds fantastic! Literally took about a day and a half of running wires and then putting the dash back together and it fired up immediately. Super Excited and pleased w/ the centech harness and the mds ready to run system.

[youtube]UykIwji4WBI[/youtube]
 
Last edited:

Stutsmo

Contributor
Bronco Guru
Joined
Jan 24, 2009
Messages
2,549
Sounds good. I have really enjoyed watching this Build come together!
 
OP
OP
rydog1130

rydog1130

Sponsor/Vendor
Bronco Guru
Joined
Jun 19, 2014
Messages
4,026
Sounds good. I have really enjoyed watching this Build come together!

Thank You! I'm hoping to have some footage up next week of me driving it! Just need to install hand controls and put the brake lines back in and were good to go! I just found a hell of a steal on hand controls today on ebay. These normally run $650 a set and I got them for $300 shipped! Should be here Monday! ;D
hand controls.jpg

Here's a video demoing how they work!
[youtube]LNKNggh4b5Q[/youtube]
 

broncobsession

Bronco Guru
Joined
Aug 12, 2001
Messages
4,049
That's so cool! Can't wait to see the video of you driving Ryan. Leave that element at home for next years Super Cel!
 
OP
OP
rydog1130

rydog1130

Sponsor/Vendor
Bronco Guru
Joined
Jun 19, 2014
Messages
4,026
That's so cool! Can't wait to see the video of you driving Ryan. Leave that element at home for next years Super Cel!

That's the game plan! Yes if all goes smooth i'll have the winter to fine tweak everything and get my transfer seat sorted out! I'll for sure see you and stout down there!
 
OP
OP
rydog1130

rydog1130

Sponsor/Vendor
Bronco Guru
Joined
Jun 19, 2014
Messages
4,026
Waiting anxiously for this work week to end. Hand controls have arrived, and new stainless brake lines are here! I have a buddy helping me out with welding up the roll bar on Monday. The game plan is getting roll bar in, seats in, brake lines in and bled, speedo hooked up, and rear wire harness hooked up. Pretty Ambitious but we have 5 days to do it! Hopefully I'll have a video of it on the road! ;D
 

sprdv1

Contributor
REBEL
Joined
Mar 8, 2007
Messages
81,756
Get err done brother.. U got it. Meant to do some stuff myself today, but got stuck on yard work w/wifey
 
OP
OP
rydog1130

rydog1130

Sponsor/Vendor
Bronco Guru
Joined
Jun 19, 2014
Messages
4,026
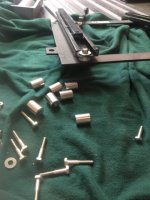
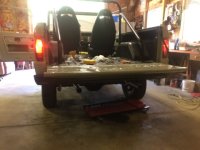
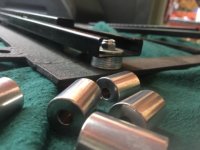
Ok so latest updated, got the new stainless break lines in. Added an extra 1/2' to my seat brackets and ditched the stacked washers and replaced them with 1" x 3/4" thick aluminum spacers. I got my seats installed along w/ the shoulder belts, I got my roll bar welded up, painted and installed. Played around with the turn single switch and have all my lights working now. I also have my bracket for the hand controls installed. We took it out for a spin and it's driving great other than a little shift issue which I heard was normal but im going to recheck the fluid, vac leaks, and maybe replace the vac module and see how it does. I was told it could be an air pocket too....

stacked washers wern't cutting it and looked horible
IMG_9972.jpg IMG_9963.jpg

Roll bar in and lights looking good, below is the color code for the after market turn sign switch from jeffs.
IMG_0223.jpg IMG_0096.jpg

IMG_0107.jpg IMG_0065.JPG

Hand control install was going good. I had to make a second brace to support the dash. I was getting too much flex. I was letting a friend drill some holes to mount the second brace and it got loose on the drill press. Lucky no one got hurt but the bracket got banged up pretty good. took about an hour to bend it back into shape.
IMG_0086.jpg IMG_0222.jpg IMG_0072.jpg

How shes looking at the moment!
IMG_0225.jpg

IMG_0221.jpg

And a few test drive vids!

[youtube]APDz7zvb3-s[/youtube]

[youtube]bWLZCMklaBQ[/youtube]
 
OP
OP
rydog1130

rydog1130

Sponsor/Vendor
Bronco Guru
Joined
Jun 19, 2014
Messages
4,026
Thanks Ben!!! Game plan is to have it at our local event "the take over" the guys at the body shop where it was painted want me to bring it back for a final touch up. Once the event is over I'll bring it to the shop for that then finishing installing all the glass and exterior trim/emblems
 

69broncofun

Bronco Guru
Joined
Nov 22, 2016
Messages
1,380
Thanks Ben!!! Game plan is to have it at our local event "the take over" the guys at the body shop where it was painted want me to bring it back for a final touch up. Once the event is over I'll bring it to the shop for that then finishing installing all the glass and exterior trim/emblems

Sweet brother you killed it!
 
Top