• Welcome to ClassicBroncos! - You are currently viewing the forums as a GUEST. To take advantage of all the site features, please take a moment to register. It's fast, simple and absolutely free. So please join our community today!
    If you have problems registering or can't log into your account, please contact Admin.

Bronco Sheet Metal Replacement

tonytony9

Contributor
Full Member
Joined
Mar 21, 2024
Messages
262
Have a couple questions on replacing the windshield cowl and horizontal cowls. I am about ready to weld my replacement panels in and have been practicing my welds with my buddy’s MiG.

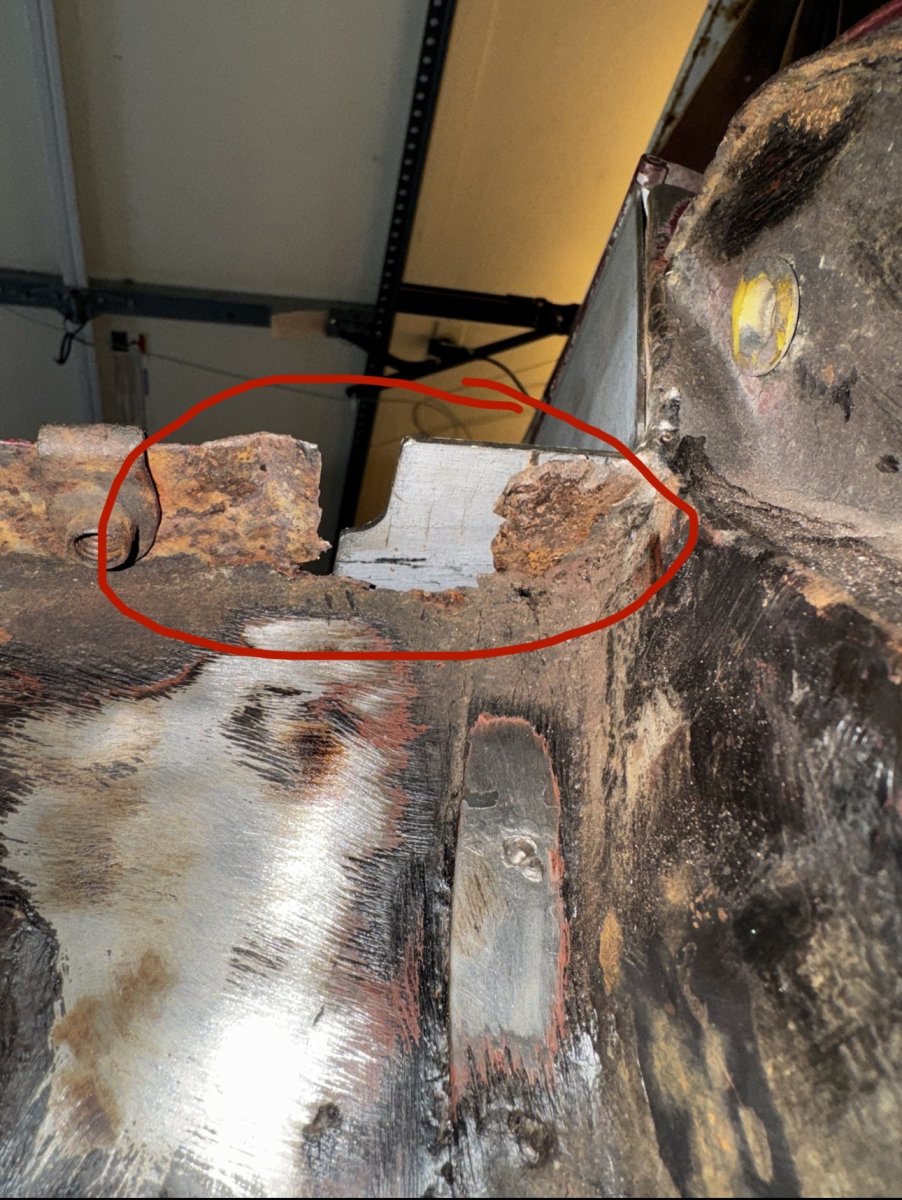
On the passenger side top of the kick, my flange isn’t in great shape. See below. It’s “solid” enough but I’ll probably blow through it with any welding. As in solid enough to push weight on but it’s rough as you can tell.
IMG_2316.jpeg


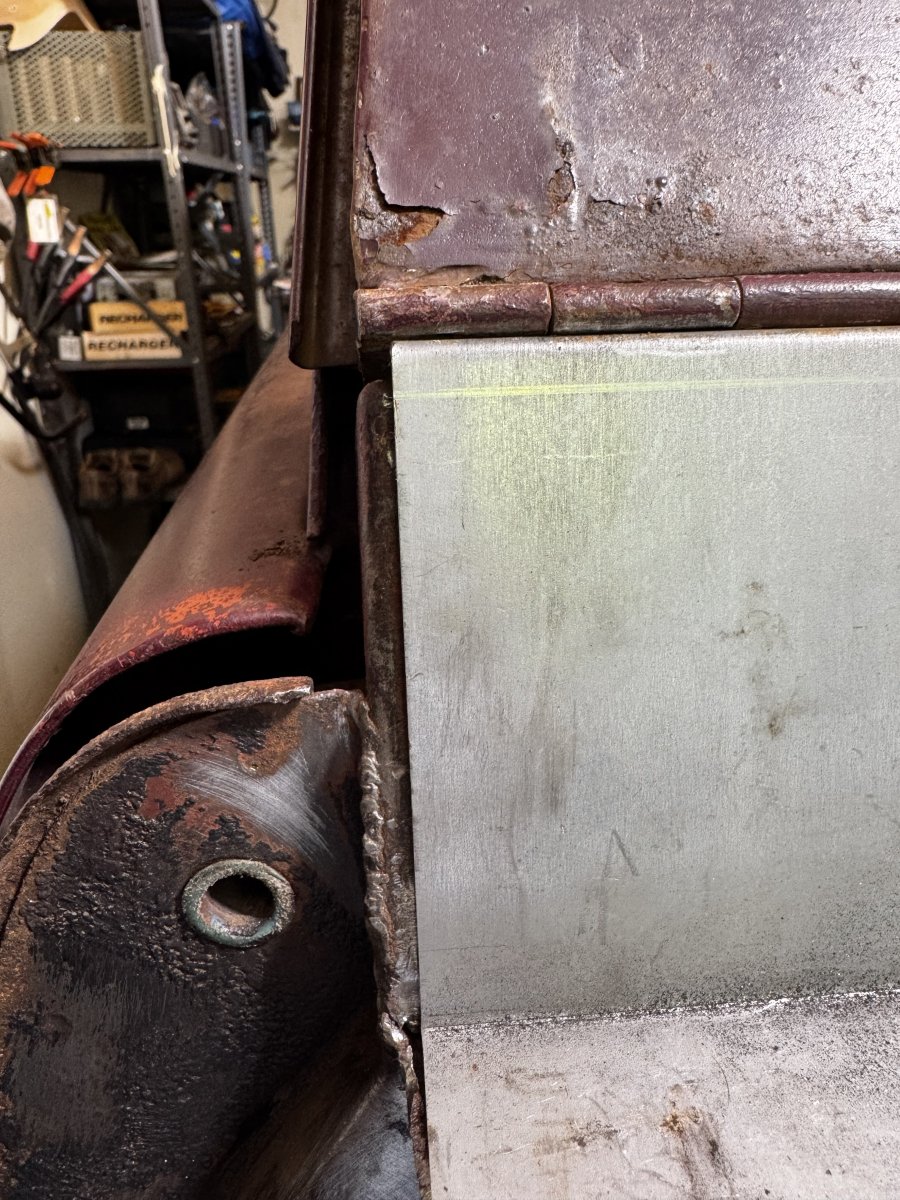
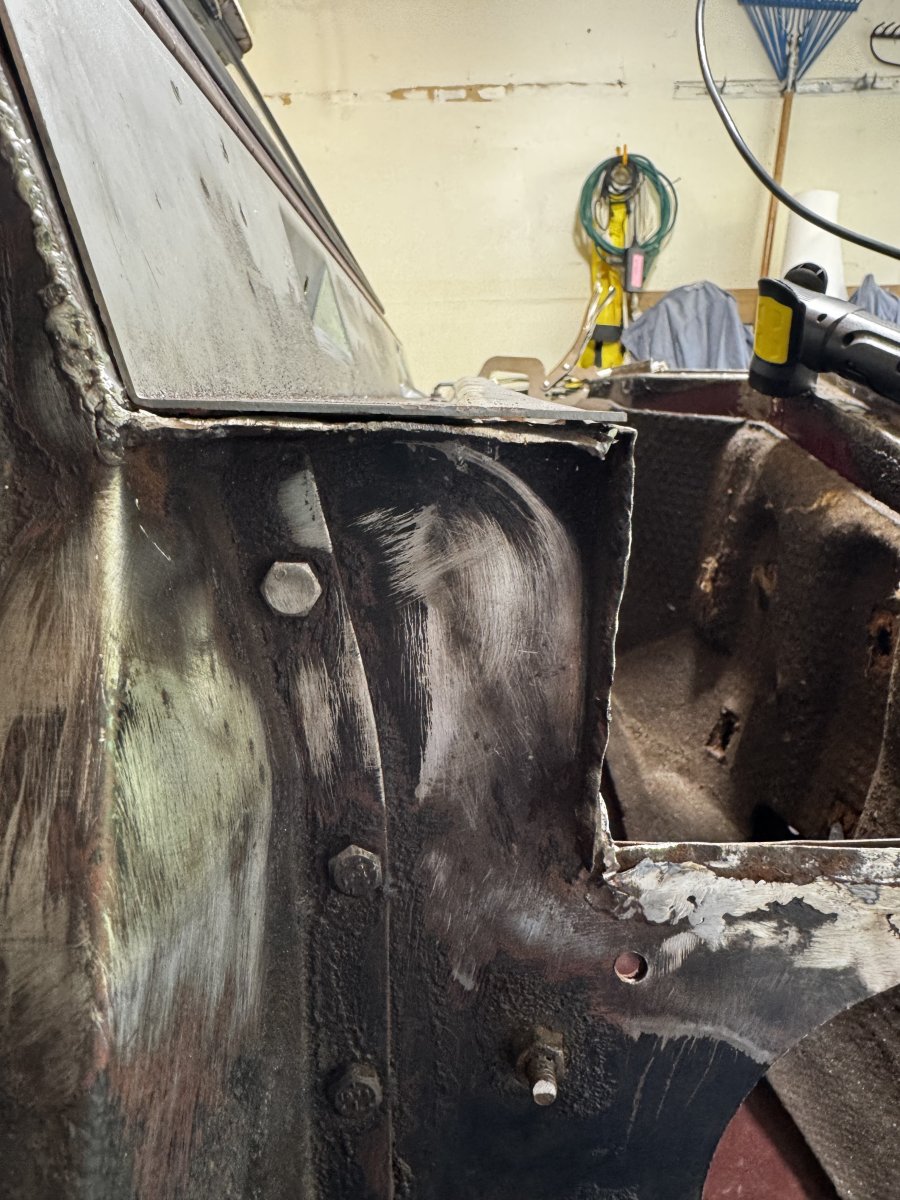
Drivers side is similar. I had to cut out the portion you’ll see to fit the new windshield cowl in.
IMG_2318.jpeg

IMG_2319.jpeg


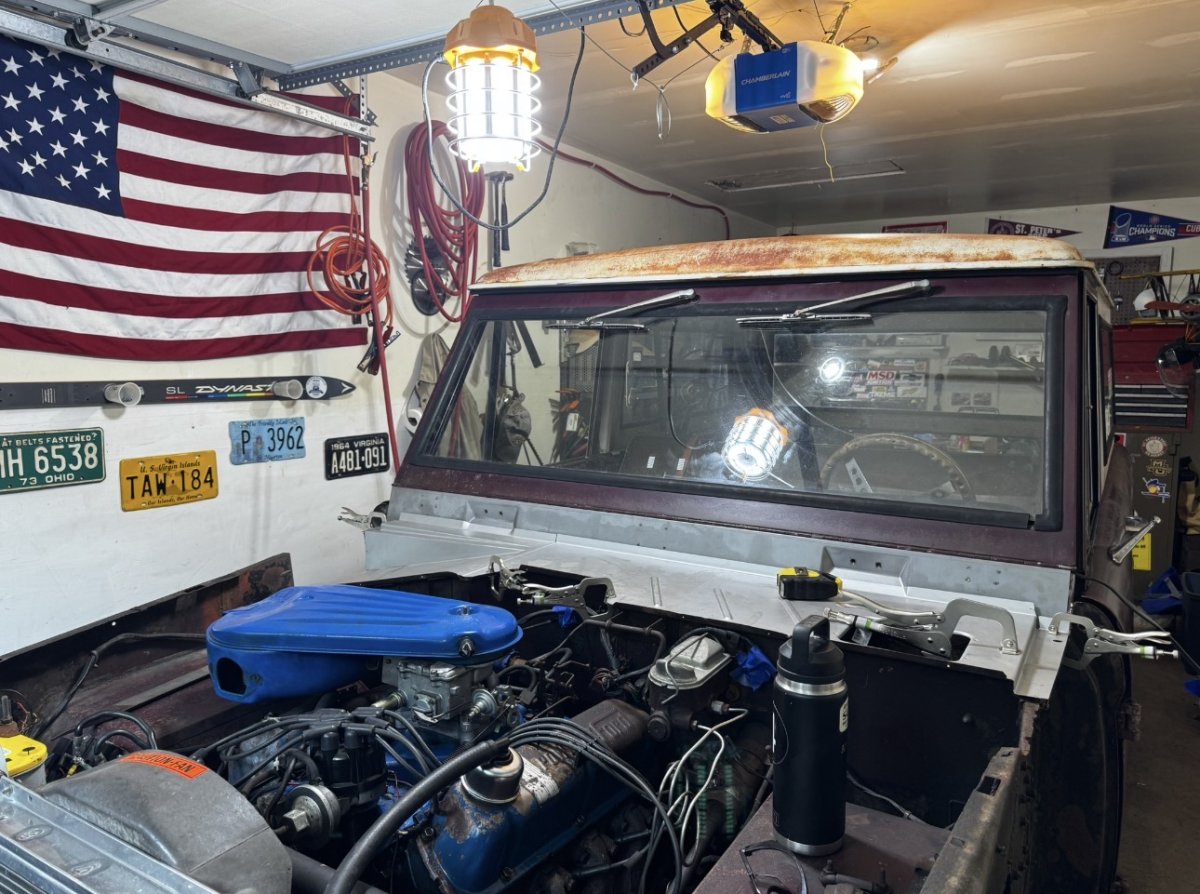
My question to you all is, what would you recommend I do with this circled areas? The truck is not going to be perfect. And to my untrained eye these don’t seem to be structural. But this is my first run at body work so I’d love any advice.
IMG_2286.jpeg

IMG_2283.jpeg

IMG_1815.jpeg
IMG_1809.jpeg
IMG_1814.jpeg
IMG_1818.jpeg
 

1969

Contributor
Bronco Guru
Joined
Feb 28, 2022
Messages
1,072
Loc.
Reno, NV
As you said, the truck isn’t going to be perfect, and neither is mine. I cut out the affected areas and grafted in clean sections from new panels where I needed them. IMO, you’re pretty much at that point now, so I’d cut out the questionable areas and graft in some clean, new pieces. I think you’ll end up with a much better result that way.
 

hsach

Contributor
Members Only
Joined
Apr 19, 2013
Messages
433
I did what 1969 suggested, cut out the bad metal and welded in some good. It looks difficult because of the layers of metal in those areas, but once you cut it out you can see what needs to be done. Here are a couple of pics that show my driver's side.

Cut the bad metal out.
20220117_140055.jpg


Weld in new metal and make sure you secure it to the inner fender as well as the cowl.
20220117_182837.jpg


I made my patch in two pieces, here is the final piece welded in.
20220119_174927.jpg
 

66 Bronco Dave

Jr. Member
Joined
May 24, 2012
Messages
106
Also agree, cut the bad and replace, welding rust sucks!
Yea start with clean metal. Before you cut out the metal make a paper temp let lay over old metal mark then cut Get the metal clean as possible and use copper weld through primer Especially in areas that overlap. Make sure you use .023 wire so you don’t burn through
 

Attachments

  • image.jpg
    image.jpg
    237.2 KB · Views: 51
Last edited:

Torkman66

Contributor
Sr. Member
Joined
Apr 3, 2022
Messages
853
Loc.
New Braunfels, Tx
Lots of thoughts here. First thing you need to do is get a gallon of Ospho and spray it everywhere you see rust. It will neutralize the rust, then put a simple top coat of anything like Rustoleum satin blacks to seal the metal. Especially all that metal under the cowl that you will not have access to after you weld the new cowl on. Then, as others have said, cut out any bad metal that is rotted all the way through. If it is so thin that you burn through it continually, then cut it out and replace that sections. Replacing little small postage size areas is fine. Often a panel will rust bad where a bit of water continues to sit. No need to cut out the whole panel, just the rot. In those areas here the metal is somewhat deformed, you can leave it if it is not paper thin. But before any welding, use a flapper wheel on your grinder and clean every spec of rust off the areas where you will weld and those areas where you new panel will lay on top of other metal. You do not want to bury rust under a new panel. The ospho is a great way to go as long as you follow it with rustoleum or such to seal it. Once your ready to weld, sand down (flapper disc) the 1/2" area where the weld will go to shinny bare metal. Then get a can of "Weld Thru" primer and coat the areas where you will weld. When done welding, wire brish your welds and hit them with the rustoleum to keep them from rusting.

Also, put that Osho in a spray bottle and drench every opening in those A pillars. Use it anywhere you think you have rust. Spray wll its running out of the seams. It wall etch your concrete floors, so use a tarp. IN a quick fix scenario i have used Ospho in a and B pillars, inside the rockers, anywhere there is rust. Then follow up with rutoleum as a top coat. The white residue left by the Ospho can be painted over without issue. This is not a full restoration method (you are not replacing all rusted metal), so at least try to stop the current rust from spreading or getting worse.

ON that windshield, the rust you see and the holes that are present are only the tip of the iceberg. First thing you need to do is cut out sections of that bad metal. If you want to keep it rather than replacing it, same process, drench it in Ospho and the spray inside thru those holes with rustoleum the best you can. Don't worry if it runs out of the seams, that's a good thing. Then just make little templates out of heavy stock paper or cardboard to the exact size of the cutout and then fabricate that into a piece of metal and weld it in place. Make sure your welds are penetrating (going clear thru to the other side of the metal) so that when you grind the welds flat, the weld on the back side keep it all in place with plenty of strength. There is considerable rust in that windshiled frame.
 
OP
OP
tonytony9

tonytony9

Contributor
Full Member
Joined
Mar 21, 2024
Messages
262
I did what 1969 suggested, cut out the bad metal and welded in some good. It looks difficult because of the layers of metal in those areas, but once you cut it out you can see what needs to be done. Here are a couple of pics that show my driver's side.

Cut the bad metal out.
View attachment 967867

Weld in new metal and make sure you secure it to the inner fender as well as the cowl.
View attachment 967868

I made my patch in two pieces, here is the final piece welded in.
View attachment 967869

Thank you for these photos!

It looks like you cut out the entire kick panel flange. The portion I have circled in the below photo. Is that the new horizonal cowl piece has the shelf built into it? Meaning all I need is a flat piece of sheet metal sitting onto of the kick panel?

1790862952057.png

1790863060012.png
 
OP
OP
tonytony9

tonytony9

Contributor
Full Member
Joined
Mar 21, 2024
Messages
262
Lots of thoughts here. First thing you need to do is get a gallon of Ospho and spray it everywhere you see rust. It will neutralize the rust, then put a simple top coat of anything like Rustoleum satin blacks to seal the metal. Especially all that metal under the cowl that you will not have access to after you weld the new cowl on. Then, as others have said, cut out any bad metal that is rotted all the way through. If it is so thin that you burn through it continually, then cut it out and replace that sections. Replacing little small postage size areas is fine. Often a panel will rust bad where a bit of water continues to sit. No need to cut out the whole panel, just the rot. In those areas here the metal is somewhat deformed, you can leave it if it is not paper thin. But before any welding, use a flapper wheel on your grinder and clean every spec of rust off the areas where you will weld and those areas where you new panel will lay on top of other metal. You do not want to bury rust under a new panel. The ospho is a great way to go as long as you follow it with rustoleum or such to seal it. Once your ready to weld, sand down (flapper disc) the 1/2" area where the weld will go to shinny bare metal. Then get a can of "Weld Thru" primer and coat the areas where you will weld. When done welding, wire brish your welds and hit them with the rustoleum to keep them from rusting.

Also, put that Osho in a spray bottle and drench every opening in those A pillars. Use it anywhere you think you have rust. Spray wll its running out of the seams. It wall etch your concrete floors, so use a tarp. IN a quick fix scenario i have used Ospho in a and B pillars, inside the rockers, anywhere there is rust. Then follow up with rutoleum as a top coat. The white residue left by the Ospho can be painted over without issue. This is not a full restoration method (you are not replacing all rusted metal), so at least try to stop the current rust from spreading or getting worse.

ON that windshield, the rust you see and the holes that are present are only the tip of the iceberg. First thing you need to do is cut out sections of that bad metal. If you want to keep it rather than replacing it, same process, drench it in Ospho and the spray inside thru those holes with rustoleum the best you can. Don't worry if it runs out of the seams, that's a good thing. Then just make little templates out of heavy stock paper or cardboard to the exact size of the cutout and then fabricate that into a piece of metal and weld it in place. Make sure your welds are penetrating (going clear thru to the other side of the metal) so that when you grind the welds flat, the weld on the back side keep it all in place with plenty of strength. There is considerable rust in that windshiled frame.
Thank you! To be clear, the ospho + rustoleum needs to be sanded back to bare metal then spray with weld through in the areas welds will sit? Anything that can't be sanded down to bare metal that needs a weld should eb replaced with new metal patch?
 

hsach

Contributor
Members Only
Joined
Apr 19, 2013
Messages
433
Yes, I cut out the bad metal that was most of the shelf area down to the top of the kick panel. The flat piece was welded to the top of the kick panel from both sides and tied into the windshield cowl area. The new upper cowl will sit on top. Don't worry about the bolt hole yet, you will probably have to relocate it once you test fit your fender, mine wasn't close. Here are a couple of pics.

The new upper cowl sitting on the flat metal piece
20220226_174815.jpg


Finished with bolt hole relocation

20250201_182825.jpg
 
OP
OP
tonytony9

tonytony9

Contributor
Full Member
Joined
Mar 21, 2024
Messages
262
Yes, I cut out the bad metal that was most of the shelf area down to the top of the kick panel. The flat piece was welded to the top of the kick panel from both sides and tied into the windshield cowl area. The new upper cowl will sit on top. Don't worry about the bolt hole yet, you will probably have to relocate it once you test fit your fender, mine wasn't close. Here are a couple of pics.

The new upper cowl sitting on the flat metal piece
View attachment 967984

Finished with bolt hole relocation

View attachment 967985
@hsach @1969 @Dylan_Shaffer This is all really helpful, thank you. I started a bit of the cutting and cleaning of the metal. A few questions

Passenger Side:

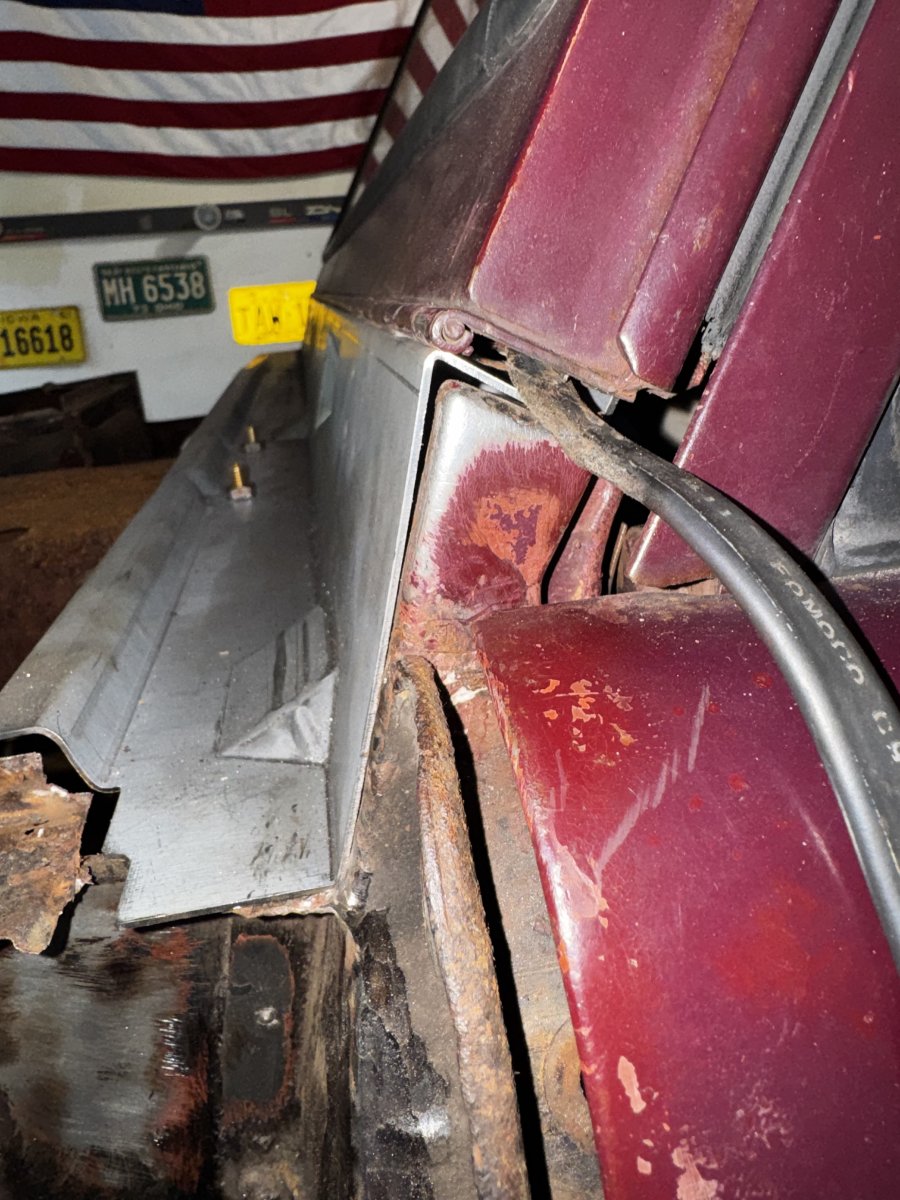
1. I bent this up, I need to cut it a bit more to size vertically and horizontally. Would I butt weld this into the top of the kick (cut the kick down another lets say inch)?
2. What do I do with the the piece that is directly below the end cap? Its the piece that is on top of the A pillar. I am worried to cut this out since the end cap and A Pillars are so crucial.

1791132918176.png

1791132963762.png

1791132998937.png

1791133065504.png


Driver's Side:

1. I assume the same process over here? Cut it all the way back to the top of the A-Pillar, weld it on either side of the top of the kick.


1791133371556.png


1791133417587.png


1791133462551.png


1791133487702.png


1.. I assume doing this on both sides will help allow my windshield cowl to sit down and back more on the end caps, the problem I was having in my original post where is spacing.

1791133540705.png
 

hsach

Contributor
Members Only
Joined
Apr 19, 2013
Messages
433
You are on the right track. I would cut the metal down to where the kick panel metal is good, and when you weld the new metal on top for building up the shelf, use a piece of metal as an "L brace" so it is stable and level. I would also trim as far back to the end cap as necessary to make the new piece lay down correctly. Tack everything in and make sure the fit is good before you weld it all up.

Here is a pic of the bracket for supporting kick panel shelf. It is a stock picture, but I just make my own out of the scrap metal laying around. 1 or 2 should work and you will never see them when the fender and cowl are back on.

lshaped.jpg
 
OP
OP
tonytony9

tonytony9

Contributor
Full Member
Joined
Mar 21, 2024
Messages
262
You are on the right track. I would cut the metal down to where the kick panel metal is good, and when you weld the new metal on top for building up the shelf, use a piece of metal as an "L brace" so it is stable and level. I would also trim as far back to the end cap as necessary to make the new piece lay down correctly. Tack everything in and make sure the fit is good before you weld it all up.

Here is a pic of the bracket for supporting kick panel shelf. It is a stock picture, but I just make my own out of the scrap metal laying around. 1 or 2 should work and you will never see them when the fender and cowl are back on.

View attachment 968197
This is a great idea instead of bending a 90ish into the shelf to connect it to the kick. Thank you
 
OP
OP
tonytony9

tonytony9

Contributor
Full Member
Joined
Mar 21, 2024
Messages
262
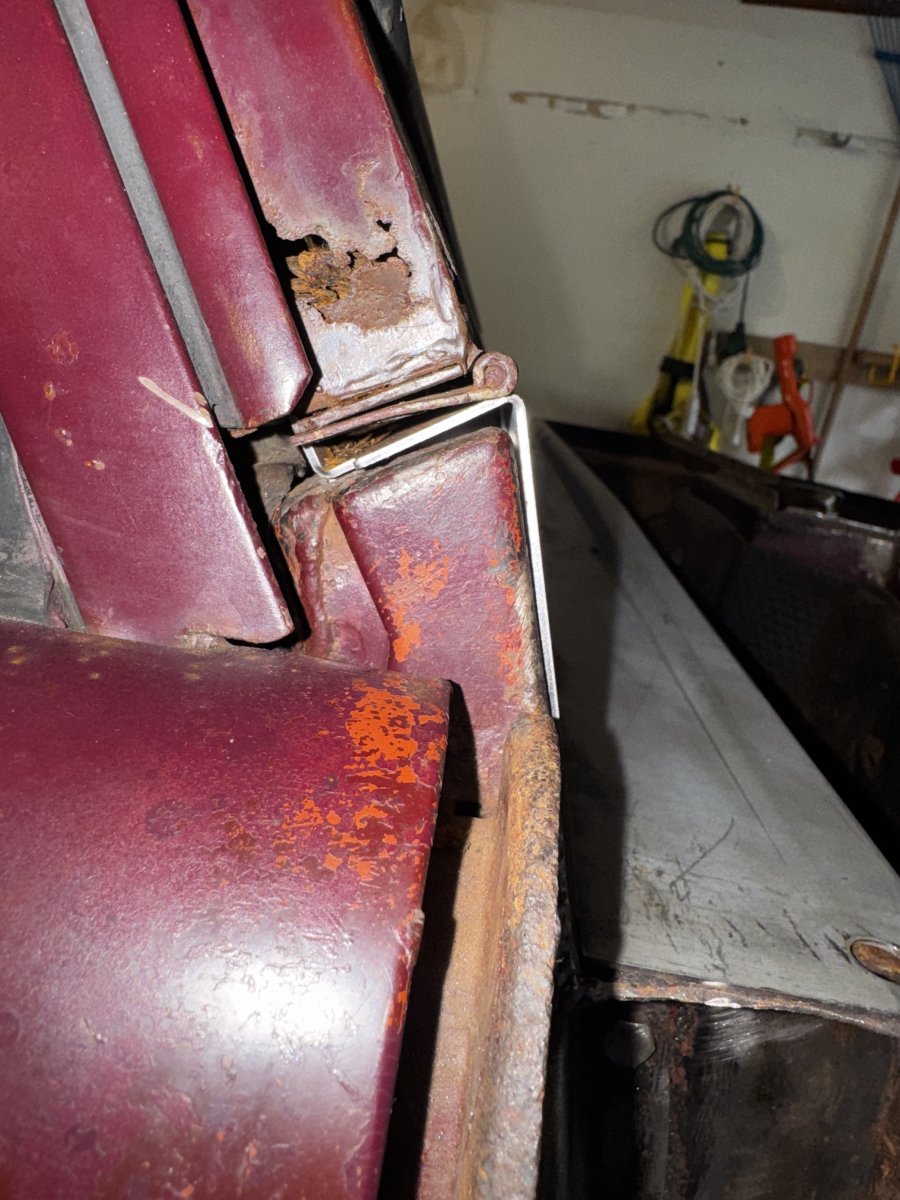
here is my mock patch for the drivers side. I trimmed back as far as I could get my Dremel on the top of the a pillar cap.

How do I clean up the gaps between the two patches I made on passenger and driver side. Between the old metal and the new? Just lay a fatter weld across it?

IMG_2562.jpeg

IMG_2559.jpeg
IMG_2532.jpeg
 

Attachments

  • IMG_2558.jpeg
    IMG_2558.jpeg
    169.6 KB · Views: 27

OGKev

Sponsor/Vendor
New Member
Joined
Feb 17, 2025
Messages
4
With my experience. I’ll add some extra weld or even a extra piece of metal under the mock you have right now to the tub, just so in case any vibration or pumps that will have some more hold there with more area of holding in place. At least mentally it’s stronger
 
OP
OP
tonytony9

tonytony9

Contributor
Full Member
Joined
Mar 21, 2024
Messages
262
With my experience. I’ll add some extra weld or even a extra piece of metal under the mock you have right now to the tub, just so in case any vibration or pumps that will have some more hold there with more area of holding in place. At least mentally it’s stronger
Im not sure I understand. With gaps as big as mine, am I able to stack welds on top of each other to connect the A pillar to the flat piece? I like the idea of adding extra metal but not sure how I would even mock that up. Can you help me visualize what you are referring to?
 

Jetfixr320

Jr. Member
Joined
Jun 26, 2025
Messages
132
@hsach @1969 @Dylan_Shaffer This is all really helpful, thank you. I started a bit of the cutting and cleaning of the metal. A few questions

Passenger Side:

1. I bent this up, I need to cut it a bit more to size vertically and horizontally. Would I butt weld this into the top of the kick (cut the kick down another lets say inch)?
2. What do I do with the the piece that is directly below the end cap? Its the piece that is on top of the A pillar. I am worried to cut this out since the end cap and A Pillars are so crucial.

View attachment 968066
View attachment 968067
View attachment 968068
View attachment 968069


Driver's Side:

1. I assume the same process over here? Cut it all the way back to the top of the A-Pillar, weld it on either side of the top of the kick.


View attachment 968070

View attachment 968071

View attachment 968072

View attachment 968073


1.. I assume doing this on both sides will help allow my windshield cowl to sit down and back more on the end caps, the problem I was having in my original post where is spacing.

View attachment 968074
Your upper circled area looks like it was bent to much when they bent it in a break, You may be able to open this back up some to fit better.
I can't tell on the bottom.
 
Top