BanditBronco
Sr. Member
- Joined
- Jul 2, 2008
- Messages
- 690
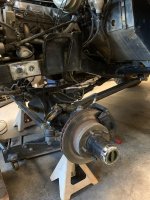
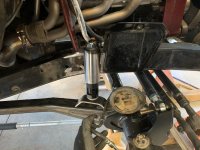
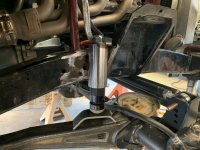
Finally, the time has come for me to install the Solo Motorsports radius arms I have had for a bit, as well as build a track bar and add ram assist, along with possibly some coilovers or fancy shocks to be determined.
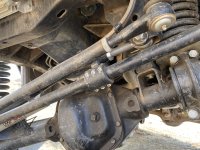
I have built a similar track bar set up on a buddies Bronco that came out well, so I decided to give it a go on my rig as well as possibly simplify it a little. The basic preference is, I found a rear jeep 1 ton swap bracket that works pretty well as an outside the radius arm mount for the front of a Bronco. Full disclosure, I have only done this on HP44 axles with the C's welded in the stock location. It does require some modification to the mount for tie rod clearance, but I will get to that later on.
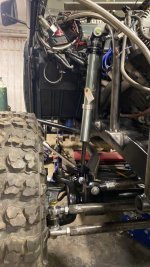
On the frame side I am running a tmr customs offset bracket that is made for a jeep style bushing up top, so the track bar will be hiem on the axle and a bushing at the frame.
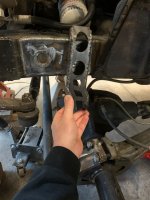
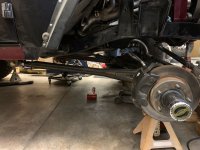
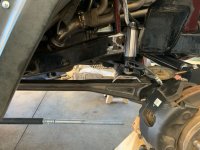
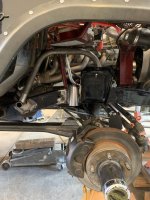
tacked the arm pivot boxes onto the frame last night trying to dial in my wheelbase and see what kind of full bump clearance I will need for the track bar. I think I am going to cut them off this evening and move them back a little, I think. I got excited trying to get a tad more wheelbase and ended up a hair too far forward. In the picture I am sitting at about 96" with 1" ruffstuff spring perches in the rear but I will probably pull it back to around 95" or 94.5" depending on steering clearance.
I will update as I move forward this week.
I have built a similar track bar set up on a buddies Bronco that came out well, so I decided to give it a go on my rig as well as possibly simplify it a little. The basic preference is, I found a rear jeep 1 ton swap bracket that works pretty well as an outside the radius arm mount for the front of a Bronco. Full disclosure, I have only done this on HP44 axles with the C's welded in the stock location. It does require some modification to the mount for tie rod clearance, but I will get to that later on.
On the frame side I am running a tmr customs offset bracket that is made for a jeep style bushing up top, so the track bar will be hiem on the axle and a bushing at the frame.
tacked the arm pivot boxes onto the frame last night trying to dial in my wheelbase and see what kind of full bump clearance I will need for the track bar. I think I am going to cut them off this evening and move them back a little, I think. I got excited trying to get a tad more wheelbase and ended up a hair too far forward. In the picture I am sitting at about 96" with 1" ruffstuff spring perches in the rear but I will probably pull it back to around 95" or 94.5" depending on steering clearance.
I will update as I move forward this week.