- Joined
- Oct 21, 2014
- Messages
- 13
I was missing a driver side vent box and really like the idea of having one, vs. having a piece of cardboard duct taped over the hole. I recently got into 3D printing, and as a result into CAD designing. So I figured why buy one for $150 when I could print one for probably much more $$
I designed this in 2 pieces that glue together since it was too big to print in one go. Other than the hinge pin, the entire box is 3d printed. The top piece is a really odd shape since it has to align with both the slope of the hood, and the offset of the vents vs the hole in the bulkhead. It screws into the 8 existing holes in the bulkhead.
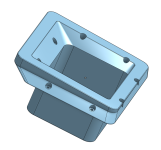
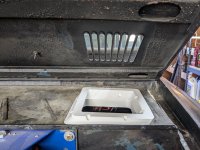
The lower box is slanted to drain, and aligns with my firewall hole for the vent box drain. There is some clearance for the speedo cable too. The door has a hinge that has no clearance to the box, so once the pin is in place the door moves but stays where you move it to. I'll have to see how this works over time.
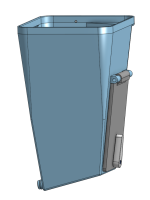


The door, lever, and lock are all polycarbonate. The upper is ASA, and the lower is PETG (I ran out of ASA.)
I made the lower section 10mm too small on the one in the pics, so this one has an adapter. Upper and lower (and adapter) are glued with epoxy.
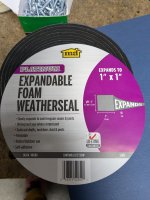
I used this foam weatherseal for the seal to the hood, time will tell if it holds up.

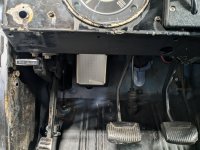
I designed this in 2 pieces that glue together since it was too big to print in one go. Other than the hinge pin, the entire box is 3d printed. The top piece is a really odd shape since it has to align with both the slope of the hood, and the offset of the vents vs the hole in the bulkhead. It screws into the 8 existing holes in the bulkhead.


The lower box is slanted to drain, and aligns with my firewall hole for the vent box drain. There is some clearance for the speedo cable too. The door has a hinge that has no clearance to the box, so once the pin is in place the door moves but stays where you move it to. I'll have to see how this works over time.


The door, lever, and lock are all polycarbonate. The upper is ASA, and the lower is PETG (I ran out of ASA.)
I made the lower section 10mm too small on the one in the pics, so this one has an adapter. Upper and lower (and adapter) are glued with epoxy.
I used this foam weatherseal for the seal to the hood, time will tell if it holds up.


