• Welcome to ClassicBroncos! - You are currently viewing the forums as a GUEST. To take advantage of all the site features, please take a moment to register. It's fast, simple and absolutely free. So please join our community today!
    If you have problems registering or can't log into your account, please contact Admin.

'71/'76 Badass Bronco Bronco Build

WPS 73 Bronco

Contributor
Full Member
Joined
Jan 12, 2023
Messages
300
Loc.
The Woodlands, Tx
Back on post 185 you can see a good pic of your radiator hose. It looks like a custom bend, fit for your application. Is that right and how did you do it? I made one for my LS Swap, but it's pieced together with clamps.
 
OP
OP
ba123

ba123

Contributor
Bronco Guru
Joined
Oct 29, 2022
Messages
1,888
Loc.
CA
Also finally getting around to doing my auto/manual with OD lockout valve body for the AOD. Got the Silverfox SPT-R

http://www.silverfoxtrans.com/valveBodies.html#vbsptr

The guy, Dan, has been great answering my questions along the way (waitlist as he builds per order) and I highly recommend him.

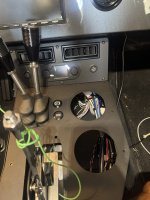
I installed a switch that lights up Green when OD is ON and RED when OD is OFF.

https://billetautomotivebuttons.com/products/22mm-o-d-billet-push-button-switch-overdrive (I got the 3 LED version)

I also installed a Park Brake button to match for my eStopp:

https://billetautomotivebuttons.com/products/22mm-park-brake-symbol-billet-push-button-switch (just red when engaged), instead of the chrome button the kit comes with and won’t match. Estopp does sell a plain black button but I wanted this one. Wasn’t difficult to wire in.

I don’t yet have the OD switch wired but will finish that up soon. Might do a test drive first and it’s a but hot out right now but here are the switches installed and not buttoned up.
IMG_8852.jpeg

The hard part in the project was getting the non-stop flow of ATF out without too much of a mess and then measuring how much I got out so that I have a baseline to start with although I know I was low. I used clear 1 gallon water jugs that I filled with fluid.

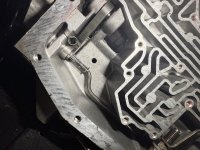
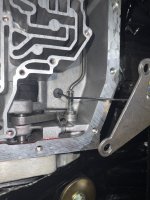
The other hard part (mentally) was drilling through the trans case for the wire. Don’t wanna do that twice!
IMG_8890.jpeg IMG_8891.jpeg

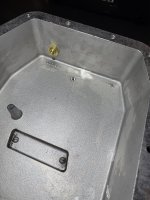
The plug just gets massaged into the 5/16”hole and seals it with nothing but a little oil to get it in there. I did add a tiny zip tie on the top since I’m paranoid of leaks.

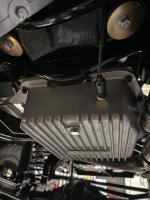
I also added a temp sensor to my pan and will add a switch to go between the TC output and the pan since I already installed the output temp sensor previously.
IMG_8895.jpeg IMG_8892.jpeg

Hope all goes as planned!!!
 
OP
OP
ba123

ba123

Contributor
Bronco Guru
Joined
Oct 29, 2022
Messages
1,888
Loc.
CA
Back on post 185 you can see a good pic of your radiator hose. It looks like a custom bend, fit for your application. Is that right and how did you do it? I made one for my LS Swap, but it's pieced together with clamps.
I don’t love that hose. It’s not custom, just that company’s version of a Mustang top hose.
 
OP
OP
ba123

ba123

Contributor
Bronco Guru
Joined
Oct 29, 2022
Messages
1,888
Loc.
CA
Stoked that the VB work is done, got to go for a test drive today but was rush hour and couldn’t get out of third.

It seemed to shift great in both fully auto or manual. I accidentally had it in the old D, which is now 2nd and it still auto shifted to second, which was nice.

This VB does have a shift point adjustment screw (on the VB) which is really cool, but I might not need to adjust.

Will take it on the freeway tomorrow to test OD and then button up my OD switch stuff.

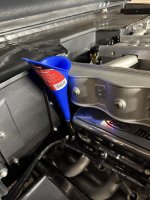
Also swapped the dipstick tube. I hated the braided stainless tube. Dumb idea for this trans as it was the biggest pain to fill through, show, and leaked a little at the bottom.

Got a hard tube dipstick from Allstar Performance (on Amazon) and the funnel fit and I could pout a gallon of ATF in easy as pie. I did have to massage the Engle at the top to be where I wanted it but was easy to do.
 

Attachments

  • IMG_8896.jpeg
    IMG_8896.jpeg
    194.1 KB · Views: 18
Top