• Welcome to ClassicBroncos! - You are currently viewing the forums as a GUEST. To take advantage of all the site features, please take a moment to register. It's fast, simple and absolutely free. So please join our community today!
    If you have problems registering or can't log into your account, please contact Admin.

75 Bronco Restoration

Splash440

Contributor
Newbie
Joined
Sep 9, 2021
Messages
25
Loc.
Dover, NC
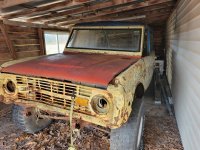
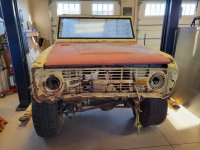
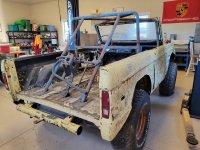
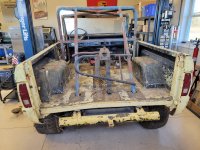
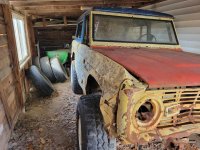
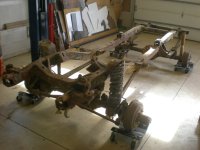
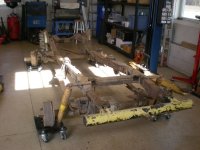
While waiting for a previous 57 Thunderbird project to get out of the paint shop, I started working on another project, a 1975 Bronco.

Actually, I purchased this project a couple of years ago but took over a year to get the title straight. I have been working on it for about a year but just got around to posting pictures.

It is extremely beat up as it was a hunt club truck for about 20 years before it was parked.
 

Attachments

  • B1.JPG
    B1.JPG
    386 KB · Views: 52
  • B6.jpg
    B6.jpg
    289.9 KB · Views: 45
  • B5.jpg
    B5.jpg
    357.2 KB · Views: 48
  • B4.jpg
    B4.jpg
    361.3 KB · Views: 51
  • B3.jpg
    B3.jpg
    353 KB · Views: 55
  • B2.JPG
    B2.JPG
    392.6 KB · Views: 51

JB Fab

Sponsor/Vendor
Bronco Guru
Joined
Mar 21, 2004
Messages
1,292
Wow, a hunt club rig! The loner rig hunters use to relive their teenage off-road mis-adventures? that rig? I sir, applaud your ambition! It seems you chosen to make us all look bad by choosing the holy grail of 'worst case' previous owners, as your starting point.....

Cheers!
Jon
 
OP
OP
S

Splash440

Contributor
Newbie
Joined
Sep 9, 2021
Messages
25
Loc.
Dover, NC
Yep, I am s sucker for a basket case. Based on where I am in the project at the moment there is not much original sheet metal left.
 
OP
OP
S

Splash440

Contributor
Newbie
Joined
Sep 9, 2021
Messages
25
Loc.
Dover, NC
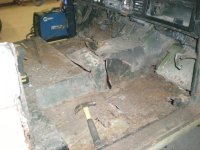
Most of the floor was aluminum plate over very rusty metal.
 

Attachments

  • B7.JPG
    B7.JPG
    173.4 KB · Views: 34
  • B8.JPG
    B8.JPG
    163.5 KB · Views: 28
  • B9.JPG
    B9.JPG
    206 KB · Views: 36
  • B10.JPG
    B10.JPG
    211.6 KB · Views: 30
  • B12.JPG
    B12.JPG
    238.7 KB · Views: 35
  • B11.JPG
    B11.JPG
    222.8 KB · Views: 33
OP
OP
S

Splash440

Contributor
Newbie
Joined
Sep 9, 2021
Messages
25
Loc.
Dover, NC
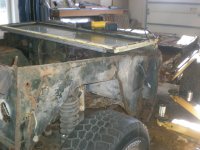
More pictures of the very rusty body. Sometime in the past a previous owner welded a 3 inch pipe to the frame for a rear bumper.
 

Attachments

  • B13.JPG
    B13.JPG
    229.1 KB · Views: 39
  • B14.JPG
    B14.JPG
    181.4 KB · Views: 43
  • B15.JPG
    B15.JPG
    208.7 KB · Views: 41
  • B16.JPG
    B16.JPG
    179.8 KB · Views: 38
  • B20.JPG
    B20.JPG
    154.2 KB · Views: 42
  • B19.JPG
    B19.JPG
    137.9 KB · Views: 41
  • B18.JPG
    B18.JPG
    175.8 KB · Views: 41
  • B17.JPG
    B17.JPG
    173.3 KB · Views: 39
  • B21.JPG
    B21.JPG
    173.3 KB · Views: 43
OP
OP
S

Splash440

Contributor
Newbie
Joined
Sep 9, 2021
Messages
25
Loc.
Dover, NC
Got some more pictures resized and ready to post.

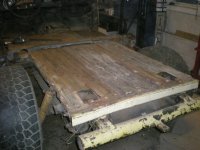
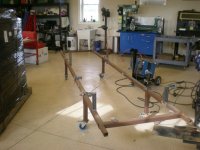
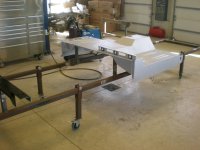
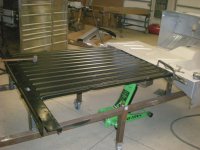
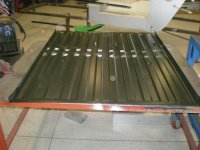
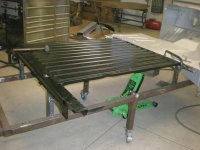
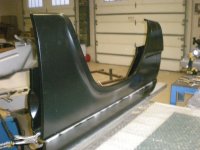
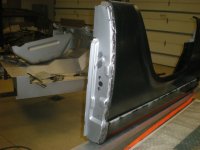
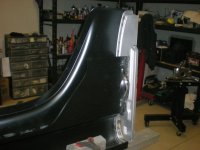
While I was disassembling the body I realized that there was very little that it made sense to try and save. I decided to buy all new parts and build a body from scratch. First, I watched a lot of videos and read all I could about the key measurements for the jig and for the body assembly. I had a jig frame for my last project (57 Thunderbird). It was fairly easy to change the mount points once I settle on the right dimensions.
 

Attachments

  • B22.JPG
    B22.JPG
    170.8 KB · Views: 43
  • B23.JPG
    B23.JPG
    193.3 KB · Views: 39
  • B24.JPG
    B24.JPG
    144.4 KB · Views: 39
  • B25.JPG
    B25.JPG
    124.5 KB · Views: 37
  • B26.JPG
    B26.JPG
    175 KB · Views: 43
  • B29.JPG
    B29.JPG
    118.7 KB · Views: 38
  • B28.JPG
    B28.JPG
    127.1 KB · Views: 40
  • B27.JPG
    B27.JPG
    145.4 KB · Views: 35
  • B30.JPG
    B30.JPG
    143.1 KB · Views: 46
OP
OP
S

Splash440

Contributor
Newbie
Joined
Sep 9, 2021
Messages
25
Loc.
Dover, NC
It is a little scary when you are assembling the body. I kept checking the measurements and just hoped it was all right. But, at this point you are committed.
 

Attachments

  • B31.JPG
    B31.JPG
    124.6 KB · Views: 38
  • B33.JPG
    B33.JPG
    207.2 KB · Views: 35
  • B32.JPG
    B32.JPG
    198.5 KB · Views: 37
  • B34.JPG
    B34.JPG
    208.1 KB · Views: 38
OP
OP
S

Splash440

Contributor
Newbie
Joined
Sep 9, 2021
Messages
25
Loc.
Dover, NC
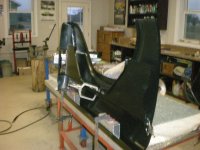
Assembling the rear quarter panels seems a little tricking in the beginning but turned out to be one of the easier procedures. There were multiple pieces but it all made sense to me for some reason.
 

Attachments

  • B36.JPG
    B36.JPG
    167.1 KB · Views: 45
  • B37.JPG
    B37.JPG
    204.8 KB · Views: 43
  • B38.JPG
    B38.JPG
    192.8 KB · Views: 40
  • B40.JPG
    B40.JPG
    152.8 KB · Views: 39
  • B39.JPG
    B39.JPG
    143.2 KB · Views: 40
  • B41.JPG
    B41.JPG
    136.5 KB · Views: 40
  • B42.JPG
    B42.JPG
    185.3 KB · Views: 39
  • B43.JPG
    B43.JPG
    159.2 KB · Views: 43

phred

Contributor
Bronco Guru
Joined
Aug 25, 2006
Messages
3,532
Loc.
Earth
Wow! I wish my shop looked that clean and neat. Nice work, looking forward to the build progress
 

fordfan

Bronco Guru
Joined
Sep 13, 2009
Messages
3,524
I'm a subscriber to your build! Keep us updated! There's not many builds like yours going on here anymore, so we will be tuning in!
 

rcmbronc

Contributor
Bronco Guru
Joined
Dec 15, 2003
Messages
2,727
Loc.
Tomah WI
Looks awesome. One word of advise if you are going to run doors make sure they fit well before pinning down any post locations.

Good luck looks fun.
 
OP
OP
S

Splash440

Contributor
Newbie
Joined
Sep 9, 2021
Messages
25
Loc.
Dover, NC
Looks awesome. One word of advise if you are going to run doors make sure they fit well before pinning down any post locations.

Good luck looks fun.
Thanks, I plan to have standard doors. I have looked at a lot of information on measurements, but it is still a little intimidating.
 
Top