Community
Message Forum
Photo Gallery
Event Calendar
Book Reviews
Bronco Wallpaper
Bronco FAQ
Link Back to CB!
Photo Gallery
Event Calendar
Book Reviews
Bronco Wallpaper
Bronco FAQ
Link Back to CB!

Buy / Sell


Bronco Tech
3 Arm Wiper Setup
Fix Motor Mount
Roll Cage Braces
Throttle Body 65mm
Wheel Alignment
Heat Riser Replacement
Vent Window Repair
Center Console Mount
Straighten Bumper
Ford 6R80 6 spd
More Tech...
Fix Motor Mount
Roll Cage Braces
Throttle Body 65mm
Wheel Alignment
Heat Riser Replacement
Vent Window Repair
Center Console Mount
Straighten Bumper
Ford 6R80 6 spd
More Tech...

Install the app
-
Welcome to ClassicBroncos! - You are currently viewing the forums as a GUEST. To take advantage of all the site features, please take a moment to register. It's fast, simple and absolutely free. So please join our community today!If you have problems registering or can't log into your account, please contact Admin.
You are using an out of date browser. It may not display this or other websites correctly.
You should upgrade or use an alternative browser.
You should upgrade or use an alternative browser.
A4x4Junkys 1970 build
- Thread starter A4x4Junky
- Start date
A4x4Junky
Sr. Member
......It's tomorrow!;D
Sorry...I promise to not take so long
Worked all day today and didnt feel like I got enough done.
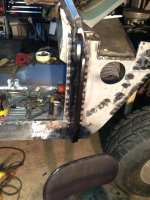
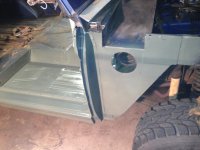
Started off by welding in the passenger hinge post.
Went together easy enough.
Then it was time to have fun with the striker post.
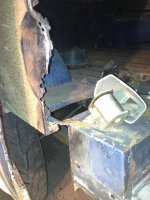
The quarter is horrible where it attaches to the striker, so not a lot of metal there to save.
Also found that the inner quarter is rotten where it connects to the striker.
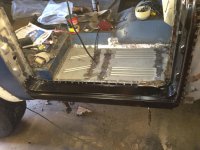
Spent a good deal of time patching the inner rocker, floor by the striker and the inner quarter. Not pretty, but very solid and wont be visible later.
Test fit everything and am hopeful that it will go together pretty quickly...tomorrow
Anthony
Attachments
A4x4Junky
Sr. Member
Lots more done on the passenger side today.
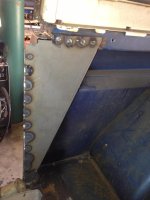
Started with the striker support. This welded in with no issues and fit pretty well compared to some of the pieces.
Ran out of shielding gas...and the place I buy from is closed till Monday.
Damn.
Called around and found a tool rental place that would rent me the bottle off their welder. Straight Argon...it works, but I miss the Stargon mix I was using.
Moved onto the striker. No major issues after rebuilding the inner quarter behind it last night. Good fit and no problems getting this into place.
Rocker went in pretty well. Same fitment issues as driver side (none of the corners fit right) but I knew what to change and how much from doing the driver side. No major issues.
Spent quite a while cleaning up my welds and got a cheap rattlecan coat of primer on the new metal.
Getting closer. Have some seams to seal and 2 small patches to weld in, but I think Ill wait till I have the Stargon
So, one more day to get it back together so I can drive to work on monday...gonna be real close.
Anthony
Attachments
-
 IMG_1394.jpg90.2 KB · Views: 49
 -
 IMG_1393.jpg83.2 KB · Views: 46
 -
 IMG_1389.jpg104.4 KB · Views: 40
 -
 IMG_1392.jpg107.3 KB · Views: 48
 -
 IMG_1390.jpg110.5 KB · Views: 48
 -
 IMG_1388.jpg87.1 KB · Views: 45
 -
 IMG_1385.jpg82.1 KB · Views: 44
 -
 IMG_1386.jpg76.2 KB · Views: 47
 -
 IMG_1396.jpg91.9 KB · Views: 65
 -
 IMG_1395.jpg86.8 KB · Views: 46
- Joined
- Jan 24, 2009
- Messages
- 2,551
Any way you look at it you did a lot of work on it in a week! good idea on the shielding gas,that would have stopped me right there. The Bronco looks good... Even though the week is over keep posting updates I want to see how it turns out.
A4x4Junky
Sr. Member
Any way you look at it you did a lot of work on it in a week! good idea on the shielding gas,that would have stopped me right there. The Bronco looks good... Even though the week is over keep posting updates I want to see how it turns out.
Thanks for the compliments. Shielding gas was a pain and wasnt fun welding with the pure argon, but it worked.
Last day of the mad scramble finally over. Turned out ok for what I was going for. I wanted to get the rot out of the front of the truck. Everything from the striker posts forward is now rot free.
Still have some door adjusting to do, but they close nicely.
Crap seat reinstalled, but dont want to put the new seats in until I finish the bed and rear wheel wells.
To do (short and easy list) :
Weld up cage and install (once it is delivered)
Remove rot from bed
Stretch rear wheel wells
Install new interior and console
Not tomorrow
Anthony
Attachments
A4x4Junky
Sr. Member
Been driving it daily which brings a smile to my face ;D
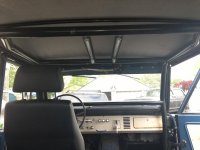
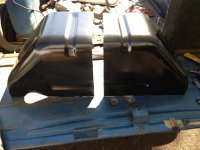
Got the cage, soft top, and interior delivered.
Decided to test fit cage to make sure I have room to mess with my wheel wells.
Cage seems to fit real well.
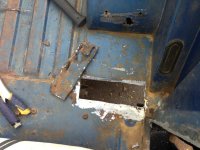
Started by cutting out and patching some rust behind the driver seat.
Moved onto the driver wheel well. I have plans in the future to stretch the wheelbase. Not sure exactly how far this time, but doing this now will ensure I wont have to do it later.
I forgot how much this sucks. Lots of weld to clean up, but it should all disapprear when Im done.
Got most of the driver side done and got just the initial cut done on pass side.
More tomorrow
Anthony
Attachments
-
 IMG_1527.jpg92.1 KB · Views: 38
 -
 IMG_1526.jpg76.5 KB · Views: 38
 -
 IMG_1523.jpg124.9 KB · Views: 38
 -
 IMG_1522.jpg94.2 KB · Views: 40
 -
 IMG_1516.jpg127.9 KB · Views: 36
 -
 IMG_1517.jpg123.1 KB · Views: 36
 -
 IMG_1518.jpg137.6 KB · Views: 39
 -
 IMG_1520.jpg114.6 KB · Views: 37
 -
 IMG_1537.jpg106.6 KB · Views: 37
 -
 IMG_1534.jpg83.1 KB · Views: 36
 -
 IMG_1530.jpg109 KB · Views: 36
 -
 IMG_1529.jpg112 KB · Views: 38
A4x4Junky
Sr. Member
Kept going with the kill the rust theme yesterday.
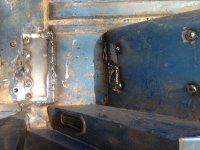
Finished cutting out and fitting the extended wheel well for the passenger side. Went together easily.
Moved onto other small patches. Some came out well...some not so well, but at least I am running out of rot in this truck.
Feels damned good to know that what I have isnt rotting away as I drive it ;D
Treated the fresh metal/welds with a quick coat of paint to hold it over until I can get around to finishing the job.
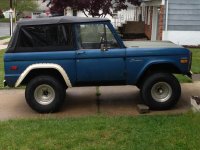
Since this is my daily driver and rain was coming I spent the rest of the day putting on the new Rampage top.
Fit was decent...have more adjusting to go, but not bad overall.
Once I find the time to clean up these patches I can finally start putting together the cage I picked up.
Need more weekends...or less work days %)
Anthony
Attachments
-
 IMG_1550.jpg95.3 KB · Views: 32
 -
 IMG_1554.jpg64.5 KB · Views: 32
 -
 IMG_1551.jpg109.8 KB · Views: 30
 -
 IMG_1549.jpg116 KB · Views: 27
 -
 IMG_1547.jpg111.1 KB · Views: 27
 -
 IMG_1545.jpg130.9 KB · Views: 27
 -
 IMG_1542.jpg110.5 KB · Views: 28
 -
 IMG_1541.jpg115.8 KB · Views: 28
 -
 IMG_1555.jpg117.4 KB · Views: 47
A4x4Junky
Sr. Member
Nice job but ..... You gotta slow down. Your making most of the rest of us seem lazy!
Thanks, but I hardly feel Im setting any speed records here
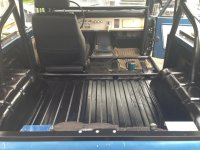
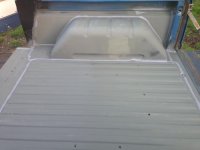
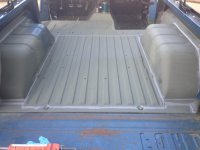
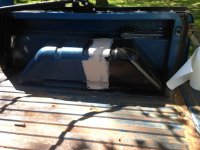
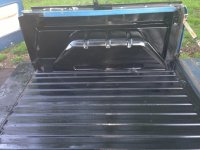
Spent a few days working on cleaning up the bed and finishing the wheel wells. Pretty happy over all. Wheel wells came out decent.
The bed is a little rust pitted, but cleaned that up and plan to bedliner it at some point, so not too concerned.
Anthony
Attachments
-
 IMG_1594.jpg55.9 KB · Views: 25
 -
 IMG_1593.jpg55.6 KB · Views: 28
 -
 IMG_1591.jpg72.3 KB · Views: 34
 -
 IMG_1581.jpg108.9 KB · Views: 28
 -
 IMG_1580.jpg98.6 KB · Views: 25
 -
 IMG_1579.jpg104.3 KB · Views: 24
 -
 IMG_1576.jpg104.2 KB · Views: 23
 -
 IMG_1575.jpg113.7 KB · Views: 25
 -
 IMG_1596.jpg96.1 KB · Views: 31
 -
 IMG_1598.jpg95.5 KB · Views: 28
 -
 IMG_1597.jpg85.8 KB · Views: 32
 -
 IMG_1595.jpg105.6 KB · Views: 30
A4x4Junky
Sr. Member
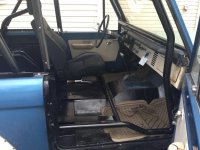
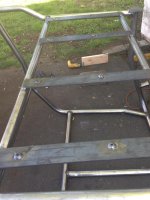
I started working on putting together my cage as well.
Got the front section of that done along with seat mounts...just ran out of weekend.
Still have the back end of the cage and then have to mount it.
Will have to work on frame tie-ins, seatbelts, passenger and rear seats and console later...always something.
Anthony
Got the front section of that done along with seat mounts...just ran out of weekend.
Still have the back end of the cage and then have to mount it.
Will have to work on frame tie-ins, seatbelts, passenger and rear seats and console later...always something.
Anthony
Attachments
A4x4Junky
Sr. Member
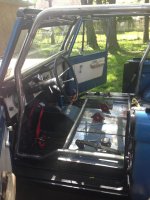
Finished welding up the rear part of the cage and then moved onto seats.
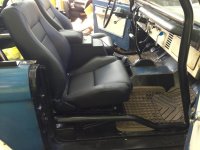
The passenger seat I purchased is designed to be bolted down with no adjustment or ability to fold forward.
With a few kids, that isnt gonna work for me.
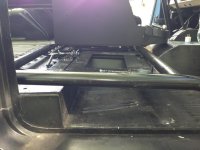
Me and a buddy of mine jumpstarted a couple braincells and came up with a simple seat support that would allow the seat to fold forward for reasonable access to the back seat. Still have a couple things I intend to change, but works pretty well.
Anthony
Attachments
Similar threads
City: Stockton
Price: $50
- Replies
- 0
- Views
- 94
City: Longmont
Price: $70000
- Replies
- 3
- Views
- 303
City: Bend Oregon
Price: $5000
- Replies
- 1
- Views
- 286


