Community
Buy / Sell


Bronco Tech
3 Arm Wiper Setup
Fix Motor Mount
Roll Cage Braces
Throttle Body 65mm
Wheel Alignment
Heat Riser Replacement
Vent Window Repair
Center Console Mount
Straighten Bumper
Ford 6R80 6 spd
More Tech...
Fix Motor Mount
Roll Cage Braces
Throttle Body 65mm
Wheel Alignment
Heat Riser Replacement
Vent Window Repair
Center Console Mount
Straighten Bumper
Ford 6R80 6 spd
More Tech...

-
Welcome to ClassicBroncos! - You are currently viewing the forums as a GUEST. To take advantage of all the site features, please take a moment to register. It's fast, simple and absolutely free. So please join our community today!If you have problems registering or can't log into your account, please contact Admin.
You are using an out of date browser. It may not display this or other websites correctly.
You should upgrade or use an alternative browser.
You should upgrade or use an alternative browser.
My Build Thread - Clifford
- Thread starter kbldawg
- Start date
kbldawg
Bronco Guru
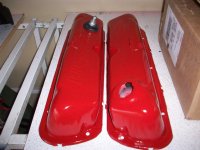
You're right on bending that shifter. Heat and bend, heat and bend, heat and bend. The paint will hold up just fine on things like the valve covers.
Good to hear, thanks!
mustangtoby
Bronco Guru
Nice Bronco, nice thread. I really like those skis, I'm gonna attemp that myself soon. I need to do some more studying before I get out the grinding wheel, but if it turns out 1/2 as nice as yours I'll be happy. I dig that tranny swap, too. Looking at yours I see how much I still need to do!
kbldawg
Bronco Guru
I know the feeling man. I've felt like that myself. It wasn't until just recently, with the engine/tranny/exhuast, that I feel like I am on the down hill side. For me, this is by far the most exciting part.
I guess because those three things have been the most needed upgrades. Getting all three done at once is going to be pretty killer.
I've tried to keep the upgrades from creating to much down time, so far it's worked out. Hopefully, these will go smooth.
I guess because those three things have been the most needed upgrades. Getting all three done at once is going to be pretty killer.
I've tried to keep the upgrades from creating to much down time, so far it's worked out. Hopefully, these will go smooth.
kbldawg
Bronco Guru
Engine and Tranny Swap
Time to update the build.
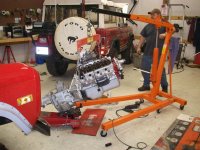
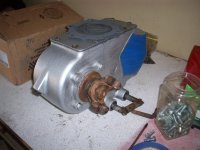
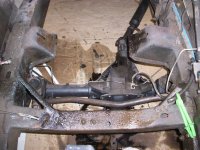
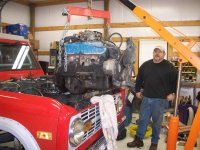
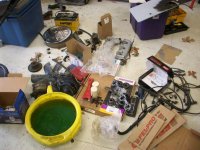
Last weekend bigmuddy and I pulled the old Engine, Tranny, and Transfer Case and basically prepped for the transplant.
It was a great feeling knowing the this tired old motor was finally coming out, but I couldn't help but feel a little aprehension seeing her all torn apart. The point of "no return" was at hand. Although, Ben didn't appear as aprehensive as I was, odd? ha!
As most tear-downs go, this went pretty smooth. We assessed what we had, what we needed, and where to start. It was obvious, I needed to restore a lot of old parts to go with the new motor/tranny.
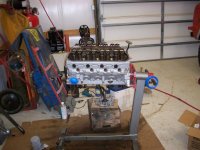
Since I had already put a new coat of paint on the engine I couldn't see slapping all those nasty parts on it. So, I gathered up everything and spent the next week cleaning and painting.
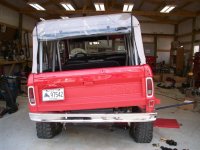
I had also decided I was going to have to break down and put in (at least) a 1" body lift in order to keep from completely butchering the tunnel for installations of the 435.
So, I got that ordered and by end of week I had everything ready to make another run at this project.
Time to update the build.
Last weekend bigmuddy and I pulled the old Engine, Tranny, and Transfer Case and basically prepped for the transplant.
It was a great feeling knowing the this tired old motor was finally coming out, but I couldn't help but feel a little aprehension seeing her all torn apart. The point of "no return" was at hand.
As most tear-downs go, this went pretty smooth. We assessed what we had, what we needed, and where to start. It was obvious, I needed to restore a lot of old parts to go with the new motor/tranny.
Since I had already put a new coat of paint on the engine I couldn't see slapping all those nasty parts on it. So, I gathered up everything and spent the next week cleaning and painting.
I had also decided I was going to have to break down and put in (at least) a 1" body lift in order to keep from completely butchering the tunnel for installations of the 435.
So, I got that ordered and by end of week I had everything ready to make another run at this project.
Attachments
-
 Engine & Tranny Swap 002.jpg140.2 KB · Views: 26
 -
 Engine & Tranny Swap 010.jpg86.6 KB · Views: 28
 -
 Engine & Tranny Swap 009.jpg90.7 KB · Views: 22
 -
 Engine & Tranny Swap 008.jpg102.8 KB · Views: 26
 -
 Engine & Tranny Swap 001.jpg110.4 KB · Views: 33
 -
 Engine & Tranny Swap 006.jpg151.6 KB · Views: 19
 -
 Engine & Tranny Swap 005.jpg89.3 KB · Views: 25
 -
 Engine & Tranny Swap 003.jpg133.4 KB · Views: 23
 -
 Engine & Tranny Swap 024.jpg120.2 KB · Views: 23
 -
 Engine & Tranny Swap 026.jpg99.4 KB · Views: 25
 -
 Engine & Tranny Swap 017.jpg104 KB · Views: 25
 -
 Engine & Tranny Swap 018.jpg118.6 KB · Views: 24
Last edited:
kbldawg
Bronco Guru
Body Lift & Engine Assembly
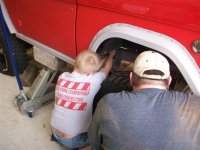
So, the next weekend, sick Ben and all, we tackle the project.
Ben went crazy on the body lift. He was like a mad man in there ripping, cuting, beating, those old mounts out and putting the new in. It was something to behold. At one point I turned and looked and I was getting a little nervous....
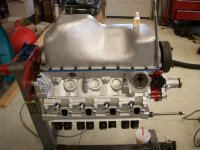
Some how, I ended up spending most of that time building the engine. In hind-site, I think we should have swaped jobs, I trust his engine building skills much more than my own. ;D
As it was though, Ben had an obvious firm grip on the Body Lift and so I started plugging away on the motor.
Attachments
Last edited:
JC
Jr. Member
Looks great dude! Hope everythings goes smooth! I need to get by and check out your rig sometime, you've really done a lot to it and it looks great.
kbldawg
Bronco Guru
Engine and Tranny Install
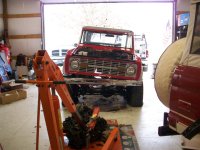
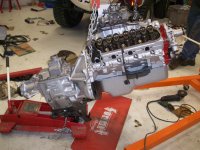
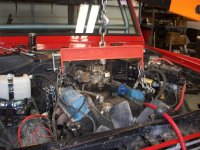
Finally, we were ready to drop in the engine and tranny.
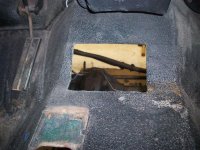
My tunnel cover hole...
I ended up having to cut another 1" more out of the floor brace in order to get the engine to drop in to the motor mounts, but I didn't retake this previous pic, so...just add an inch.
The final size of the tunnel hole would work out really well for someone doing the same swap. I could have left about a 1/2" more material on the passenger side, but as it is, the hole is pretty close to 6" x 6".
and by the end of the day, this is where we're at...
The engine, tranny, transfer case, and body lift are all in. Now we're working on some of the "little stuff". We got the steering shaft extended, exhaust manifolds on, front dress on, radiator in and shroud clearanced for the 1" BL...etc.
So, we're really close and I am getting pretty dang excited.
Thanks again to Ben, he's the man and I really appreciate the time and hard work you've put in to this and past projects.
Chad
Attachments
Last edited:
kbldawg
Bronco Guru
Looks great dude! Hope everythings goes smooth! I need to get by and check out your rig sometime, you've really done a lot to it and it looks great.
Thanks JC, so far so good.
Anytime you wanna get together, give me a shout. ;D
kbldawg
Bronco Guru
EB Brother in Training...
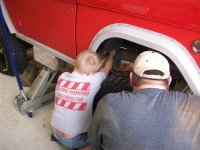
I did manage to get a couple shots of my Son (Dillon) taking some lessons from bigmuddy on how to remove old body bushing using an air chisel.
He seemed more interested in Ben's "Man Cave" than he did with all the wrenching and knuckle busting going on in the shop.
I did manage to get a couple shots of my Son (Dillon) taking some lessons from bigmuddy on how to remove old body bushing using an air chisel.
He seemed more interested in Ben's "Man Cave" than he did with all the wrenching and knuckle busting going on in the shop.
Attachments
Last edited:
Ohio Bronco 21
Bronco Guru
Nice bit of progress on this last bit. The engine looks great.
Dang your getting close! Everything looks great!
You know your gonna have to build another one with your boy when he gets older.
You know your gonna have to build another one with your boy when he gets older.
kbldawg
Bronco Guru
I'm getting really excited to be able to fix so many issues all at once. It's been expensive, but it would have been more expensive and time consuming to have done it in stages. Except for the T-Case, everything we've done needed to be fixed or replaced anyway. The last bit will be a new exhaust, and that's is another area that needed some serious attention.
By the time the exhaust shop gets done with her, I'm sure I'll have a permanent grin on my face when I turn the key.
I may have already mentioned this, but...the silver is from the POR15 engine paint kit. It's actually called "aluminum". It goes with the whole Red and Grey scheme I've got going on, but more importantly, it will show oil leaks.
You can see from the pics, the old drive-train had plenty of oil leaks and so, you could say that I'm kind of on a mission to rid myself and others driveways of that.
The red is just plain old Red Duplicolor Engine Paint. It's a much darker red than the rest of the truck, but there's enough seperation that it blends well enough. I had to break up all that silver.
I suspected, and bigmuddy confirmed, my front driveshaft has a lot of play (perpendicular) in the splines so it will need replaced soon, but...it may just have to break before I do that. ;D
The engine bay still has a lot of trail dust/dirt, once we get done that will all clean up nicely too.
I'll be able to focus on the smaller stuff (less expensive too!) and dial some things in and really enjoy the rig. Good times ahead.
Chad
kbldawg
Bronco Guru
Dang your getting close! Everything looks great!
You know your gonna have to build another one with your boy when he gets older.
Thanks, Mark. I may just have to take off a day this week and get back after it, I can't think of anything else.
As all good Fathers do, I've been trying to talk my son into making his first vehicle an EB. I didn't have to try to hard.
Just getting a minute to look at this thread and the only question I have is? When did you have time to take all the pics 
Lots of fun. If I hadn't been nursing a bad cold and lack of sleep it would have been even better. Take off a day and lets finish putting it together!
Ben
Lots of fun. If I hadn't been nursing a bad cold and lack of sleep it would have been even better. Take off a day and lets finish putting it together!
Ben
kbldawg
Bronco Guru
Just getting a minute to look at this thread and the only question I have is? When did you have time to take all the pics
Lots of fun. If I hadn't been nursing a bad cold and lack of sleep it would have been even better. Take off a day and lets finish putting it together!
Ben
I was surprised too actually. When I got to digging around I found a lot more pics than I thought I had.
80 degress tomorrow and 49 the next day...craziness.
kbldawg
Bronco Guru
Great job guys...Your rig has come a long way since you got it.
Thanks man. It sure has, the PO left a lot un-done in the drivetrain department, but I'd rather be wrenchin then sanding. I HATE SANDING!! ;D
Buldozer
Bronco Virtuoso
Man I can't wait to see that rig up close, you have made so many changes I am not going to know it anymore! You were thinking you may not make the shake down run to Hot Springs on 4-4, heck you are almost ready now and it is still over three weeks away!;D
kbldawg
Bronco Guru
Man I can't wait to see that rig up close, you have made so many changes I am not going to know it anymore! You were thinking you may not make the shake down run to Hot Springs on 4-4, heck you are almost ready now and it is still over three weeks away!;D
Thanks Rick. Hopefully I'll be there and you can give it a good inspection.
I should know more Wednesday. We're going to be able to work on it all day and we'll see what's left after that.
Clutch Rod to extend
hook up clutch
drive shafts to bolt back up
radiator hoses to hook up
battery tray and battery install
engine wiring
swap steel dizzy gear over
spark plug cables and boots to install
bend gear shifter
install t-case shifter
install electric fuel pump
bolt check, fluids
crank engine
set timing, idle...etc.
test drive
and once I get it home, I'm gonna rebuild the carb.
I'm sure I'm forgetting something.
After all that, I've still got to get the exhaust built, which I have to figure out how to get it to the exhaust shop first. May have to fab up something in order to flat tow it (no trailer).
Chad
Last edited:
Similar threads
- Replies
- 37
- Views
- 2K


