• Welcome to ClassicBroncos! - You are currently viewing the forums as a GUEST. To take advantage of all the site features, please take a moment to register. It's fast, simple and absolutely free. So please join our community today!
    If you have problems registering or can't log into your account, please contact Admin.

My sound system install (pics!)

paul430c

Jr. Member
Joined
Oct 1, 2012
Messages
63
Loc.
Richmond, Virginia
Hello all.

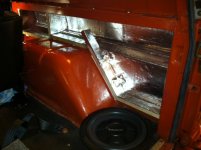
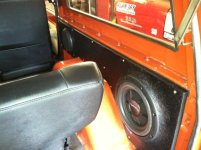
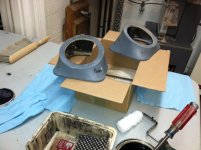
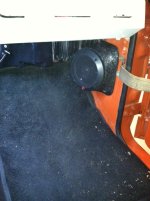
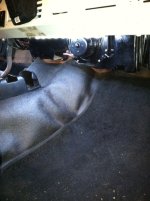
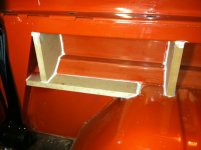
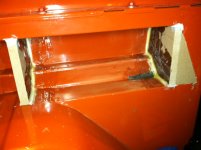
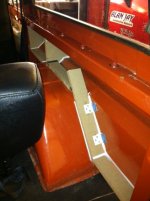
I just wanted to share my recent sound system install project. I fabricated and installed a system made up of a nice Kenwood head unit and Rockford Fosgate speakers. Two 5.25" coaxials (kicks), two 6.5" tri-axials, and a 10" shallow subwoofer. I made all speaker enclosures from combination of 3/4" MDF, fiberglass and body filler. I walled-off (isolated) the speaker cavities with MDF and lined everything with hushmat. I did a lot of research from this great website as I developed my ideas. It sound very good but the final thing I need to do is install some sound deadening inside the vehicle such as the roof, inside wheel wells, etc. I have some reflecting sound (tin can effect) that needs to be controlled.

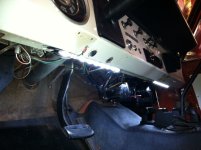
Also notice the whole LED lighting scheme involving door plunger switches, etc. My Bronco had no lights that came on when doors were opened.

Having a lot of fun with my Bronco after only having it for 2-months now.
 

Attachments

  • image1.jpeg
    image1.jpeg
    109.8 KB · Views: 474
  • image2.jpeg
    image2.jpeg
    131.1 KB · Views: 455
  • image3.jpeg
    image3.jpeg
    138.3 KB · Views: 469
  • image4.jpeg
    image4.jpeg
    112.3 KB · Views: 431
  • image6.jpeg
    image6.jpeg
    125.2 KB · Views: 412
  • image8.jpeg
    image8.jpeg
    115.6 KB · Views: 428
  • kick speaker.JPG
    kick speaker.JPG
    87.3 KB · Views: 428
OP
OP
P

paul430c

Jr. Member
Joined
Oct 1, 2012
Messages
63
Loc.
Richmond, Virginia
AaronWelch, I'll take and share plunger switches tomorrow evening. Per what I learned from this forum, they came from a 1980's F150 and many other models as well, I believe. More info tomorrow.
 
OP
OP
P

paul430c

Jr. Member
Joined
Oct 1, 2012
Messages
63
Loc.
Richmond, Virginia
Could you post pics of the door plungers? Looks good I plan on something similar.

Sorry for the slow reply on this. Busy time.

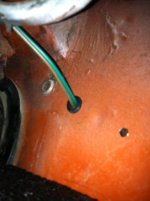
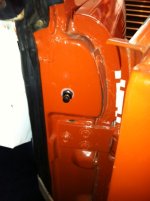
Below are some photos per your request. I really like the plunger switch but there are a few tricky things that I'll list below:

1) the switch is made to receive a molded male plug. It's assumed the car already has this plug. Since our Broncos wont have these plugs, I had to solder my wires into this delicate connection. You could probably just push them in as long as you generate enough friction in the female part of the connector.
2) When you drill the hole in the door jam you'll find out that there is a cavity such that you will have to drill through a second wall before you will see daylight. The existence of this cavity leads to two issues: a) the depth of the cavity is about the same as the length of the switch so you need to make sure you protect the electrical connections from potentially shorting on the door frame (e.g. use shrink tubing). b) You can't access the inside of this cavity to put a nut on the back of the threaded switch so you need to drill the switch hole small enough that you can thread it with a tap to receive the switch.

The photos below show the switch, how I routed the wire into the driver/passenger compartment (using a grommet), and the adhesive led lights I put under the dash.
 

Attachments

  • image2.jpeg
    image2.jpeg
    94.4 KB · Views: 130
  • image3.jpeg
    image3.jpeg
    68.8 KB · Views: 117
  • image1.jpeg
    image1.jpeg
    70.5 KB · Views: 128

broncoitis

Bronco Guru
Joined
Jul 23, 2010
Messages
4,449
Nice job and it looks really good! Nothing like some music and the Bronco! Good Times for sure. ;D
 

matt w

Bronco Guru
Joined
Jun 12, 2007
Messages
2,799
That looks great! I have been wanting to install speakers just like you have at the kicker areas. I like those. That is way cool! I bet you could sell those enclosures! heh heh
 

hammer

Bronco Guru
Joined
Nov 13, 2006
Messages
1,359
I agree, nice work. I like the idea of walling off the compartments and then essentially creating a "lid" to complete the system. How is the mdf attached to the truck in this pic? Also how do you think that hushmat would adhere to a tub that is lined?

speakerenclosure.jpg
 

lonesouth

Contributor
Bronco Guru
Joined
Dec 18, 2003
Messages
5,045
did you calculate the volume of the sub enclosure, how much? What is the min cubic feet for the sub?
 
OP
OP
P

paul430c

Jr. Member
Joined
Oct 1, 2012
Messages
63
Loc.
Richmond, Virginia
Attachment technique and cubic feet

Thanks for the compliments and questions.

To attach the MDF in place I used a combination of silicone caulk, fiberglass and metal angle brackets. Every element used the first two and some allowed me to use angle brackets but not all. Some angle brackets cannot be seen in the photos. I used cardboard templates to iterate the complex quarterpanel shape of the dividers shown in some photos. I let that one piece of MDF 'run long' to give me a screw surface in the middle of the long panel. I applied peel and stick foam rubber door/window insulation (roll from Home Depot) on all the edges of every cavity such that when I 'drew up' the black panel with screws, it would seal neatly and isolate the cavities.

With regard to cubic feet, I did the calculation but it became clear that I couldn't generate enough cubic feet with this situation so I settled for 'as much as I can get'. It's close. Some might want to vent the subwoofer compartment to get a different sound profile. I went unvented. There are acoustical pros and cons to both.

More interim installation photos below:
 

Attachments

  • photo 1.JPG
    photo 1.JPG
    98.2 KB · Views: 63
  • photo 2.JPG
    photo 2.JPG
    110.9 KB · Views: 61
  • photo 5.JPG
    photo 5.JPG
    107.7 KB · Views: 59
  • photo 3.JPG
    photo 3.JPG
    86 KB · Views: 59

hammer

Bronco Guru
Joined
Nov 13, 2006
Messages
1,359
hmmm thanks for the response. Although I like your end product your install method is a little more permanent then I would like in my rig.
 
Top