doghauler
Jr. Member
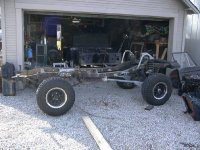
Just finished my frame and I decided I give a summary of how I got the inside cleaned and painted. My first step was to duct tape a 7 foot piece of 1.5 inch PVC pipe on the end of my shop vac and clean out each tube from both ends. I followed this with a cleaning from the pressure washer, again from both ends of the tube. I let it dry, then I took the same PVC pipe and stuff my shoe-handle wire brush in one end and wire brushed all four sides from both ends, then blew out the dust. Next I built an extension out of ½ inch PVC about 7 feet long with a 45 degree fitting on one end that I attached to my sandblaster. The setup was: Blaster hose to on-off valve, PVC pipe, 45 fitting, blaster tip. You can get all the pipe fittings at the local hardware store. I was able to stuff the pipe in each end, and with 45 I was able to blast each interior wall fairly well. I used the similar method that I used with the wire brush, attacked one interior wall at a time, rotate 90 degrees, blast, rotate, etc.
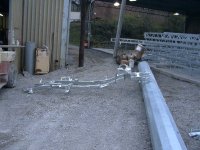
Next I bought a cheap garden sprayer and extended the hose between the spray head and the tank. I ran the hose down the center of the same ½ inch PVC I used for sandblasting and attached the wand to one end, filled the sprayer with Marine Clean, sprayed, let sit, rinse, dry, did the same with the Metal Ready.
After that, I put POR 15 in the sprayer (thinned 5 percent). Since it was too thick to spray, I used the garden sprayer to apply the POR inside the frame then I ran a sponge through the frame. (I had previously cut it to fit just inside the frame and soaked it in POR, and I had also taped over the holes in the frame) I used a length of spring-wire I had laying around, ran it down the frame, attached the sponge, pulled it through. I then rotated the frame so it was sitting on its side, repeat, rotate so it’s upside down, repeat, etc, until all four sides were done.
Things I learned: 1) It’s messy, put a lot of plastic down if you want to keep it off your shop floor, even well past the ends since your sprayer wand and spring wire are going to be covered in POR. 2) Wear nice rubber gloves when you use POR, I wore the disposable latex ones (doubled up) and still got a little on one hand. It does not come off. (like the label says!) 3) I used a flat washer on the end of my spring wire setup to prevent it from pulling through the sponge, but somehow lost it in the middle of the frame on one trip through. I was able to get it out, but should have figured out a better way (bigger washer? Huh. %) )
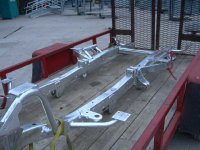
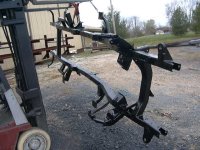
I’ve looked inside my frame with a flashlight and it looks to be completely coated with the exception of a little bit around the bolt-backer plates on the front drivers side. Other than that it looks all black.
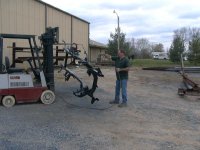
I know this seems like a lot of work, but I could not find anyone in my area that would clean the inside and I really wanted to get it done. I know there are options to galvanized, but I didn’t want to spend that much. All told (sprayer, sand, POR, etc) I’m into it about $200, the inside has one (sloppy heavy) coat of POR, the outside 2 coats of POR and one coat of Blackcoat.
That's that, and it's done!
Thanks.
Next I bought a cheap garden sprayer and extended the hose between the spray head and the tank. I ran the hose down the center of the same ½ inch PVC I used for sandblasting and attached the wand to one end, filled the sprayer with Marine Clean, sprayed, let sit, rinse, dry, did the same with the Metal Ready.
After that, I put POR 15 in the sprayer (thinned 5 percent). Since it was too thick to spray, I used the garden sprayer to apply the POR inside the frame then I ran a sponge through the frame. (I had previously cut it to fit just inside the frame and soaked it in POR, and I had also taped over the holes in the frame) I used a length of spring-wire I had laying around, ran it down the frame, attached the sponge, pulled it through. I then rotated the frame so it was sitting on its side, repeat, rotate so it’s upside down, repeat, etc, until all four sides were done.
Things I learned: 1) It’s messy, put a lot of plastic down if you want to keep it off your shop floor, even well past the ends since your sprayer wand and spring wire are going to be covered in POR. 2) Wear nice rubber gloves when you use POR, I wore the disposable latex ones (doubled up) and still got a little on one hand. It does not come off. (like the label says!) 3) I used a flat washer on the end of my spring wire setup to prevent it from pulling through the sponge, but somehow lost it in the middle of the frame on one trip through. I was able to get it out, but should have figured out a better way (bigger washer? Huh. %) )
I’ve looked inside my frame with a flashlight and it looks to be completely coated with the exception of a little bit around the bolt-backer plates on the front drivers side. Other than that it looks all black.
I know this seems like a lot of work, but I could not find anyone in my area that would clean the inside and I really wanted to get it done. I know there are options to galvanized, but I didn’t want to spend that much. All told (sprayer, sand, POR, etc) I’m into it about $200, the inside has one (sloppy heavy) coat of POR, the outside 2 coats of POR and one coat of Blackcoat.
That's that, and it's done!
Thanks.