• Just a reminder that you won't be able to start new posts or reply to existings posts in the Archive forum.

    This is where all the old posts go so they can still be used for reference and searched.
  • Welcome to ClassicBroncos! - You are currently viewing the forums as a GUEST. To take advantage of all the site features, please take a moment to register. It's fast, simple and absolutely free. So please join our community today!
    If you have problems registering or can't log into your account, please contact Admin.

Project "CRAZY CANUCK" BUILD- 9-8-11 - UPDATE

Raskew

Sr. Member
Joined
Oct 9, 2002
Messages
594
Loc.
Vancouver, B.C.
Project "CRAZY CANUCK" BUILD- 5-11-12 - UPDATE - UPHOLSTERY IS DONE

I've been on here for quite a while following all the threads, soaking up tons of knowledge, collecting great ideas from member after member, accumulating a great library of information for the day that I would eventually start my own rebuild.

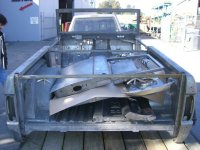
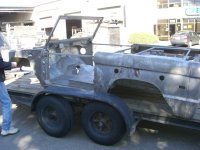
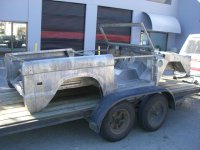
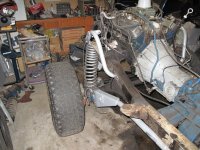
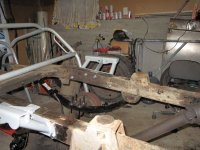
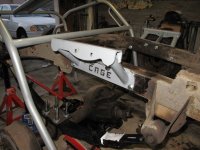
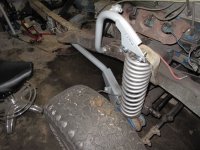
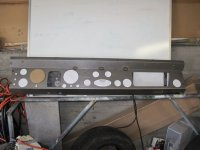
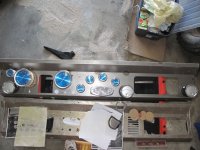
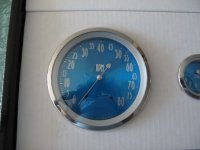
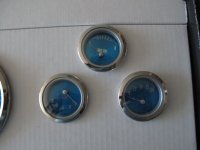
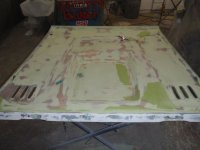
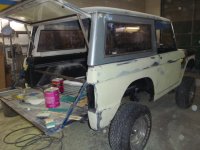
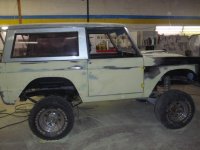
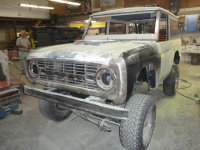
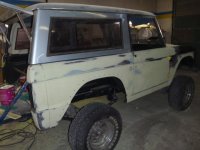
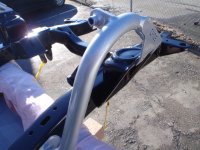
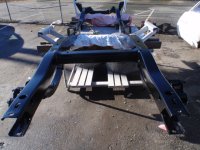
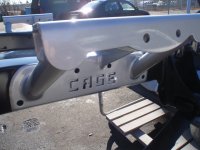
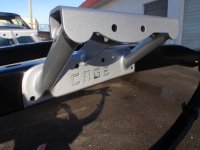
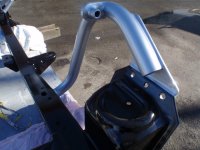
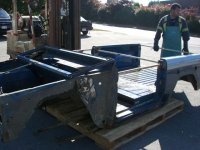
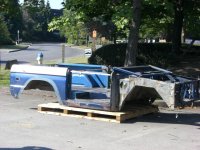
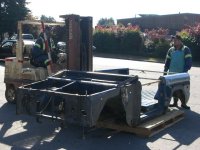
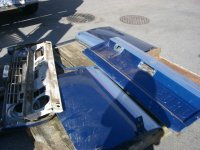
Well that day finally came and I'm well on my way. The tear down was easy and well documented with many pictures. As this is my first attempt at a restoration every little bit helps. Here are some pics of the progress so far. These pictures are of just before I had the body dipped;
 

Attachments

  • CIMG0003_2.jpg
    CIMG0003_2.jpg
    90.7 KB · Views: 201
  • CIMG0004_2.jpg
    CIMG0004_2.jpg
    102.2 KB · Views: 210
  • CIMG0001_2.jpg
    CIMG0001_2.jpg
    91.1 KB · Views: 165
  • CIMG0005.jpg
    CIMG0005.jpg
    92.7 KB · Views: 189
Last edited:
OP
OP
R

Raskew

Sr. Member
Joined
Oct 9, 2002
Messages
594
Loc.
Vancouver, B.C.
And these pictures are what it looked like when I picked it up;
 

Attachments

  • CIMG0002.jpg
    CIMG0002.jpg
    94.2 KB · Views: 175
  • CIMG0003.jpg
    CIMG0003.jpg
    89.5 KB · Views: 193
  • CIMG0001.jpg
    CIMG0001.jpg
    87 KB · Views: 211
OP
OP
R

Raskew

Sr. Member
Joined
Oct 9, 2002
Messages
594
Loc.
Vancouver, B.C.
And here it is with the new Cage Suspension installed. Some McGyvering had to be done to get everything to fit right. Thanks to my friend Ulysses, he did all the work.
 

Attachments

  • IMG_0867.jpg
    IMG_0867.jpg
    81.1 KB · Views: 175
  • IMG_0866.jpg
    IMG_0866.jpg
    66.2 KB · Views: 160
  • IMG_0864.jpg
    IMG_0864.jpg
    61 KB · Views: 187
  • IMG_0862.jpg
    IMG_0862.jpg
    57.5 KB · Views: 168
  • IMG_0861.jpg
    IMG_0861.jpg
    66.9 KB · Views: 158
  • IMG_0860.jpg
    IMG_0860.jpg
    73.3 KB · Views: 205
OP
OP
R

Raskew

Sr. Member
Joined
Oct 9, 2002
Messages
594
Loc.
Vancouver, B.C.
I just put the body back on the frame this weekend and it's off to the bodyshop next week for some new metal and paint. I wish I had the time to do it myself, but I want this thing back on the road as soon as possible. If I was to attempt the bodywork it would take me years of weekends.

I know you guys are always wanting pics, so I will post them as much as possible.

Rick
 

Heus33

Bronco Guru
Joined
Jun 1, 2005
Messages
7,408
Looks great so far! What are your plans for the rig? Street/Trail/Combo?

What colors are you planning?
 

ep67bro

Contributor
Bronco Junky
Joined
Aug 28, 2008
Messages
3,702
Loc.
Easton, MD
Nice I wish I could have the body of the 73 I have dipped. So nice to start with clean metal. But it looks like you have very little rust to deal with. Doing the project frame off is the way to go. good luck with it.
 
OP
OP
R

Raskew

Sr. Member
Joined
Oct 9, 2002
Messages
594
Loc.
Vancouver, B.C.
Thanks for the well wishes. I can't wait to finish it. Such a long way to go. As for it's end purpose, the plan is for a trail/street combo. It's being built out to handle rough terrain, but after i add up all the bills to complete it, I'll probably be afraid to get it scratched.

I haven't finalized the colour yet, but I'm getting close.

As for where I got it dipped. We have a place not too far called Redi-Strip
 
OP
OP
R

Raskew

Sr. Member
Joined
Oct 9, 2002
Messages
594
Loc.
Vancouver, B.C.
Here is my Dash Layout. What do you guys think? See any potential interference problems?

The first pic is with the paper cut outs, the second is with the guages, etc. sitting on top of the dash.

The dash is a new blank one from BC Broncos, the gauges are custom made from Classic Instruments. I still need to add a panel underneath the dash for a GPS, air locker switches, and various other toggles.
 

Attachments

  • IMG_1025.jpg
    IMG_1025.jpg
    44.5 KB · Views: 214
  • IMG_1024.jpg
    IMG_1024.jpg
    65 KB · Views: 381

Heus33

Bronco Guru
Joined
Jun 1, 2005
Messages
7,408
Cool gauges - where'd you get those? Reminds me of my S60R (heres a pic in km/h for you northerners!)

I dont think you'll have any interference issues with that setup
 

Attachments

  • volvo_r_gauges.jpg
    volvo_r_gauges.jpg
    64.7 KB · Views: 195

sprdv1

Contributor
REBEL
Joined
Mar 8, 2007
Messages
81,875
Yeah, those are cool guages... the rmp guage looks a little close to the column hole... probably just my eyes...
 
OP
OP
R

Raskew

Sr. Member
Joined
Oct 9, 2002
Messages
594
Loc.
Vancouver, B.C.
Here's what they look like close up.

They're from Classic Instruments. You won't find them on their site. I had them made.
 

Attachments

  • Tach.jpg
    Tach.jpg
    35.9 KB · Views: 212
  • Temp.jpg
    Temp.jpg
    32.8 KB · Views: 165

DZap

Full Member
Joined
Feb 17, 2008
Messages
329
Loc.
Houston, TX
Thats gonna look SWEET!!!!!
Those gauges are classy!
I really like the way you've got 'em set up...
you've got a good eye for the classic look.


DANG IT.......another thread I'll have to keep revisiting.
Where will I find the time??


the rmp guage looks a little close to the column hole... probably just my eyes...
Its a funky camera angle.....the camera is over the center of the dash, not "in the drivers seat". I kept doing that while taking pics in my truck....it took me a while to learn not to do that. Thats the "guy in the back seat" view.
 
OP
OP
R

Raskew

Sr. Member
Joined
Oct 9, 2002
Messages
594
Loc.
Vancouver, B.C.
Haven't updated this project for a while so here goes;

Some body pics;
 

Attachments

  • 1970_bronco_013.jpg
    1970_bronco_013.jpg
    71.5 KB · Views: 93
  • 1970_bronco_011.jpg
    1970_bronco_011.jpg
    91.4 KB · Views: 88
  • 1970_bronco_010.jpg
    1970_bronco_010.jpg
    81 KB · Views: 105
  • 1970_bronco_009.jpg
    1970_bronco_009.jpg
    104 KB · Views: 95
  • 1970_bronco_008.jpg
    1970_bronco_008.jpg
    78.6 KB · Views: 95
OP
OP
R

Raskew

Sr. Member
Joined
Oct 9, 2002
Messages
594
Loc.
Vancouver, B.C.
Here are some pics of the frame. Got a little carried away.
 

Attachments

  • 1970_bronco_037.jpg
    1970_bronco_037.jpg
    140.2 KB · Views: 170
  • 1970_bronco_040.jpg
    1970_bronco_040.jpg
    141.5 KB · Views: 173
  • 1970_bronco_036.jpg
    1970_bronco_036.jpg
    139.9 KB · Views: 178
  • 1970_bronco_035.jpg
    1970_bronco_035.jpg
    151.1 KB · Views: 171
  • 1970_bronco_034.jpg
    1970_bronco_034.jpg
    162.9 KB · Views: 188
  • 1970_bronco_033.jpg
    1970_bronco_033.jpg
    121 KB · Views: 170
  • 1970_bronco_032.jpg
    1970_bronco_032.jpg
    109.7 KB · Views: 176
  • 1970_bronco_039.jpg
    1970_bronco_039.jpg
    126.3 KB · Views: 156
Top